Replacing brake discs
Content
“Good braking skills” are absolutely essential in today's traffic. Therefore, a regular check of the brake system is mandatory for all riders and should be done more often than only during the mandatory technical checks every two years. In addition to replacing used brake fluid and replacing worn pads, servicing the brake system also includes checking. brake discs. Each disc is the minimum thickness specified by the manufacturer and must not be exceeded. Check thickness with a micrometer screw, not with a vernier caliper. This is due to the fact that due to material wear, a small protrusion forms on the outer edge of the brake disc. If you are using a vernier caliper, this comb can skew the calculation.
However, exceeding the wear limit is not the only reason to replace a brake disc. At high braking forces, the brake discs reach temperatures of up to 600 °C.
Warning: Operate the brake system according to the following instructions yourself only if you are an experienced handyman. Don't risk your safety! If you doubt your abilities, be sure to entrust the work on the braking system to your garage.
Varying temperatures, especially at the outer ring and disc sprocket, cause uneven thermal expansion, which can deform the disc. Even on the daily commute to work, extreme temperatures can be reached. In the mountains, crossings (with heavy luggage and a passenger) that require constant use of the brakes raise the temperature to dizzying levels. Blocked brake caliper pistons often cause high temperatures; discs constantly in contact with the pad wear out and can deform, especially discs of large diameter and stationary.
Modern motorcycles use inexpensive fixed discs with relatively low brake loads. In accordance with the state of the art, floating discs are mounted on the front axle;
- Reduced rolling mass for better handling
- Reduction of persistent masses
- Materials better meet requirements
- More spontaneous brake response
- Reduced tendency of brake discs to deform
Floating discs are equipped with a ring screwed onto the wheel hub; movable "loops" are connected to the track on which the pads rub. If the axial play of this joint exceeds 1 mm, the brake disc will break and must be replaced. Any radial play causes some kind of "play" when braking and is also considered a defect in technical control.
If the disc is deformed and needs to be replaced, also check for the following possible causes of the deformation (the brake disc may not be parallel to the piston in the caliper):
- Is the front fork correctly adjusted / installed without deformation?
- Is the brake system installed correctly (original or vehicle-compatible brake caliper, optimally aligned with the brake disc during assembly)?
- Are the brake discs perfectly flat on the hub (uneven contact surfaces can be caused by paint or Loctite residues)?
- Does the wheel rotate correctly on the axle and in the center of the front fork?
- Is the tire pressure correct?
- Is the hub bearing in good condition?
But the brake disc should not only be replaced when the wear limit is exceeded, when it is deformed or when the lugs are worn out. A surface with a lot of scoop also significantly reduces braking performance and the only solution to this problem is to replace the disc. If you have double disc brakes, you should always replace both discs.
For optimal braking with new brake discs, always fit new brake pads. Even if the pads have not yet reached the wear limit, you can no longer reuse them because their surface has adapted to the wear of the old disc and therefore will not be in optimal contact with the brake pads. This will lead to poor braking and increased wear on the new disc.
Check if the disc you have purchased is suitable for the vehicle's application using the provided ABE authorization. Use only suitable tools for assembly. To properly tighten the screws on the brake rotor and caliper, use Wrench... Refer to the repair manual for your vehicle model or contact an Authorized Service Center for information on the tightening torques and brake readings for your vehicle.
Replacing brake discs - let's get started
01 - Raise the motorcycle, remove and hang the brake caliper
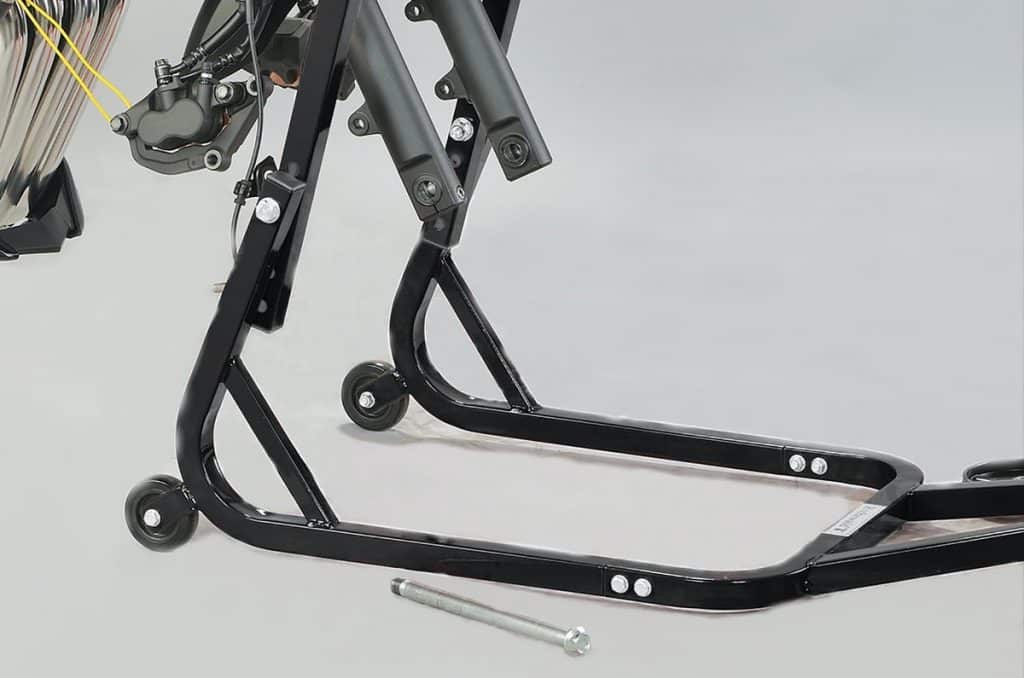
Start by lifting the motorcycle in a safe way to relieve the wheel you are working on. Use a workshop stand for this if your motorcycle does not have a center stand. Start by disconnecting the brake caliper (s) from their body, then replace the pads according to the appropriate mechanical advice. Brake pads. For example, hook on the brake caliper. with insulated wire to the car so you don't mind taking apart the wheel, just don't let it hang from the brake hose.
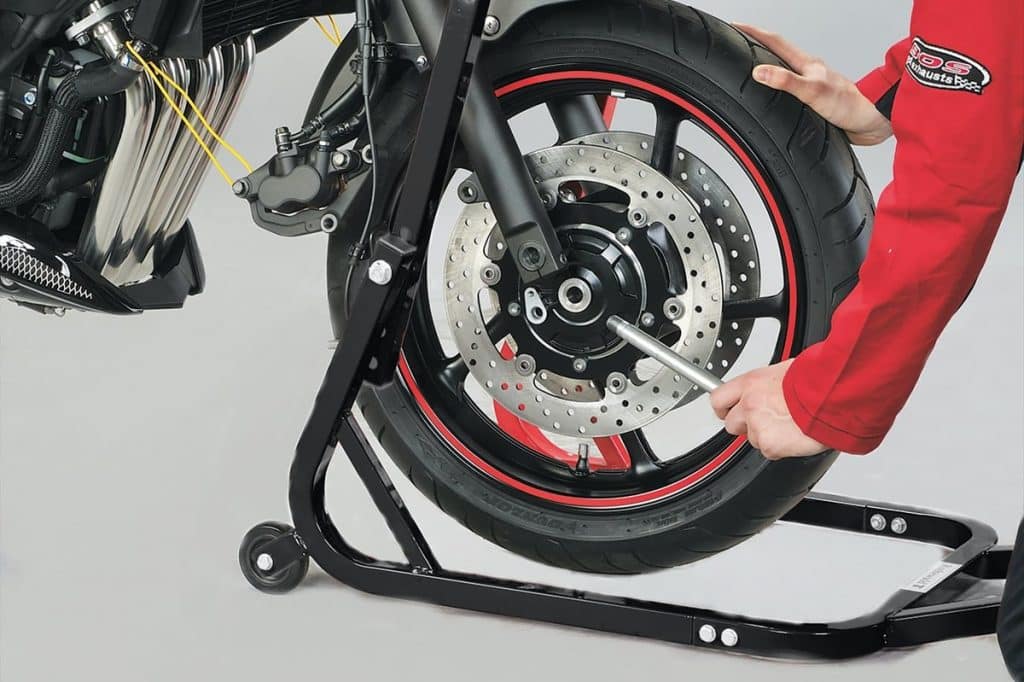
02 - Remove the wheel
Disconnect the axle from the wheel and remove the wheel from the front fork / swingarm. If the wheel axle does not come off easily, first check if it is securely fastened, for example. with additional clamping screws. If you are still unable to loosen the screws, consult a mechanic's advice. Loose screws.
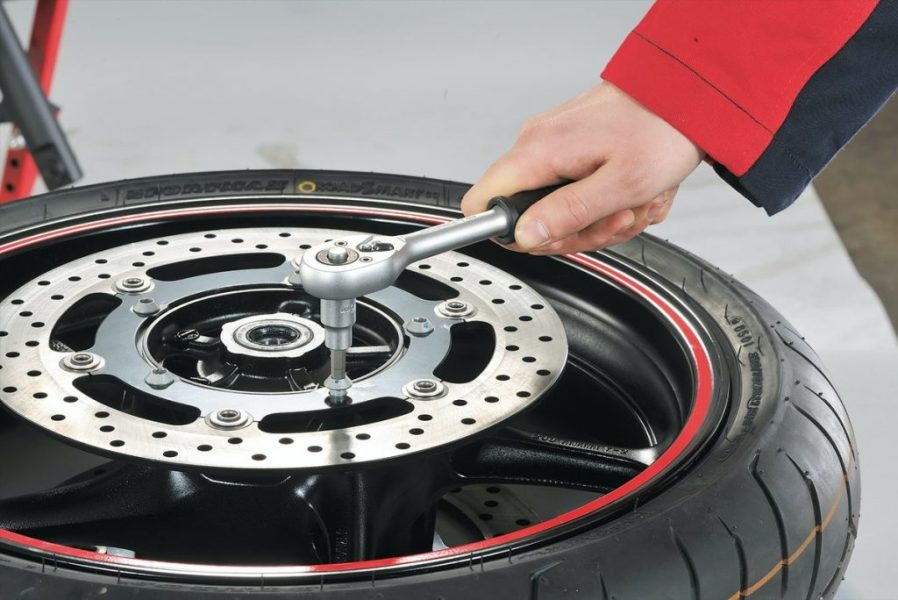
03 - Loosen the fixing screws of the brake disc.
Place the wheel on a suitable work surface and loosen the cross disc mounting screws. In particular, for locked hex head screws, use a suitable tool and make sure it engages as deep as possible in the hex socket. When the screw heads are damaged and no tool snaps into their grooves, it will be difficult for you to remove the screws. When the screws are tight, heat them up with a hair dryer several times and hit the tool to loosen them. If the hex on the screw head is bent, you can try to drive in a slightly larger size by tapping on it to loosen the screw.
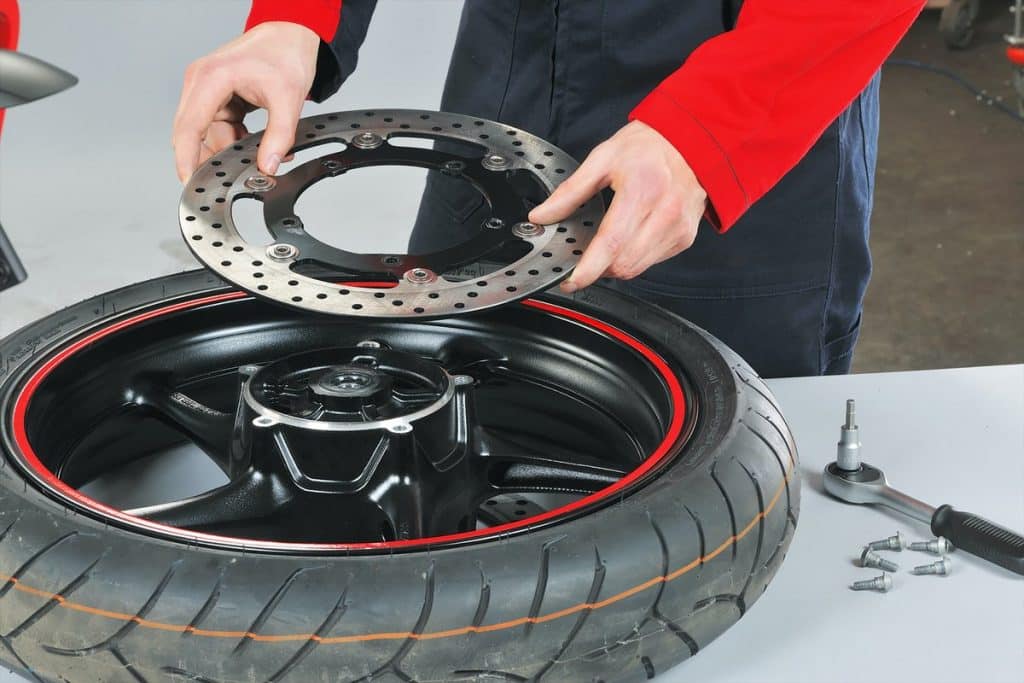
04 - Remove the old brake disc
Remove the old brake disc (s) from the hub and clean the seating surface. Be sure to remove any irregularities (paint residues, Loctite, etc.). This makes it easier to clean the rims and axles. If the axle is rusted, it can be removed, for example. sandpaper.
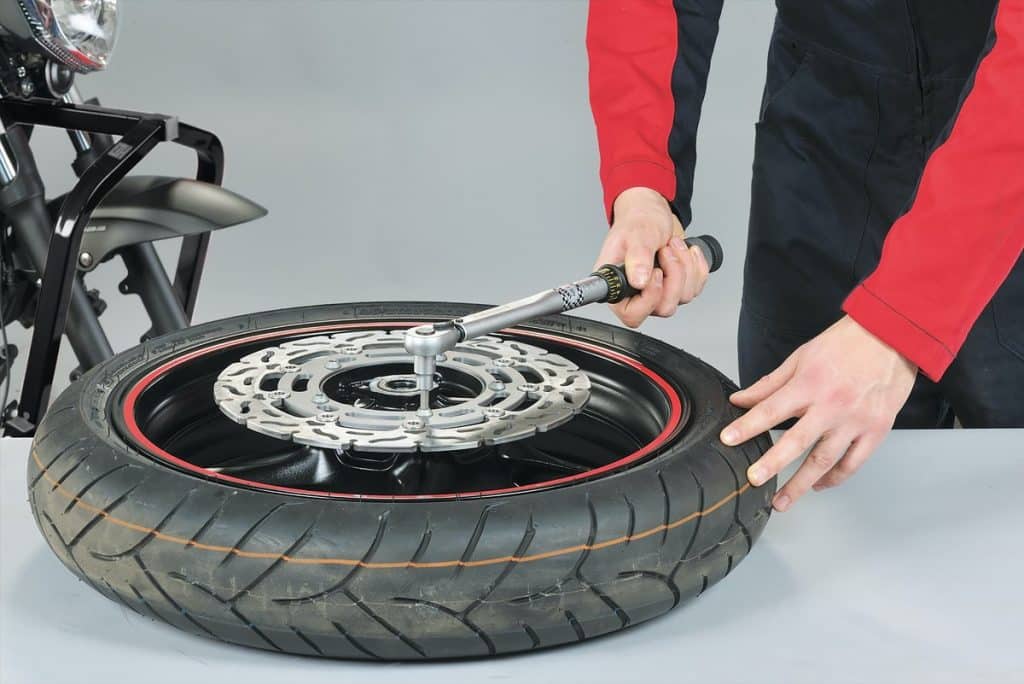
05 - Install the new brake disc and secure it.
Now install the new brake disc (s). Tighten the mounting screws crosswise, observing the tightening torque specified by the vehicle manufacturer. Severely corroded or damaged original mounting screws must be replaced with new ones.
The note : If the manufacturer recommends the use of a thread lock, use it carefully and sparingly. Under no circumstances should the liquid thread lock sink under the brake disc bearing surface. Otherwise, the parallelism of the disc will be lost, leading to friction during braking. The wheel and brake calipers are installed in the reverse order of disassembly. Apply a light coat of grease to the wheel axle before assembly to prevent rust formation. Observe the direction of rotation of the tire at the front and tighten all screws to the torque specified by the manufacturer.
06 - Check brake and wheel
Before turning on the master cylinder, make sure there is enough room in the reservoir for a higher level of brake fluid. New pads and discs push fluid upward from the system; it must not exceed the maximum fill level. Turn on the master cylinder to engage the brake pads. Check the pressure point in the brake system. Make sure the wheel turns freely when the brake is released. If the brake is rubbing, an error has occurred during assembly or the pistons are stuck in the brake caliper.
The note : the surface of the brake pads must not come into contact with grease, pastes, brake fluid or other chemicals during operation. If such dirt gets on the brake discs, clean them with a brake cleaner.
Warning: for the first 200 km of the journey, the brake discs and pads must be worn in. During this period, if the traffic situation permits, sudden or prolonged braking should be avoided. You should also avoid friction in the brakes, which will overheat the brake pads and reduce their coefficient of friction.