Replacing the vacuum amplifier VAZ 2114
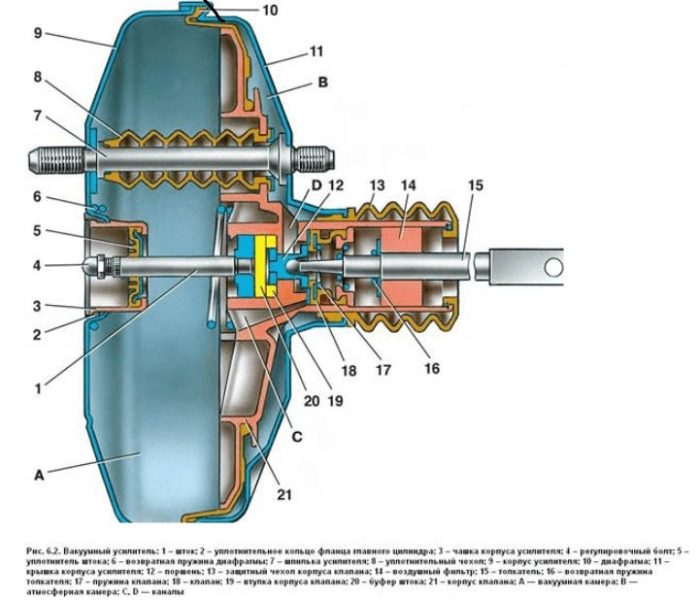
The vacuum booster on cars of the VAZ family plays an important role not only in the functioning of the brake system, but also in the operation of the engine. So, for example, if the vacuum booster does not seal air tightly, then most likely the engine will triple and keep revs poorly.
In this article, we will consider the scheme for replacing the VAZ 2114 vacuum amplifier, it is also worth noting that the replacement is carried out in the same way in VAZ cars: 2108, 2109, 21099, 2113, 2114, 2115.
Tools
- keys for 13, 17;
- pliers;
- screwdrivers.
How to check a vacuum booster
There are various ways to test the operability of a VUT. Here are 2 different methods, namely, checking with the brake system, as well as checking the previously removed VUT.
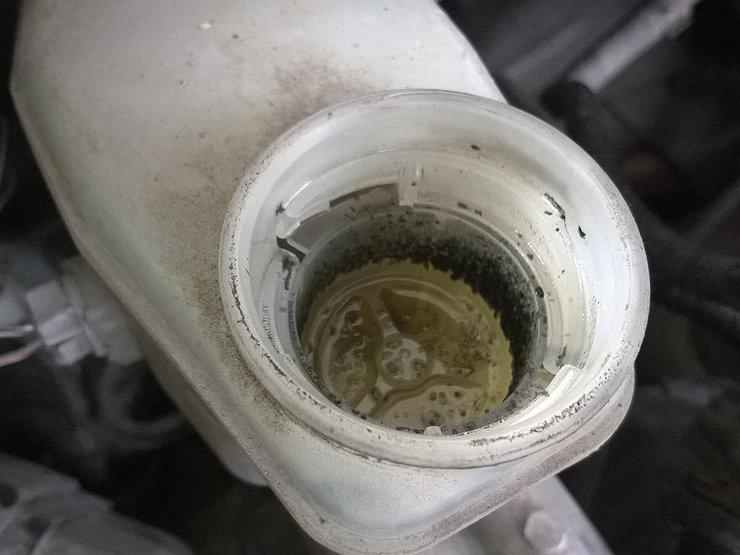
Of course, the first check is to inspect all brake hoses and pipes for leaks and leaks. We advise you to do this regularly, along with checking the brake fluid level, since your safety depends on the brakes.
1 way to check is as follows:
- turn off the engine;
- press the brake pedal several times, it should become tighter;
- then press the pedal again and hold it in the middle position;
- then, without changing the effort on the pedal, start the engine. If the pedal fails, then everything is fine with the vacuum cleaner, and if not, then most likely it needs to be replaced.
Method 2 can be used if you have already dismantled the VUT in advance. Add any cleaner (foaming) to the connection of the 2 circles of the amplifier and blow air into the hole where the hose is from the intake manifold. It is not necessary to do this sealed, you can simply direct the air stream from the compressor or pump. The place where VUT bleeds air will bubble. You can clearly see this method in the video below.

Vacuum Booster Replacement Process
In order to change the VUT, it is not necessary to unscrew the brake pipes that fit the brake fluid reservoir. Everything can be made much easier.
- 1 step: We release the brake pedal, for this it is necessary to remove the small cotter pin in the upper part of the pedal;
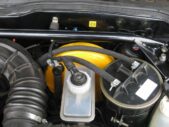
- 2 step... Remove the brake fluid barrel. First, we disconnect the terminal located at the very top of the tank, and then unscrew the nuts that secure the tank to the vacuum amplifier;

- 3 step: You can start removing the vacuum cleaner itself. And this can be done in two ways, either unscrew the VUT itself from the bracket on which it is attached, or unscrew it together with the bracket, which is already fixed to the body with 13 nuts. Here you can choose whichever is more convenient for you. VUT is fixed on the bracket with nuts 17;
- 4 step: Disconnect the hose from the VUT that comes from the intake manifold.
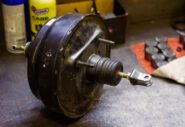
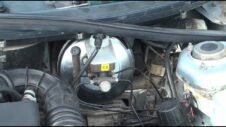
After dismantling, you can start installing a new amplifier. If you unscrewed the old VUT together with the bracket, then move the bracket from the old to the new one and reinstall everything in the reverse order.

Questions and answers:
How to check a VAZ 2114 vacuum brake booster? The motor turns off. A couple of times the brake is pressed with effort and is delayed halfway. Then the motor starts. with a working vacuum amplifier, the pedal will fail a little.
How to replace the brake master cylinder on a VAZ 2114? The battery is disconnected. The brake fluid is pumped out from the reservoir. TG supply tubes are unscrewed. The GTZ is removed from the vacuum amplifier. A new GTZ is being installed. The system is being assembled.
Do I need to bleed the brakes after replacing the vacuum booster? Experts recommend changing the brake fluid when replacing the GTZ. In this case, bleeding the brakes is required. But the vacuum booster is not in contact with the liquid, so no bleeding is required.