Replacing the rear brake pads on the Priore - instructions
The service life of the Priora rear brake pads is quite long, but provided that the quality of the components is decent. Even the factory can safely retreat more than 50 km with careful operation without sudden braking and maneuvers using the handbrake. But there are also such instances that after the first 000 km they already begin to show a terrible sound when working, and the efficiency drops sharply.
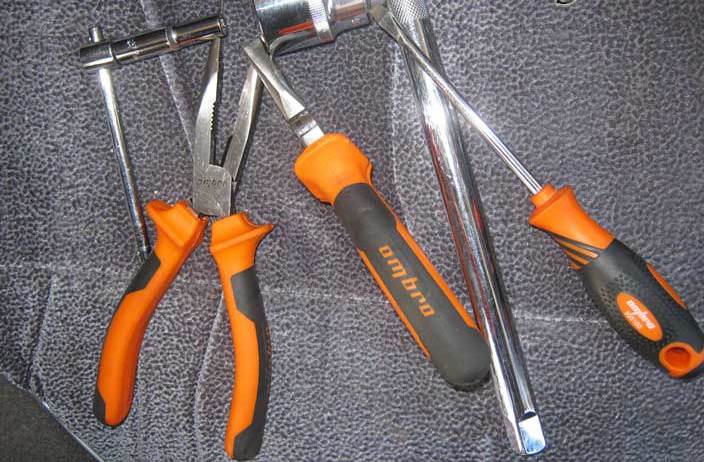
If you decide to replace, then below I will try to give detailed instructions for replacing the rear pads on the Priore with a detailed photo report of the work done. So, first of all, it should be said about the tool that will be needed for all this work:
- Flat and Phillips screwdriver
- Pliers and long nose pliers
- 7 deep head and knob
- Head 30 (if the rear drum cannot be removed in the usual way)
The procedure for replacing the rear pads of a Lada Priora car
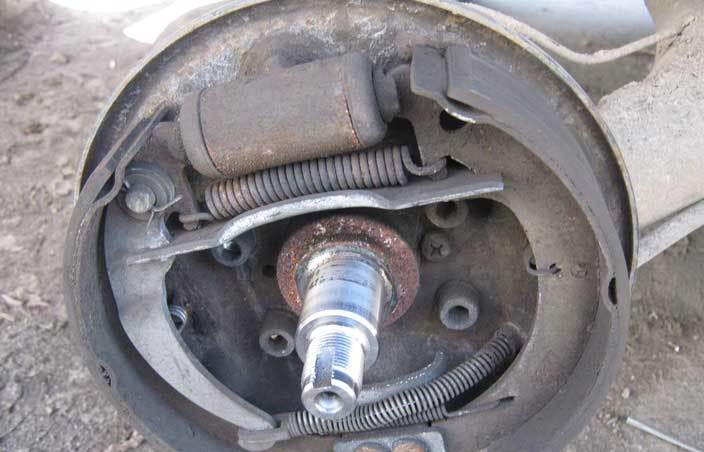
To begin with, you need to raise the rear of the car with a jack and substitute reliable stops in addition to the jack. Then try to remove the drum, for which you need to unscrew the two guide pins:
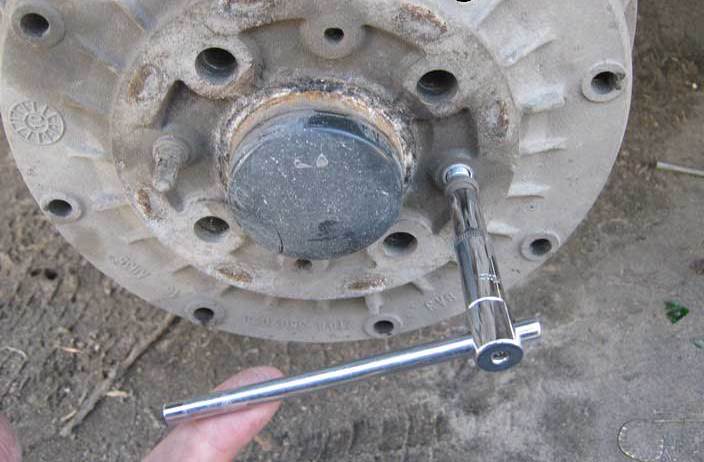
I repeat, if the drum cannot be removed in the usual way, then you can unscrew the hub fastening nut and remove it with it. As a result, it turns out even more convenient, since the hub will not interfere when removing the brake mechanisms:
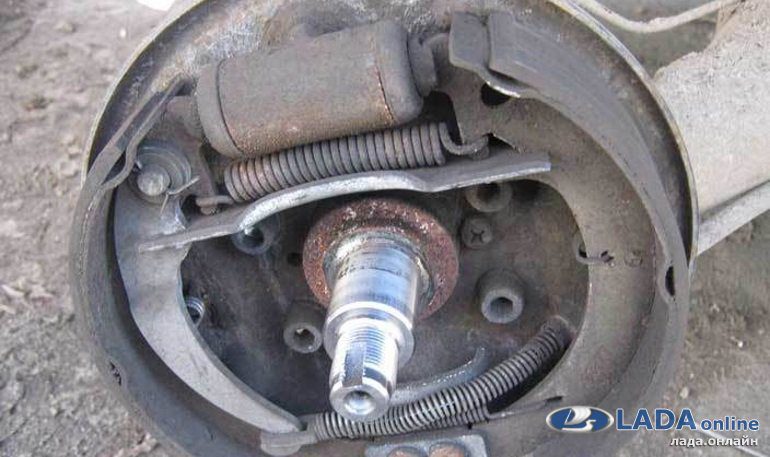
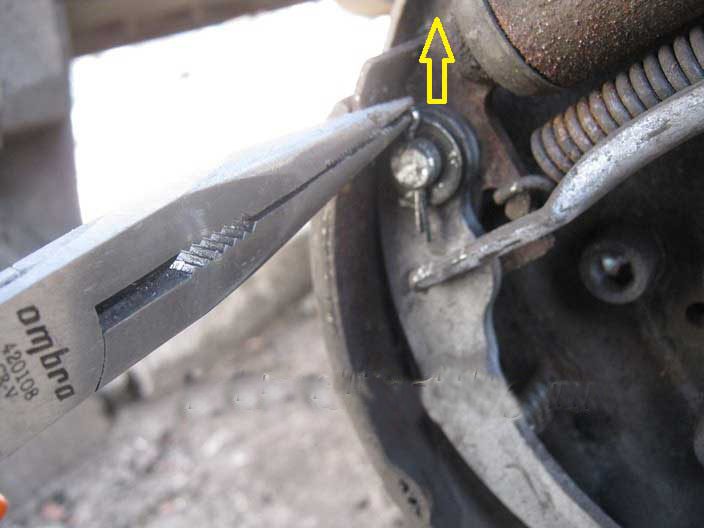
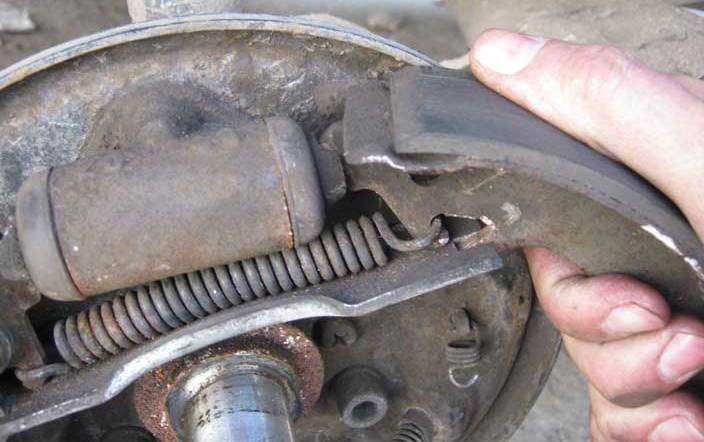
Now we need a tool such as long nose pliers. They need to remove the hand brake lever cotter pin, as shown clearly in the picture below:
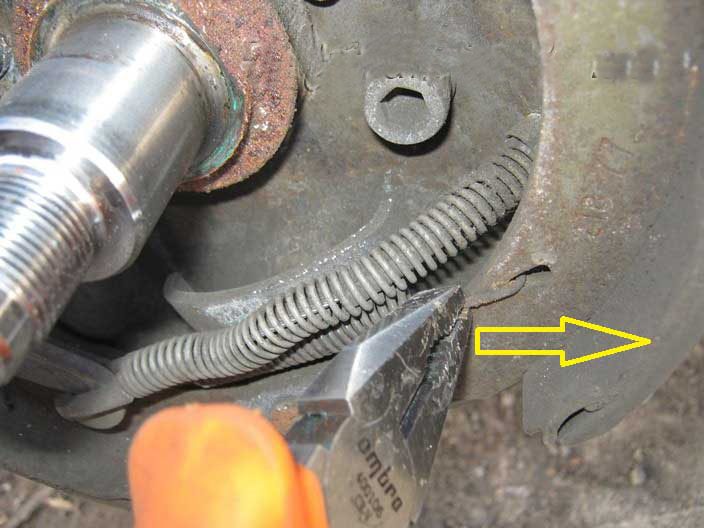
Then you can proceed to dismantle the right spring from below by prying it either with a screwdriver or by pulling it a little with pliers until it comes off:
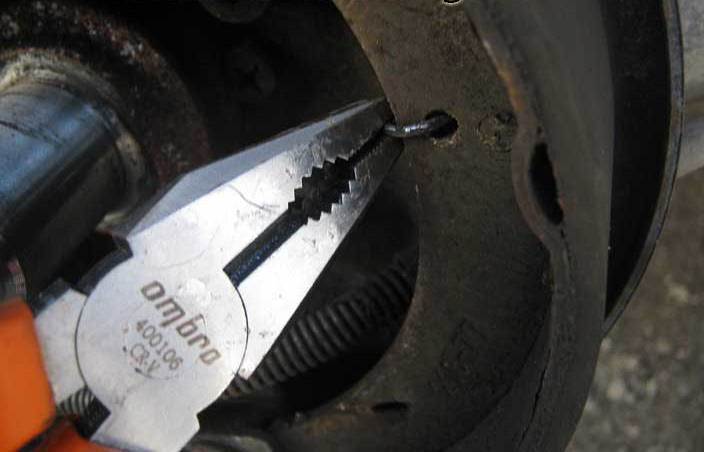
Next, on both sides, you need to remove the small springs that fix the pads in an upright position, they are on the sides. The photo below shows this very clearly:
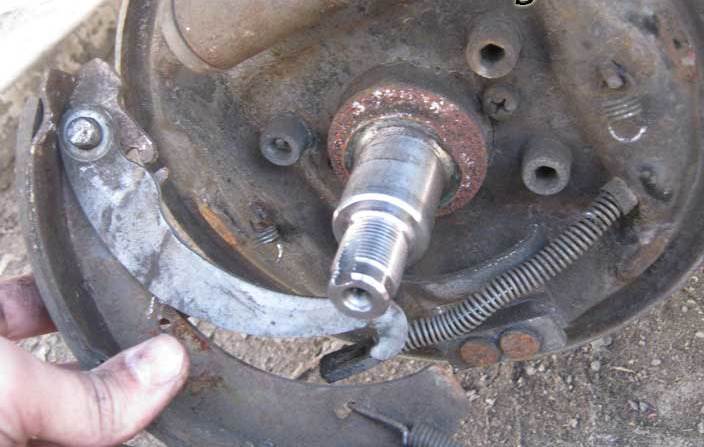
When they have been dealt with, you can try to remove the pads. To do this, it is not even necessary to remove the upper spring, you can simply apply great effort, spread them in the upper part to the sides:
Thus, freed from the plate, they spontaneously fall down:
When replacing the rear pads on the Priora, one important detail should be taken into account, that after installing new ones, the drum may simply not get dressed. If this happens, then it is necessary to loosen a little the parking brake cable, which is located under the bottom of the car in the rear of it. You need to loosen up until the drum is put on without unnecessary obstacles. We install all the removed parts in reverse order and do not forget that for the first several hundred kilometers you should not resort to sharp braking, since the mechanisms are new and have to get used to it.