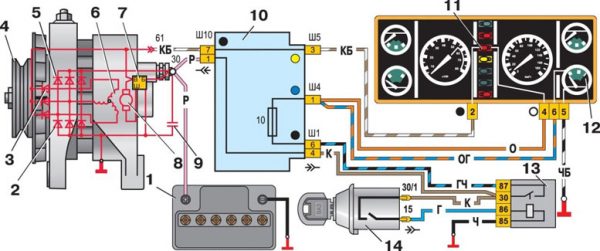
Diagnostics and repair of the VAZ 2107 generator
Content
- How to check the VAZ 2107 generator
- Generator repair
- Replacing the alternator belt and its tension
The generator in any car is an integral part, since it provides battery charge and feeds consumers while the engine is running. With any of the breakdowns that occurred with the generator, problems with the charge immediately appear, which requires an immediate search for the cause and elimination of the malfunction.
How to check the VAZ 2107 generator
The need to diagnose the generator on the "seven" appears in the absence of a charge or when the battery is recharged, that is, when the voltage is not normal. It is believed that a working generator should produce a voltage in the range of 13,5–14,5 V, which is quite enough to charge the battery. Since there are many elements in the charge source that affect the voltage supplied to the battery, checking each of them should be given attention separately.
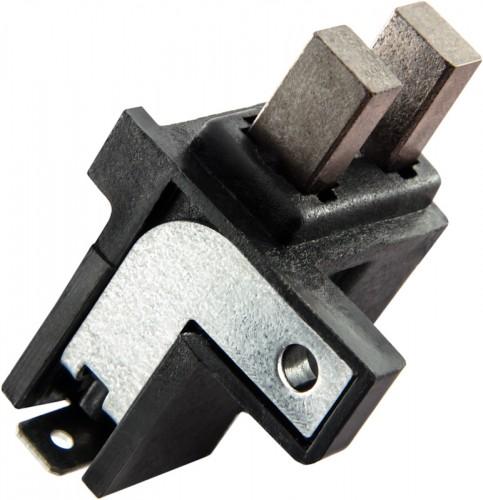
Checking the brushes
The generator brushes on the VAZ 2107 is a device made in a single unit with a voltage regulator. On earlier models, these two elements were installed separately. The brush assembly sometimes fails and needs to be replaced, especially if poor quality parts are used. Problems first manifest themselves in the form of periodic interruptions in the voltage supplied by the generator, after which it completely fails. However, there are cases of sudden failure of the brushes.
Experts recommend inspecting the brush assembly every 45–55 thousand km. run.
You can determine that the problem with the charge lies precisely in the brushes by a number of signs:
- car consumers are disconnected for unknown reasons;
- lighting elements dim and flash;
- the voltage of the on-board network drops sharply;
- The battery drains quickly.
To diagnose the brushes, the generator itself does not need to be removed. It is enough to unscrew the fasteners of the brush holder and dismantle the latter. First, the state of the node is estimated from the external state. Brushes can simply wear out, break, crumble, break off from the conductive contact. A multimeter will help in troubleshooting, which is called every detail.
You can check the condition of the brushes by the size of the protruding part. If the size is less than 5 mm, then the part must be replaced.
Video: ringing the brushes of the VAZ 2107 generator

Checking the voltage regulator
The following signs indicate that there are some problems with the voltage regulator:
- The battery is not fully charged even when a new battery is installed;
- the voltage source boils, which indicates overcharging.
In any of these situations, the relay-regulator needs to be diagnosed, which will require a multimeter. Verification can be done with a simple and more complex method.
A simple option
To check, perform the following steps:
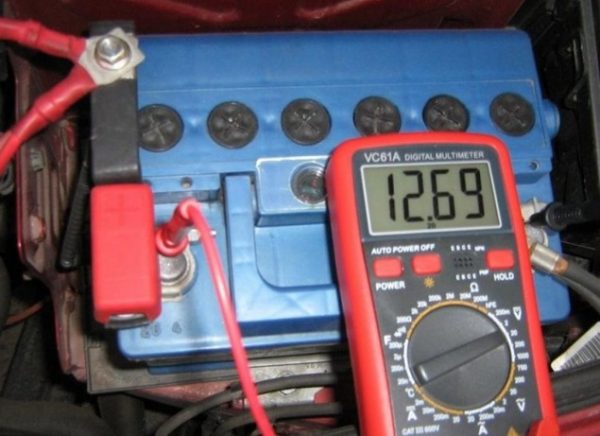
- We start the engine, turn on the headlights, let the engine run for 15 minutes.
- Open the hood and measure the voltage at the battery terminals with a multimeter. It should be in the range of 13,5–14,5 V. If it deviates from the indicated values, this indicates a breakdown of the regulator and the need to replace it, since the part cannot be repaired.
 At low voltages, the battery will not charge, which requires checking the voltage regulator
Difficult option
This method of verification is resorted to if the first method failed to identify the malfunction. Such a situation may arise, for example, if, when measuring the voltage on the battery, the device shows 11,7–11,9 V. To diagnose the voltage regulator on the VAZ 2107, you will need a multimeter, a light bulb and a 16 V power supply. The procedure consists of the following steps:
- The relay-regulator has two output contacts, which are powered from the battery. There are a couple more contacts going to the brushes. The lamp is connected to them as shown in the figure below.
- If the outputs connected to the power supply have a voltage of no more than 14 V, the control lamp between the contacts of the brushes should light up brightly.
- If the voltage on the power contacts is raised to 15 V and above, with a working relay-regulator, the lamp should go out. If this does not happen, then the regulator is faulty.
- If the lamp does not light up in both cases, then the device must also be replaced.
Video: diagnostics of the voltage regulator on the classic Zhiguli

Checking the windings
The VAZ 2107 generator, like any other Zhiguli, has two windings: a rotor and a stator. The first of them is structurally made at anchor and constantly rotates during the operation of the generator. The stator winding is fixedly fixed to the assembly body. Sometimes there are problems with the windings, which come down to breakdowns on the case, short circuits between the turns, and breaks. All these faults put the generator out of action. The main symptom of such breakdowns is the lack of charge. In this situation, after starting the engine, the battery charge lamp located on the dashboard does not go out, and the arrow on the voltmeter tends to the red zone. When measuring the voltage at the battery terminals, it turns out to be below 13,6 V. When the stator windings are short-circuited, the generator sometimes makes a characteristic howling sound.
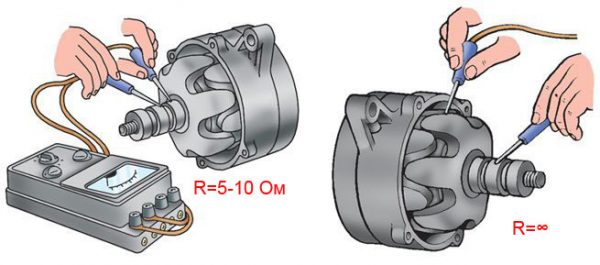
If the battery is not charging and there is a suspicion that the reason lies in the generator windings, the device will need to be removed from the car and disassembled. After that, armed with a multimeter, perform diagnostics in this order:
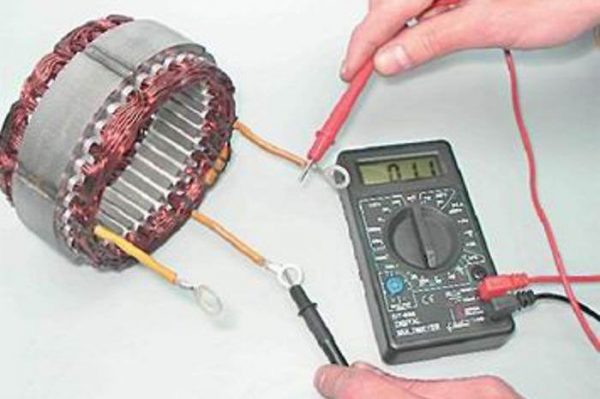
- We check the rotor windings, for which we touch the contact rings with the probes of the device at the limit of measuring resistance. A good winding should have a value in the range of 5–10 ohms.
- We touch the slip rings and the armature body with the probes, revealing a short to ground. In the absence of problems with the winding, the device should show an infinitely large resistance.When checking the rotor windings, the probability of an open and a short circuit is determined
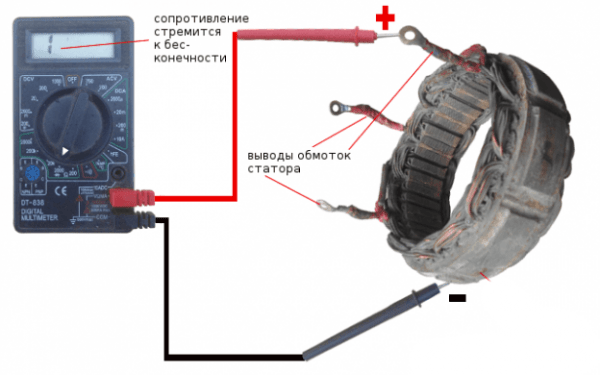
- To check the stator windings, we alternately touch the wires with the probes, performing a break test. In the absence of a break, the multimeter will show a resistance of about 10 ohms.To check the stator windings for an open circuit, the multimeter probes alternately touch the winding leads
- We touch the leads of the windings and the stator housing with probes to check for a short to the housing. If there is no short circuit, there will be an infinitely large resistance on the device.To detect a short circuit, the probes touch the windings and the stator housing
If during the diagnostics problems with the windings were identified, they must be replaced or restored (rewinded).
Diode bridge test
The diode bridge of the generator is a block of rectifier diodes, structurally made on one plate and installed inside the generator. The node converts AC voltage to DC. Diodes can fail (burn out) for a number of reasons:
- water ingress;
- pollution (dust, oil, etc.);
- improper battery charging from another car (lighting).
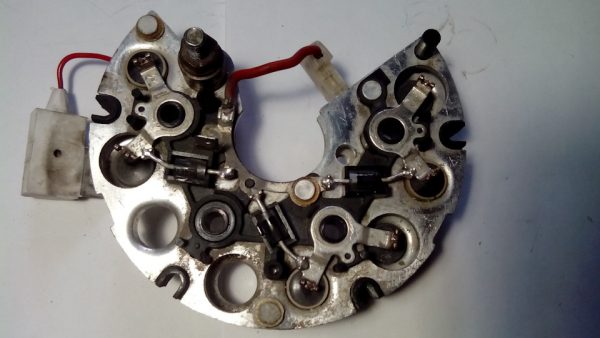
The plate with diodes for testing must be dismantled from the generator, which involves disassembling the latter. You can troubleshoot in a variety of ways.
With the use of control
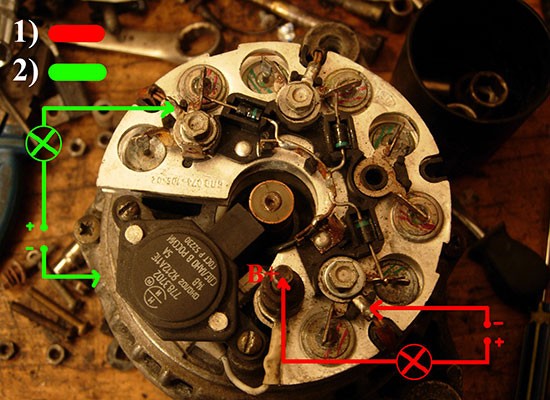
Using a 12 V test light, the diagnosis is carried out as follows:
- We connect the case of the diode bridge to the "-" battery, and the plate itself must have good contact with the generator case.
- We take a light bulb and connect one end of it to the positive terminal of the battery, and connect the other to the output contact of additional diodes. Then, with the same wire, we touch the bolted connection “+” of the generator output and the connection points of the stator winding.The red color shows the circuit for checking the bridge with a light bulb, the green color shows the circuit for checking for a break
- If the diodes are working, then having assembled the above circuit, the light should not light, as well as when connected to different points of the device. If at one of the stages of the test the control lights up, then this indicates that the diode bridge is out of order and needs to be replaced.
Video: checking a diode bridge with a light bulb

Checking with a multimeter
The troubleshooting procedure consists of the following steps:
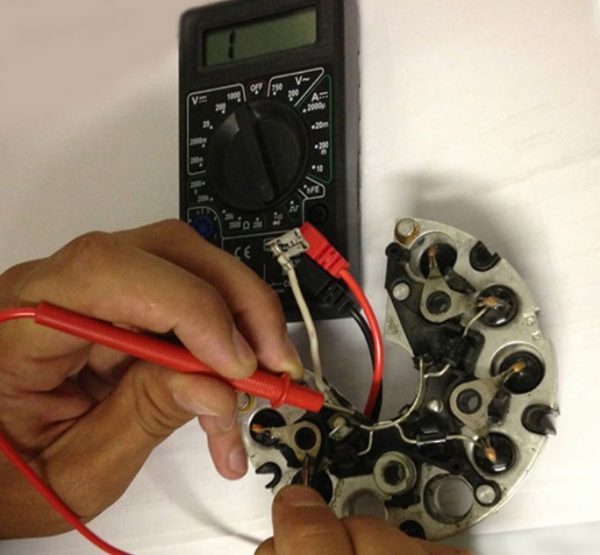
- We turn on the multimeter in ringing mode. When connecting the probes, the device should make a characteristic sound. If the multimeter does not have such a mode, then select the diode test position (there is a corresponding designation).In ringing mode, the display of the multimeter shows the unit
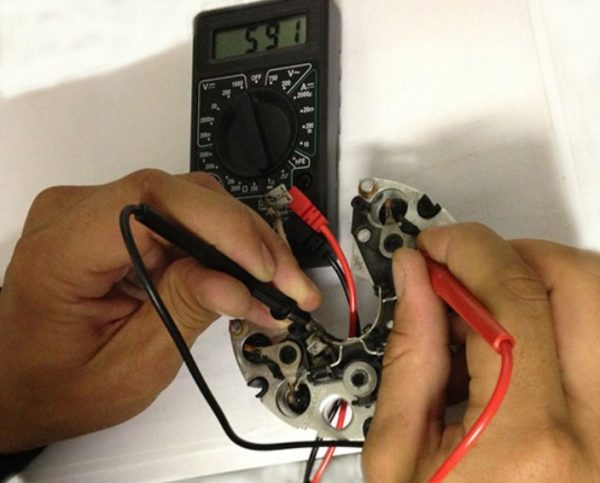
- We connect the probes of the device to the contacts of the first diode. After we check the same diode by changing the polarity of the wires. At the first connection and a working element, the resistance should be about 400–700 Ohms, and in the reverse position, it should tend to infinity. If the resistance in both positions is infinitely large, then the diode is out of order.The multimeter shows a resistance of 591 ohms, which indicates the health of the diode
Checking the bearings
Because generator bearings are constantly subjected to stress, they can fail over time. Increased wear of the part manifests itself in the form of noise, hum or howl of the generator. You can determine the condition of the front bearing without dismantling the device from the car and disassembling it. To do this, remove the belt and, holding the alternator pulley with your hands, shake it from side to side. If there is play or noise is heard when the pulley rotates, then the bearing is broken and needs to be replaced.
A more detailed check of the front and rear bearings is carried out after disassembling the generator. This will determine the condition of the outer cage, separators, the presence of lubrication and the integrity of the generator cover. If during the diagnostics it was revealed that the bearing races or the cover are cracked, the separators are damaged, then the parts need to be replaced.
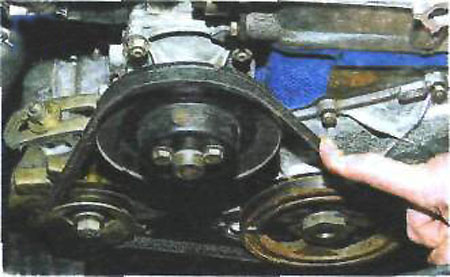
Checking the belt tension
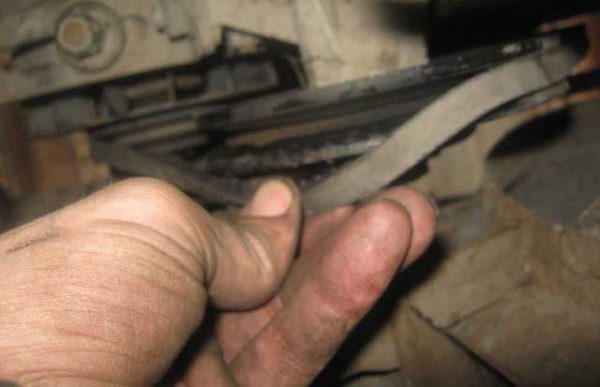
The VAZ 2107 generator is driven from the crankshaft pulley by means of a belt. The latter is 10 mm wide and 944 mm long. For engagement with pulleys, it is made with teeth in the form of a wedge. The belt must be replaced on average every 80 thousand km. mileage, because the material from which it is made cracks and wears out. Despite the simple purpose of the belt drive, it needs to be paid attention from time to time, checking the tension and condition. To do this, press the middle of the long part of the belt with your hand - it should not bend more than 1,5 cm.
Generator repair
The VAZ 2107 generator is a rather complex assembly, the repair of which involves partial or complete disassembly, but the device must first be removed from the car. To work, you will need the following tools:
- keys on 17 and 19;
- heads 10, 17 and 19;
- ratchet handles and knobs;
- extension with cardan joint.
Dismantling the generator
We carry out work on removing the generator in the following order:
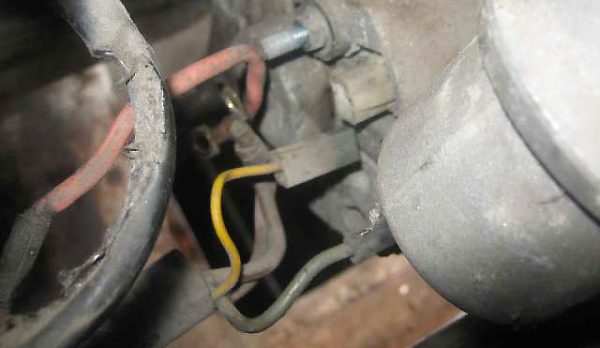
- We remove the negative terminal from the battery and disconnect all the wires coming from the generator.To dismantle the generator from the car, disconnect all the wires coming from it
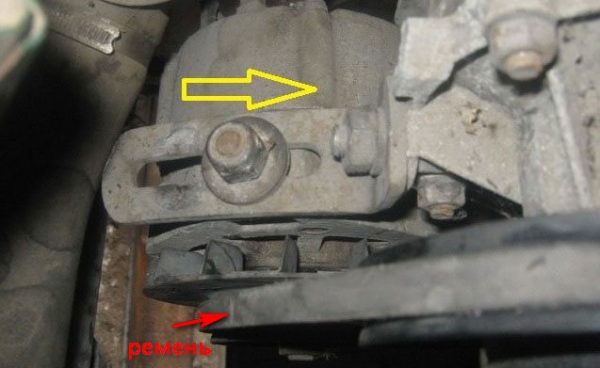
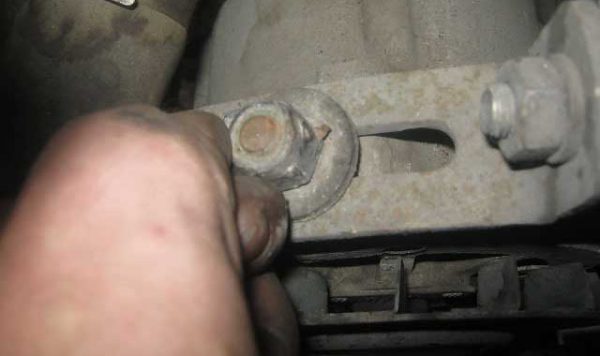
- Using a 17 key, we tear off and unscrew the upper fasteners of the generator, while loosening and tightening the belt.The upper mount of the generator is also a belt tension element
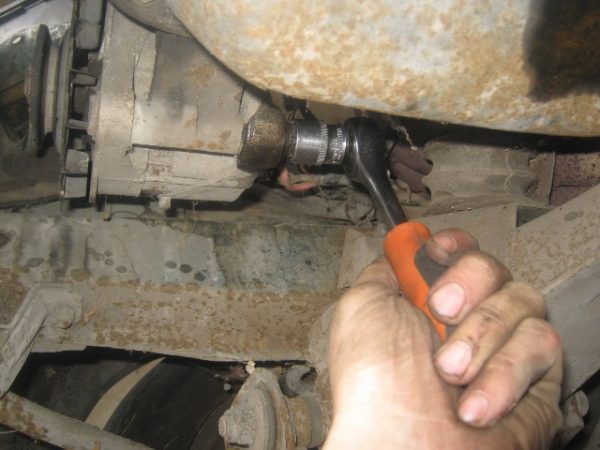
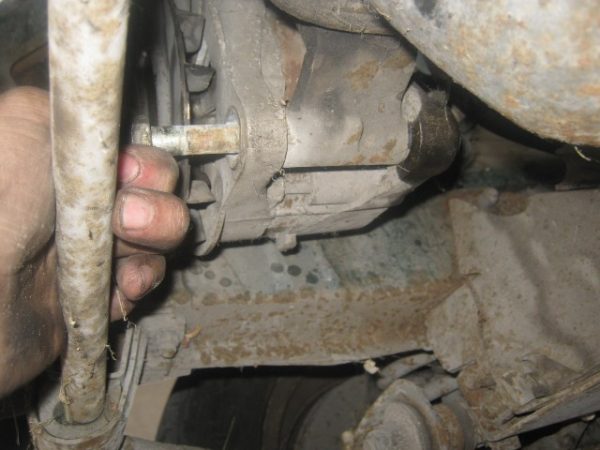
- We go under the car and unscrew the lower mount. It is convenient to use a ratchet to unscrew the fasteners.Climbing under the car, unscrew the lower mount of the generator
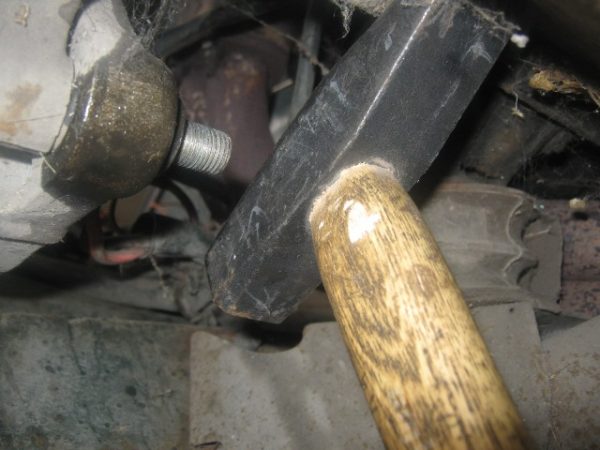
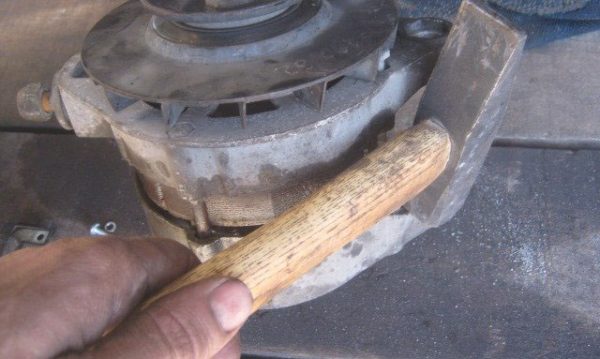
- After unscrewing the nut, we knock out the bolt, for which we point a piece of a wooden block on it and strike the head with a hammer to avoid damaging the thread.We must knock out the bolt through a wooden tip, although it is not in the photo
- We take out the bolt. If it comes out tight, you can use, for example, brake fluid or penetrating lubricant.If the bottom bolt is tight, you can moisten it with penetrating grease.
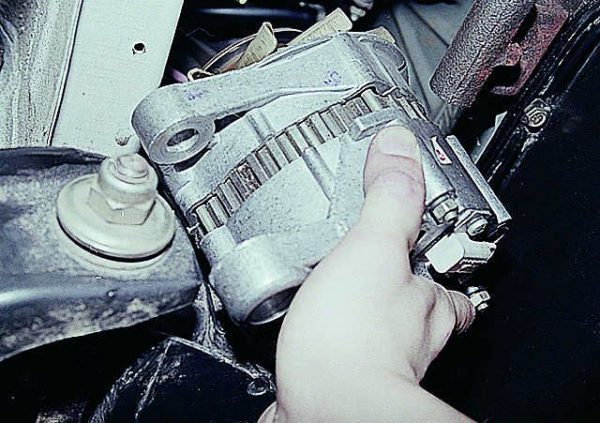
- We dismantle the generator from below.We remove the generator from the car by lowering it between the bracket and the front axle beam
Video: dismantling the generator on the "classic"

Disassembly
To disassemble the assembly, you need the following tools:
- box or open-end wrench for 19;
- ratchet with extension;
- heads for 8 and 10;
- a hammer.
The sequence of actions for disassembly is as follows:
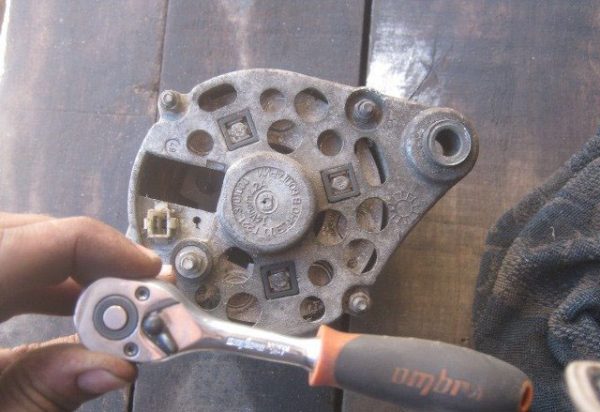
- Unscrew the 4 nuts that secure the back of the case.The generator housing is fastened with four bolts with nuts that need to be unscrewed
- We turn the generator over and slightly extend the bolts so that their heads fall between the blades of the pulley to fix it.
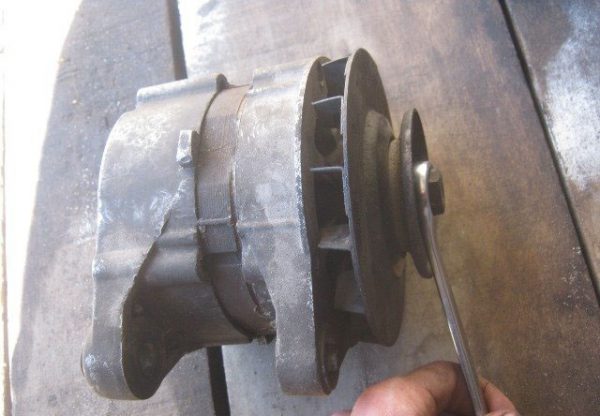
- Using a 19 wrench, unscrew the pulley mounting nut.The alternator pulley is held by a nut at 19
- If it was not possible to unscrew the nut, then we clamp the generator in a yew and repeat the operation.
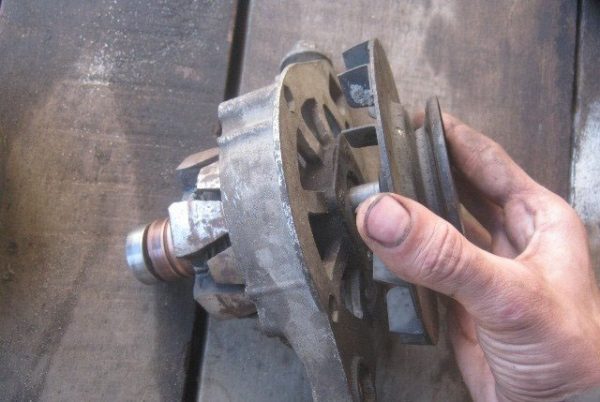
- We separate the two parts of the device, for which we lightly hit the body with a hammer.After unscrewing the fasteners, we disconnect the case by applying light blows with a hammer
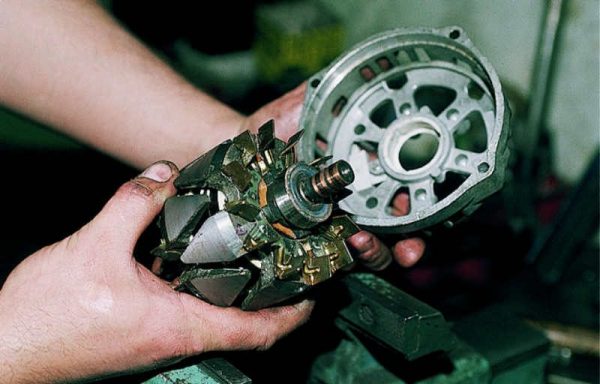
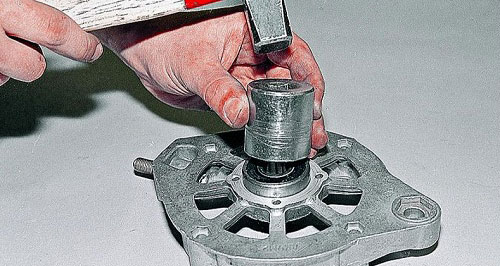
- Remove the pulley.The pulley is removed from the anchor quite easily. If you have any difficulties, you can pry it with a screwdriver
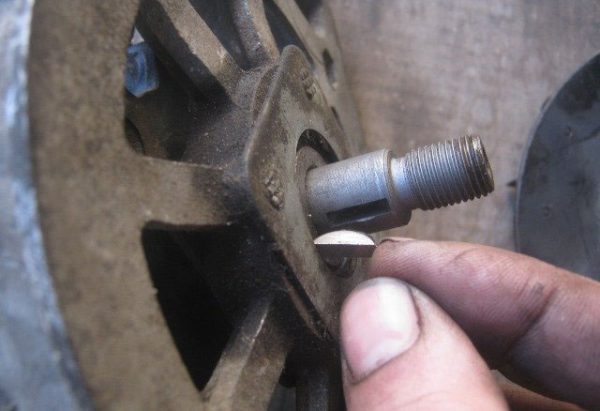
- We remove the key.The pulley is kept from turning on the rotor by a key, so when disassembling it, you need to carefully remove it and not lose it.
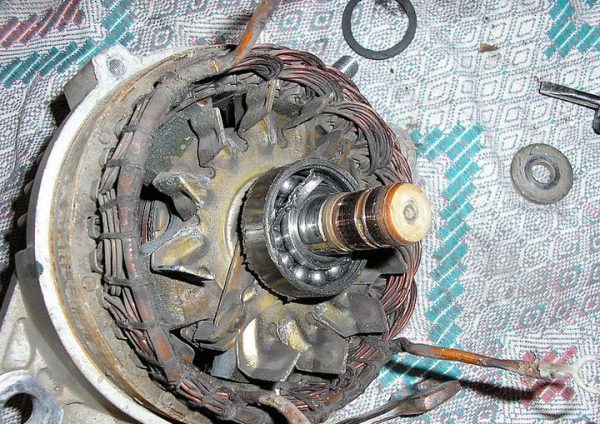
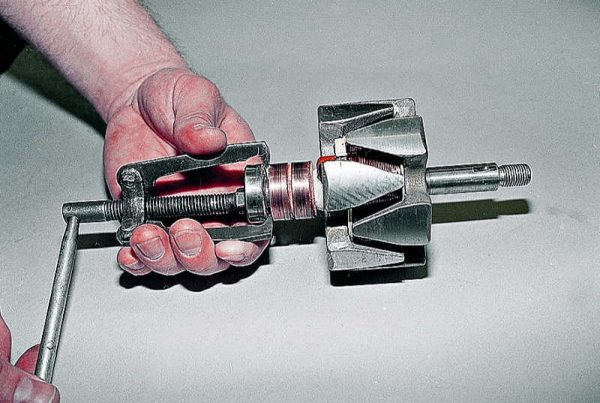
- We take out the anchor together with the bearing.We take out the anchor from the cover together with the bearing
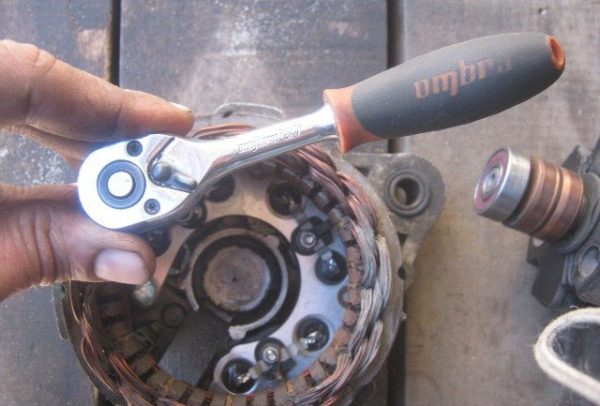
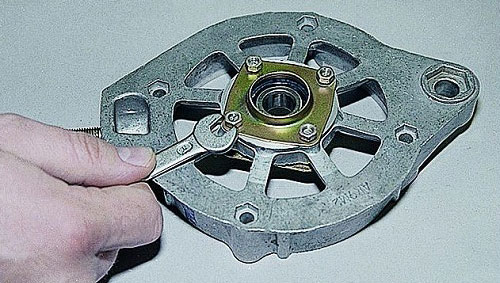
- To remove the stator winding, unscrew 3 nuts from the inside.The stator winding is fastened with three nuts, unscrew them with a ratchet
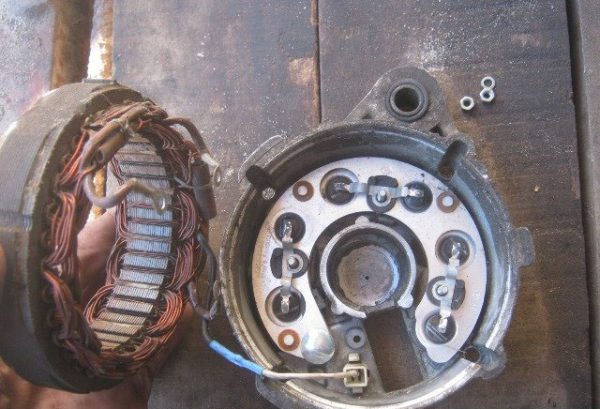
- We remove the bolts, winding and plate with diodes.Having unscrewed the fasteners, we take out the stator winding and the diode bridge
If the diode bridge needs to be replaced, then we perform the described sequence of actions, after which we install a new part and assemble the assembly in the reverse order.
Generator bearings
Before proceeding with the replacement of generator bearings, you need to know what their dimension is and whether it is possible to install analogues. In addition, it is worth considering that such bearings can be structurally open, closed on one side with a steel washer and closed on both sides with rubber seals that prevent dust and lubricant leakage.
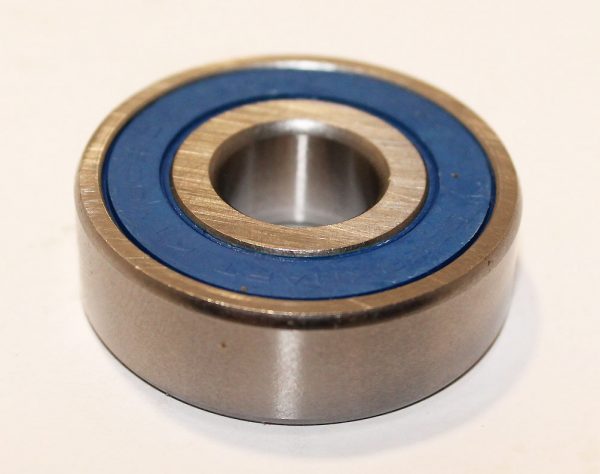
Table: dimensions and analogues of generator bearings
| Applicability | Bearing number | Analog import / China | Size mm | Quantity |
| Rear alternator bearing | 180201 | 6201–2RS | 12h32h10 | 1 |
| Front alternator bearing | 180302 | 6302–2RS | 15h42h13 | 1 |
Bearing replacement
The replacement of bearings on the "seven" generator is carried out on a disassembled device using a special puller and a key for 8. We perform the procedure in this way:
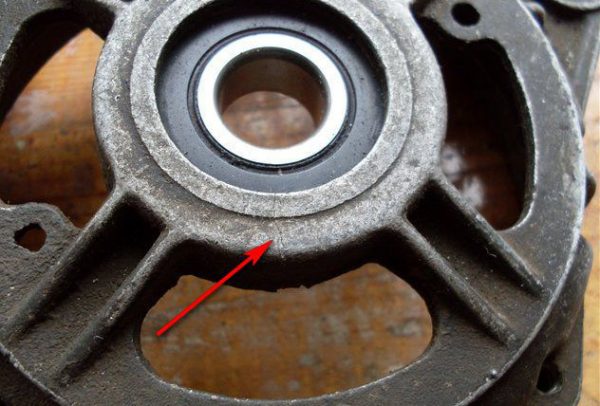
- On the front cover, unscrew the nuts for fastening the linings located on both sides and holding the bearing.Linings on a cover of the generator hold the bearing
- Press out the old bearing using a suitable tool.
- To remove the ball bearing from the armature, use a puller.To remove the bearing from the rotor, you will need a special puller.
- We install new parts in the reverse order by pressing in with suitable adapters.To install a new bearing, you can use a suitable size adapter
Voltage regulator
The relay-regulator, like any other device, can fail at the most inopportune moment. Therefore, it is important to know not only how to replace it, but also what options this product has.
Which one can be put
Different relay-regulators were installed on the VAZ 2107: external and internal three-level. The first are a separate device, which is located on the left side of the front wheel arch. Such regulators are easy to change, and their cost is low. However, the external design is unreliable and has a large size. The second version of the regulator for the "sevens" began to be installed in 1999. The device has a compact size, is located on the generator, has high reliability. However, replacing it is much more difficult than an external part.
Replacing the regulator
First you need to decide on a set of tools that will be required for work:
- open-end wrench for 10;
- flat screwdriver;
- Phillips screwdriver.
Having revealed during the test that the device is not working properly, you need to replace it with a known good one. To do this, perform the following steps:
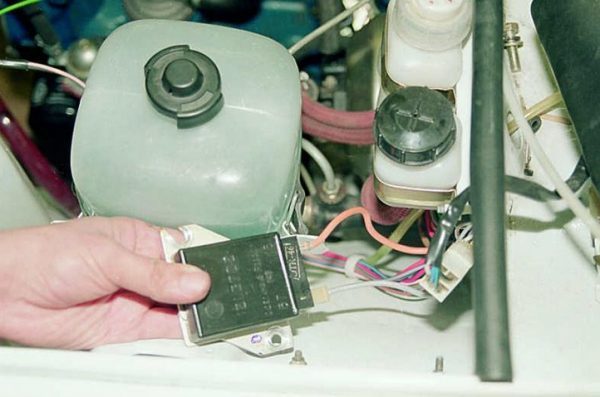
- If the generator has an external regulator, then to dismantle it, remove the terminals and unscrew the fasteners with a 10 wrench.The external voltage regulator VAZ 2107 rests on only two turnkey bolts for 10
- If an internal regulator is installed, then to remove it, you need to remove the wires and unscrew just a couple of screws with a Phillips screwdriver that hold the device in the generator housing.The internal regulator is removed using a small Phillips screwdriver.
- We check the relay-regulator and make a replacement if necessary, after which we assemble in the reverse order.
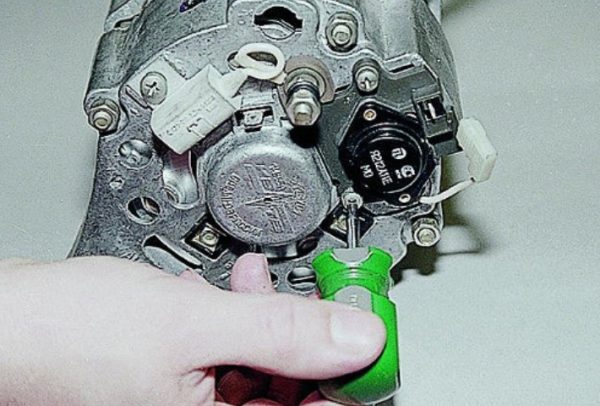
Generator brushes
It is most convenient to replace the brushes on a removed generator, but no one dismantles it on purpose. The part has a catalog number 21013701470. An analogue is a brush holder from UTM (HE0703A). In addition, similar parts from the VAZ 2110 or 2114 are suitable. Due to the peculiar design of the internal voltage regulator, when it is replaced, the brushes also change at the same time.
The brushes, when installed in place, must enter without distortion, and the rotation of the generator by the pulley must be free.
Video: dismantling the brushes of the "seven" generator

Replacing the alternator belt and its tension
Having determined that the belt needs to be tightened or replaced, you need to prepare the appropriate tools for the job:
- open-end wrench for 17;
- open-end or box wrench for 19.
The procedure for replacing the belt is as follows:
- We turn off the upper mount of the generator, but not completely.
- We go under the car and loosen the bottom nut.
- We shift the nut to the right, you can lightly tap with a hammer, loosening the belt tension.To loosen the alternator belt, move the device to the right
- Remove the belt from the pulleys.After loosening the upper mount of the generator, remove the belt
- Install the new part in reverse order.
If you just need to tighten the belt, then the upper nut of the generator is simply loosened and adjusted, for which the assembly is moved away from the engine using a mount. To weaken, on the contrary, the generator is shifted to the motor. After completing the procedure, tighten both nuts, start the engine and check the charge at the battery terminals.
Video: alternator belt tension on the "classic"

If your "seven" "has" problems with the generator, you do not need to immediately rush to the car service for help, because you can read the step-by-step instructions for checking and repairing the unit and do the necessary work yourself. In addition, there are no special difficulties in this even for novice car owners.

