Why do we need and how to replace glass on a VAZ 2106
Content
In the VAZ "six", as in other cars, comfort and safety are provided by car windows. As the vehicle is operated, they are exposed to negative environmental factors, which leads to gradual surface damage. Ultimately, this or that glass has to be changed. This procedure is simple and within the power of every owner of "Zhiguli".
What are glasses on a VAZ 2106 for?
At the beginning of the appearance of vehicles such as cars, their speed was barely faster than that of a person. The driver and passengers did not experience any discomfort and did not need any additional protection. But since speeds increased over time, it became necessary to protect the people in the car both from the oncoming air flow and from dust, dirt, stones and precipitation. As such protective elements, automobile glasses began to be used. They simultaneously play the role of a kind of shield, and also provide the necessary comfort in the vehicle interior. The main requirements that auto glass meets are high strength, safety and reliability during operation.
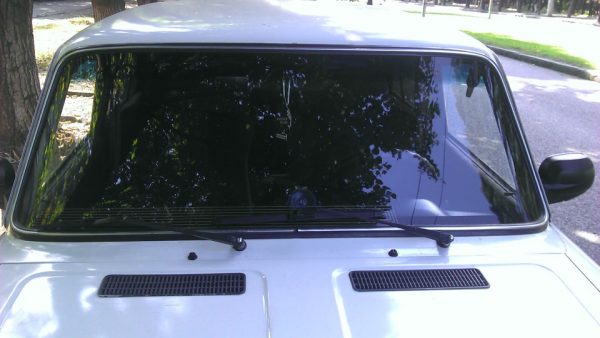
Windshield
The windshield of a car, also called a windshield, is installed in front of the body and provides protection for passengers and the driver in the cabin. Since it is the windshield in the car that is most affected by the environment (gravel, sand, dirt, etc.), it is on this element that most often damage occurs in the form of chips and cracks. Sometimes situations arise when a pebble flies into the glass from a passing or oncoming vehicle, from which a web (numerous cracks) appears on the entire surface of the glass. In this case, the windshield must only be replaced. Therefore, it would be useful for the owners of the VAZ "six" to know in advance the dimensions of the windshield, which have the following values: 1440 x 536 mm.
How to remove glass
The windshield is changed with a minimum of tools, but for convenience and safety, this procedure is best done with an assistant. The tools you will need are the following:
- slotted and Phillips screwdriver;
- hook for prying the seal.
Dismantling is carried out as follows:
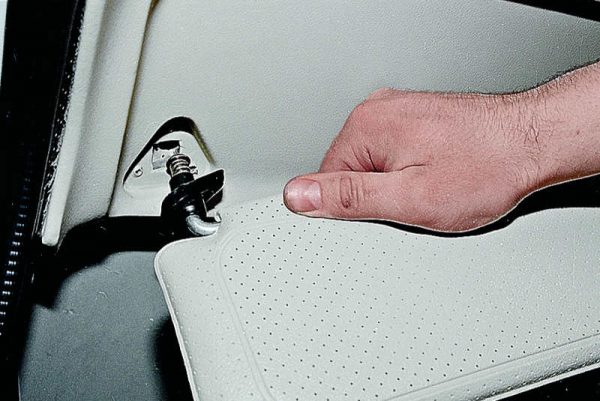
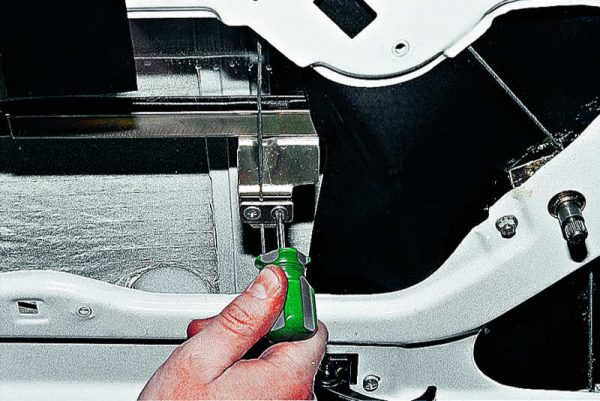
- Using a Phillips screwdriver, unscrew the fastening of the side trim.
 The side panel is held in place with three screws.
 - We remove the cladding.Unscrew the fastener, remove the cover
- In the same way, we dismantle the lining on the opposite side of the glass.
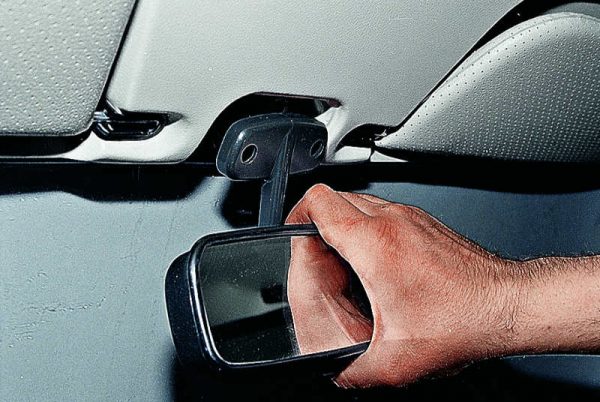
- To provide access to the windshield in the upper part, we pry off the decorative element and unscrew the screws, after which we remove the rear-view mirror from the ceiling.We remove the decorative element, unscrew the mount and remove the rear-view mirror
- We unscrew the fasteners and remove both visors.Unscrew the fasteners and remove the sun visors
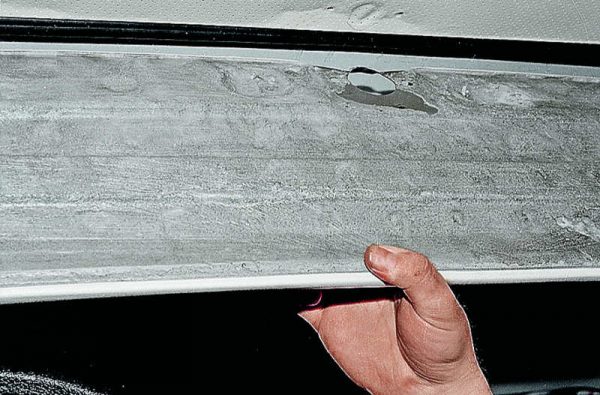
- We dismantle the lining from the ceiling.Removing the lining from the ceiling
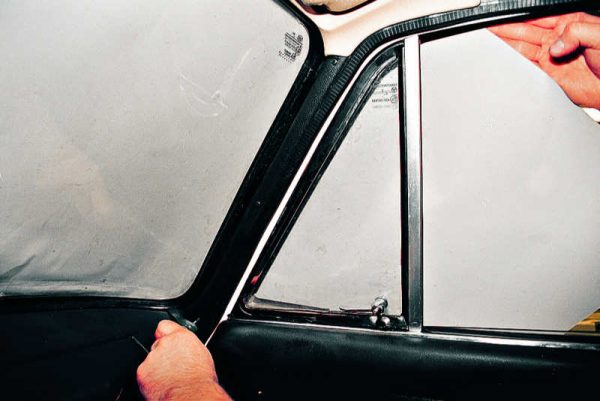
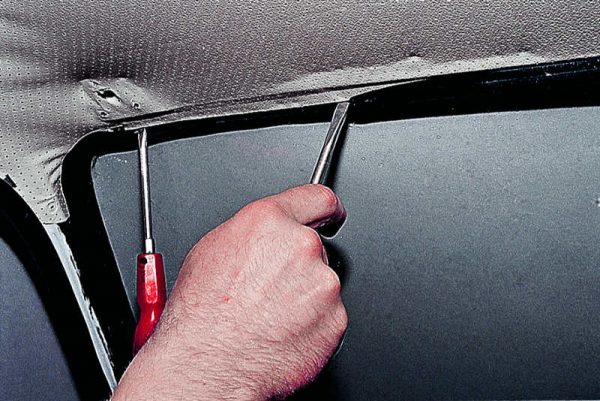
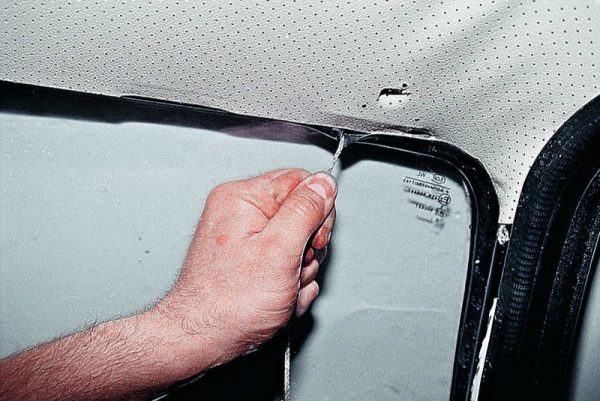
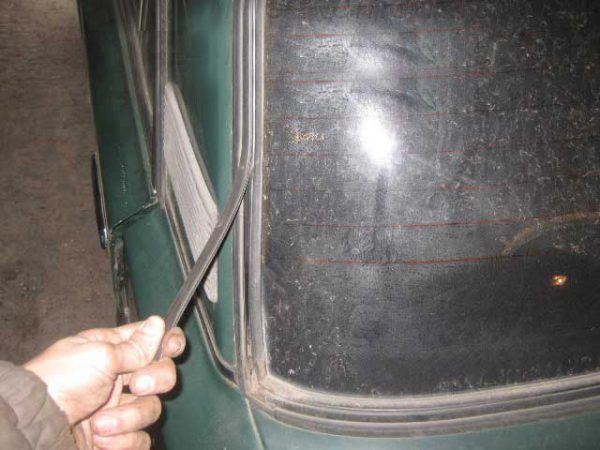
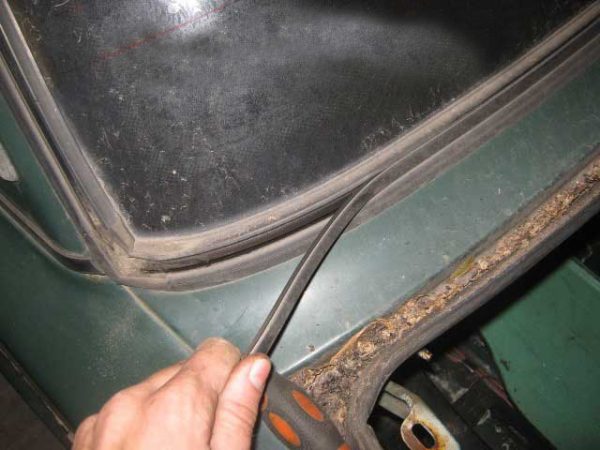
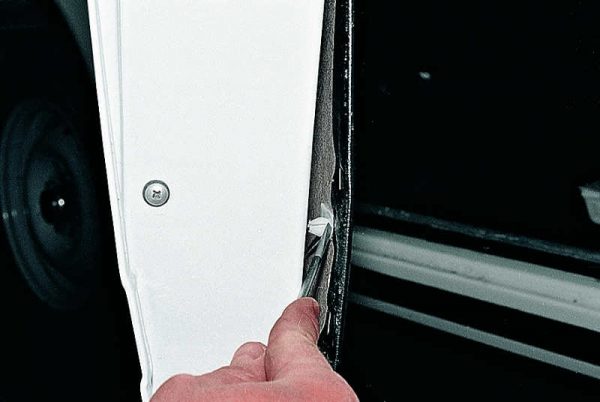
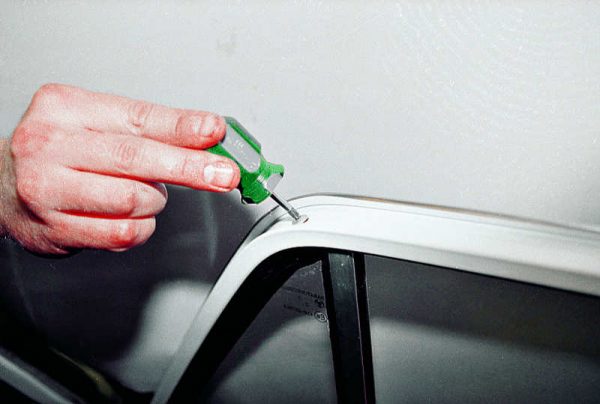
- In one of the inner upper corners of the glass, we begin to gently pry off the seal with a flat screwdriver, pushing the rubber behind the flanging. We place a screwdriver shallowly in the gap formed, avoiding damage to the glass, and with the second screwdriver we continue to pry the seal over the edge of the windshield frame.To dismantle the windshield, it is necessary to pry the seal with flat screwdrivers
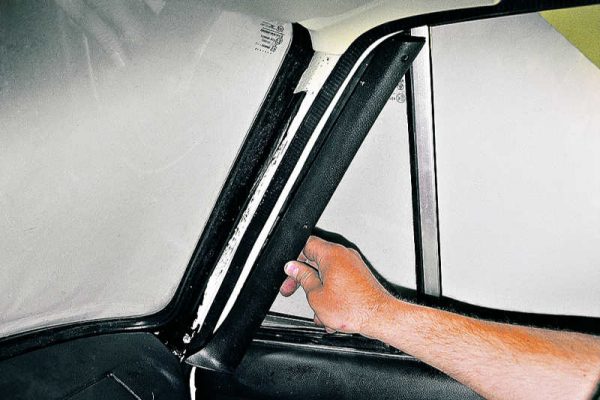
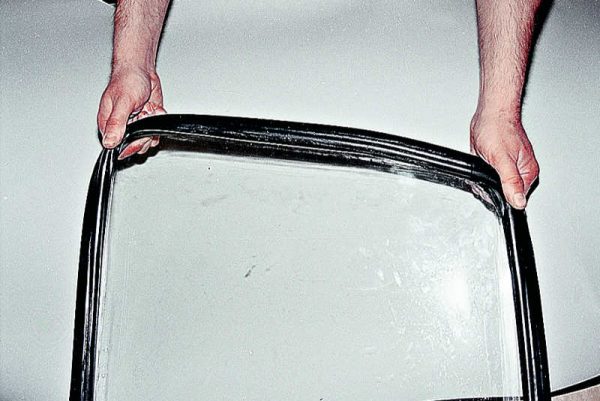
- From the top of the glass we move to the sides, pushing the glass out and dismantling it from the car, while one person is in the cabin, and the assistant outside takes the glass over.When the glass comes out from above and on the sides, we press on it from the inside and take it out of the opening
- We pull the edging from the seal, and then the rubber element itself.
If the sealing gum has retained its softness, and also has no damage (cracks, tears), then it can be reinstalled on a new windshield. However, the classic "Zhiguli" is characterized by such a frequent malfunction as the flow of water through the seal. Therefore, it is desirable to replace the element with a new one.
How to install glass
Installation of new glass will require the preparation of such materials:
- glass degreaser;
- clean rags;
- a rope with a diameter of 4–5 millimeters and a length of at least 5 meters;
- molding.
Installation consists of the following steps:
- We spread a soft cloth on the table, which will avoid scratches on the glass. We put new glass on it.
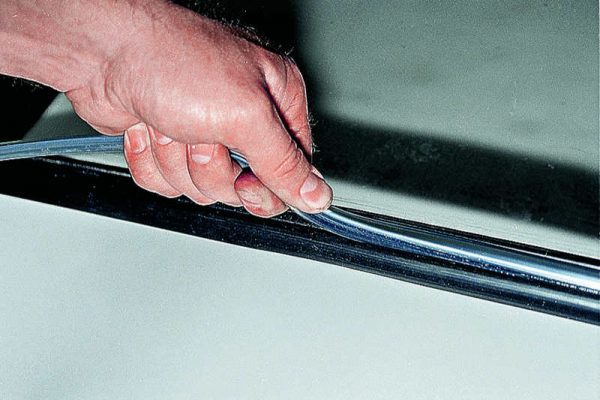
- We stretch the seal in the corners and further along all sides of the glass.The sealant on the glass should be put on from the corners, spreading it well from all sides
- We turn the glass over and insert the edging into the rubber element.We fill the edging into the sealant
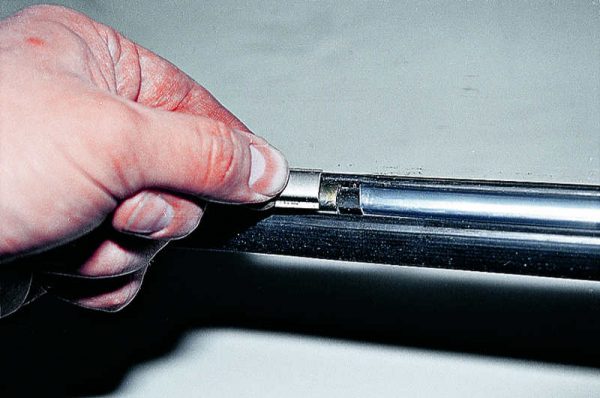
- We put a lock in place of the junction of the edging.When the edging is tucked into the seal, insert the lock into the junction
- We turn the glass over again and place the rope in the side cut, while its ends should overlap in the middle of the bottom of the glass.We place the rope in a special cut in the seal, while the edges of the cord should overlap
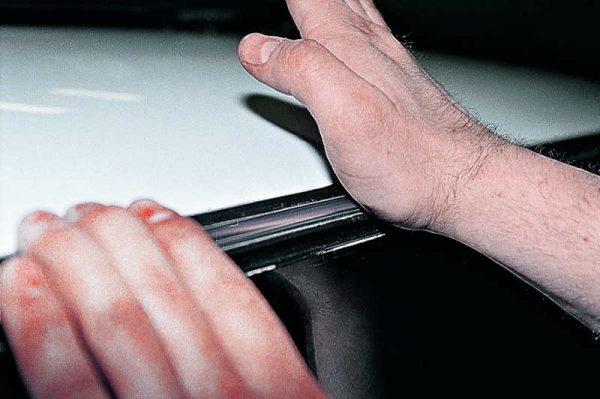
- Together with an assistant, we apply glass to the opening of the body and set it in the center. One person presses on the bottom of the glass from the outside, and the other from the passenger compartment gradually pulls the rope out of the elastic, first at one end, and then at the other. We press on the seal and try to plant it deeper on the flanging of the body. In this sequence, we pass along the bottom of the glass.
- Hit the palm of your hand on the top of the windshield from the outside to seat it in place.In order for the glass to sit in place, we strike the upper part of it from the outside with the palm of our hand.
- We take out the rope on the sides of the glass.We pull the cord from the sides, gradually moving to the top of the glass
- We remove the cord in the upper part of the windshield from the edges to the middle, filling the edge of the seal.
- We put in place all previously dismantled interior elements.

Video: how to replace the windshield on the classic Zhiguli

Windshield tinting
Many VAZ 2106 car owners tint the windshield and other windows of their car. The main goals pursued are the following:
- reduction of interior heating in the summer;
- retention of glass fragments on the film in the event of an accident;
- protection of interior elements from damage under the influence of ultraviolet radiation;
- reducing the likelihood of being blinded by the reflections of snow or the headlights of oncoming traffic.

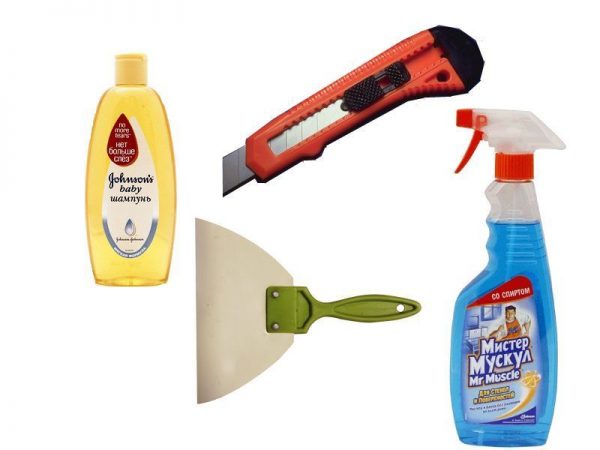
Having decided to darken the windshield, the main thing you need to know about is the light transmission, which for the body element in question should be at least 75%, and for the front side windows - 70%. Other glasses can be tinted at your discretion. From the required list of materials you will need:
- shampoo;
- pure water;
- spray gun;
- glass cleaner;
- rubber spatula;
- sharp blade, knife;
- non-woven wipes.
Toning is carried out in the following sequence:
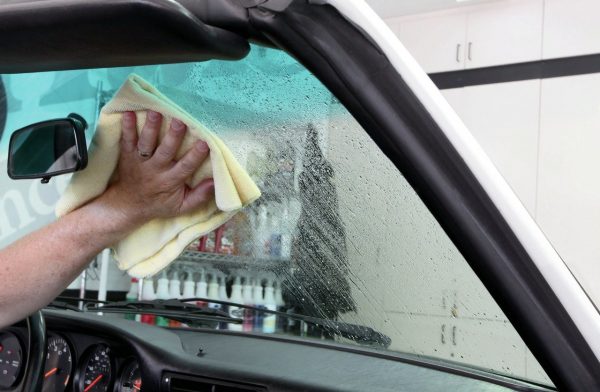
- We clean and degrease the inner surface of the glass.Before applying the film, the windshield must be cleaned of dirt.
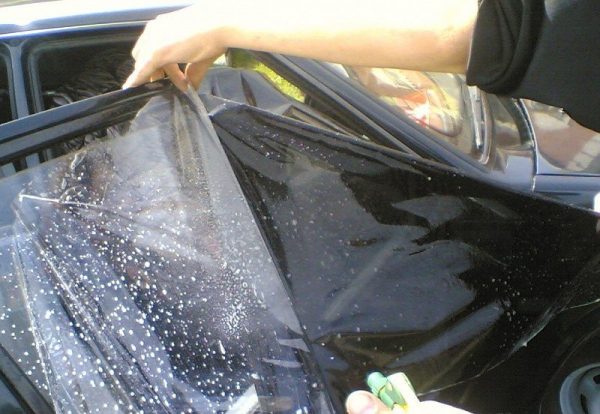
- We apply the film from the outside and cut off a piece with a small margin on the sides.
- Wet the inner surface of the glass from the sprayer and peel off the protective layer from the film.Remove the protective layer from the prepared piece of film
- We apply the film to the glass, gradually expelling air bubbles with a spatula.We smooth the film with a special spatula and dry it with a building hair dryer
- To make the material sit better, in problem areas (at the bends) we heat it with a hairdryer.
- A few hours after tinting, cut off the excess film with a blade.
Rear Glass
The rear window of the "six" is also a body element, through which rear visibility is provided, protection of the passenger compartment and people in it from precipitation and other external influences. It is not often necessary to remove the part and this is done mainly for the purpose of replacing the sealing rubber, during repair work or replacing it with heated glass. The rear glass has dimensions of 1360 x 512 mm.
How to remove glass
The sequence of work on removing the rear window is similar to the procedure with the wind element, but there are some features that we will consider in more detail:
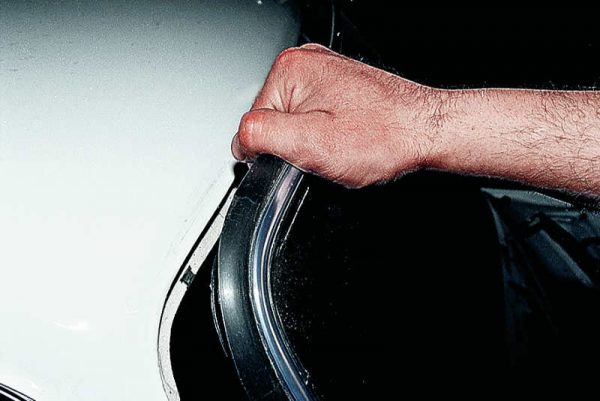
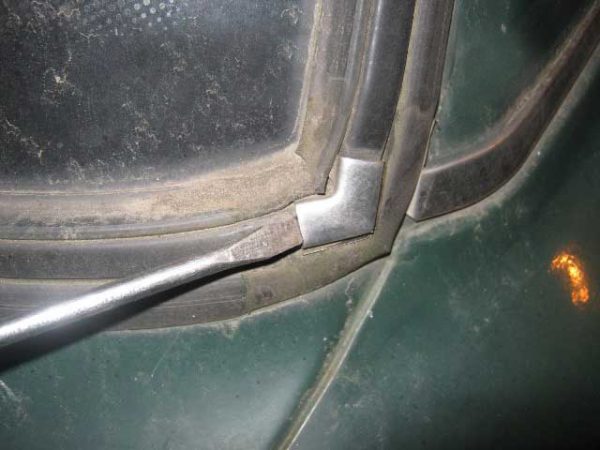
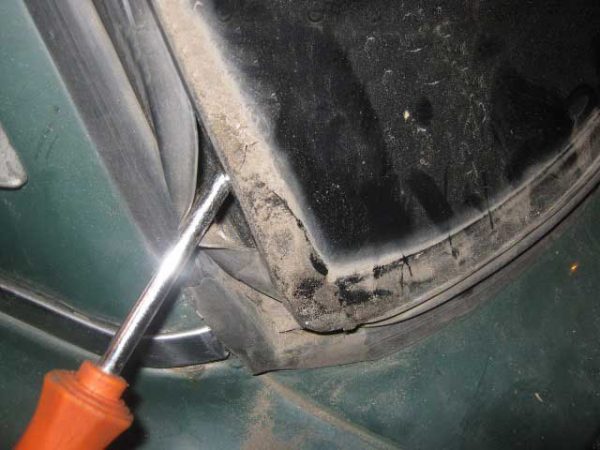
- Using a screwdriver, pry off the elements in the lower corners of the seal.We pry the edging in the corners with a screwdriver
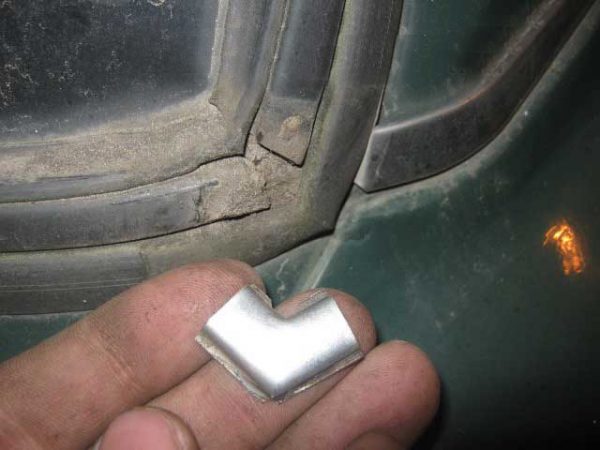
- We dismantle the corners.We dismantle the edging on both sides
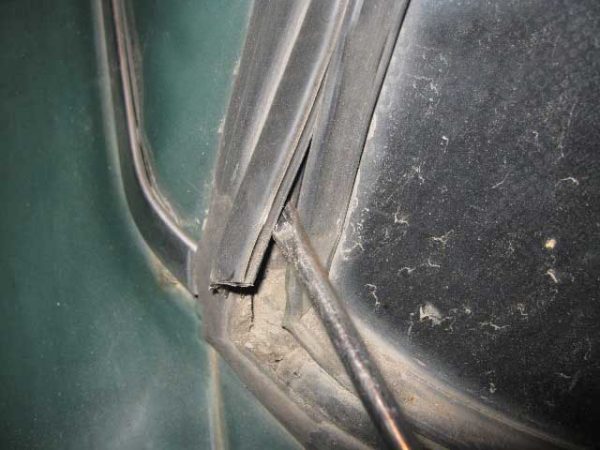
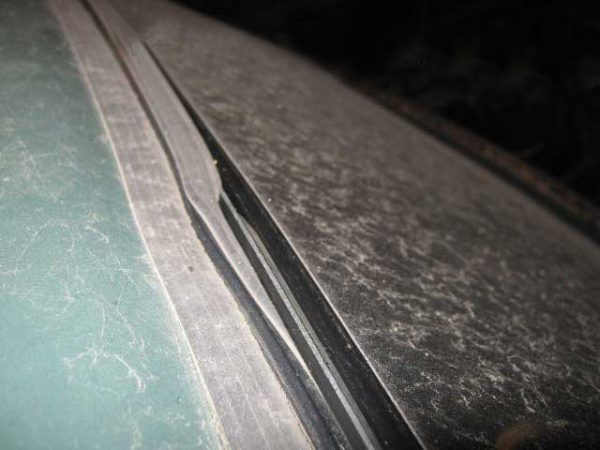
- We pry off the edge of the central harness with a screwdriver.Using a screwdriver, pry off the edge of the central harness
- Pull the harness up and remove it completely from the seal.Pull the edge of the harness and remove it from the seal
- At the bottom of the glass, we take out the tourniquet in the same way.We also take out the lower harness by pulling the edge
- We insert a screwdriver under the lower corner of the glass and, stepping back about 10 cm, insert another one so that the glass comes out slightly from the seal.Insert a screwdriver under the bottom edge of the glass and step back a little, insert another one
- Using a screwdriver, push the edges of the rubber band under the glass.We fill the rubber band under the glass with a screwdriver
- When the side of the glass comes out of the seal, we take the glass with our hands and gradually swing it, completely removing it from the rubber band.We remove the glass from the seal and completely remove it from the rubber
The installation of the rear window is carried out by analogy with the windshield.
Rear window tinting
The dimming of the rear window occurs in the same sequence and using the same tools as the windshield. To facilitate the application of a tint film in places of bends, some car owners divide it into three longitudinal strips.
Rear window defogger
The sixth model of the Zhiguli, although it was equipped with rear window heating, but only in the last years of production. This option is not at all superfluous, since it allows you to get rid of glass fogging in wet and frosty weather, thereby improving visibility. Therefore, many owners of "sixes" tend to put such glass on their cars. For such a conversion you will need:
- heated glass;
- terminals - wide and bolted;
- circuit breakers;
- wires;
- relay (RS527 or equivalent) and a block for it;
- nut;
- rubber tubes;
- on / off button.
Since glass heating consumes a rather large current, it is advisable to use the button from the indications, which will allow you to turn off this function in a timely manner.
We install heated glass in the same way as usual, after which we connect it as follows:
- We remove the negative terminal from the battery.
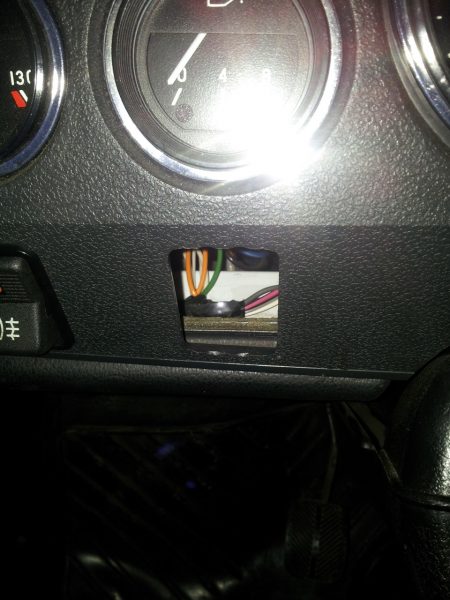
- We dismantle the instrument panel and cut a button into it.Punch a hole in the dashboard for the button
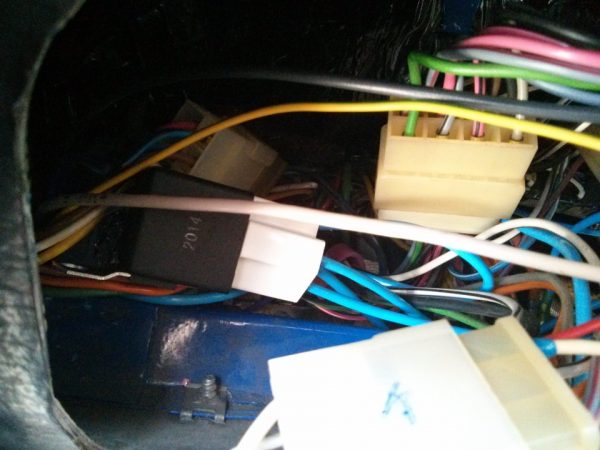
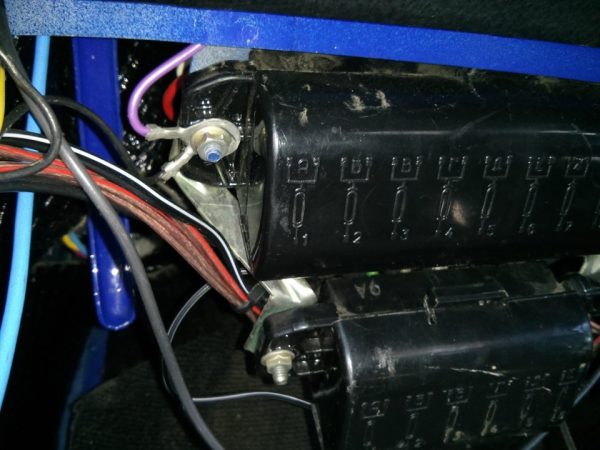
- We place the relay in a convenient place, for example, behind the dashboard.The relay is located behind the instrument panel
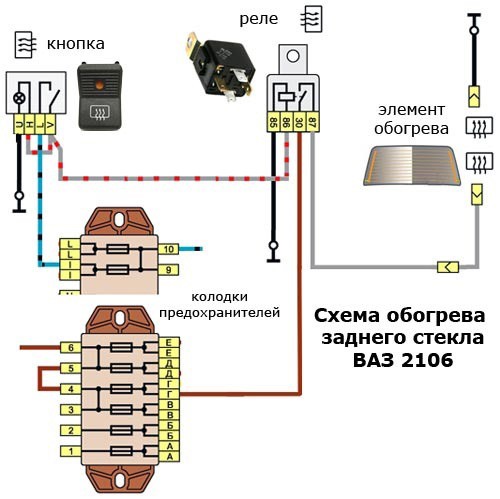
- The connection of all elements is carried out according to the above scheme.We connect glass heating according to the scheme
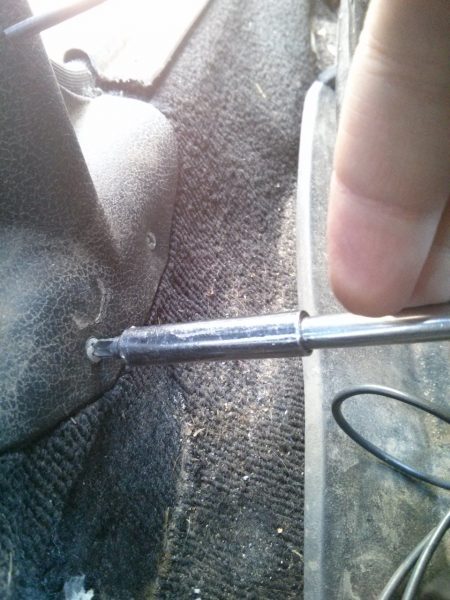
- We connect the negative wire to the stud through which the fuse box is attached to the body.Minus connect the fuse box mount to the stud
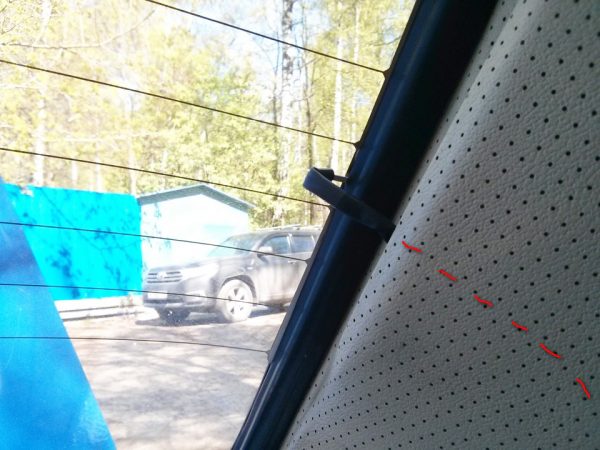
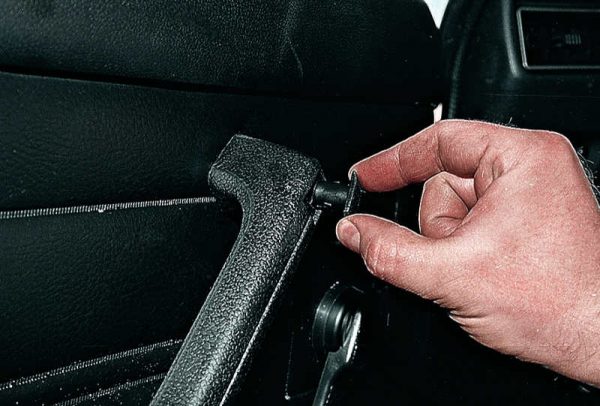
- To lay the positive conductor, we dismantle the left sill trim, as well as the decorative element of the rack and the bolt holding the seat belt.We turn off the fastening of the decorative element of the rack
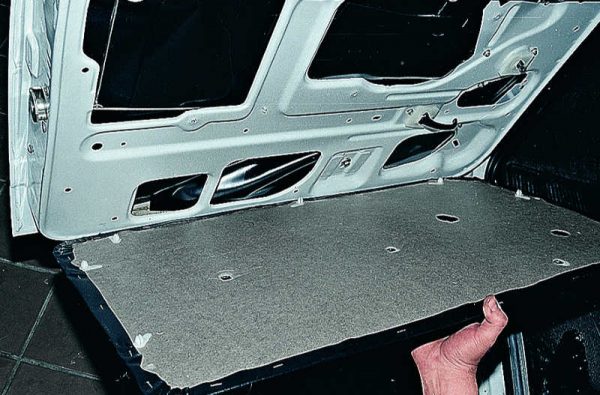
- We remove the back seat.Removing the rear seat from the passenger compartment
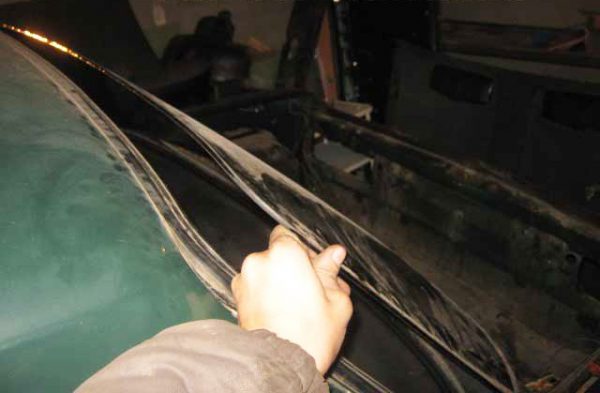
- We lay the wire through the entire cabin, as well as under the rear lining trim.To hide the wire to the glass heating, we lay it under the lining of the skin
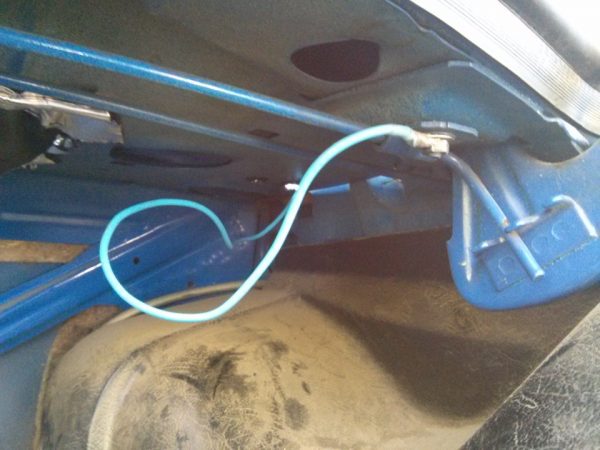
- We fix the mass from the glass on the bolt of the trunk lid.We connect the mass from the glass to the bolt of the trunk lid

Rear window grille
Sometimes you can find classic Zhiguli with bars on the rear windows. Previously, this element was more popular, but today some owners seek to install it on their cars. The main goals that are pursued during the installation of such a part are as follows:
- glass is less polluted;
- on sunny days, the interior heats up less;
- reduces the likelihood of being blinded by traffic moving behind.
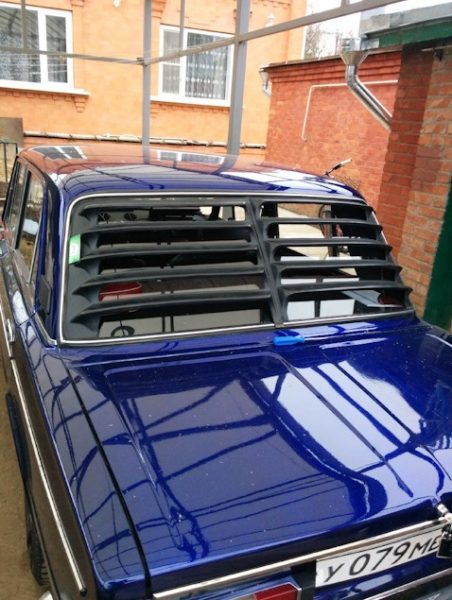
As for the shortcomings, they are also present and boil down to problematic cleaning of glass in the corners from debris, dirt and snow. The installation of the grille consists of the following steps:
- We dismantle the glass.
- We put a grate under the seal.
- We fill the cord and install the glass in place.
Video: installing a grille on the rear window

Side glass front door
On the sixth Zhiguli model, two glasses are installed in the front doors - lowering and turning (window). The first of them has dimensions of 503 x 422 x 5 mm, the second - 346 x 255 x 5 mm. In most cases, the need to dismantle the glass of the front doors arises during the repair of the latter.
How to remove glass
To remove the glass, you will need a slotted and Phillips screwdriver, as well as an open-end wrench for 8 and 10. The dismantling process itself is performed in the following sequence:
- We remove the plastic plugs from the door armrest by prying them with a flat screwdriver.We pry with a screwdriver and take out the armrest plugs
- We unscrew the fixing screws and remove the armrest.Unscrew the armrest mount, remove it from the door
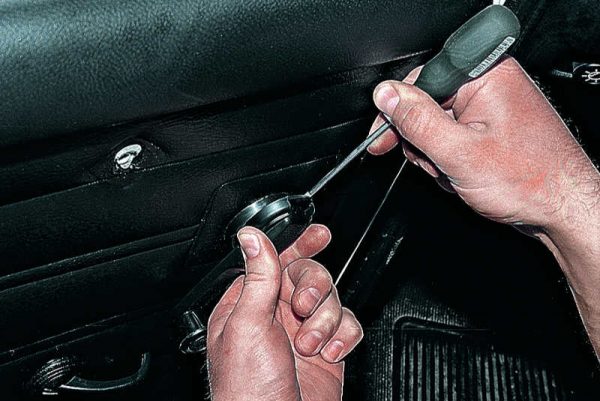
- With a screwdriver, we pry and push out the lining, and then remove the window lifter handle with a socket.We pry off with a screwdriver and remove the lining of the window lifter handle, and then the handle itself
- We dismantle the decorative element from the inner door handle.To remove the trim of the door handle, pry it with a flat screwdriver.
- We place a screwdriver between the door upholstery and the door itself and pry off the plastic clips around the perimeter.The door trim is held in place with clips that need to be pryed off with a screwdriver.
- We take off the cover.After snapping off all the clips, remove the upholstery
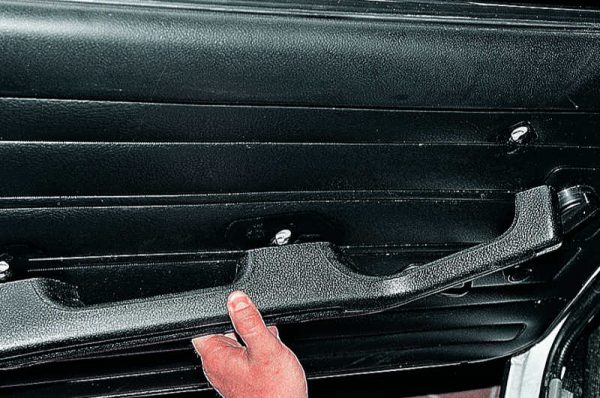
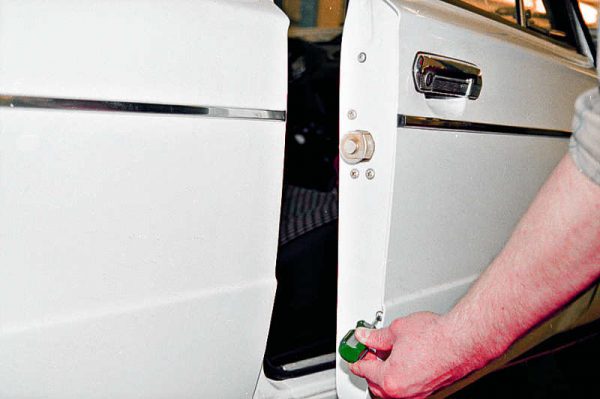
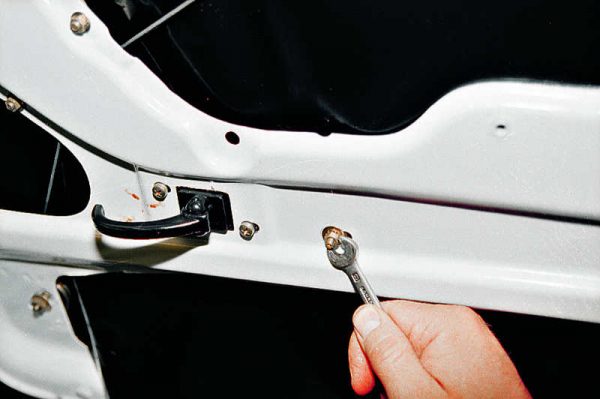
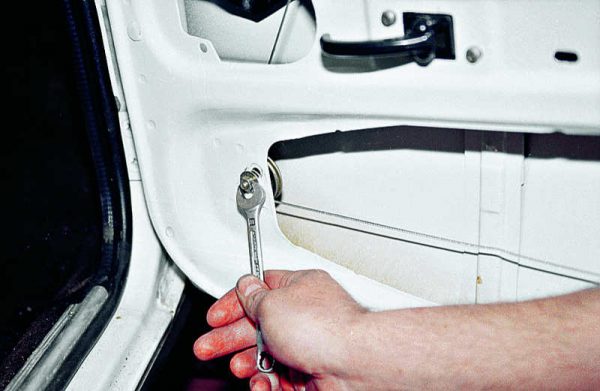
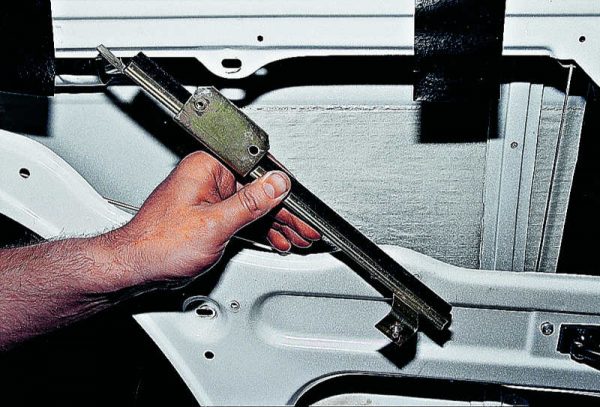
- From the end of the door, unscrew the fasteners of the rear chute and take the part out of the door.Loosen the rear window guide
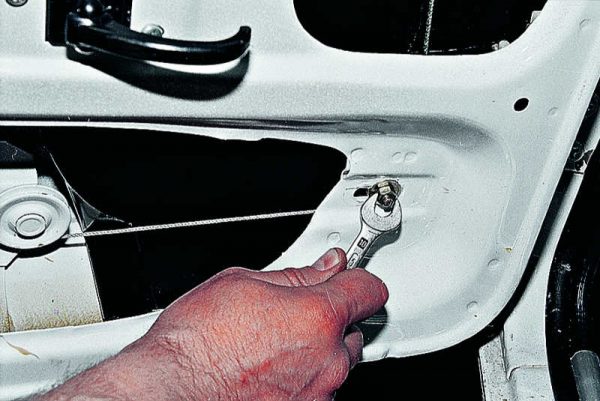
- We unscrew the fastening of the front guide bar, after which we disconnect it from the window stand and take it out of the door.Using the key, unscrew the fastening of the front guide element
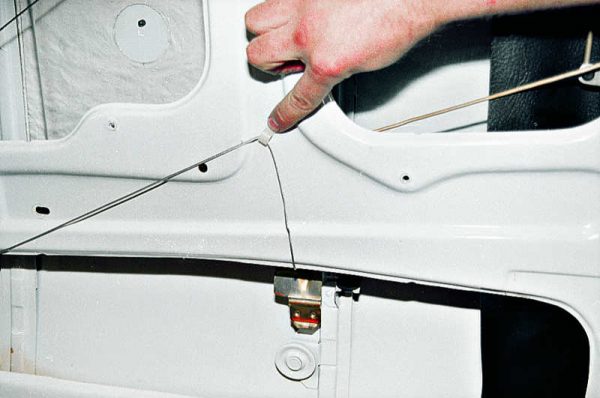
- We lower the glass, unscrew the fasteners of the glass clip to the window lifter cable, and then completely lower the glass.
- Slightly unscrew the roller mount and move it, loosening the cable.We unscrew the fastening of the tension roller and move it to loosen the cable
- We pull the cable from the lower roller, fasten the latter to the door to avoid weakening.So that the cable does not weaken, we fasten it to the door
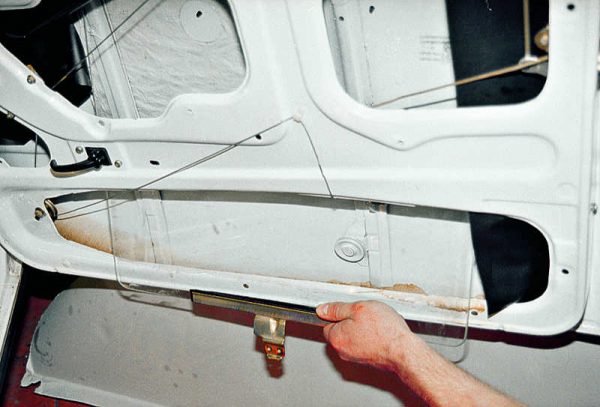
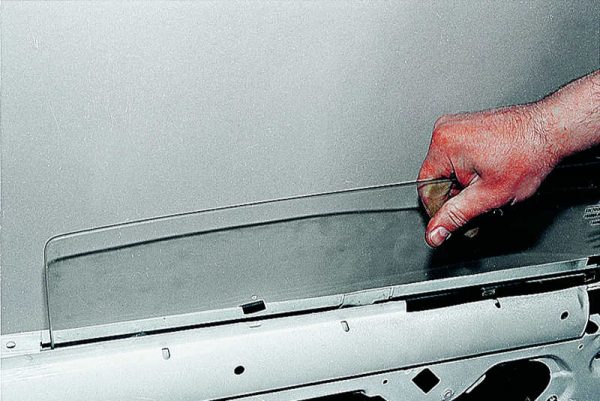
- We display the glass through the space below the door.We take out the glass through the space at the bottom of the door
- Assembly is carried out by installing all the elements in their places.

door glass seal
The sliding window of the front and rear doors is sealed with special elements, the profile of which ensures ease of installation. To reduce friction, the seals are covered with a layer of pile. When water seeps under the rubber, it flows into the bottom of the door and exits through the drain holes. Over time, the pile is erased, and the seal cracks, as a result of which the element needs to be replaced.
The hinged glass of the front door and the rear corner glass are sealed with rubber bands, which also become unusable as the rubber ages and bursts. To prevent water from leaking into the cabin, the seals are replaced with new ones after the preliminary dismantling of the window and the fixed glass.
How to remove the window
To remove the hinged glass, follow these steps:
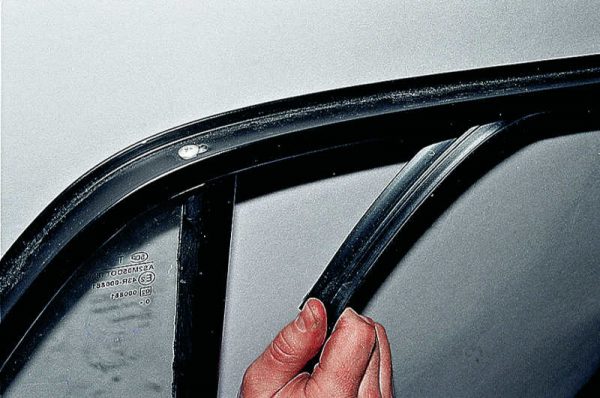
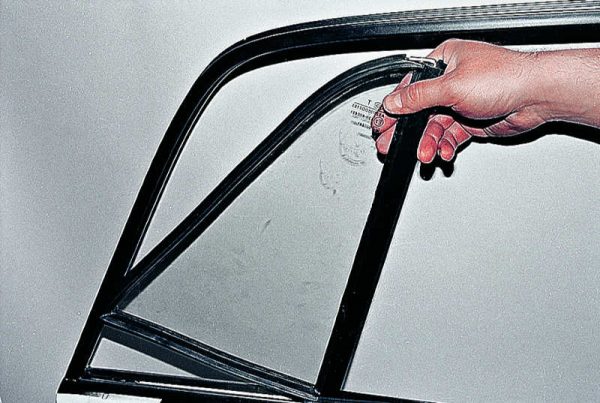
- We remove the upper sealing element from the door frame.Remove the top seal from the door frame.
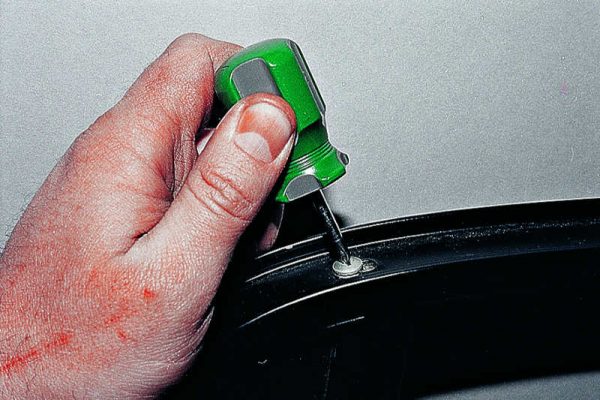
- We unscrew the fastening of the window.Swivel glass is fixed with a self-tapping screw in the upper part
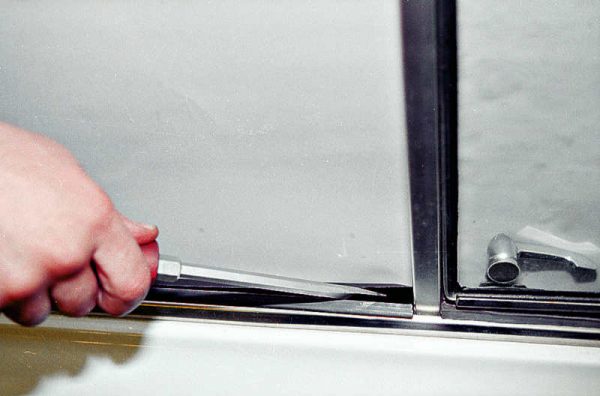
- We spread the seals of the sliding glass to the sides.Using a screwdriver, push the glass seals to the sides
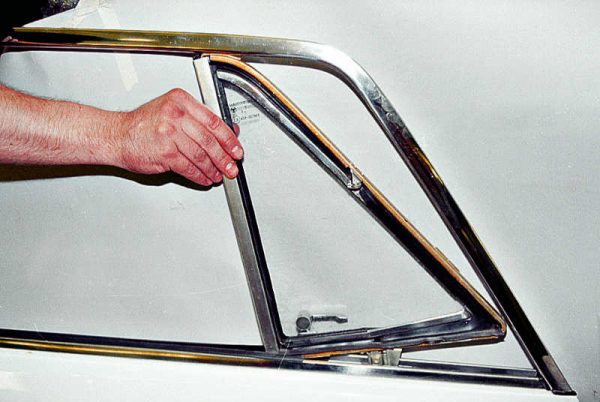
- We get a window with a frame from the door.Removing the hatch from the door
- After the necessary actions, we put the dismantled element in place in the reverse order.

Video: removing the window on the "classic"

Side window rear door
The main purpose of removing glass in the rear door of the "six" is repair work with the door. The glazing is made of two elements - lowering and fixed (corner). The first glass has a dimension of 543 x 429 x 5 mm, the second - 372 x 258 x 5 mm.
How to remove glass
To remove the windows of the rear door, you will need the same tools as for working with the front door. The process itself is carried out as follows:
- We dismantle the door upholstery, unscrew the fastening of the guides and remove them from the door.We unscrew the mount and remove the guide elements from the door
- We lower the glass and turn off the bar attaching the cable to the window lifter, after which we completely lower the glass.The cable is attached to the glass using a special strap, unscrew its mount
- Weaken the tension roller.Slightly loosen the roller tension
- We pull the cable from the roller and fasten it to the door, and then completely lower the glass.After dismantling the cable from the roller, lower the glass down to the stop
- Remove the top seal.Removing the top seal from the door
- We turn off the self-tapping screw holding the stand of the "deaf" glass.The rack is fixed at the top of the door with a self-tapping screw, unscrew it
- We take out the rack and the glass itself from the door.Removing the stand together with the corner glass
- Removing chrome elements.
- We remove the sliding glass through the upper slot in the door.Removing the glass from the rear door
- We install all dismantled elements in the reverse order.

Even with careful operation of the car, sometimes you have to deal with glass replacement. This is especially true for the frontal element. To replace car glass, you will need to prepare a minimum list of tools, familiarize yourself with the step-by-step actions and follow them during the repair.

