VAZ 2104 generator: driver's manual
Content
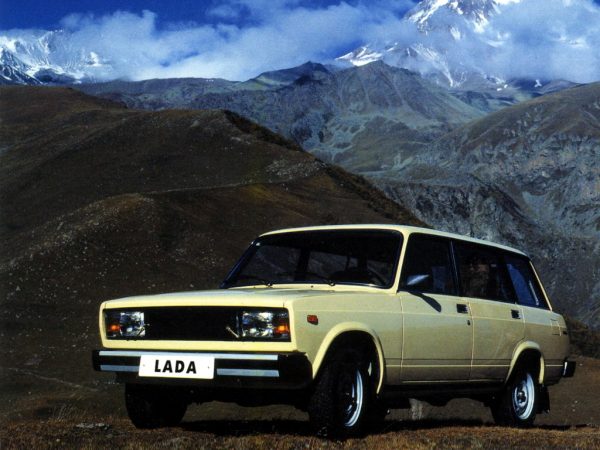
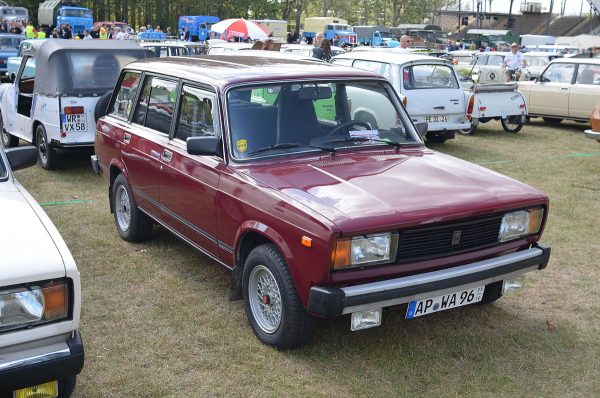
VAZ 2104 is a model of a domestic manufacturer, produced from 1984 to 2012. Russian drivers still drive the “four” today, since the car is unpretentious in operation and affordable in terms of repair. One of the main elements of 2104 is the AvtoVAZ generator, which is responsible for the performance of the entire car. However, despite the long history of the model, the owners still have many questions regarding the operation, breakdowns and repair of this spare part.
VAZ 2104 generator: device purpose
Under the hood of the "four" there are many different mechanisms and parts, so it is sometimes difficult for a beginner to deal with certain breakdowns. It is the generator that is of great interest to the VAZ 2104, since the rest of the car mechanics “dances” from its work.
An autogenerator is a device whose main task is to convert energy from mechanical to electrical, that is, to generate current. That is, in fact, the generator ensures the stable functioning of all electrical equipment in the car, and also maintains the battery charge level.
To perform its function in the generator housing, the following work occurs:
- Immediately after the driver has started the car, the energy with the plus sign passes through the ignition switch to the safety unit, the charge lamp, the rectifier and exits through the resistor to the energy with the minus sign.
- When the light on the instrument panel in the cabin lights up about turning on the power, the “plus” enters the generator - on the copper winding.
- The winding converts the signal and transfers it to the pulley in the form of mechanical energy.
- The pulley starts to rotate, generating electricity.
- The alternating current thus obtained is transferred to the battery and other devices in the vehicle structure.
The main characteristics of the generator "four"
A regular generator of the G-2104 model is installed on the VAZ 222. This is a typical device manufactured by AvtoVAZ with stable performance. If we talk about the technical characteristics of the G-222 generator, then they are expressed in the following indicators:
- the maximum possible current strength when the rotor rotates 5000 rpm - 55 A;
- voltage - up to 14 V;
- power - up to 500 watts;
- the rotation of the rotor occurs in the right direction;
- the weight of the device without a pulley is 4.2 kilograms;
- dimensions: length - 22 cm, width - 15 cm, height - 12 cm.
The generator on the VAZ 2104 is installed directly on the motor housing on its right side. Starting the generator is ensured by the movement of the crankshaft immediately after ignition.
What generators can be put on the VAZ 2104
The driver is not always satisfied with the work of a regular VAZ generator. The thing is that the device is designed for strictly defined loads, and when additional electrical appliances are connected, it no longer copes with its work.
Therefore, the owners of the "four" often think about putting in a new, more powerful generator, and it could be used without problems:
- additional lighting devices;
- new sound system;
- navigator.
The G-222 and G-221 generators are basically identical to each other, with the only difference being that the G-221 produces 5 amperes less. Therefore, there would be no point in such a replacement.
It is best for the VAZ 2104 to purchase generators from KATEK or KZATEM (Samara Plant). They produce up to 75 A, which is quite acceptable for a car. In addition, the design of Samara generators is quite suitable for the "four".
The most popular are Western generators - Bosch, Delphi. However, it should be borne in mind that the VAZ mechanisms are not designed for the installation of European equipment, so the device mounts will have to be redone.
The owners of the VAZ 2104 themselves are of the opinion that it’s not just a more powerful generator that is needed, but a device with a higher efficiency:
I think that a more powerful generator will not solve this problem, we need a generator that is not more powerful, but with more output at idle speed. But the fact is that all generators have almost the same output at XX (BOSCH has 2A more, but it also costs 5 times more expensive!!!). But with your foglights, it will not cope on XX. They need 50W / 13V = 3,85A * 4 + another ~ 10A for dimensions and dipped beam = 25,4A. ignition, excitation of the generator, radio, finally ... You can, of course, try to replace the pulley on the generator with a smaller diameter so that the generator shaft rotates with a higher number of revolutions. But the groove length on the tension bar may not be enough, and the belt cannot be tensioned. Yes, and for bearings of the generator and the rotor winding, rotation with high calculated revolutions is not good.
Thus, the owner of the VAZ 2104 needs to clearly understand what goals he wants to install a new generator to achieve.
How the generator is connected
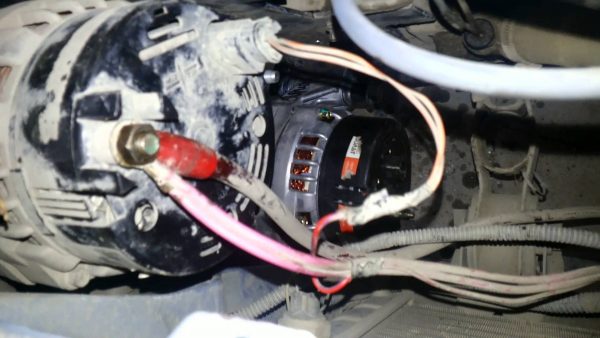
The generator is primarily an electrical device, so it is very important to connect it correctly. Usually drivers have connection problems, since several wires of different colors and thicknesses must be connected to the case, and the device must also have the correct polarization.
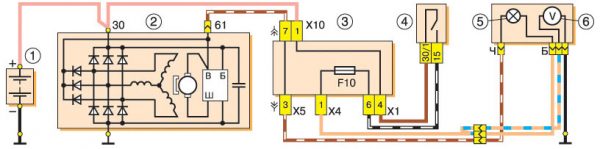
The easiest way to connect the generator to the car systems is according to this scheme. The generator stator has a three-phase winding, which is connected according to the "star" scheme. The battery charging indicator relay is connected to the "zero" terminal. Further, the connection is carried out according to the scheme.
How to deal with a bunch of wires
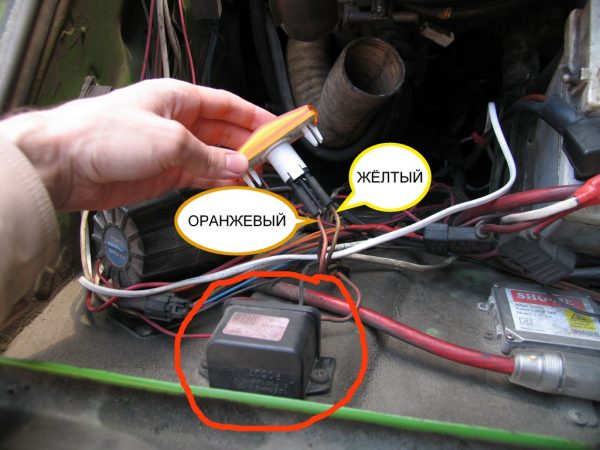
The generator is an electrical device, so there is nothing surprising in the fact that several multi-colored wires are connected to it at once. For convenience, you can use this hint:
- the yellow wire comes from the control lamp-signaling device in the cabin;
- thick gray - from the regulator relay to the brushes;
- thick thin - connected to the relay;
- orange acts as an additional connector and is usually connected together with a thin gray wire during installation.
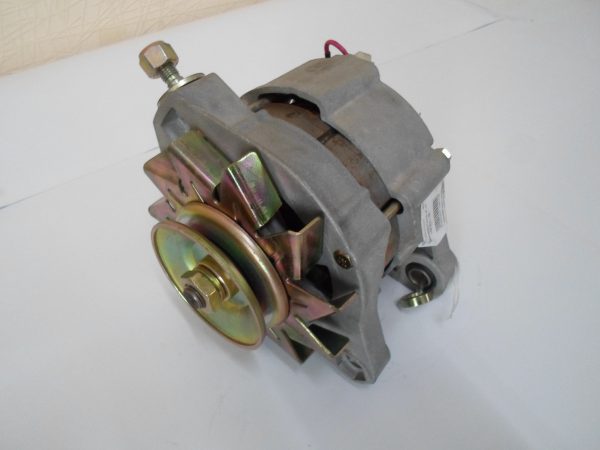
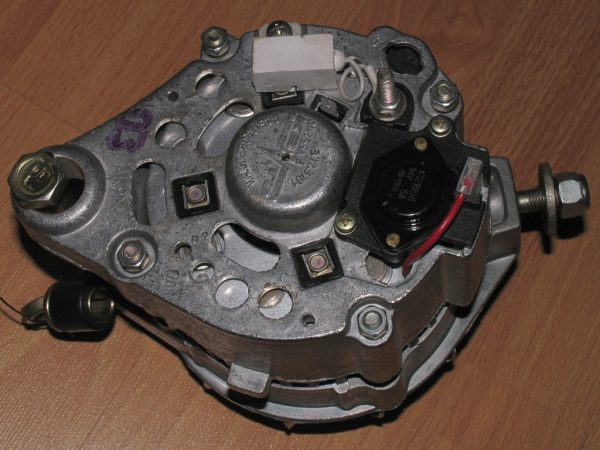
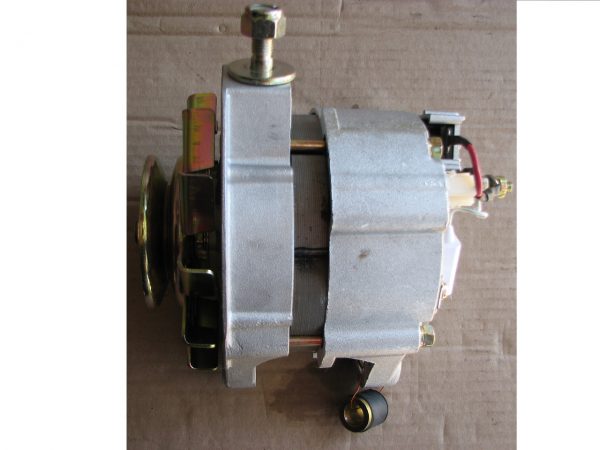
Generator device
The VAZ 2104 has a standard G-222 generator. Since 1988, it has been somewhat modified and began to be called by marking 37.3701 (exactly the same devices were installed on the VAZ 2108). G-222 and 37.3707 differ only in the data of the windings, the presence of a built-in regulator relay.
The device is fixed to the cast bracket on the engine with one bolt and one pin. This fastener is enough for reliable operation of the generator.
G-222 consists of several parts, the main ones are the rotor, stator and covers.
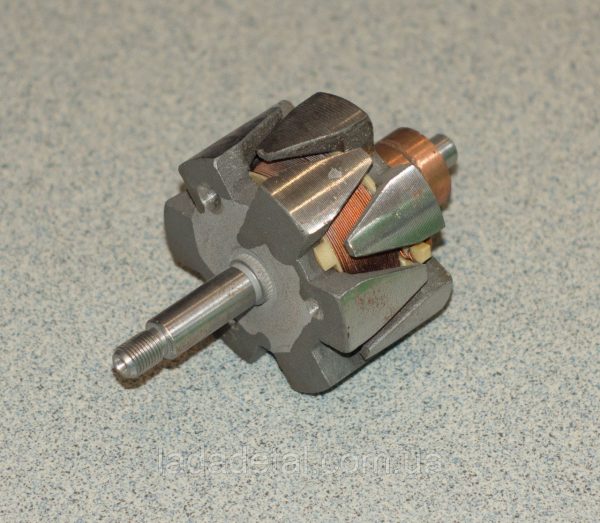
Rotor
The rotor is the rotating element of the generator. It consists of a shaft with a corrugated surface. A steel sleeve and poles are mounted on the shaft, which together form the core of the electromagnetic field.
The rotor rotates in two ball bearings. It is important that the bearings are closed, that is, they do not require additional lubrication. Therefore, if they break over time, it is easier to replace them.
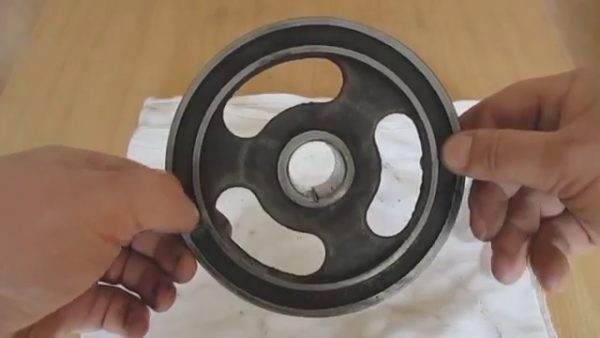
Pulley
A pulley is also installed on the rotor shaft. There are three elongated holes on the surface of the pulley - this is a necessary structural element for ventilation of the generator and protection of the device from overheating. The pulley receives rotational energy from the crankshaft and transfers it to the rotor.
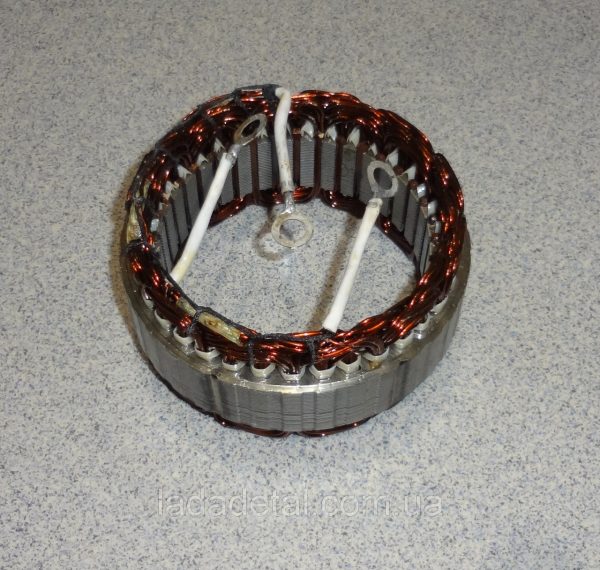
Stator with windings
The stator is made of electrical steel plates. All plates are connected into one whole by welding. A winding of copper wire is inserted into the special grooves of the product. In turn, each of the three windings is divided into six coils.
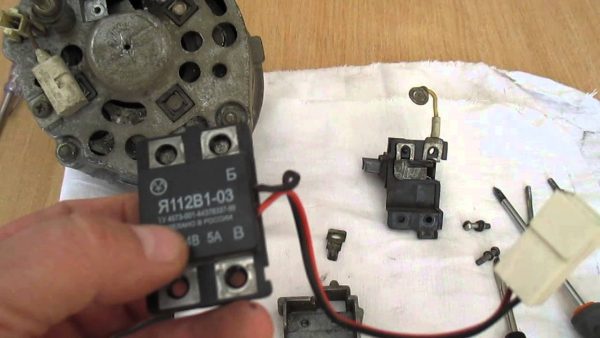
Regulator relay
The regulator relay is a plate with an electrical circuit. The main task of this plate is to control the voltage at the output of the case, so the element is attached to the back of the generator.
Brushes
Brushes are the main elements in the power generation system. They are clamped in the brush holder and are also located on the stator.

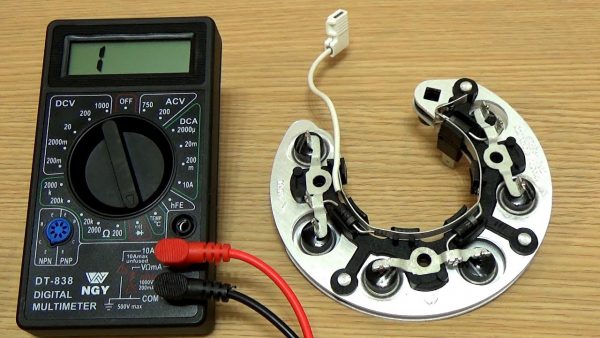
Diode bridge
A diode bridge (or rectifier) is structurally a combination of six individual diodes, which are fixed at an equal distance on one board. A rectifier is needed in order to process alternating current and make it constant, stable. Accordingly, if at least one of the diodes fails, there will be problems in the operation of the generator.
How to check the generator
Checking the performance of the generator on the VAZ 2104 can be done in several ways. Diagnostics with an oscilloscope or on a stand involves contacting specialists, so let's consider the simplest do-it-yourself verification method.
To check the generator, you will need the following devices:
- multimeter;
- light bulb with soldered wires;
- wires for connecting between the generator and the battery.
Verification procedure
After the motor has cooled down, you can start checking:
- Open the bonnet.
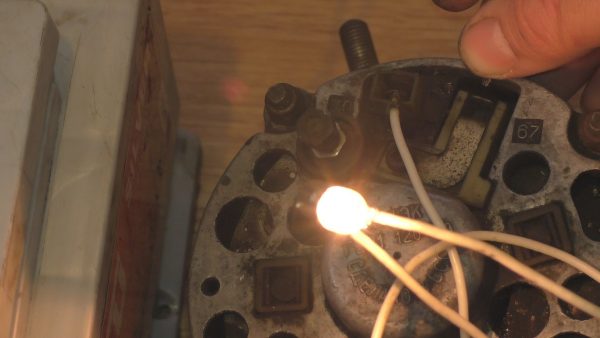
- Connect the bulb wires to the alternator input terminal and the rotor.
- Connect the power wires: negative to the “minus” terminal of the battery and to the generator ground, positive to the “plus” terminal of the generator and to its output terminal.
- It is better to connect the mass last so as not to create a short circuit in the network.
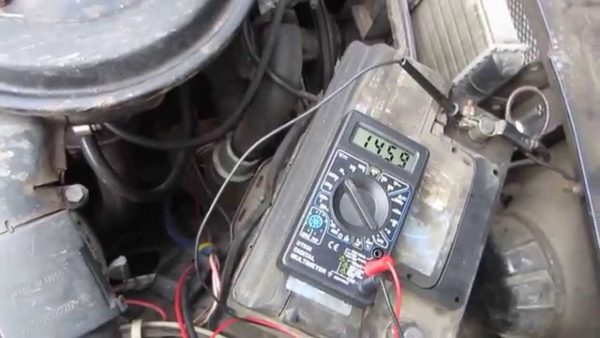
- Next, turn on the multimeter, connect one probe to the “plus” of the battery, the other to the “minus” of the battery.
- After that, the test lamp should light up.
- The multimeter should show about 12.4 V.
- Next, you need to ask an assistant to spin the generator. At the same time, you can turn on the lighting devices on the VAZ.
- The multimeter reading should not drop or jump sharply. The normal mode of operation of the generator is from 11.9 to 14.1 V, if the indicator is lower, the generator will soon fail, if it is higher, then the battery is likely to boil.
Video: test procedure on a removed generator

Do not:
- check the generator through a short circuit, that is, through a "spark";
- test the operation of the generator with the battery disconnected.
Faults in operation: symptoms of problems and how to fix them
Alas, in the design of any car there is no such detail that sooner or later would not start to “act up”. The VAZ 2104 generator usually has a very long service life, but this does not mean that the device will work all the time in normal mode.
The driver needs to be attentive to all manifestations of malfunctions in his work in order to eliminate them in a timely and safe manner.
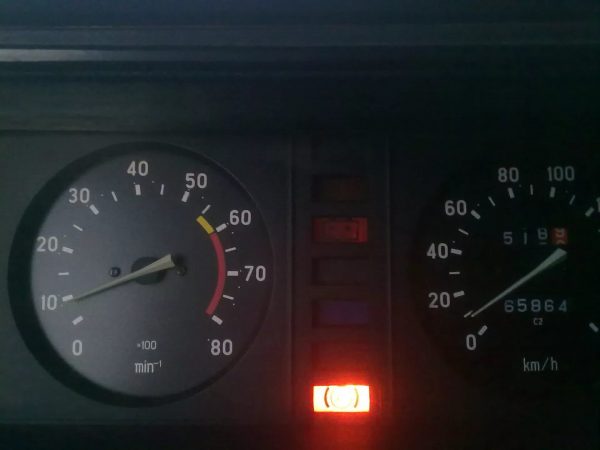
Why did the charging indicator light come on on the instrument panel?
In fact, this is the function of the light bulb - to signal the driver at the moment when there is not enough charge in the system. However, the light bulb does not always work for this very reason:
- the alternator belt began to slip - it is necessary to stop and adjust the degree of its tension;
- there is damage in the control lamp relay, so it does not work correctly - you need to “ring” the relay and make sure that it is working properly;
- break in the winding - you will have to disassemble the generator, clean all contact connections and, possibly, change the regulator relay to a new one;
- brushes are worn out - it is necessary to replace them with new ones;
- a short circuit in one of the rectifier diodes - it will be necessary either to change the diodes, or the entire diode bridge at once.
Why is the battery not charging while driving?
One of the most common problems on the VAZ 2104. Indeed, this malfunction is often found on G-222 generators, which, during normal operation, do not charge the battery for a number of reasons:
- the alternator belt has lost its tension - it is necessary to adjust it;
- during operation, the fastenings of the wire ends between the generator and the battery loosened - it is necessary to clean the contacts, if necessary, replace the damaged wires;
- The battery is faulty - if the problem with charging appeared immediately after replacing the battery, then you should not blame the generator, most likely, you just need to buy a new battery again;
- damage appeared in the voltage regulator - clean all contacts and make sure the wiring is intact.
Video: looking for reasons for the lack of battery charging

What causes a battery to drain
Boiling off the battery can be considered the last stage of the "life" of the battery. After all, even after refueling, there is no guarantee that the battery will serve normally:
- poor contact between the "ground" and the voltage regulator housing - you need to restore the contact, if necessary, replace the terminals;
- damage to the regulator - it is better to immediately replace it with a new one;
- a malfunction in the battery itself - only replacing the battery will save.
Loud noises while the generator is running - is it good or bad
All mechanisms that have moving parts usually make noise during operation. And the VAZ 2104 generator is no exception. However, if the driver began to notice that this noise is getting louder day by day, it will be necessary to find the reason for this:
- the nut on the pulley has loosened - the generator must be clearly fixed in one position, so you will have to tighten its fasteners;
- bearings crashed - it is recommended to disassemble the generator and change the bearings on the rotor;
- there was a short circuit in the winding - you should immediately change the entire stator;
- brushes creaked - it is necessary to clean their surfaces and contacts.

Generator repair on VAZ 2104
In fact, repairing a car generator is not the most difficult task. It is important to properly remove and disassemble the device, and the replacement of burnt or worn parts is intuitive. Therefore, motorists say that repair work on the G-222 is quite within the power of even a driver who has never disassembled generators.
Removing the generator from the car
For work, you will need to prepare in advance a minimum set of tools:
- open-end wrench for 10;
- open-end wrench for 17;
- open end wrench 19.
After the car has cooled down, you can start dismantling. The procedure is relatively simple and does not require specific knowledge in the field of electrical equipment:
- Remove the wheel from the right front side of the vehicle.
- Make sure the car is securely on the jack.
- Crawl on the right side and find the generator case.
- Loosen the lower mounting nut, but do not unscrew it yet.
- Loosen the nut on the stud on the top side, also without unscrewing it yet.
- After that, you can slide the generator housing onto the engine - this way the belt is loosened, it can be removed from the pulley without damage.
- Disconnect the wire coming from the generator output.
- Disconnect the wiring from the winding.
- Remove wire from brushes.
- Unscrew the lower and upper nuts.
- Pull the generator towards you, remove it from the engine bracket.
Video: dismantling instructions

The device can be very dirty, so before disassembling it, it is recommended to wipe the case. Indeed, during disassembly, dust can get on internal parts and lead to a short circuit.
How to disassemble a generator
The next stage of work requires a change of tools:
- open-end wrench for 19;
- spanner key for 19;
- ratchet (you can add an extension cord);
- head 8;
- head 10;
- small mallet.
Before disassembling the generator housing, it is also necessary to prepare containers in which you will put small parts (nuts, washers, screws). You can even sign from which mechanism certain parts were removed, so that later it would be easier to assemble the generator back:
- The first step is to unscrew the four nuts on the back cover.
- Next, remove the pulley, for this you need to unscrew the nut of its fastening.
- After the body can be divided into two parts. One part easily comes out of the other. As a result, the generator breaks up into a stator with a winding and a rotor.
- Remove the pulley from the rotor - it usually comes out easily. In case of difficulty, you can tap on it with a hammer.
- Pull the rotor with bearings out of the housing.
- Disassemble the stator into parts, trying not to touch the winding.
Video: instructions for disassembling the device

How to repair a generator
After the process of disassembling the device, you will need to carefully inspect each part. A part needs to be replaced if:
- it is covered with a coating of burning and soot;
- heavy wear is visible;
- there are cracks and notches on the surface;
- appearance is deformed.
Accordingly, in order to carry out a full repair, it is necessary to replace the failed generator mechanisms with new ones. It is now quite difficult to find suitable elements on the VAZ 2104, so it is worth immediately assessing the feasibility of repair work. Maybe it's easier to buy an original generator than to waste time looking for the necessary spare parts?
Depending on the remoteness of the regions from Moscow, the G-222 can be valued at between 4200 and 5800 rubles.
If the path of repairing the device was chosen, it will be necessary to make sure that all components are identical to the standard elements. Even a slight difference from the "native" part can lead to incorrect operation of the generator and even to its breakdown.
Replace the mechanisms during assembly of the device in the reverse order.
Video: repair instructions

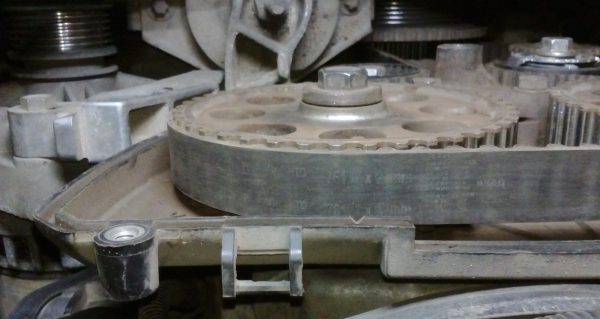
Generator set belt for VAZ 2104
Due to the long history of the "four", two types of alternator belts were installed on the car:
- The old-style belt was smooth, as the drive pulleys also had a smooth surface.
- The belt of the new sample is made of high-strength rubber and has teeth, as the drives began to be made with teeth for the most reliable connection.
If we talk about new-style belts, then motorists prefer to install products from the German manufacturer Bosch - they have a maximum service life and feel great on the "fours".
A typical alternator belt weighs 0.068 kg and has the following dimensions:
- length - 250 mm;
- width - 8 mm;
- thickness - 2 mm.
Correct belt tension
The question sharply arises of how to tighten the belt after replacing or repairing the generator, because the success of the device will depend on this. You must follow the following instructions:
- Install the alternator in place by tightening the two fastening nuts halfway.
- It is necessary to tighten the nuts until the stroke of the generator housing does not exceed 2 cm.
- Insert a pry bar or thick long bolt between the alternator housing and the water pump housing.
- Put the belt on the pulleys.
- Without loosening the pressure of the mount, tighten the belt.
- Next, tighten the top nut securing the generator.
- Check the degree of belt tension - it should not be too tight or, on the contrary, sag.
- Tighten the bottom nut.
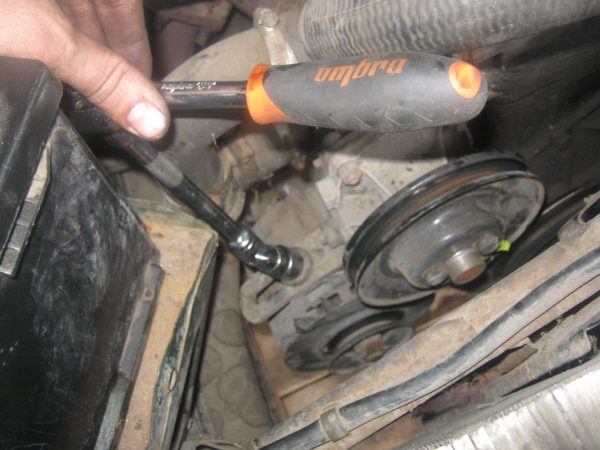
To make sure that the belt has a working degree of tension, it is necessary to sell its free space with your finger after completion of work. Rubber should give in no more than 1.5 centimeters.
Therefore, we can say that self-maintenance of the generator on the VAZ 2104 is quite possible and does not belong to the category of impossible tasks. It is important to follow the recommendations and algorithms of a particular work in order to carry out repairs or diagnostics in a quality manner.

