How to maintain a car after 50,000 miles
Content
Maintaining your vehicle on time, including changing fluids, belts, and other mechanical components as scheduled, is vital to keeping your vehicle running smoothly. While most manufacturers have their own recommended service intervals, most agree that 50,000 mile service is one of the most important.
Most cars built today are designed for maximum efficiency. Because of this, some components that used to be part of a scheduled replacement, such as spark plugs, ignition points, and timing belts, no longer need to be replaced until more than 50,000 miles have been driven. However, there are some components that should be checked and serviced for 50,000 miles.
Below are a few general steps to perform 50,000 mile service on most domestic and foreign cars, trucks and SUVs. Please be aware that each manufacturer has different service and component replacement requirements, especially in order to cover the warranties offered today.
For detailed information on what your particular vehicle requires, visit our Scheduled Maintenance page. You can access your vehicle's service schedule, including which items need to be replaced, inspected, or serviced for each milestone your vehicle reaches.
Part 1 of 6: Fuel Cell Cap Inspection
Modern complex fuel systems consist of several separate parts. However, if you take it apart simply, the fuel system consists of two separate components that should be checked and serviced for 50,000 miles: a fuel filter change and a fuel cell cap inspection.
The first item that is easiest to do during a 50,000 mile inspection is to check the fuel cell cap. The fuel tank cap contains a rubber o-ring that can be damaged, compressed, cut or worn. If this happens, it may affect the fuel cap's ability to properly seal the fuel cell.
While most of us never consider a fuel cell cap to be inspected, the reality is that the fuel cell cap (gas cap) is a vital component in keeping an engine running reliably. The fuel cell cap provides a seal inside the fuel system. When a cover wears out or a seal is damaged, it affects the vehicle's ride, emissions system, and vehicle fuel efficiency.
Step 1: Inspect the fuel cell cap. Check the fuel tank cap for proper tightness.
When you put on the cap, it should click one or more times. This tells the driver that the cover is installed correctly. If the fuel cell cap does not click when you put it on, it is probably damaged and should be replaced.
Step 2: Inspect the o-ring. If the rubber ring is cut or damaged in any way, you must replace the entire fuel cell cap.
These parts are very inexpensive, so it's best to just replace the whole unit.
If the fuel cell is easy to install and remove and the rubber o-ring is in good condition, you should be able to get the next 50,000 miles.
Part 2 of 6: Replacing the Fuel Filter
Fuel filters are usually located inside the engine compartment and directly ahead of the fuel injection system. Fuel filters are designed to remove microscopic particles, debris, and contaminants that could otherwise enter the fuel injector system and potentially clog fuel lines.
Fuel filters come in many shapes and sizes and are made of metal or, in some cases, non-corrosive plastic. However, it is recommended to replace the fuel filter on most cars, trucks and SUVs that use unleaded gasoline as a fuel source. To replace a fuel filter, you must refer to your individual service manual for specific instructions, but the general steps for replacing a fuel filter are listed below.
Necessary materials
- End wrenches or line wrenches
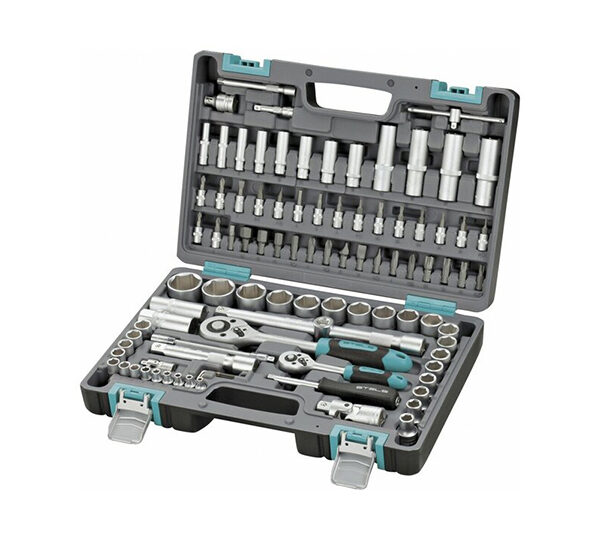
- Set of ratchets and sockets
- Replaceable fuel filter
- Screwdrivers
- Solvent cleaner
Step 1: Locate the fuel filter and fuel line connections.. Most fuel filters are located under the hood of a car and usually look like metal parts.
On most domestic and foreign four- and six-cylinder engines, the fuel filter is usually fastened with two clamps with a flat screwdriver or a 10 mm bolt.
Step 2 Remove the battery terminals for safety..
Step 3: Place some rags under the fuel line connections.. Having this next to the connections on the front and back of the fuel filter helps reduce clutter.
Step 4: Loosen the fuel line connections on both sides of the fuel filter..
Step 5: Remove the fuel lines from the fuel filter..
Step 6: Install a New Fuel Filter. Pay attention to the direction of fuel flow. Most fuel filters have an arrow indicating the direction in which the line connects to the inlet and outlet fuel lines. Properly dispose of the old fuel filter and rags soaked in fuel.
Step 7 Connect the battery terminals and remove all tools..
Step 8: Check fuel filter replacement.. Start the engine to verify that the fuel filter change was successful.
- A warning: Every time you change the fuel filter, you should spray the fuel leak with a solvent-based cleaner/degreaser. This removes residual fuel and reduces the chance of a fire or fire under the hood.
Part 3 of 6: Performing an Exhaust System Check
Another service that must be performed during the 50,000 MOT is an exhaust system check. Most modern trucks, SUVs, and cars have very well designed exhaust systems that typically last over 100,000 miles or 10 years before they start to wear out. However, for 50,000 mile service, you will need to do a good "lookup" and study some common exhaust system trouble spots, which include the following separate sections.
Necessary materials
- Crawler or creeper
- flashlight
- Shop rags
Step 1: Inspect the system at various points. Inspect the catalytic converter connections, muffler and exhaust sensors.
In most cases, you will not need to replace any components. However, if you notice that individual parts of your vehicle's exhaust system are damaged, refer to your service manual for instructions on how to properly replace those components.
Step 2: Inspect the catalytic converter. The catalytic converter is responsible for converting hazardous gases such as carbon monoxide, NOx and hydrocarbons into carbon monoxide, nitrogen and even water.
The catalytic converter contains three different catalysts (metals) and a series of chambers that filter unburned hydrocarbon emissions and convert them into less hazardous particles. Most catalytic converters do not need to be replaced until at least 100,000 miles; however, they should be checked during the 50,000XNUMX inspection for the following potential issues:
Inspect the welds connecting the catalytic converter to the exhaust system. The catalytic converter is factory welded to the exhaust pipe, which is attached to the exhaust manifold at the front, and to the exhaust pipe leading to the muffler at the rear of the catalytic converter. Sometimes these welds crack due to exposure to salt, moisture, road grime, or excessive bottoming of the vehicle.
Get under the car or jack up the car and inspect the welds on the front and rear of this component. If they are ok, you can continue. If you notice cracked welds, you should have them repaired by a professional mechanic or exhaust shop as soon as possible.
Step 3: Inspect the muffler. The inspection here is similar, as you are looking for any structural damage to the muffler.
Look for any dents in the muffler, damage to the welds connecting the muffler to the exhaust pipe, and any signs of rust or metal fatigue along the muffler body.
If you notice any muffler damage at 50,000 miles, you should replace it to be on the safe side. Consult your vehicle's service manual for exact instructions on how to replace the muffler, or have an ASE certified mechanic check the exhaust for you.
Step 4: Inspect Exhaust and Oxygen Sensors. A common part that often fails unexpectedly between 50,000 and 100,000 miles are exhaust or oxygen sensors.
They transmit data to the vehicle's ECM and monitor the emissions system. These sensors are usually attached to the exhaust manifold or each individual outlet on the exhaust pipe. These parts are exposed to extreme temperatures and sometimes break due to this exposure.
In order to test these components, you may need an OBD-II scanner to download any error codes stored in the ECM. You can complete the physical inspection by looking for any signs of severe wear or possible failure, including:
Look for damaged wires or connections, as well as burn marks on the wiring harness. Check the position of the sensor and determine if it is hard, loose, or bent. If you notice any unusual signs of a damaged oxygen sensor, replace it by reviewing the appropriate steps in the service manual.
Part 4 of 6: Automatic transmission fluid and filter change
Another common service after 50,000 miles is to drain and change the automatic transmission fluid and filter. Most modern automatic transmission vehicles have different standards regarding when and even if the oil and filter should be changed. In fact, many of the new vehicles using CVTs are sealed at the factory and the manufacturer recommends never changing the oil or filter.
However, most pre-2014 vehicle service manuals recommend changing the automatic transmission fluid, filter inside the transmission, and new sump gaskets every 50,000 miles. All of these parts are sold at many auto parts stores as a replacement kit, which may also include new sump bolts or even a new sump for your transmission. Every time you remove a transmission filter or sump, it is highly recommended to install a new sump or at least a new gasket.
Necessary materials
- Can of Carburetor Cleaner
- Pallet
- Access to hydraulic lift
- Jacks
- Jack stands
- Fluid change in automatic transmission
- Transmission Filter Replacement
- Replacement of a laying of the pallet of a transmission
- Shop rags
- Set of sockets/ratchets
Step 1: Disconnect the battery cables from the battery terminals.. Any time you work with electricity, you need to disconnect the battery cables from the battery terminals.
Remove both positive and negative terminals before draining and changing transmission fluid and filters.
Step 2: Raise the car. Do this on a hydraulic jack or jack up and put the car on stands.
You will need access to the undercarriage of the vehicle to drain the transmission fluid and replace the filter. If you have access to a hydraulic lift, take advantage of this resource as this task is much easier to complete. If not, jack up the front of the vehicle and place it on jack stands.
Step 3: Drain the oil from the gearbox drain plug.. After lifting the car, drain the old oil from the transmission.
This is completed by removing the drain plug at the bottom of the transmission pan. The plug is usually similar to the oil plug on most oil pans, meaning you will use a 9/16" or ½" socket wrench (or metric equivalent) to remove it.
Make sure you have a drain pan under the oil plug with plenty of shop rags to clean up any spilled oil.
Step 4: Remove the transmission pan. Once the oil is drained, you will need to remove the transmission pan to replace the filter inside the transmission.
There are usually 8 to 10 bolts that attach the pan to the bottom of the automatic transmission that need to be removed. Once the pan has been removed, set it aside as you will need to clean the pan and install a new gasket before reinstalling.
Step 5: Replace Transmission Filter Assembly. Once you have removed the oil and oil pan from the transmission, you will need to remove the filter assembly.
In most cases, the filter assembly is attached to the bottom of the converter housing with a single bolt, or simply slides freely over the oil tube. Before proceeding, refer to your vehicle's service manual for the proper methods for removing the transmission filter and removing it from the transmission.
After removing the filter, clean the filter connection with a clean cloth and install a new filter.
Step 6: Clean the transmission pan and install the gasket. When you remove the transmission pan, the gasket is most likely not attached to the transmission.
On some vehicles it is necessary to glue the gasket to the bottom of the gasket with silicone, while on others this step is not required. However, they all require the gasket to be attached to a clean, oil-free surface.
To do this, you will have to clean the transmission pan, unless you bought a new one. Find an empty bucket and spray carburetor cleaner on the transmission pan, remembering to clean it several times to make sure there is no oil left on it.
Pay special attention to galleys inside the oil pan, as the gear oil tends to "hide" there. Dry the oil pan by blowing it out with compressed air or a clean rag.
After cleaning the oil pan, place the new gasket on the oil pan in the same direction as the old one. If the owner's manual says the new gasket needs to be glued to the pan with silicone, do it now.
Step 7: Install the oil pan. Place the oil pan on the gearbox and install by inserting the screws into each hole in order.
Tighten the pan bolts as specified in the service manual. In most cases, the bolts are tightened in a pattern that provides proper gasket compression. Refer to your service manual for this model and recommended bolt torque settings.
Step 8: Fill the transmission with new recommended automatic transmission fluid.. It is recommended to use several grades and thicknesses of oil for each make and model.
You will usually find this information in the service manual. Open the hood of your car and locate the transmission oil filler neck. Add the recommended amount of transmission fluid to the transmission.
When finished, wait about 4 minutes to check the fluid level with the transmission dipstick. If the level is low, add transmission fluid ¼ liter at a time until you reach the desired level.
Step 9: Lower and test run the vehicle, checking the transmission fluid after it has warmed up.. Transmissions are hydraulic devices, so the oil level drops after the initial fluid change.
Add fluid after the vehicle has been running for a while. Refer to your vehicle service manual for exact recommendations for adding fluid after an oil change.
Part 5 of 6: Checking the Suspension Components
There are several different elements that affect front component wear. Front suspension components wear out over time or depending on mileage. When you hit the 50,000 mile mark, you should inspect the front suspension for signs of damage. When it comes to checking the front suspension, there are two particular items that often wear out before others: CV joints and tie rods.
Both the CV joints and the tie rods are connected to the wheel hub where the tires and wheels are connected to the vehicle. These two components are subjected to enormous stress on a daily basis and wear out or break down before the car reaches the 100,000 mile threshold.
Step 1: Jack up the car. Checking the steering rods and CV joints is a very simple check. All you have to do is raise the front of your vehicle by placing a floor jack on the lower control arm and follow the steps below.
Step 2: Inspect the CV Joint/Ball Joint. To check the condition of your CV joints, all you have to do is put two hands on the wheel, which is raised off the ground.
Place your right hand at the 12:00 position and your left hand at the 6:00 position and try to rock the tire back and forth.
If the tire moves, the CV joints begin to wear out and must be replaced. If the tire is solid and moves little, the CV joints are in good condition. After this quick physical inspection, look behind the tire for the CV boot. If the boot is torn and you see a lot of grease under the wheel arch, you should replace the CV boot and CV joint.
Step 3: Inspect the tie rods. To inspect the tie rods, place your hands at 3 and 9 o'clock and try to rock the tire left and right.
If the tires move, the tie rod or tie rod bushings are damaged and must be replaced. Both of these components are critical to suspension alignment, which should be checked and adjusted by a professional suspension alignment shop after completing the next step on the checklist.
Part 6 of 6: Replace all four tires
Most factory-fitted tires are designed to run as smoothly as possible to impress new car owners, but that comes at a price. Tires that are OEM are often made with a very soft rubber compound and only last about 50,000 miles (if they are properly flipped every 5,000 miles, always properly inflated and there are no suspension alignment issues). So when you reach 50,000 miles, you should be ready to buy new tires.
Step 1. Study the tire labels. Most tires manufactured today fall under the metric "P" tire size system.
They are factory installed and are designed to enhance or match a vehicle's suspension design for maximum efficiency. Some tires are designed for high-performance driving, while others are designed for aggressive road conditions or all-season use.
Regardless of the exact purpose, the first thing you need to know about the tires on your car is what the numbers mean. Here are a few important details to remember before you go shopping.
Look at the side of the tire and find the size, load rating and speed rating. As shown in the image above, the tire size starts after the "P".
The first number is the width of the tire (in millimeters) and the second number is what's called the aspect ratio (which is the height of the tire from the bead to the top of the tire. This ratio is a percentage of the width of the tire's width).
The final designation is the letter "R" (for "Radial Tire") followed by the size of the wheel diameter in inches. The last numbers to write down on paper will be the load index (two numbers) followed by the speed index (usually the letters S, T, H, V, or Z).
Step 2: Choose tires of the same size. When you buy new tires, you should ALWAYS keep the tires the same size as your factory tires.
Tire size affects several functions, including gear ratios, transmission usage, speedometer, and engine performance. It can also affect fuel economy and vehicle stability if modified. Regardless of what some people may tell you, replacing a tire with a larger one is NOT the best idea.
Step 3: Purchase tires in pairs.. Every time you buy tires, be sure to buy them in at least pairs (per axle).
Most manufacturers recommend purchasing all four tires at the same time; and they are correct in assuming it, since four new tires are safer than two new ones. Also, when you start with four new tires, you can make sure you follow the proper tire replacement procedures. Tires should be changed every 5,000 miles maximum (especially on front wheel drive vehicles). Proper tire rotation can increase mileage by up to 30%.
Step 4. Be sure to buy a tire for your climate. Most tires manufactured today are considered all-season tires; however, some are better suited to colder, wet, and snowy roads than others.
There are three elements that make a tire good for snowy or icy roads.
The tire is designed with full channel channels: when you drive on snowy or wet roads, you need a tire that "self-cleans" well. This is done when the tire has full groove channels that allow debris to exit the sides.
Tires have good "sipes": Sipes are small, wavy lines inside a tire's tread. In fact, they are designed to draw small ice particles into the lamella block. The reason is simple when you think about it: what is the only thing that can stick to ice? If you answered "More ice", you would be right.
When ice hits the sipes, it actually helps the tire stick to the ice, which reduces tire slip and can significantly shorten stopping distances on icy or snowy roads.
Buy a tire for most weather conditions. If you live in Las Vegas, the chances of you needing winter tires are pretty low. Of course, you may get covered in snow from time to time, but most of the time you will be dealing with roads in rainy or dry weather.
Some tire sellers are trying to sell "winter tires" to customers, which are good for places like Buffalo, New York, Minnesota or Alaska where ice stays on the roads for months. However, winter tires are very soft and wear out quickly on dry roads.
Step 5: Align wheels professionally after installing new tires.. When you buy new tires, you should always have your front suspension aligned professionally.
At 50,000 miles, this is also recommended by the manufacturer in most cases. There are a few things that can cause the front end to shift, including hitting potholes, clipping curbs, and constantly driving on rough roads.
During the first 50,000 miles, your vehicle is subject to many of these situations. However, this is a job that should not be done by yourself unless you have a professional computer to adjust the suspension and accessories. Go to a professional suspension shop to get your front end straight after buying new tires. This will ensure proper tire wear and reduce the chance of skidding or slipping.
Regular maintenance of your vehicle is vital to the longevity of mechanical components. If you have a vehicle that is approaching 50,000 miles, have one of AvtoTachki Certified Technicians come to your home or work to make sure you perform your vehicle's scheduled maintenance.