How to inspect a used car for damage
Car accidents happen hundreds of times every day, and sometimes cars are repaired in secret, without notice. Some cars are crushed, others are sold for scrap, but there are those that can get into ...
Car accidents happen hundreds of times every day, and sometimes cars are repaired in secret, without notice. Some cars are wrecked, others are sold for scrap, but there are also those that can be repaired and returned to the used car market. To do this, it is important to know some methods for checking a used car in order to find out if it has been in an accident.
Being able to assess past damage can help you determine the true value of a car to further determine if that damage could affect the car in the future, and most importantly, it can help you determine if a car is safe or not. Here are some easy ways to inspect a car for past accidents and damage using nothing more than some research prowess and a couple of your senses.
Method 1 of 1: Use the vehicle report and carefully check the vehicle for anything wrong with the paint and bodywork.
Step 1: You should always check the Carfax report first. When you go to a car dealership to buy a car, they should have an up-to-date report on hand for you to review. If you are buying a car privately, the seller may not have a report. Either ask or get it yourself. This report will show you the full documented history of the vehicle in question, including claims, accident reports, maintenance, hold information, fleet, flood damage, odometer tampering, and more. This report can give you a great idea of what to look for if you are going to see a car.
Step 2: Examine the paint around the car.. Start by looking for more obvious damage like cracks, dents and scratches and then work your way down.
Stand at a distance and check different parts of the car to make sure the paint color matches the entire circle. If it doesn't fit the car, surely some work has been done.
Get closer to the car and crouch at an angle to see if the reflection is smooth. If the reflection is uneven or blurry, it has probably been repainted. In this situation, also pay attention to peeling varnish. If there was sloppy painting, you might see drops.
Step 3: Take your hand and feel the paint. Is it smooth or rough? Factory paint is almost always smooth because it is applied by a machine and cannot be replicated by a human.
If you see some textural differences in the paint (usually from sandpaper), you can probably feel them too. If there are rough spots from paint or body putty (or both), this requires further inspection and questioning.
Step 4: Check for overspray. If you see and feel rough paint, open the doors and check for overspray. There is never excess paint on a new car because the parts are painted before assembly. If you see paint on the plastic trim or wiring, it may be evidence of a body repair.
Step 5: Check under the hood. Look under the hood and look at the bolts that connect the hood to the hinges and the fenders to the body. The bolts must be completely covered with paint, and there must be no marks on them. If the paint is missing, the car has probably been repaired.
Step 6 Check the body panels and see how they fit together.. Are they flush with the door and frame? None of the bumpers are loose? If something seems misaligned, there's a good chance a repair has been made. In this case, it is best to check the opposite side for differences. If both sides do not match, this is a clear sign of repair.
Step 7: Check the windshield as well as all other windows.. Are they chipped, cracked, or are there any bridges? How well do the side windows fit into the frame when they are rolled up? Anything but a perfect fit can be a sign of an accident.
Step 8: Another good inspection is to check the lines of the car.. The lines of the body should be perfectly straight, and the best way to test them is to squat down and examine them at eye level. Look for dents or bumps that indicate body work has been done or that the dents have been hammered in.
Step 9: Check the car for rust. A little rust on the body is sometimes not critical, but once the corrosion process begins, it is very difficult to stop it. Check under the car and around the edges for rust. If you see repair marks from rust damage, it will be obvious and very rough. In some cases, you may even see very thin metal or holes.
- A warning: Severe rust damage compromises structural integrity and for safety reasons this type of vehicle should always be avoided.
Step 10: Check if the car has flooded. Any submerged vehicle should show up on the vehicle history report, but in case no insurance claim has been reported, make sure you know what to look out for.
Even if the car looks good and works well, open the door and look at the speaker grill, usually at the bottom of the door. Any discoloration can be caused by dirty water stains. Another way to verify this is to remove part of the center console trim and check behind it. If there is a mark with a clear line, this indicates muddy water and obvious flood damage. A car in this condition should always be avoided.
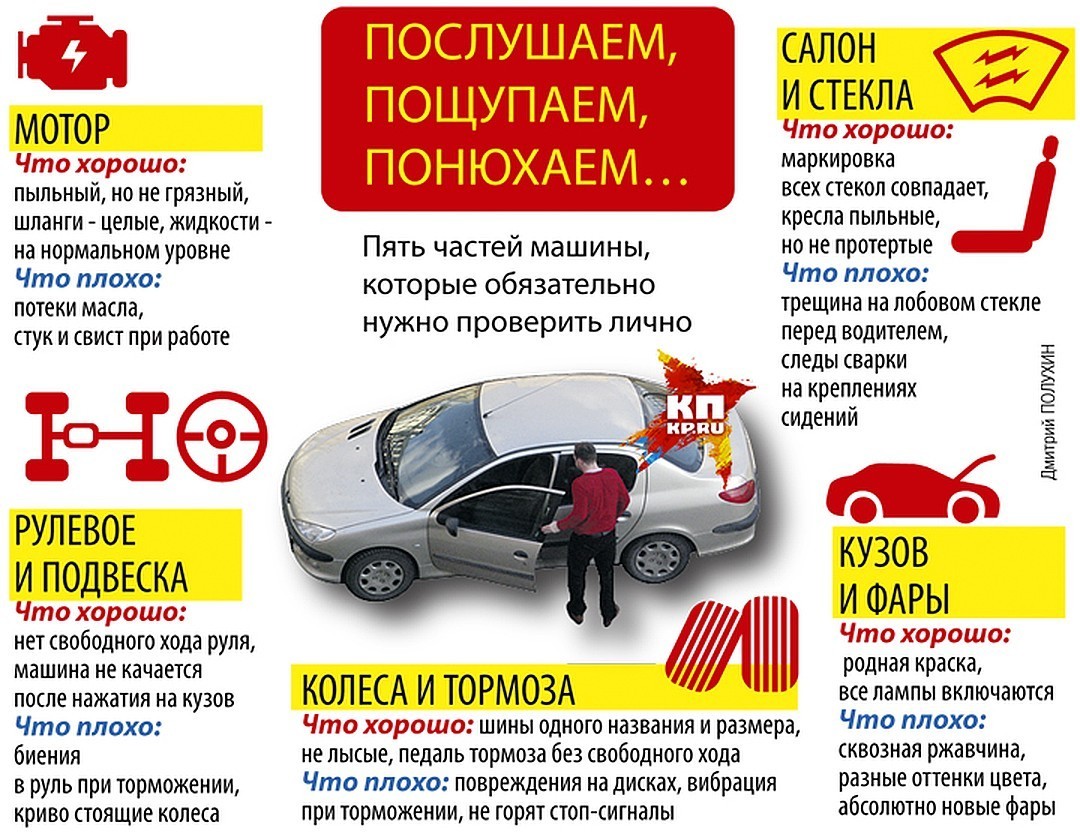
In addition to inspecting the vehicle on its own, it is important that the mechanic inspect it for proper functioning and operating elements that are not visible to the naked eye. Complete a Pre-Purchase Inspection, which includes a full inspection and a list of expected repairs and their cost, so you can know the true price and condition of the car you are interested in buying.