How to change the clutch
Content
Any car with a manual transmission needs regular clutch replacement. Replacing the clutch itself does not cause any particular difficulties with the necessary equipment and knowledge of the procedure. The mileage of the drive is 70-150 thousand kilometers and depends on the operating conditions of the car. The rest of the clutch parts are changed as needed. After reading the article, you will learn how to change the clutch without contacting a car service.
Equipment and tools necessary for work
Clutch Alignment Tool
For work you will need:
- pit, overpass, elevator or jack;
- a set of open-end and socket wrenches;
- install;
- winch;
- gearbox input shaft (manual transmission) or a special cartridge corresponding to the type of gearbox;
- brake fluid (for vehicles with hydraulic clutch);
- extension cord with transport lamp;
- assistant.
Replacing the clutch
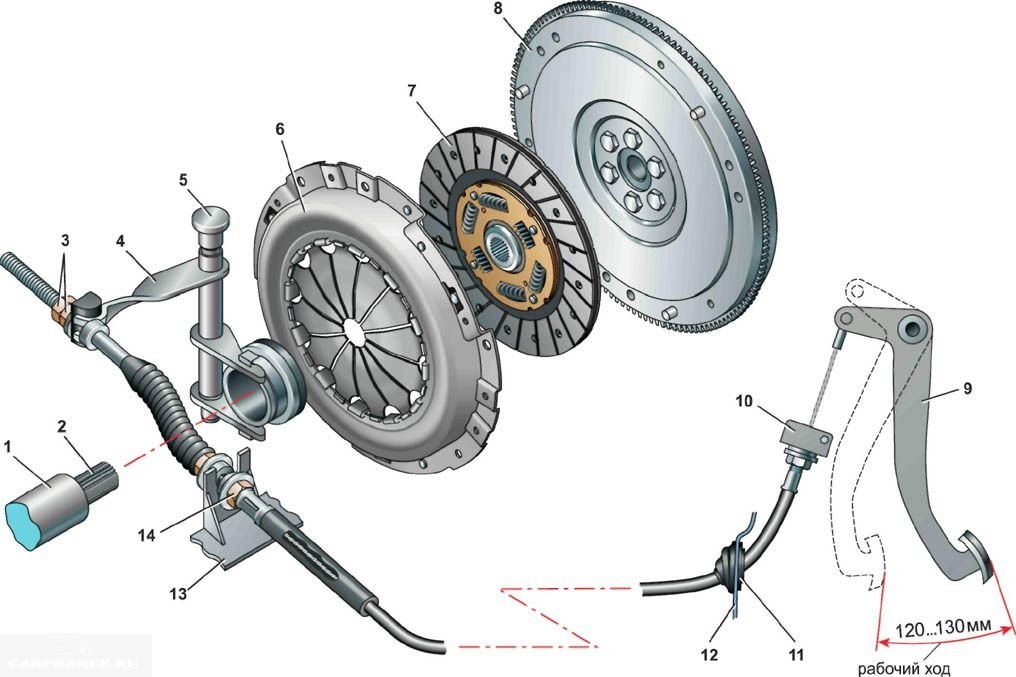
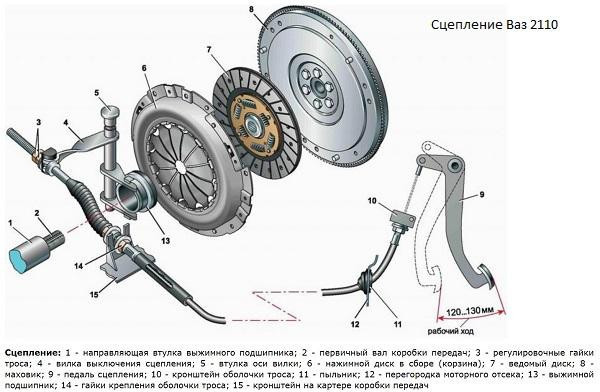
A complete replacement of the clutch kit includes the following procedure:
- removal and installation of manual transmission;
- replacement:
- disk;
- baskets;
- master and slave cylinders (if any);
- the wire;
- release bearing
.
Removal and installation of the box
The technologies for removing and installing manual transmissions on rear-wheel drive and front-wheel drive vehicles are different. On rear-wheel drive vehicles, the clutch that connects the manual transmission to the driveshaft must be disengaged. On the front drive, you need to remove the driveshafts and insert plugs in their place. After that, disconnect the cables or the rear of the gear selector, unscrew the fastening nuts, then remove the gearbox input shaft from the bearing on the engine flywheel.
Be sure to check the condition of the shifter gasket. Seal wear is indicated by oil stains in the stem area.
When installing, it is necessary to rotate the box shaft so that it falls into the splines of the flywheel. When removing or installing a manual transmission on vehicles with four-wheel drive or a large engine, use a winch. After installing the manual transmission in the car, it is necessary to adjust the length of the rod that tightens the fork.
Disc and Cart Replacement
Replacing the clutch disc is as follows. Turn out bolts of fastening of a basket, and then remove all details of a flywheel. There must be no traces of oil on the flywheel and the surface of the driven disk. If there are traces, it is necessary to check the condition of the gearbox oil seal, otherwise oil will continue to flow from it, which will shorten the life of the disc. Drops of oil on the surface of the sleeve or drive plate will damage them. If the seal is in poor condition, replace it. If the surface of the driven disc is scratched or deeply cracked, replace the basket.
Clean with a rag and then degrease the surface of the flywheel and basket drive with gasoline. Insert the disc into the basket, then put both parts on the manual transmission input shaft or cartridge, and then insert it into the flywheel hole. When the chuck reaches the stop, move the parts along the flywheel and secure the basket with standard bolts. Pull the mandrel out a few times and then put it back in to make sure the wheel is aligned. If everything is in order, insert the cartridge and tighten the bolts with a force of 2,5 to 3,5 kgf-m. More precisely, the force is indicated in the repair manual for your machine. This completes the replacement of the clutch disc. Replacing the clutch basket is done in the same way.
Remember, replacing a clutch disc is a responsible operation, so do not do it in a hurry or while intoxicated.
Vibrations appear after changing the clutch due to poor centering of the disc or poor tightening of the basket. In this case, you must remove and reinstall the disk and basket.
Replacement of cylinders
- The clutch master cylinder must be replaced if installing new o-rings has not improved system performance.
- Clutch slave cylinder replacement is necessary if brake fluid continues to ooze even after new hoses are installed.
b - pusher of the working cylinder
To remove the slave cylinder, remove the spring that returns the fork when the pedal is released. Next, unscrew the 2 nuts that secure the slave cylinder to the gearbox housing. Holding the working cylinder on weight, unscrew the rubber hose suitable for it.
To avoid leakage of brake fluid, immediately screw a new slave cylinder onto the hose. To remove the master cylinder, pump out all the fluid from the reservoir. Unscrew the fitting with the copper tube that goes into the cylinder and close it with a rubber plug to prevent leakage of brake fluid. Move the tube to the side so that it does not interfere, then unscrew the two nuts that secure the master cylinder to the car body. Pull towards you and release the loop that the pedal is attached to. Remove the pin and disconnect the cylinder from the pedal. Install the master and slave cylinders in reverse order. Don't forget to adjust the length of the rod pressing the clutch fork.
Master cylinder
After installing new cylinders, fill the reservoir with new brake fluid and be sure to bleed the clutch. To do this, put a rubber tube on the valve and lower it into a transparent container, pour in the brake fluid, and then ask him to gently press / release the pedal 4 times. After that, he asks to press the pedal again and not to release it without your command.
When the assistant presses the pedal for the fifth time, unscrew the valve to drain the liquid. Then tighten the valve, then ask the assistant to release the pedal. You need to pump the clutch until you are sure that the fluid comes out without air. Fill the reservoir with brake fluid in a timely manner so that the cylinder does not suck in air. If the brake fluid level drops too low, it must be refilled.
Replacing the cable
The cable came to replace the fluid coupling. Higher reliability, low maintenance and low price have made the cable very popular. The cable must be changed if the mileage has exceeded 150 thousand kilometers or more than 10 years have passed since the previous replacement. Replacing the clutch cable is not difficult even for an inexperienced driver. Release the return spring bracket, then remove the cable. After that, disconnect the connection and remove the cable from the pedal. Pull out the pin, then pull the old cable through the cab. Install the new cable in the same way. This completes the replacement of the clutch cable. The cable should be changed if even minor damage is found on it. If this is not done, the cable will break during movement.

Replacing the release bearing
The mileage of the release bearing should not exceed 150 thousand kilometers. Also, the replacement of the release bearing will be required if the gears began to shift indistinctly or noise appeared when the clutch pedal was pressed. The procedure for replacing the release bearing is described in detail in the article Replacing the release bearing.
Hack and predictor Aviator
If you have the right equipment, tools and know how to work carefully, then replacing the clutch yourself is not difficult. Now you know what a clutch replacement is, what is the procedure and you can carry out this operation yourself on your car.