How to glue the rear light lens
A cracked tail light can cause a lot of problems if left unattended. Water can get in and cause the bulbs or even the entire rear light to fail. A chip or crack can grow larger, and a broken taillight is a reason to stop and get a ticket. Gluing the missing part back to the tail light is an easy way to avoid having to replace the tail light housing.
This article shows you how to glue the missing part back into the tail light assembly.
Part 1 of 2: Preparing the tail light assembly
Necessary materials
- the cloth
- Sandpaper with fine grit
- Hairdryer
- plastic glue
- Medical alcohol
Step 1: Wipe down the taillight. Lightly dampen a cloth with alcohol and wipe down the entire tail light you are about to repair.
This is done to lift and loosen particles, dust and dirt.
Step 2: Use sandpaper on the broken edges. Now fine grit sandpaper will be used to clean up the broken edges of the crack.
This is done in order to slightly roughen the edges so that the glue sticks to the plastic better. Use fine sandpaper to avoid damaging the surface of the rear light. If you use coarser sandpaper, it will scratch the rear light badly. Once the area has been sanded, wipe it down again to clear the area of any debris.
Step 3: Remove moisture from the rear light. If the chip has not been there for a long time, there is a good chance that moisture has remained inside the tail light.
If this moisture is not removed, the tail light may fail, especially if it is closed. The taillight will need to be removed from the car, and the bulbs will need to be removed from the back. Once this is done, you can use the hair dryer on the cool setting to dry out all the water.
Part 2 of 2: Rear Light Mount
Necessary materials
- the cloth
- Sandpaper with fine grit
- plastic glue
- Medical alcohol
Step 1: Finish the edges with sandpaper. Finish the edges of the part with sandpaper, which will be glued into place.
Once the edge is rough, use a cloth to wipe it clean.
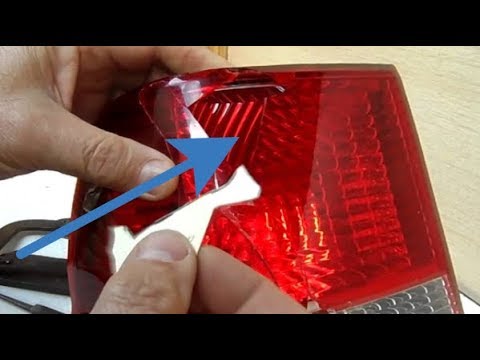
Step 2: Apply glue to the part. Apply glue to the entire outer edge of the missing part.
Step 3: Install the part. Place the part in the hole it came out of and hold it in place for a while until the glue sets.
Once the glue has set and the part stays in place, you can remove your hand. If excess glue has squeezed out, it can be sanded down with sandpaper so that it is less noticeable.
Step 2: Install the Taillight. If the tail light was removed to dry out the interior, the tail light will now be in place.
Check fit and tighten all bolts.
With a repaired tail light, the car is safe to drive again and you won't get a ticket. In cases where parts are missing from the tail light, the tail light must be replaced. One of the AvtoTachki specialists can replace the lamp or lens.