
How to check the ballast with a multimeter
Content
Does your home's fluorescent light seem to be having a problem?
Have you changed it and are still experiencing the same lighting problems? If your answer to these questions is yes, then your ballast may be the cause.
Fluorescent light bulbs are commonly used to light up our homes, and ballast is the component that determines their overall health and lifespan.
Unfortunately, not everyone knows how to diagnose this device for malfunctions.
Our guide covers the entire process of checking the ballast with a multimeter. Let's get started.
What is ballast?
An electronic ballast is a device connected in series with a circuit load that limits the amount of current flowing through it.
This helps limit the amount of voltage passing through the circuit so that the fragile component within it is not damaged.
Fluorescent lamps are a common use case for these devices.
Light bulbs have negative differential resistance, which makes them brittle when loaded with current.
Ballasts are used not only to protect them, but also to control whether they are launched or not.
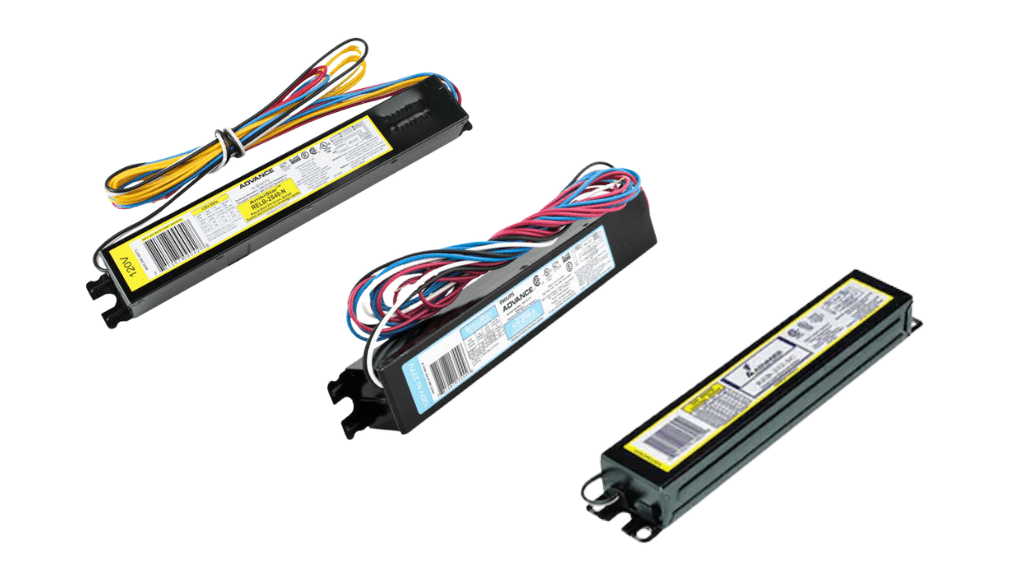
There are several types of ballasts that determine how a light bulb lights up and the amount of voltage it uses.
These include preheat, instant start, quick start, dimmable, emergency and hybrid ballasts.
All of this works differently. However, no matter which type you use, its main job is to protect the fluorescent light from damage.
How then to know when it is bad and needs to be replaced?
How to determine that the ballast is bad
There are certain signs that your fluorescent lamp is putting out bad ballast. Some of them include
- Shimmering
While this is a common symptom that the fluorescent tube itself is about to fail, it can also be the result of a faulty ballast.
- Slow start
If your fluorescent lamp takes a long time to reach full brightness, your ballast may be defective and need to be replaced.
- Low light
Another annoying symptom is the low power of the fluorescent lamp. A dim light can also mean that the device needs to be replaced.
- Strange sounds from the light bulb
While a faulty light bulb may be the cause, the buzzing sound coming from it is also a sign that your ballast needs to be checked.
- Dark fluorescent corners
Your fluorescent lamp looks like it's burned out at the ends (due to dark spots) - another sign to look out for. In this case, your light bulbs are not actually lit. You may also experience uneven lighting in your room.
Causes of ballast damage
The main causes of ballast failure are extreme levels of temperature and humidity.
These devices operate within certain temperature ranges and usually have UL ratings that indicate the climatic conditions in which the device can operate.
Using one of them in an environment with variable temperature or environmental conditions will cause malfunctions.
Extremely high temperatures cause it to ignite, and extremely low temperatures prevent fluorescent lamps from igniting at all.
Prolonged exposure to high temperatures and moisture will corrode the entire device, and you may see oil or liquid leaks on it.
However, the device may also have electrical problems and need to be diagnosed.
Tools needed to check the ballast
To check the ballast you will need
- Digital multimeter
- Insulated gloves
- Screwdriver
The DMM is the main tool for diagnosing your electronic ballast and we will focus on it.
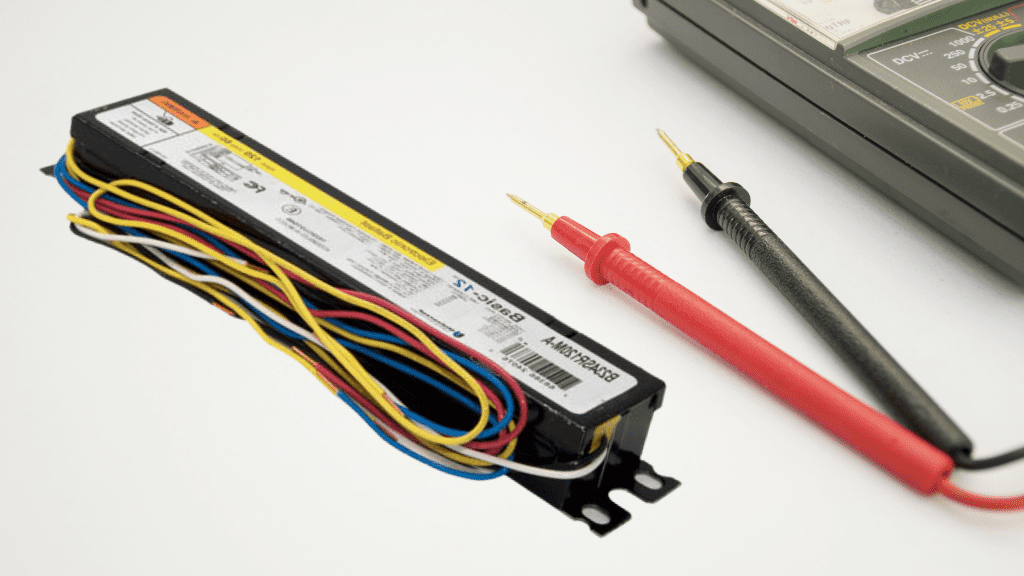
How to check the ballast with a multimeter
Turn off the switch on the fluorescent lamp, open the ballast in its housing and set the multimeter to the maximum resistance value. Place the black test lead on the white ground wire and the red test lead on each of the other wires. A good ballast is expected to be marked "OL", or maximum resistance..
Each of these steps will be explained next.
- Turn off the circuit breaker
The first step in testing a ballast is safety, as you must interact directly with its wiring to make a diagnosis.
Activate the circuit breaker on the switch to turn off the power and avoid electric shock.
The diagnostic also requires you to check its resistance, and you need to get rid of the electrical current in order to accurately do this.
- Open the ballast in his hull
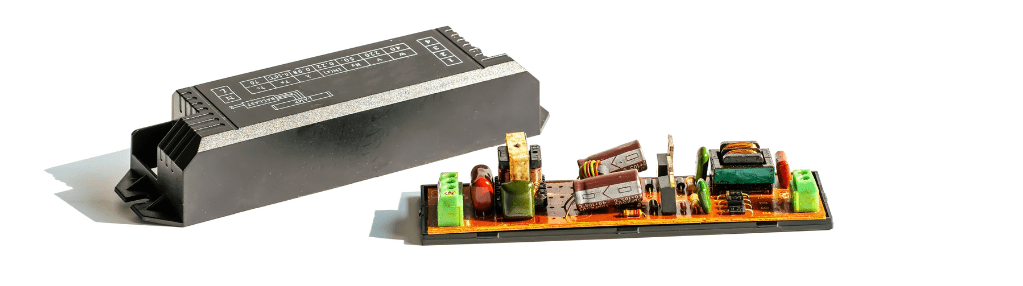
To have access to the ballast wiring you are testing it with, you need to remove it from the case.
The first step here is to remove the fluorescent lamp connected to the ballast, and the method of removing the lamp depends on its design.
Some simply unscrew, while others require you to pull them out of their tombstone slots.
Now we proceed to remove the casing that covers the ballast. You may need a screwdriver for this.
After the shroud is removed, check the ballast for obvious physical damage. If you see oil or liquid in any form on your ballast, then its internal seal has been damaged by excessive heat and the entire unit needs to be replaced.
You also expect to see your ballast with white, yellow, blue and red wires connected to it. The white wire is the ground wire, and each of the other wires is also important for subsequent tests.
Check out our wire tracing guide if you're having trouble locating wires.
If you don't notice any physical damage, continue with the next steps.
- Set the multimeter to the maximum resistance value
Remember that a ballast is a device that limits the current flowing through an electrical load.
To do this, it is designed to have a high resistance that prevents current from flowing freely through an electrical circuit.
Looking at this, you turn the scale of the digital multimeter to a resistance value of 1 kΩ. If your multimeter does not have an accurate 1 kΩ range, set it to the nearest higher range. They are all represented by the letter "Ω" on the meter.
- Place multimeter leads on ballast wiring
The next step is to place the multimeter leads on different wires going to and from the ballast.
Connect the multimeter's black negative lead to the white ground wire and the red positive lead to the yellow, blue, and red wires. You will test each of these yellow, blue, and red wires for faults on the white ground wire.
- Rate results
This is when you check the results with a multimeter. If the ballast is OK, the multimeter is expected to read "OL", which means "open circuit". it can also display a value of "1" which means high or infinite resistance.
If you get any other result, such as low resistance, then it is defective and needs to be replaced.
Alternatively, if all your tests show that the ballast is working fine and you are still having problems with the fluorescent lamp, you may want to check the tombstone or the component that the lamp is on.
Sometimes they may have loose wiring that prevents the ballast or light bulb from functioning properly.
Conclusion
Checking the electronic ballast is one of the easiest procedures you can perform. You simply unplug it from any power source and use a multimeter to determine if its wiring has high resistance or not.
Replace the device if you do not get the desired results.
F.A.Q.
What is the output voltage of the ballast?
Luminescent ballasts are designed to work with a voltage of 120 or 277 volts. 120 volt ballasts are common in home systems, while 277 volt ballasts are used in commercial settings.
What happens when the ballast deteriorates?
When your ballast fails you experience fluorescent symptoms such as flickering, slow start, buzzing, dark corners and dim light.
