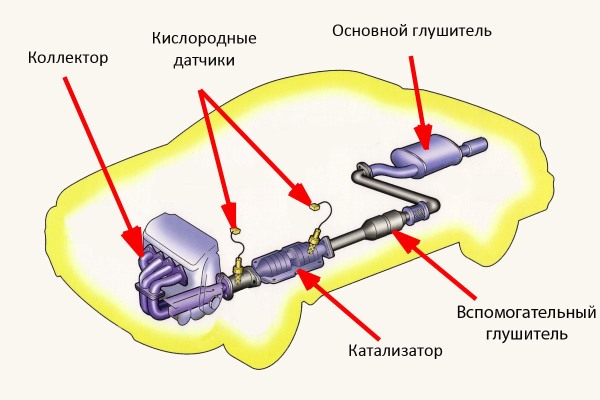
How to check the catalyst?
When the car stops accelerating normally or the Check Engine light comes on, a catalytic converter test will be required. It can clog or completely collapse the honeycomb. the bobbin may also be damaged. To check the catalyst, you can completely remove it or use the method without removing it. The complexity of this method lies in the fact that you need an assistant to work with the pressure gauge, you cannot cope on your own.
Reasons for Catalyst Removal
At the first problems in the operation of the catalyst, the owners of used cars think about removing this element. There may be several reasons for this.
The reasons why many dismantle catalysts:
some suggest that the catalyst may fail at the most inopportune moment;
the second thinks that it is rather badly battered by domestic gasoline, it does not allow the internal combustion engine to “breathe deeply”;
others believe that if you remove excess resistance at the outlet, you can get an increase in ICE power, as well as reduce fuel consumption.
But, unfortunately, most motorists who climbed under the hood with a crowbar are in for a not very pleasant surprise - and this is an ECU (ICE control unit). this block will notice that there are no changes in the exhaust gases before and after the catalyst and will issue an error.
It is possible to deceive the block, but you can also reflash it (this method will not be mentioned in this material). For each case, there is a method (these issues are discussed on machine forums).
Let's consider the root of evil - the state of "katalik". BUT should it be removed? Most motorists are guided by their feelings: the car began to pull poorly, “I’m sure that the catalyst is clogged and it’s the cause,” etc. I will not convince the stubborn, but the sane read on. So, all you need to do is check the condition of the catalyst, and based on its condition, we will conclude that it needs to be removed or replaced, but most often they are removed because of their cost.
Check the catalyst
Inspection of the catalyst for clearance and clogging
So, the question arose, "How to check the catalyst?". The most effective and easiest method is to dismantle the catalyst and inspect it. If serious damage is found, the catalyst can be repaired.
We remove the catalyst and look at the state of the cells as a whole - the clogging of the cells can be checked for clearance, and for this a light source is useful. But not everything is as simple as it seems. Sometimes, during prolonged use, the catalyst mount sticks so much that Removing the catalyst can turn into a long and exciting task. (I personally unscrewed the two rear fastening nuts for 3 hours, in the end it didn’t work out - I had to cut them in half!). The work is extremely inconvenient, because you need to work from below the car.
The main signs and methods for checking the catalyst is it not clogged
There is there are also several ways to check the catalyst:
- it is possible to measure the exhaust for the content of harmful substances (with a faulty catalyst, the content of harmful substances increases significantly compared to a serviceable catalyst);
- you can also check the back pressure at the outlet (a sign of a clogged catalyst is increased resistance and, as a result, pressure).
For an objective assessment of the state, you need to combine both of these methods.
Checking the catalyst for back pressure
Back pressure test
The following describes a method for checking the condition of the catalyst against the generated back pressure.
To do this, in front of the catalyst, it is necessary to weld sampling fittings for sampling exhaust gases. It is advisable to weld fittings with a thread and a channel shape, these fittings are similar to fittings for brake pipes. After the measurements are completed, plugs are screwed into these fittings.
Stoppers preferably made of brass - this will provide them with free unscrewing during operation. For measurements, a brake pipe 400-500 mm long must be screwed into the fitting, the task of which is to dissipate excess heat. We put a rubber hose on the free end of the tube, hook a pressure gauge to the hose, its measurement range should be up to 1 kg / cm3.
Back pressure can be measured while the vehicle is accelerating with the throttle wide open. The pressure is determined by the pressure gauge during acceleration, with an increase in speed, all values \u0,35b\u3bare recorded. In the event that the values of the back pressure during operation with a fully open damper in any speed range exceed XNUMX kg / cmXNUMX, this means that the exhaust system needs to be improved.
This method of checking the catalyst is desirable, however, in real life, welding fittings is a rather muddy business. Therefore, I did this: I unscrewed the lambda that stands in front of the catalyst and inserted a pressure gauge through the adapter. (It is advisable to use a pressure gauge more precisely up to 1 kg / cm3).
As an adapter, I used a rubber hose, which I adjusted to size with a knife (do not forget that tightness is important).
This is what a professional service tool looks like
Sam measured her with the hose.
So:
- We start the internal combustion engine and look at the readings of the pressure gauge (this is the backpressure at the outlet).
- We put an assistant behind the wheel, he raises the speed to 3000, we take readings.
- The assistant again raises the speed, but already up to 5000, we take readings.
ICE does not need to be twisted! 5-7 seconds is enough. It is not necessary to use a pressure gauge measuring up to 3 kg / cm3, as it may not even feel the pressure. The maximum pressure gauge is 2kg/cm3, better than 0,5 (otherwise the error may be commensurate with the measurement value). I used a pressure gauge that was not quite suitable, but at the same time the maximum was 0,5 kg / cm3, the maximum during an instant increase in speed from XX to 5000 (the pressure gauge jerked and fell to "0"). So, this doesn't count.
And in my mind These two methods can be combined like this:
1) unscrew the lambda in front of the catalyst;
2) instead of this lambda, we screw in the fitting;
3) fasten a piece of the brake pipe to the fitting (there are with union bolts);
4) put a hose on the end of the tube, and push it into the cabin;
5) well, and then, as in the first case;
On the other hand, we connect to a pressure gauge, the measurement range of which is up to 1 kg / cm3. It is necessary to ensure that the hose does not come into contact with the details of the exhaust system.
The pressure is determined by the pressure gauge during acceleration, with an increase in speed, all values \u0,35b\u3bare recorded. In the event that the values of the back pressure during operation with a fully open damper in any speed range exceed XNUMX kg / cmXNUMX, this means that the exhaust system needs to be improved.
6) due to non-functioning (unscrewed lambda, the check will start to burn), after the lambda is installed in place, the check will go out;
7) The limit of 0,35 kg/cm3 is used for tuned cars, but for normal cars, in my opinion, the tolerance can be extended to 0,5 kg/cm3.
If the diagnostics of the catalyst shows increased resistance to the passage of exhaust gases, then the catalyst needs to be flushed; if flushing is not possible, then the catalyst will have to be replaced. And if the replacement is not economically feasible, then we remove the catalyst. You can learn more about diagnosing a backpressure catalyst in the video below:
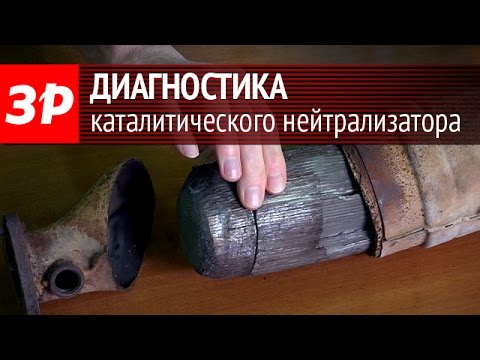
Catalytic Converter Back Pressure Diagnosis
Source: http://avtogid4you.narod2.ru/In_the_garage/Test_catalytic