
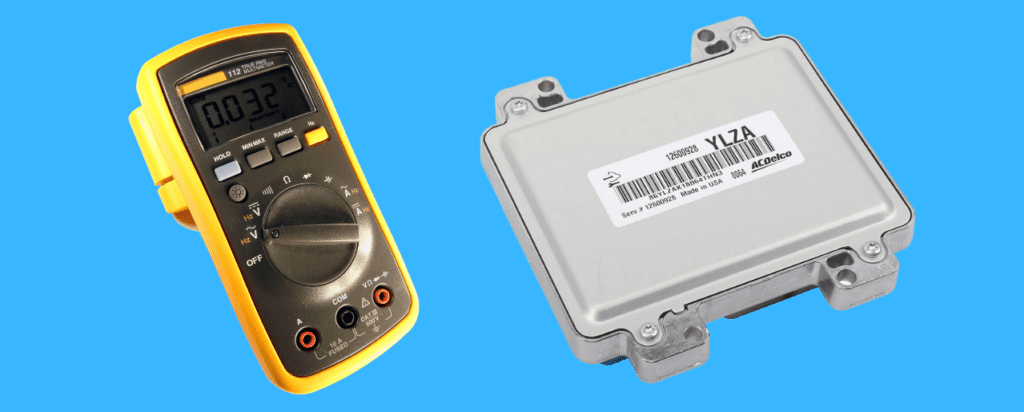
How to test PCM with a multimeter
Content
Cars produced in more modern years have helped make our lives a lot easier. The electronic components in them were especially useful.
How can you control the engine and transmission, as well as other vehicle systems, with a simple push of a button? Well, it has to do with the PCM (Powertrain Control Module).
This article quickly sheds some light on some of these things you need to know and how you can simply use a multimeter to diagnose. Let's get started.
What is PCM in a car?
It is a joint controller for your Engine Control Unit (ECU) and Transmission Control Unit (TCU), two important engine computers. It is also known as the ignition control module (ICM) or engine control module (ECM).
However, as with any other electronic component, problems with your PCM will inevitably or may occur; some are more serious than others.
Symptoms of a Faulty PCM
Before you dive into your car's systems to stick your hands in your PCM, you need to be sure it has a malfunction. Here are some of the symptoms that indicate a malfunctioning PCM;
- The warning lights are on. These include the "check engine" indicator, traction control indicator, and ABS indicator.
- Misfire or reverse engine operation
- Excessive exhaust and increased fuel consumption
- Difficulty starting the car as it stutters or won't start at all
- Weak tire management
- Bad gear transmission
These are just some of the many symptoms that accompany bad PCM. However, the ones mentioned above are more common and indicate a problem.
Checking PCM with a multimeter
Now it is clear that the multimeter plays a very important role in testing your PCM. However, this is not the only tool you will need. Some of the other important tools for proper and comprehensive diagnosis include:
- crosshead screwdriver
- Flashlight
- OBD code scanner and
- a new PCM in case you have to replace the PCM in the worst case
Typically, a multimeter is most relevant when checking the battery and system wiring for problems. But before you start with them, you must take preliminary steps;
- Do a visual inspection
A visual inspection is simply a check of the engine and systems to quickly find surface problems. By doing this, you want to pay attention to your wires.
You check to make sure your wires are not disconnected and free from corrosion and rust.
You also check for excessive rust on the battery or the PCM itself. Excessive corrosion on the PCM means you may have to replace the entire PCM with a new one.
Once they are verified, you move on to the next step, and this is where the multimeter comes into play.
- Inspect the battery
The battery test is mainly related to the battery charge voltage. Low battery voltage can cause sensor malfunctions affecting PCM functionality.
Identifying the problem here saves you a lot of stress.
What you do with a multimeter is check that the battery voltage is about 12.6 volts when the engine is off and about 13.7 volts when the engine is on.
If your result is a negative voltage, here's a quick guide on how to fix it.
If the reading drops below the numbers mentioned above, you continue to charge the battery and test it again.
When testing a battery, you set the multimeter to 15 or 20 volts, depending on what it has. You remove each battery plug and then connect the leads to the battery contacts.
Red lead to positive battery terminal and black lead to negative battery terminal.
Here is a video that paints a vivid picture of this.
- Use an OBD code scanner
Once the above steps have been completed without any issues, the OBD Code Scanner comes into play.
With an OBD scanner, you check the entire vehicle for OBD error codes. You just plug it into your car and read the codes.
There are several OBD error codes that have different meanings, so you need access to interpret them either through the codebook or directly from Google.
OBD error codes indicate both mechanical and electrical problems. Getting a code closely related to your PCM reduces the number of faults and makes diagnosis much easier.
For example, trouble code P0201 indicates that the PCM has a problem with the cylinder 1 injection circuit. This is caused by a dirt-filled fuel injector, fuel injector corrosion, wiring corrosion, or poor connections.
Then the appropriate corrections are made.
Along with P02 error codes, P06 error codes are also common PCM related codes.
Of course, if the OBD scanner doesn't provide an error code pointing to your PCM, you are turning your attention to other parts of your vehicle.
Using an OBD scanner is not as difficult as you might imagine.
- Examine your sensors and wiring
Now, the multimeter is also quite relevant here, and things could be a bit more complicated compared to the previous steps.
Using a multimeter, you check the sensors connected to the PCM and their associated wiring. You look for bad multimeter readings and change any component that is having problems.
You also check the ground wires and every connection associated with them. They are typical criminals.
If problems are found here and changes are made to these sensors, you then reset your vehicle's codes and check if everything is working properly.
What if all this doesn't solve your problem?
- Replace your PCM
This is the last step you take. Here you are looking for professional help to replace your entire PCM and make sure the new PCM you buy is specifically compatible with your vehicle.

Will it fix everything?
Remember that you need to be sure that your PCM is the main culprit. If this is not the case, unfortunately, problems with your vehicle's systems may persist.
However, following these steps carefully with a multimeter will ensure that all PCM-related issues are resolved.
