
How to check a fuse with a multimeter
Content
Electrical circuits are unique in the sense that the smallest components play the most important role in them.
The fuse is one of those small self-sacrifice components that prevents unexpected power surges that can render the entire circuit useless.
Is the device in your home or car not getting power? Do you suspect the problem is in the fuse box? How do you know if a fuse is blown, which could be causing your problem?
In just a few simple steps, you will learn how to test a fuse with a multimeter from this guide.
Let's get started.

How does a fuse work?
Fuses are simple components designed to protect electrical circuits from power surges or overloads.
They mainly consist of a tiny metal string or wire that melts or "blows" when excess current is passed through it. The current that a fuse can hold is known as its rated current, which varies from 10A to 6000A.
The most common type of fuse used in various electrical applications is the cartridge fuse, which is cylindrical in shape, usually transparent, with two metal lugs on either end.
Inside it is a metal string that connects these two terminals and burns out from excess current to prevent the flow of electric current between them.

Tools needed to check the fuse
To check the fuse you need:
- multimeter
- Automotive Fuse Puller
How to check a fuse with a multimeter
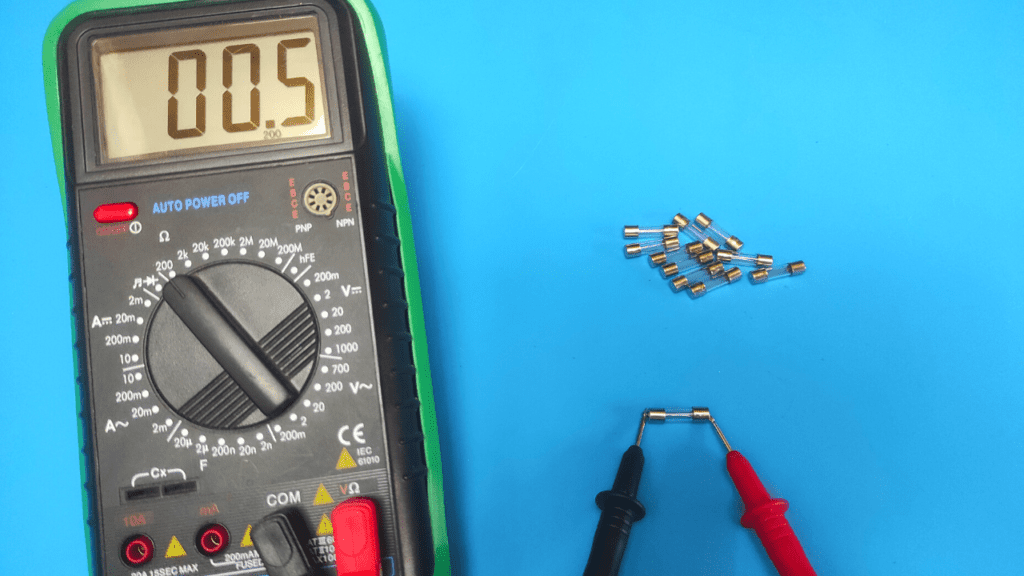
Set your multimeter to the 200 ohm range to measure resistance, place the multimeter's negative and positive probes on each end of the fuse, and wait until the reading is zero (0) or close to zero, which means the fuse is good. If you get an "OL" reading, then the fuse is bad and needs to be replaced.
We'll take a detailed look at each of these steps, as well as every other important step.
- Take out the fuse
The first step is to remove the fuse from the electrical circuit it is in. Of course, how a fuse is removed depends on the circuit, device, or type of fuse.
In any case, before doing this, disconnect the power source to avoid a fatal electric shock. You must also be careful when removing the fuse so as not to damage it.
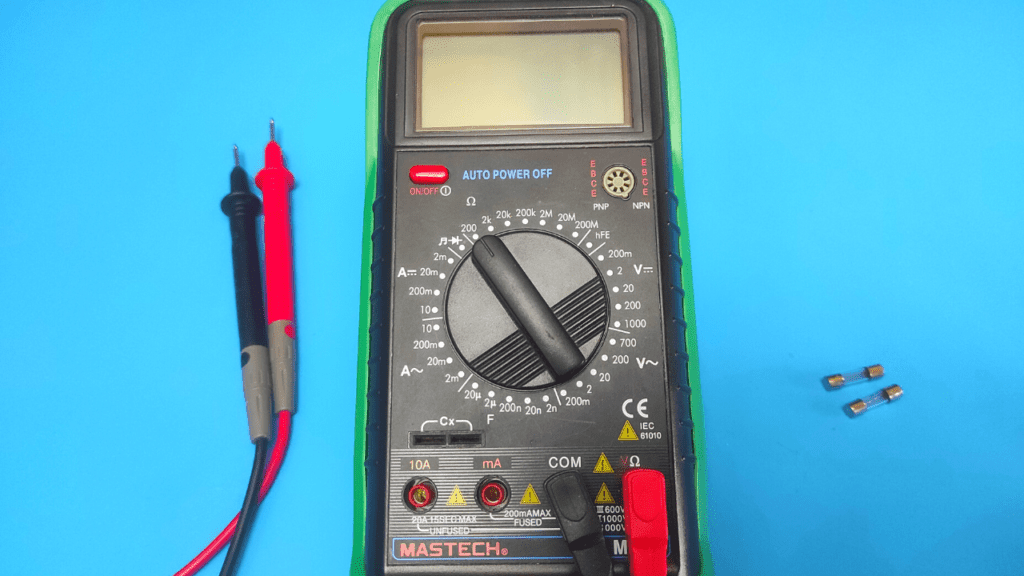
- Set the multimeter to ohms
Checking fuses for faults requires checking their resistance. To measure resistance with a multimeter, you turn its dial to the Ohm position.
The ohm setting is represented by the Omega (Ohm) symbol on the multimeter and as you will see it also has multiple ranges (2 MΩ, 200 kΩ, 20 kΩ, 2 kΩ and 200 Ω).
The 200 ohm limit is the appropriate range that you set your multimeter to as it is the nearest higher range that gives the most accurate results.
In addition, you can also set the multimeter to continuous mode, which is usually indicated by the sound wave symbol.
Now, while the continuity mode is also good for checking if a metal string is broken or not, it doesn't give you a detailed diagnosis.
The ohm setting is the best, as it tells you if the fuse is bad, even if the metal string isn't broken. Give priority to the ohm setting.
To check if the multimeter is set correctly, place the positive and negative leads on top of each other.
With the correct setting, you will get zero (0) or close to it with the ohm setting, or you will hear the multimeter beep in continuous mode. If you received them, proceed to the next step.
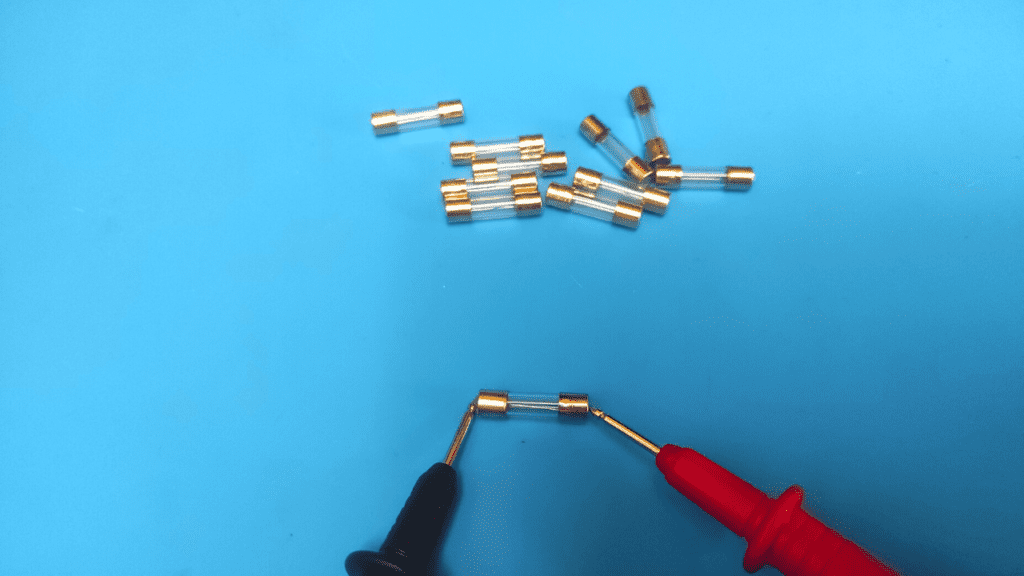
- Place multimeter leads on each end of the fuse
Here you simply place the leads of the multimeter at each end of the fuse pin, regardless of polarity.
Measuring resistance doesn't require a strict placement of the positive or negative wire at a specific end, so you don't have to worry about that. After the wires have made proper contact, check the reading on the meter screen.
- Rate results
The results are pretty simple. In continuity mode, if the multimeter beeps, it means there is continuity between the two terminals of the multimeter (metal filament is OK). If you do not hear a beep, the fuse is blown and should be replaced.
However, even when the multimeter beeps, the metal string may still have some defects, and this is where a resistance test is useful.
If the multimeter is in the ohm setting, good fuses are expected to give you a resistance value of zero (0) or close to zero.
This means that there is a continuous path between the two leads of the multimeter (metal string is still good), and it also means that current can easily flow through it if needed.
A value above 1 means that there is too much resistance inside the fuse, which may be the reason why not enough current flows through it.

The multimeter can also show you "OL", signaling that there is no continuity at all in the fuse (the metal string is blown) and the fuse needs to be replaced.
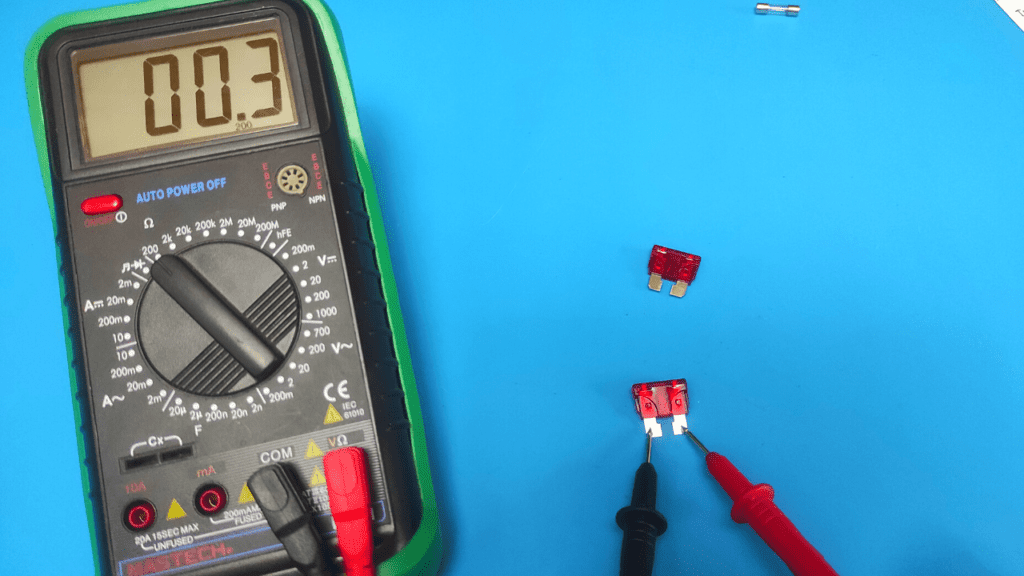
Checking car fuses with a multimeter
Automotive fuses have an unusual shape, as they have “blades” on both sides, not protrusions. They also last longer than regular fuses and are located in the fuse box.
To test a car fuse, make sure the car is off, check your car's fuse chart to find the specific fuse for the faulty device, then remove the fuse with a fuse puller.
Now you visually check it for dark spots that indicate a burnt or blown fuse, or try to check if the string is broken if the fuse is transparent. They signal a faulty fuse that needs to be replaced.
If you don't find anything wrong after a visual inspection, follow the normal process of checking the fuses with a multimeter. Set the meter to the 200 ohm range, place the multimeter probes on the two blade ends of the fuse, and check the value on the screen after proper contact has been made.
If you get a zero, a value close to zero, or a beep, the fuse is good. Reading "OL" or any other value means that the fuse is defective and should be replaced.
Finally, when replacing fuses, make sure you use a new fuse with the same amperage rating as the failed fuse. You do this to avoid installing a fuse that draws more current than necessary, which could damage the device or circuit it is designed to protect.
Guide Video
You can find the whole process in our video guide:

While you can test a fuse without a multimeter, a digital multimeter is the easiest way to determine if a fuse is bad. It is also useful for other electrical diagnostics.
Conclusion
Checking fuses with a multimeter is one of the easiest electrical diagnostic procedures to follow if you follow our tips. You simply place multimeter probes at each end and wait for a beep or a value close to zero.
Be sure to remove the fuse from the electrical device before checking, and also replace the defective fuse with a fuse of the same rating.
FAQ
How do you know if a fuse is bad?
The fuse is defective if you find that its thread is broken or there is a dark spot on it, indicating a fire. You also use a multimeter to measure continuity or resistance, which should be close to zero.
What is the most common cause of a blown meter fuse?
The most common cause of blown fuses is circuit overload. Circuit overloading is when too many appliances draw current in the circuit through a fuse, causing the circuit to blow.
