
How to test ground with a multimeter
Content
Are your headlights flickering? Is your washing machine slow, malfunctioning, or not working at all?
If your answer to these questions is yes, then the ground connection in your home is a possible cause.
Grounding in your home is one of the most important things you need to take care of.
Proper operation of your electrical devices is not only important, but can be the difference between life and death.
In this guide, you will find everything you need to know about the test site.
Let's get started.
What is grounding?
Grounding, also called grounding, is a protective practice in electrical connections that reduces the risks or consequences of electric shock.
With proper grounding, electricity coming out of outlets or electrical appliances is directed to the ground, where it is dissipated.
Without grounding, this electricity builds up in outlets or metal parts of the device and can cause appliances to not work or work properly.
A person who comes into contact with these electrically charged metal components or exposed wires is at risk of fatal electrical shock.
Grounding directs this excess electricity to the ground and prevents all of this.
Now you understand why it is important that the outlets in your home are properly grounded.
A multimeter is a tool for troubleshooting electrical problems, and it's good enough to test for grounds in your wall outlets.
How to test ground with a multimeter
Place the multimeter's red lead into the energized output port, place the black lead into the neutral port, and record the reading. Keep the red probe in the active port and place the black probe in the ground port. If the reading is not the same as the previous test, your home does not have a proper ground connection..
They will be explained next.
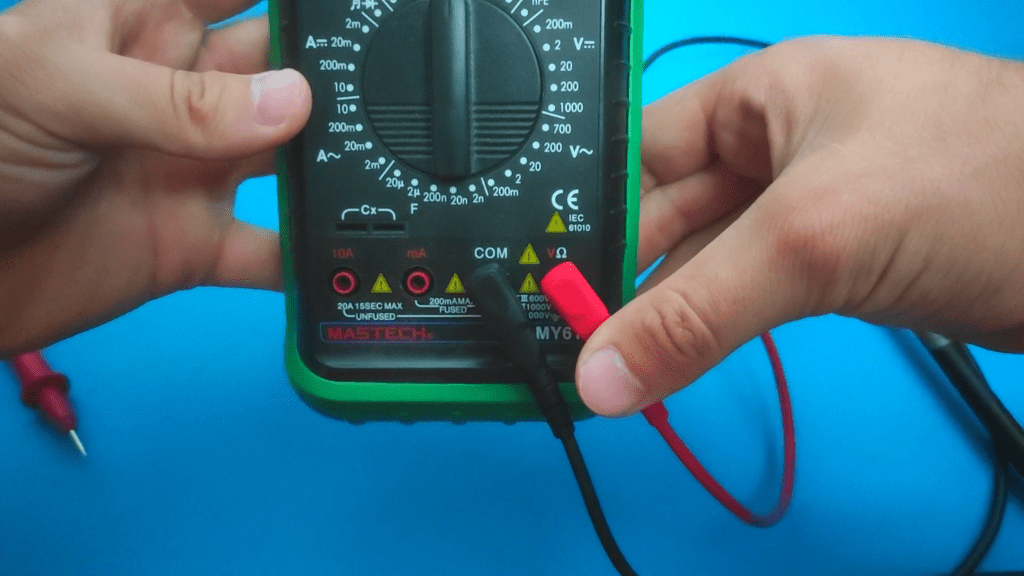
- Step 1. Insert the probes into the multimeter
When checking grounding at home outlets, you should pay attention to how you connect the probes to the multimeter.
Insert the red (positive) test lead into the multimeter port labeled "Ω, V or +" and the black (negative) test lead into the multimeter port labeled "COM or -".
Since you'll be testing hot wires, make sure your leads are in good condition and you won't mix up the leads on the multimeter to avoid damaging it.
- Step 2: Set the multimeter to AC voltage
Your appliances run on alternating current (AC) and as expected, this is the type of voltage your outlets put out.
Now you simply turn the multimeter dial to the AC voltage setting, commonly referred to as "VAC" or "V~".
This gives you the most accurate reading.

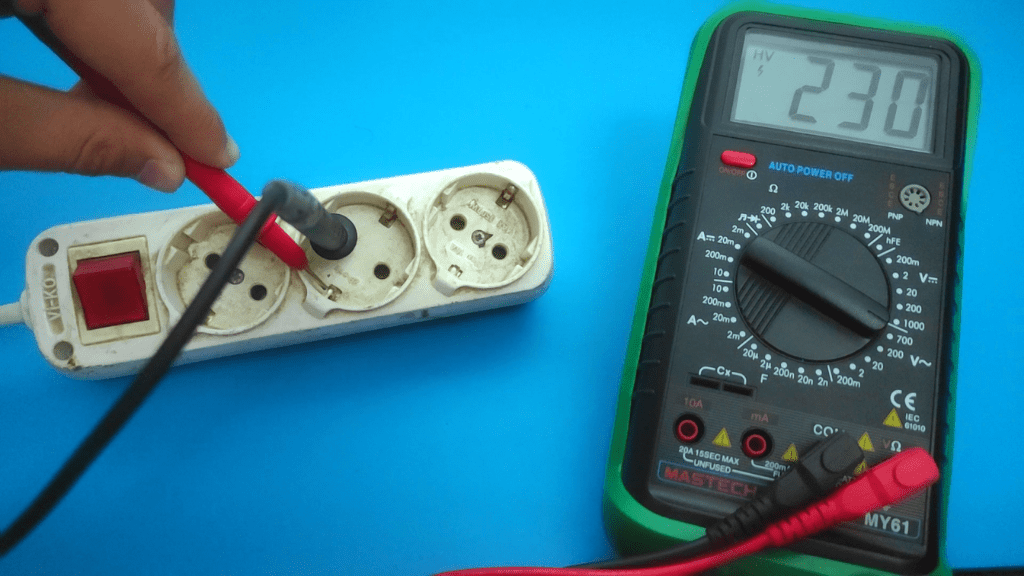
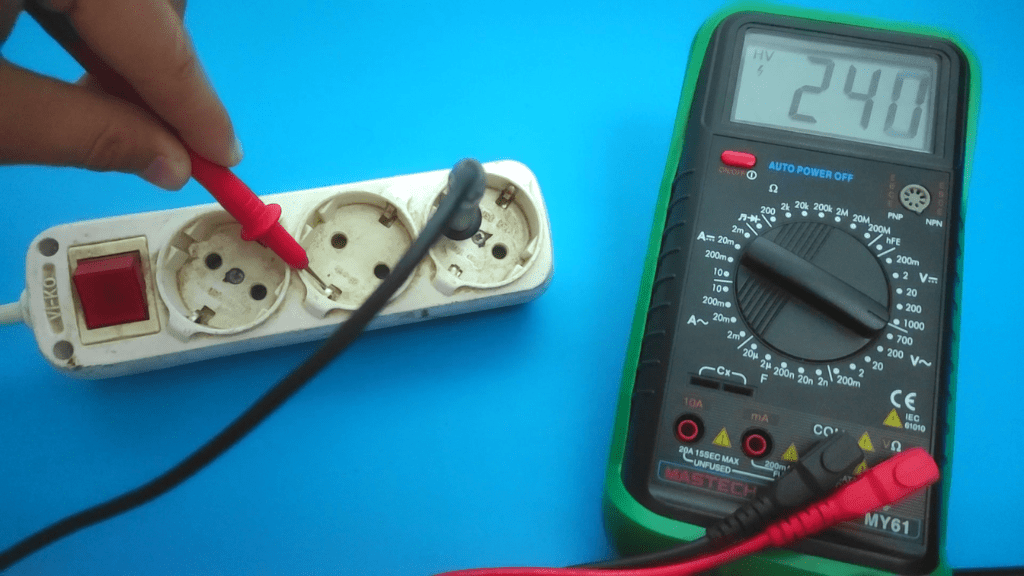
- Step 3: Measure voltage between working and neutral ports
Place the multimeter's red (positive) test lead into the energized output port and the black (negative) test lead into the neutral port.
The active port is usually the smaller of the two ports on your outlet, while the neutral port is the longest of the two.
A land port, on the other hand, is usually shaped like a "U".
Ports on some wall outlets can be shaped differently, in which case the active port is usually on the right, the neutral port is on the left, and the ground port is on the top.
The voltage reading between your live wire and neutral is important for the comparison to be made later.
Take your measurements and move on to the next step.
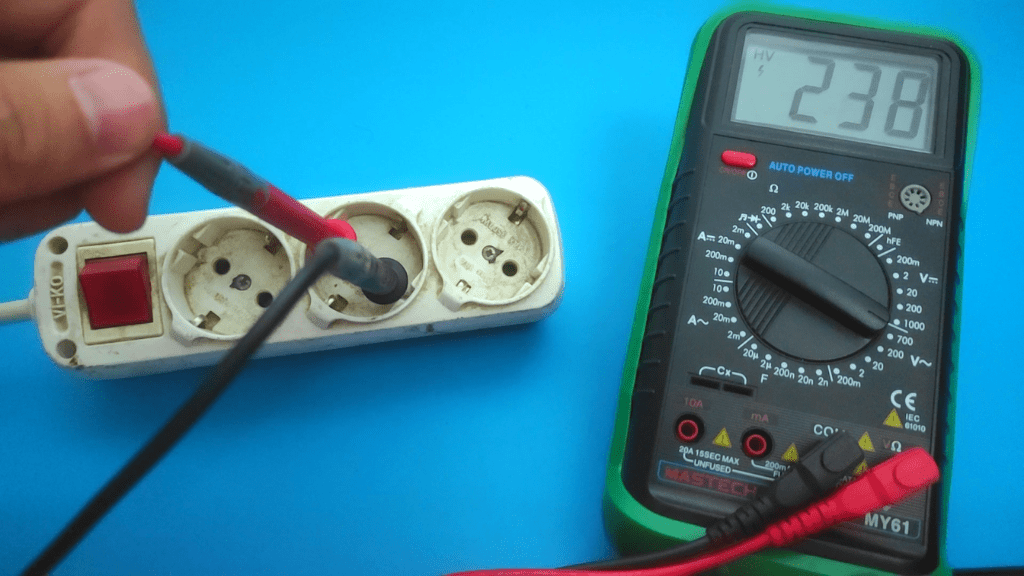
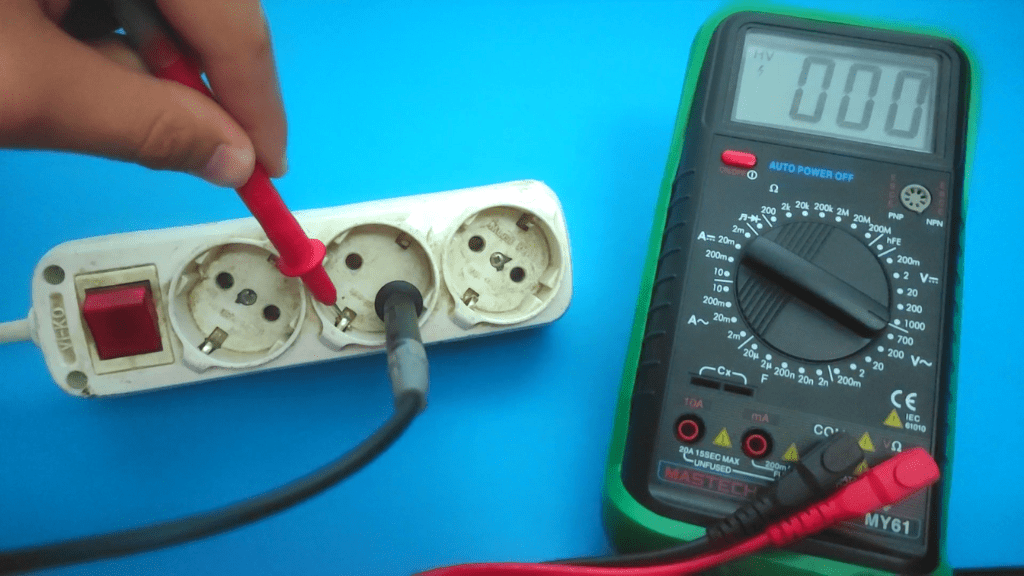
- Step 4: Measure the voltage between live ports and ground
Now take your black probe out of the neutral output port and plug it into the ground port.
Note that your red probe remains in the active port.
You will also make sure that the probes are making contact with the metal components inside the sockets so that your multimeter has a reading.
Take your measurements and move on to the next step.
- Step 5: Measure the voltage between neutral and ground ports
An additional measurement you want to take is the voltage reading between your neutral and ground ports.
Place the red probe into the neutral output port, place the black probe into the ground port and take measurements.
- Step 6: Evaluate the results
Now is the time to compare and you will be making a lot of them.
- First, if the distance between your work and ground ports is close to zero (0), your house may not be properly grounded.
- Going further, if the measurement between your active and neutral ports is not within 5V or the same as the measurement between your active and ground ports, your house may not be properly grounded. This means that in the presence of a ground, if the phase and neutral test detects 120V, the phase and ground test is expected to detect 115V to 125V.
- Just in case all this is confirmed, you will make one more comparison. This is necessary to check the level of leakage from the ground and determine its quality.
Get the difference between the live and neutral test and the live and ground test.
Add this to the neutral and ground test readings.
If their addition exceeds 2V, then your ground connection is not in perfect condition and should be checked.
In this video we explain the whole process:

Another test you can perform is regarding the earth resistivity of your connection to earth.
However, this is a completely different topic, and you can check out our detailed article on testing ground resistance with a multimeter.
Light bulb test site
To check grounding at your home outlet with a light bulb, you'll need a ball socket and a couple of cables.
Screw in the light bulb and also attach the cables to the ball socket.
Now make sure the other ends of the cables are at least 3cm bare (no insulation) and plug them into the live and neutral output ports.
If the light does not come on, then your house is not properly grounded.
As you can see, this test is not as detailed and accurate as the test with a multimeter.
Conclusion
Checking the grounding in your home is a fairly simple procedure.
All you have to do is take measurements between different wall outlets and compare those measurements with each other.
If these measurements don't match or stay within certain ranges, your home's grounding is faulty.
F.A.Q.
How do you know if you have a bad ground wire?
One common symptom of poor grounding in homes is dim or flickering lights. In other cases, electrical appliances in your home may not turn on or may not work properly.
How many ohms should the ground wire have?
It is expected that the resistance in your home ground will be no more than 5 ohms, while the most optimal value is zero (0) ohms. The closer the resistance value is to zero, the better the grounding.
What can a loose ground wire do?
Bad grounding will cause your light bulbs to become dim or flicker. It also causes electrical appliances to fail or stop working completely because there is not enough power to run them.
