How to paint your own bumper
Content
It is quite problematic to paint the bumper yourself without good experience. It is important to have not only the right help, but also the tools, as well as the ability to match the paint to match. To paint a plastic bumper, you will need to buy a primer (primer) specifically for plastic, and if it is an old bumper, then also putty for plastic. In addition, of course, a grinder, sandpaper circles and an airbrush, although you can get by with spray cans if quality is not the main goal. When everything you need is found, and you are still going to try to paint the bumper with your own hands, then knowing about the sequence of actions and the nuances of the procedure will be very necessary. And it does not matter whether it is local painting or full painting of a plastic bumper.
Required materials and tools for painting
How to paint your own bumper. 3 basic steps
- a degreaser (after each stage of grinding), and it is best to purchase a special one for working with plastic surfaces, as well as several napkins.
- primer for plastic or as they say primer (200 grams).
- sandpaper in order to rub both immediately before priming and after priming the bumper, before painting (you need P180, P220, P500, P800).
- correctly adjusted paint gun, selected paint (300 grams) and varnish for the final chord. Without an airbrush available, it is possible to perform all the necessary procedures from a spray can, but all painting of the bumper with a spray can is used only in local areas.
Step-by-step instructions on how to paint the bumper yourself
First of all, you need to decide on the type of work to be performed. That is, set the scope of work based on the state of the bumper. Is this a new bumper or an old one that needs to be restored to its original appearance, do you need a bumper repair or should you start painting right away? After all, depending on the condition and the task at hand, the procedure for painting the bumper will have its own adjustments and will differ slightly. But Be that as it may, you need to thoroughly wash the bumper and treat it with a degreaser.
Painting the new bumper
- We rub the P800 with sandpaper in order to get rid of the remains of the shipping oil and minor flaws, after which we degrease the part.
- Priming with a two-component acrylic primer. The bumper primer is produced in two layers (the frequency of applying the next one, depending on drying, is necessary in order for the layer to become matte). If you are not a master in this matter, then it is recommended to buy ready-made soil, and not to breed in the right proportions.
- Wipe or, as they say, wash the primer with P500-P800 sandpaper so that the base layer of paint sticks well to the plastic (quite often they can not wash it, but just lightly rub it dry with sandpaper, and then blow it).
- Blow with compressed air and degrease the surface before applying the base coat.
- Apply a buza and with an interval of 15 minutes also apply a couple of layers of paint.
- After making sure that there are no defects and jambs, apply varnish to give gloss to the painted bumper.
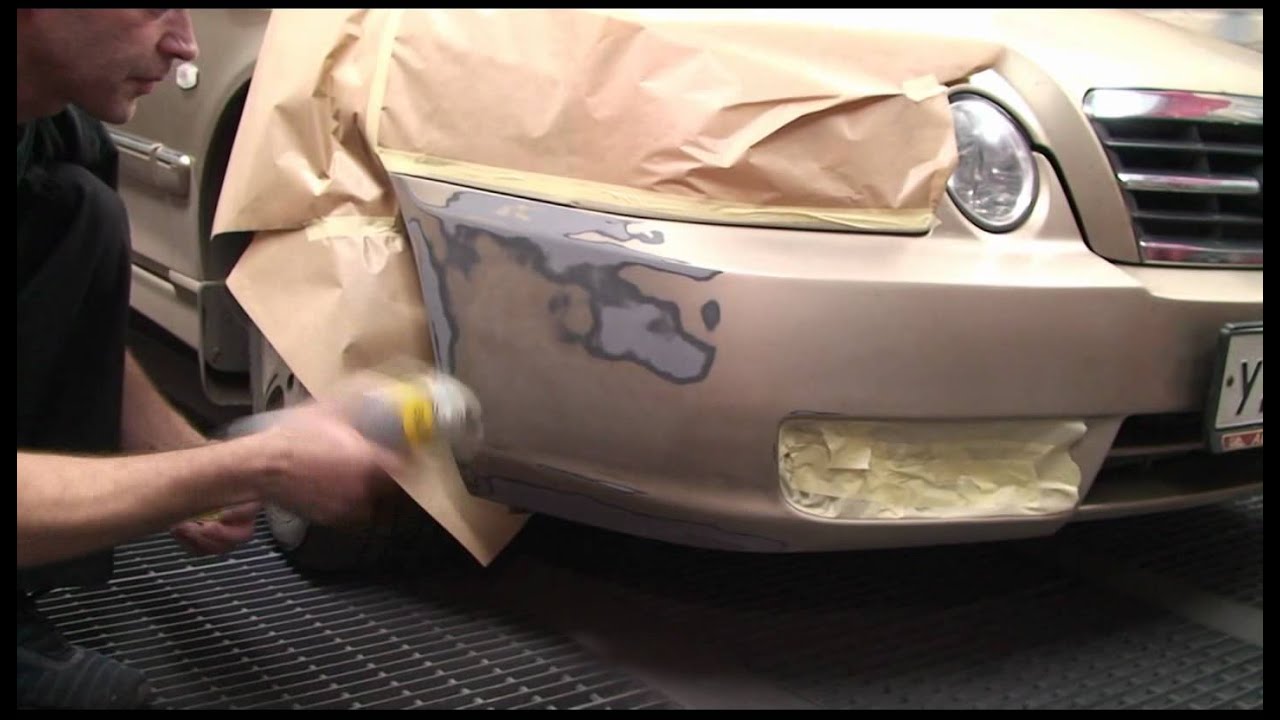
Repair and painting of the old bumper
Slightly different from the first case, since, in addition, one hundred separate places will need to be processed with a putty for plastic, an additional step will be to eliminate defects, possibly plastic soldering.
- You need to wash the part well, and then with a P180 sandpaper we clean the surface, erasing a layer of paint to the ground.
- We blow it with compressed air, treat it with anti-silicone.
- The next step is to level all the irregularities with a putty (it is better to use a special one for working with plastic parts). After drying, first wipe with P180 sandpaper, then inspect for minor defects and process with a finishing putty, rubbing it with P220 sandpaper in order to obtain a perfectly smooth surface.Between the layers of putty, be sure to sand it and clean it with a degreaser.
- Priming the bumper with a one-component quick-drying primer, and not only the areas where the filler was sanded and applied, but also the areas with old paint.
- We cover the putty with 500 sandpaper after applying two layers.
- Degrease the surface.
- Let's start painting the bumper.
Painting nuances to consider
self paint bumper
- Only start work on a well-washed and clean bumper.
- When degreasing a bumper, two types of wipes are used (wet and dry).
- If self-painting work is carried out with a bumper of Asian origin, it must be thoroughly degreased and rubbed well.
- Do not use a hair dryer or other heating technique to dry the paint.
- When working with acrylic varnish, you must follow the instructions that come with it, therefore, before you paint the bumper yourself, you need to carefully read all the instructions for putty, primer, and paint as well.
- With the formation of smudges and shagreens during painting, it is worth sanding it on a wet, waterproof sandpaper and polishing the desired area.
As you can see, it is not so easy to paint the bumper yourself, adhering to the correct technology, since not everyone has a compressor, spray gun and a good garage. But if this is for yourself, where the quality requirements can be even lower, then in an ordinary garage, having bought a can of paint and a primer, anyone can do local painting of the bumper.