How to remove chewing gum from a car
Content
When driving, you never know what rubbish and debris will be on the road or in the air. One such substance that you may come across is chewing gum.
On the road, if a car driver or passenger wants to get rid of used chewing gum, they often decide to get rid of it by throwing it out the window. Sometimes attackers also put used chewing gum on vehicles to annoy people.
Chewing gum can land right on your car when it's thrown out the window, or it can stick to your tire and then fly onto your car when it separates from your tire. It creates a sticky mess that becomes extremely hard when it dries and is nearly impossible to remove once it has hardened.
Here are some simple procedures you can use to safely remove chewing gum from your car's paintwork without damaging it.
Method 1 of 6: Use a Bug and Tar Remover
The insect and tar cleaner acts on the chewing gum to soften it so it can be easily removed.
Necessary materials
- Bug and tar remover
- Paper towel or rag
- Plastic razor blade
Step 1: Apply insect and tar remover to gum.. Make sure the spray completely covers the gum, as well as the area around it.
Let the spray soak in for a few minutes to soften the gum.
Step 2: Scrape off the base of the gum. Gently scrape off the base of the gum with a plastic blade.
As you work, lubricate the paint with insect and tar remover to prevent the razor blade from getting stuck in the chewing gum.
- A warning: Do not use a metal razor blade to scrape off the chewing gum as this will scratch the paint severely.
Step 3: Treat the edges of the gum stain. Go all over the gum stain, separating it from the car paint.
There may be chewing gum residue left on the paint, which can be dealt with after removing the bulk of the chewing gum.
Step 4: Remove the elastic. Remove loose gum from the surface of the car with a paper towel or rag. The main part of the resin will disappear, but small pieces may remain on the paint.
Step 5: Repeat the process. Spray the insect and tar remover again onto the remaining chewing gum.
Let it soak in for a few minutes so that it softens and separates from the paint.
Step 6: Polish the leftover chewing gum. Wipe the remaining chewing gum with a rag or paper towel in small circles. The pieces of chewing gum will stick to the rag when it comes off.
- Functions: Make sure the surface is kept damp with insect and resin remover to keep the gum from smearing in the same place.
Repeat the process and wipe the surface until the gum is completely gone.
Method 2 of 6: Remove gum by freezing it.
Chewing gum becomes brittle when frozen and can be separated from the paint by quickly freezing it with compressed air.
- Attention: This works especially well for gum that is still crumpled and not smeared.
Necessary materials
- Compressed air
- Plastic razor blade
- Rag
- Residue remover
Step 1: Spray a can of air onto the gum.. Spray the gum until it is completely frozen.
Step 2: Tear off the elastic. While the gum is still frozen, poke it with your fingernail or plastic razor blade. Frozen chewing gum will break into pieces.
- Attention: Make sure you don't use tools that could scratch the paint.
Step 3: Refreeze gum if needed. If the gum thaws before most of it is removed, refreeze it with canned air.
Step 4: Remove the elastic. Tear off as much gum as you can from the paint, being careful not to remove the paint along with the gum.
Step 5: Defrost the gum. When only small pieces of chewing gum remain on the paint, let it thaw completely.
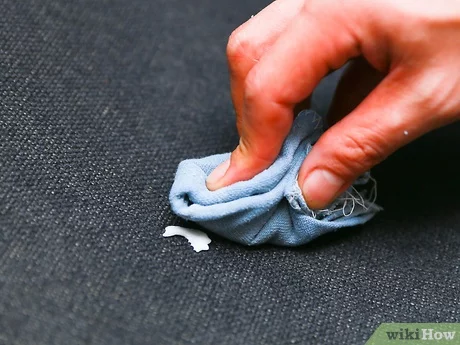
Step 6: Apply Residue Remover. Dampen a rag with the residue remover and use it to blot any remaining chewing gum left on the paint.
Step 7: Polish the Remains. Rub the residue remover in small circular motions with a damp cloth. The chewing gum comes off in small pieces and sticks to the rag.
Wipe the area with a dry and clean cloth.
Method 3 of 6: Use Home Remedies
If you don't have these items on hand, you can try the following variations, which use items you may already have at home.
Option 1: Use Peanut Butter. Peanut butter is known to remove sticky substances. Apply it over chewing gum, leave for five minutes. Wipe it with a damp cloth.
Option 2: Use Body Butter. Apply body butter to the gum, leave for a few minutes. Wipe it with a damp cloth.
Option 3: Use a gum remover. Purchase gum remover from an industrial cleaning company. Spray it on the gum and then wipe it off with a clean rag or paper towel.
Method 4 of 6: Scrape chewing gum off car windows
Finding chewing gum on your car window is more than just an embarrassing situation; it's unsightly and may even interfere with your ability to see in certain places.
While removing chewing gum from windows can be frustrating, it usually resolves quickly if you have the proper tools and knowledge.
Necessary materials
- Plastic razor blade or palette knife
- Soapy water in a bowl or bucket
- Sponge or towel
- water
Step 1: Hold the razor gently. Take a razor blade or palette knife with the non-sharp side. Hold the blade so that it is pointing away from your hand and fingers to prevent injury if it slips.
Step 2: Run the blade under the elastic. Press the edge of the blade between the gum and glass to move it. Insert the pointed side along the edge of the elastic and run it under the elastic you want to remove. Repeat this process until all of the gum is gone, being careful not to scratch the car window.
Step 3: Wash the window . Using a sponge or towel, dip it in the soapy water and gently wipe the window surface. Once it's clean, rinse off the soap using only water.
Let the window air dry for a few minutes and inspect the glass to make sure you have removed all of the gum. If you haven't, repeat the scraping and washing process.
Method 5 of 6: Use ice to remove chewing gum from car windows
Necessary materials
- Ice cubes
- Plastic razor blade or palette knife
- Sponge or towel
- water
Step 1: Put Ice on the Band. Run your hand over the chewing gum with an ice cube. This will harden the gum and make it easier to remove. Using low temperatures for an adhesive such as chewing gum is better than heating because the heat can cause the gum to melt and drip, making it even more of a mess than it started out with.
Step 2: Scrape off hardened gum. Use a razor blade or palette knife to scrape off unwanted chewing gum as described in the previous method.
Step 3: Wash off any residue from the car glass.. Using soapy water and a sponge or towel, wipe any remaining chewing gum off the glass. Then rinse it with clean water and allow the surface to air dry.
Method 6 of 6: Use a car glass degreaser
Necessary materials
- degreaser
- Durable plastic gloves
- Soapy water in a bowl or bucket
- Towels
- water
Step 1: Use a degreaser. Put on protective gloves and apply a degreaser to the rubber band on the window.
- Functions: Almost all degreasers should remove resin from glass, although some degreasers come in spray bottles and others come in capped bottles. Follow the instructions for applying the degreaser of your choice and wear heavy duty plastic gloves when handling these chemicals to avoid damaging your skin.
Step 2: Wipe off the chewing gum. Press the stain firmly with a towel to remove the chewing gum. If all of the chewing gum residue doesn't come off the first time, apply more degreaser and wipe the window again until the gum is gone.
Step 3: Wash the window. Lather the window with soapy water and a fresh towel or sponge, then rinse with clean water and allow the window to air dry.
Once your car is free of chewing gum, you will restore your car to its original look. It is always a good idea to remove any chewing gum from your vehicle to protect its paintwork and also to ensure safer driving for you, especially in situations where chewing gum may block your line of sight.
While removing sticky substances like chewing gum from car glass is a hassle, these methods ensure that you don't accidentally scratch the glass when removing it. These methods should also work for removing other adhesives that may be stuck to the exterior of your vehicle.