How to rotate car tires
Content
Swapping car tires reduces the number of punctures and other tire-related car accidents. Tires should be changed every 5 to 6 miles or every second oil change.
According to the National Highway Traffic Safety Administration (NHTSA), tire failure results in approximately 11,000 car accidents each year in the United States. Of the car accidents that occur in the US each year due to tire problems, almost half are fatal. Most Americans don't think twice about our tires; we assume that as long as they are round, have a tread and hold air, they are doing their job. However, changing your tires at the recommended intervals can save you a ton of money on new tires and potentially save your life as well.
Most automotive manufacturers, as well as OEMs and aftermarket tire manufacturers, agree that tires should be changed every 5,000 to 6,000 miles (or every second oil change). Proper change intervals can reduce the potential for major causes of tire-related accidents, including tread separation, rips, bald tires, and under-inflation. However, simply by performing tire swapping and inspection steps, you can also diagnose suspension and steering problems and improve fuel economy.
What is tire rotation?
For those who may not know, tire swapping is the act of moving your vehicle's wheels and tires to a different location on the vehicle. Different vehicles have different weights, steering and drive axle configurations. This means that not all tires wear evenly on all four corners of the car. Different types of vehicles have different tire rotation methods or recommended rotation patterns.
Different types of vehicles have individual patterns in which tires should be rearranged. For example, if you have a front wheel drive car, all four tires will end up on each wheel hub for the first 20,000 to 50,000 miles. In this example, if we trace the starting position of the left front wheel and assume all tires are brand new and the car has XNUMX,XNUMX miles on the odometer, the rotation process is as follows:
The left front wheel will turn to the left rear for 55,000 miles.
The same tire now on the left rear will be flipped to the right front after 60,000 miles.
Once on the right front wheel, the same tire will turn straight back onto the right rear after 65,000 miles.
Finally, the same tire now on the right rear wheel will be rotated back to its original position (left front) after 70,000 miles.
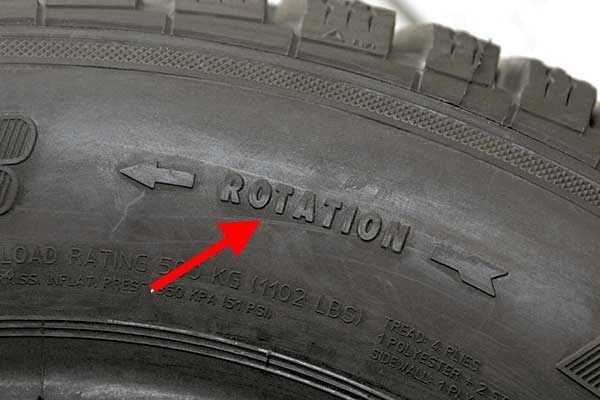
This process continues until all tires are worn above their wear indicators and need to be replaced. The only exception to the tire rotation rule is when the vehicle has tires of two different sizes, or so-called "directional" tires on cars, trucks or SUVs. An example of this is the BMW 128-I, which has smaller front tires than rear tires. In addition, tires are designed to always stay on the right or left side.
Proper rotation can extend tire life by as much as 30%, especially on front wheel drive vehicles, as front tires wear much faster than rear tires. Tire replacement can be done at the dealership, service stations, or specialty tire shops such as Discount Tires, Big-O, or Costco. However, even a novice mechanic can rotate their tires properly, inspect them for wear, and check tire pressures if they have the right tools and knowledge. In this article, we'll look at the correct steps you need to take to swap your own tires and keep your vehicle running smoothly by checking them for potential issues that occur on your car, truck, and SUV.
Part 1 of 3: Understanding Your Car Tires
If you've recently purchased a new car and want to do most of the maintenance work yourself, starting with keeping your tires properly worn and inflated is a good start. However, even older cars that used tires also need maintenance and proper turning. Tires that are OEM are often made from a very soft rubber compound and only last about 50,000 miles (if properly flipped every 5,000 miles, always properly inflated and there are no issues with suspension adjustment. Aftermarket tires tend to be made from more hard rubber compounds and can last up to 80,000 miles under ideal conditions.
Before you start thinking about swapping tires, it's important to understand what type of tires you have, what size they are, what air pressure, and when a tire is considered "worn out" and needs to be replaced.
Step 1: Determine your tire size: Most tires manufactured today fall under the metric "P" tire size system. They are factory installed and are designed to enhance or match a vehicle's suspension design for maximum efficiency.
Some tires are designed for high-performance driving, while others are designed for aggressive road conditions or all-season use. Regardless of the exact purpose, the first thing you need to know about the tires on your car is what the numbers mean:
The first number is the tire width (in millimeters).
The second number is what is called the aspect ratio (this is the height of the tire from the bead to the top of the tire. This aspect ratio is a percentage of the width of the tire).
The final designation will be the letter "R" (for "Radial Tire") followed by the size of the wheel diameter in inches.
The last numbers to write down on paper will be the load index (two numbers) followed by the speed rating (a letter, usually S, T, H, V, or Z).
If you have a sports car or sedan, chances are your tires are H, V, or Z speed rated. If your car is designed for commuter, economy class, you'll likely have tires rated S or T. Trucks come in different and may have the designation LT (light truck). However, the tire size chart still applies to them unless they are measured in inches, for example 31 x 10.5 x 15 would be a 31" high, 10.5" wide tire mounted on a 15" wheel.
Step 2: Know your recommended tire pressure: This is often a trap and can be very confusing for some general automotive mechanics. Some people will tell you that the tire pressure is on the tire itself (that they would be right on the detour).
The tire pressure documented on the tire is the maximum inflation; This means that a cold tire should not be inflated beyond the recommended pressure (because the tire pressure increases when it is hot). However, this number is NOT the recommended tire pressure for the vehicle.
To find the recommended tire pressure for your car, look inside the driver's door and look for a date code sticker that will show the vehicle's VIN number, as well as the recommended tire pressure for your car. One thing people tend to forget is that tire manufacturers make tires for different vehicles, however car manufacturers choose the tire that suits their individual components, so while the tire manufacturer may recommend the maximum pressure, the car manufacturer has the final say. recommended for proper handling, safety and efficacy.
Step 3: Know how to determine tire wear:
Wasting time swapping tires is useless if you don't know how to "read" tire wear.
Tires that show excessive wear on the outer edges of the tires are typical when tires are often not inflated. When a tire is under-inflated, it tends to "ride" more on the inside and outside edges than it should. That's why both sides are worn out.
Over-inflating is the exact opposite of under-inflated tires: those that are over-inflated (exceeding the vehicle's recommended tire pressure) tend to wear more in the center. This is because, when inflated, the tire will grow and move around the center more than evenly, as it was intended to.
Poor suspension alignment is when front suspension components are damaged or misaligned. In this case, it's an example of what's called "toe-in," or the tire leans more inward on the car than on the outside. If the wear is on the outside of the tire, it is "toe out". In any case, this is a warning sign that you should check the suspension components; as it is likely that the CV joint or tie rods are damaged, worn or may break.
Deformed or uneven tire wear due to shock absorber or strut wear is a signal that there are other problems in your car that should be fixed soon.
When tires have this much wear, they should not be swapped. You must eliminate the cause of the problem and buy new tires.
Part 2 of 3: How to swap tires
The actual process of tire rotation is quite simple. First, you need to know what type of rotation pattern is best for your tires, vehicle, and tire wear.
Necessary materials
- Flat surface
- Jack
- flat screwdriver
- (4) Jack standing
- Chalk
- Wrench
- Air compressor and tire inflation nozzle
- Air pressure gauge
- Wrench
Step 1: Find a flat surface to work on the car: You should not raise your vehicle on any incline because this increases the chance of the vehicle tipping over or a wheel slipping off.
Take your vehicle, tools, and jacks to a level area with enough room to work on the vehicle. Set the parking brake and make sure the vehicle is in Park for automatic transmission vehicles or in Forward for manual transmission vehicles. This ensures that your wheels are "locked" and you can easily loosen the nuts.
Step 2: Jack up the car on four independent jacks: To rotate all four wheels at the same time, you will have to raise the car on four independent jacks. Consult your vehicle's service manual for the best location to place the jacks for safety and proper support.
- Functions: In an ideal world, you would like to do this job with a hydraulic lift where all four wheels are easily accessible and the car can be lifted easily. If you have access to a hydraulic lift, use this method over jacks.
Step 3: Mark the Tire Destination with Chalk: This is done by professionals - why not you? Before you start spinning, mark where the wheel is spinning with chalk on the top or inside of the wheel. This will reduce confusion when you take the tires for balancing and come back to put them back on the car. Refer to the Rotation Guide for help. Label tires with these letters for the following location:
- LF for left front
- LR for left rear
- RF for right front
- RR for right rear
Step 4 Remove the hub or center cap.: Some vehicles have a center cap or hub cap that covers and protects the lug nuts from being removed.
If your vehicle has a center cap or hub cap, remove that item first before removing the nuts. The best way to remove the center cover is with a flat blade screwdriver. Locate the cap removal slot and carefully remove the cap from the center sleeve.
Step 5: Loosen the clamp nuts: Using a wrench or impact wrench/electric wrench, loosen nuts from one wheel at a time.
Step 5: Remove the wheel from the hub: After removing the nuts, remove the wheel and tire from the hub and leave them on the hub until all four tires have been removed.
Step 6. Check tire pressure: Before moving the tires to a new location, check the tire pressure and set the recommended tire pressures. You will find this information in the owner's manual or on the side of the driver's door.
Step 7 (OPTIONAL): Take the tires to a tire shop for balancing: If you have access to a truck or other vehicle, it's a good idea to get your tires professionally balanced at this time. Usually, when the tires are moving behind the vehicle, they can become unbalanced when the tires/wheels hit potholes or other objects.
When you turn these tires forward, it causes vibration above 55 mph and you will need to do a balancing act to correct the situation. You can also take your vehicle to a shop to complete this step after changing your own tires.
At this stage, you can also check the tires for wear. Refer to the section above for a description of common wear indicators. If your tires are worn more than usual, it is recommended that you install and balance new tires.
Step 8: Transfer tires to new destination and place on hub: Once you've balanced the tires and checked the air pressure, it's time to move the tires to a new location. I hope you wrote down the location where you should change the tires in step 3 above. Follow these guidelines to easily swap tires.
- Start with the left front wheel and move it to a new location.
- Place the tire on the hub where it should rotate.
- Move the tire on that hub to a new location, etc.
Once you've done this with all four tires, you'll be ready to remount the wheels on the new hub.
Step 9: Install lug nuts on each wheel: This is where most accidents happen. When you install the lug nuts on each wheel, the goal is to make sure the wheel is properly flush with the wheel hub; do not get out of the NASCAR pit stop faster than a neighbor. Seriously, most wheel accidents are due to improper wheel alignment, cross-threaded nuts, or improperly tightened wheel nuts.
The image above shows the correct clamp nut installation method and pattern depending on how many clamp nuts are installed on the vehicle hub. This is known as the "star pattern" and must be used when installing wheels on any vehicle. To properly install the clamp nuts, follow the following method:
Tighten the clamp nuts by hand until you have at least five turns on the clamp nut. This will reduce the chance of cross-tightening of the clamp nuts.
With the impact wrench at its lowest setting, or with a wrench, begin tightening the nuts in the recommended order above. DO NOT OVER TIGHTEN THEM IN THIS PLACE. You just need to guide the clamp nut until the wheel is flush and centered on the hub.
Repeat this process on all lug nuts until all lug nuts are SOLID and the wheel is centered on the hub.
Step 10: Tighten the wheel eyelets to the recommended torque: Again, this is a vital step that many forget to take and can be fatal. Using a calibrated torque wrench, tighten the lug nuts in the star pattern above to the recommended torque as listed in your vehicle service manual. Perform this step on all four wheels before lowering. Once you've set the parking brake and made sure your car is in the gear listed in step 1, this should be easy.
Step 11: Lower the car off the jack.
Part 3 of 3: Road test your vehicle
Once you've swapped the tires, you'll be ready for a test drive. If you followed our advice in step 7 and professionally balanced your tires, your ride should be very smooth. However, if you haven't, look out for the following signs that your tires need to be balanced.
- Car steering wheel vibrates when accelerating
- The front end shakes as you approach highway speeds
If this happens during a road test, take the car to a professional tire shop and have the front wheels and tires balanced. Swapping tires can extend their life by thousands of miles, prevent uneven tire wear, and keep you from blowing tires. Maintaining your tires will save you time and money in the long run and keep you safe on the road. Take the time to take care of your tires by flipping them yourself or by having a professional mechanic change your tires.