How to replace the intake air temperature sensor
Content
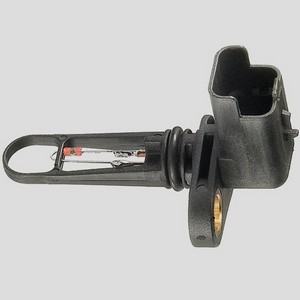
The air temperature sensor or charge air temperature sensor signals the car's computer about the air/fuel ratio. Replacing one requires several tools.
The intake air temperature (IAT) sensor, also known as the charge air temperature sensor, is used by the powertrain control module (PCM) to determine the temperature (and therefore density) of the air entering the engine. Typically, the PCM sends a 5 volt reference to the IAT sensor. The IAT sensor then changes its internal resistance based on the air temperature and sends a feedback signal back to the PCM. The PCM then uses this circuit to determine fuel injector control and other outputs.
A bad IAT sensor can cause all sorts of drivability issues, including rough idle, power spikes, engine stall, and poor fuel economy. To replace this part, you can follow the step by step instructions below.
Part 1 of 2: Removing the old intake air temperature sensor
In order to safely and effectively replace an IAT sensor, you will need a few basic tools.
Necessary materials
- New intake air temperature sensor
- Protective gloves
- Repair manuals (optional). You can access them through Chilton, or Autozone provides free online repair manuals for certain makes and models.
- Safety glasses
Step 1: Find the sensor. The IAT sensor is usually located in the air intake housing, but it can also be located in the air filter housing or intake manifold.
Step 2: Disconnect the negative battery cable. Disconnect the negative battery cable and set it aside.
Step 3 Remove the sensor electrical connector.. Now that you know where the IAT sensor is, you can remove its electrical connector.
Step 4 Remove the sensor. Carefully remove the failed sensor, remembering that some sensors simply pull out while others need to be unscrewed with a wrench.
Part 2 of 2: Installing the New Intake Air Temperature Sensor
Step 1: Install the new sensor. Install the new sensor by pushing it straight in or screwing it in, depending on the design.
Step 2 Replace the electrical connector.. To enable the new sensor, you must reconnect the electrical connector.
Step 3: Reinstall the negative battery cable.. As a final step, reinstall the negative battery cable.
As you can see, replacing the intake air temperature sensor is a fairly straightforward process that most can handle with very little material. Of course, if you'd rather have someone else do the dirty work for you, AvtoTachki's team of certified mechanics offers a professional intake air temperature sensor replacement.