How to replace the ignition relay
When you turn the key and nothing happens, most people assume that it is due to a faulty starter or ignition switch. Believe it or not, most power or starting problems that appear after the driver has turned the key are related to the "middleman" of the car's starting system: the ignition relay or ignition relay switch. This component is connected to the ignition switch block and has a number of electrical connectors that supply power to other mechanical components. The term "relay" applies here, as the ignition switch communicates information that is electrically sent to these components, which allows them to be activated.
The ignition relay is designed to last the life of the vehicle; however, there are times when a relay fails or wears out. Some of the common symptoms of a damaged or broken ignition relay include a low or dead battery, the car stalls or won't start, or a loss of power to the dashboard.
Most modern remote keyless start vehicles have a key with a computer chip inside. This requires a different type of ignition system and often has a very complex ignition relay system. The instructions below are for older vehicles without a chipped ignition key or engine start button. Please refer to your vehicle service manual or contact your local ASE certified mechanic for assistance with modern ignition systems.
Part 1 of 1: Replacing the Ignition Relay
Necessary materials
- Boxed socket wrenches or ratchet sets
- Flashlight or drop of light
- Regular size flat blade and Phillips screwdriver
- Ignition Relay Switch Replacement
- Protective equipment (safety goggles)
- Scan Tool
- Small flat blade screwdriver
- Set of torque screws (for some vehicles)
Step 1: Disconnect the car battery. Locate the vehicle's battery and disconnect the positive and negative battery cables before continuing.
You will be working with electrical components, so you will need to turn off all power sources before starting this project.
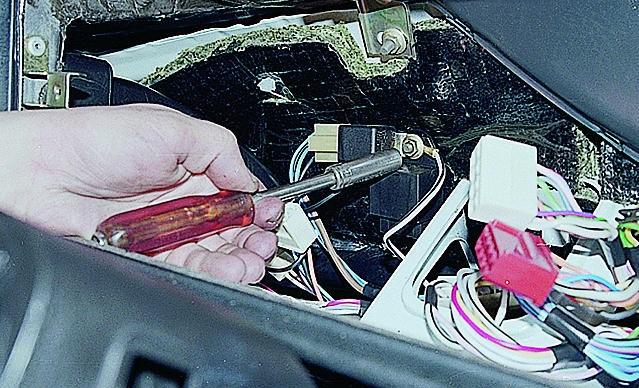
Step 2: Remove the steering column cover bolts.. Look for plastic covers covering bolts or screws. Using a small flathead screwdriver, remove the plastic covers.
Pay attention to the size and style of the bolts and use the appropriate bolt removal tool. In some cases, these will be Phillips or standard/metric bolts, which will require a socket and ratchet to remove properly.
Step 3: Remove any additional dashboard covers.. In some cases, you will have to remove some additional dashboard shrouds located under the dashboard and next to the steering column.
On most vehicles, the ignition relay will be located directly under the steering wheel cover, near the back of the steering column.
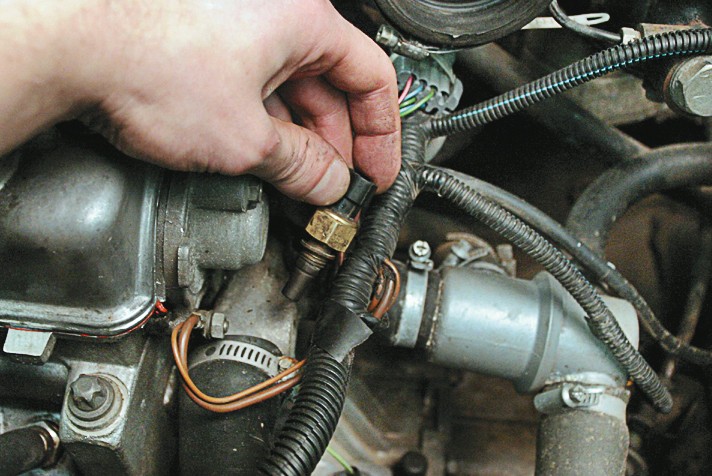
Step 4: Locate the ignition relay. Once the covers are removed, you should be able to find the ignition relay switch fairly easily. The relay switch will be connected to a series of electrical harnesses on both sides.
Step 5: Remove Electrical Harnesses. Once you have located the ignition relay switch, disconnect the electrical connections that are connected to it.
There may be one or two harnesses, so see your vehicle service manual for exact instructions.
Step 6: Remove the ignition relay. The process of removing the ignition relay depends on the specific manufacturer. Removing this component has two parts.
First, you will need to remove the cover that is on top of the relay switch. Usually held with a 7 mm bolt.
Second, remove the relay switch screws that secure the ignition relay to the steering column or support brackets. Most vehicles require two or four screws to be removed.
Step 7: Install the new ignition relay.. Once you've removed the old relay switch, you'll be ready to install the new one. This process is a simple reverse deletion.
Install the new ignition relay switch in the same direction as the previous block. Attach the ignition relay to the steering column or bracket using the previously removed screws.
Reconnect the cover that secures the wire harness to the chassis, then reconnect the wire harnesses. Finally, replace the dashboard covers or panels that were removed and reinstall the steering column covers.
Step 8: Connect the Battery Terminals. Reconnect the positive and negative terminals to the battery.
Step 9 Erase Error Codes with a Scanner. On newer vehicles with electronic control modules and a standard key ignition system, the Check Engine light will come on if your ECM has detected a problem.
If these error codes are not cleared before you check the engine start, it is possible that the ECM will prevent you from starting the vehicle.
Be sure to clear all error codes with a digital scanner before testing the repair.
Step 10: Check the New Relay. Insert the key into the open door. If you insert the key and hear the bells ring, the first connection is OK.
Then turn the key to the accessory position to test these functions. Make sure the radio has power.
As soon as you turn the key to the next position, the ignition relay should send a signal to the fuel pump. After making sure the radio is off, listen for the fuel pump prime.
Finally, start the car. If the car starts smoothly, then the ignition relay is working properly.
It is always best to consult your service manual and review their recommendations in full before undertaking this type of work. If you have read this manual and are still not sure how to perform this repair, contact one of the ASE certified mechanics at AvtoTachki to replace the ignition relay at your convenience.