How to replace brake pads on a motorcycle?
Explanations and practical tips for maintaining your motorcycle
Practical tutorial on self-removal and replacement of brake pads
Whether you are a big roller or not, a big brake or not, there is bound to be a time when replacing the brake pads becomes necessary. Wear really depends on the bike, the riding mode and many parameters. Therefore, there is no standard run frequency. The best solution is to regularly check the wear condition of the pads and change the pads without hesitation in order to avoid attacking the brake disc (s) and above all to maintain or even improve the specified braking performance.
Check the condition of the pads regularly
The controls are very simple. If the clamps have a cover, it must be removed in advance to gain access to the gaskets. The principle is the same as for tires. There is a groove at the height of the shoes. When this groove is no longer visible, the gaskets must be replaced.
When it comes down to it, don't panic! The operation is relatively straightforward. Let's get to the practical tutorial!
Check and buy the correct gaskets
Before starting this workshop, check which pads you need to change in order to buy the correct brake pads. All the advice on the different types of brake pads is here, the most expensive ones are not necessarily the best ones, or even what you've heard.
Did you find the correct link for brake pads? It's time to ride it!
Disassemble current brake pads
We will have to dismantle those who are in place. Keep them handy after removing them, they can still be used, including fully retracting the pistons back into the housing using a few clamps. Remember to protect the caliper body and push straight: the piston that goes at an angle is guaranteed to leak. Then we have to replace the clamps, and here it is a completely different story. Much longer.
By the way, remember that pad wear has lowered the level of brake fluid in his bank. If you have recently passed fluid levels, it may be that you cannot push them to the maximum ... You know what you need to do: take a little look.
Another point: either you work without disassembling the caliper on the fork leg, or, for greater freedom of movement and visibility, you remove it. We invite you to proceed with the disconnected caliper, this will allow you to better move the pistons back if necessary. This can be done posteriorly if there is significant difficulty in putting the new pads back in place (the upholstery is too thick or the piston is seized / too widened). To disassemble the brake caliper, simply unscrew the two bolts that hold it to the fork.
There are many forms of stirrups, but the base is similar. Generally speaking, the spacers are held in place by one or two rods that serve as a guide axis for optimal glide. A part that can be cleaned or replaced depending on the state of wear (groove). Expect between € 2 and € 10 depending on the model.
These stems are also called pins. They apply spacers to the powered support and limit their (slap) gap as much as possible. These plates serve as springs. They make sense, they notice the good, deceivers are sometimes hard to find.
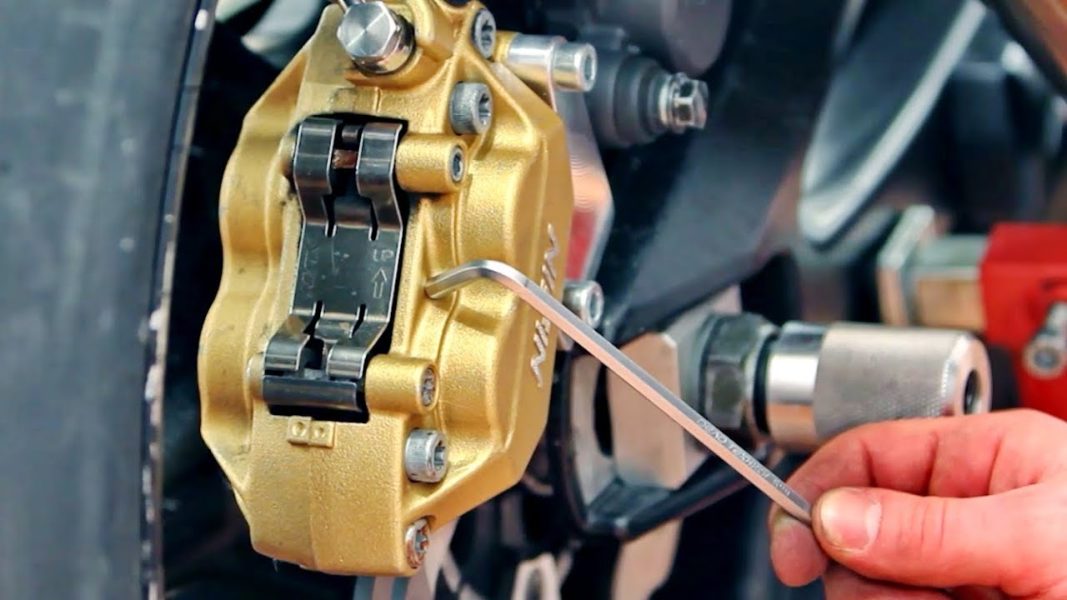
In general, do not be afraid that small parts will fly away. That's all. But sometimes access to stem contacts can be limited. They are either screwed on or embedded and held in place ... by a pin. We have already seen how the first cache protects their location. Once removed, which is sometimes tricky ... just unscrew them or remove the pin in place (another one, but classic this time). It is recommended to use a spout or thin screwdriver to remove it.
Platelets also make sense. Sometimes they differ inside and out. Be sure to get everything in the brochure. Small metal mesh and trim in between.
This serves as a sound and thermal shield. It is also the thickness, which is sometimes damned when the spacers are very thick ... Wait to see if the winding goes well and if there is enough distance to traverse the disc.
Clean up the details
- Clean the inside of the caliper with brake cleaner or a toothbrush and soapy water.
- Check the condition of the pistons. They shouldn't be too dirty or corroded.
- Check the condition of the connections (no leakage or gross deformation) if you can clearly see them.
- Push the pistons completely away using old spacers simply placed in their old place (if possible)
Insert new gaskets
- Place new raised shims
- Put the pins and "spring" plate back
- Spread the spacers around the edges of the stirrups as much as possible to get through the disc. Be careful to arrive parallel to the disc so as not to risk starting the finish when replacing the caliper.
- Reattach stirrups by tightening to torque
Brake fluid
- Check the brake fluid level in his can
- Pump the brake light several times to restore pressure and order
Be careful when rolling for the first time after changing pads: break-in is required. If they are already effective most of the time, they should not be overheated. It is also possible that the strength and grip of the shims on the disc is not the same as what you had before. Beware then, but if everything went well, don't worry, it slows down!
Tools: brake cleaner, screwdriver and tip set, multiple clips.