How to replace the tailgate lock assembly
The tailgate lock assembly controls the lock and can be activated using the key fob or the driver's lock controls.
The tailgate lock assembly on your vehicle is responsible for the movement of the lock. This lock stops the movement of the handle, so the gate does not open. It can be activated from a key fob or from the driver's lock control panel. The tailgate lock assembly must be replaced if the electric lock does not work, the tailgate lock does not latch, or the lock cylinder does not turn. Replacing a node is relatively easy and can be done in just a few short steps.
Part 1 of 1: Replacing the tailgate lock assembly
Necessary materials
- Pliers
- Replacement of the lock of a door of a luggage carrier assy
- Socket set and ratchet
- Torx screwdrivers
Step 1: Remove the access panel. Lower the tailgate and locate the access panel on the inside of the door. The exact size and number of screws varies by manufacturer and model.
They will be next to the tailgate handle so you have access to the handle and lock. Remove the star screws holding the panel in place. The panel will rise.
Step 2: Locate and Disconnect the Retaining Assembly. After removing the panel, locate the lock you are replacing.
Once you have found the assembly, locate the wiring terminal and remove the connector from the terminal.
After disconnecting the assembly, set the connector aside. If the terminal becomes stubborn, you can carefully use a pair of pliers.
Step 3: Remove the binding. Some makes and models will have connections between the blocking node and the corresponding parts surrounding it.
Most of them just fall into place. If they don't snap into place, a small clip will hold them in place.
Take a good look at the link before trying to remove it. Make sure the connection is removed properly.
Disconnection can cause a simple repair to require additional time and money to replace.
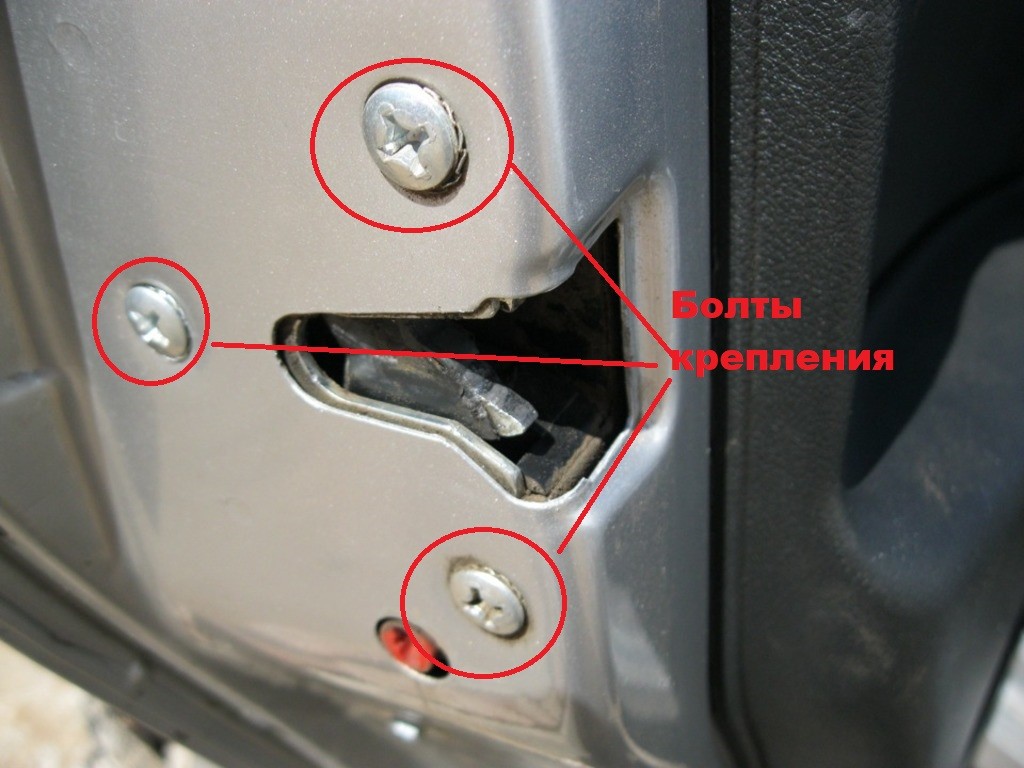
Step 4: Remove mounting bolts. Remove the retaining bolts holding the assembly in place. There should be a set of screws or small bolts holding it in place. Put them aside, as your replacement may or may not come with them.
After that, the rear door lock will be ready for removal. He should just get up.
- Attention: Always check that the replacement assembly matches the previous assembly. They are different for every make and model, and correct replacement is critical for other parts involved.
Step 5: Attach the New Assembly. Place the replacement assembly in place and screw in the locking screws. They should be hand-tight, but over-tightening shouldn't damage anything.
Step 6: Reconnect the wiring terminal. Reconnect the wiring connectors to the terminals. They should fall into place without any huge restrictions.
Always be careful when working with terminals. Violating them can also cost unnecessary time and money.
Step 7: Reattach the Links. Reattach any links you may have removed in the third step. Make sure they go in straight and exactly in the same position they were removed.
They are designed to work with a very specific layout and will not work properly in any other order.
Step 8: Test Block. Check the device before replacing the access panel. Lock and unlock the tailgate using the key fob and driver lock controls.
If it works correctly, your repair is complete. If the key lock assembly is not working properly, repeat your steps and make sure everything is done correctly.
Step 9: Replace the Access Panel. When the device is installed, tested and working properly, you can replace the access panel that was removed in the first step.
These screws must be hand-tight, but nothing will hurt if they are tightened.
Replacing the trunk lock assembly can be done in a reasonable amount of time and for little money. The access panel allows you to quickly find and replace a node. If you are stuck or need help, contact a certified technician, such as a specialist from AvtoTachki, who will replace the rear door lock for you.