How to replace the interior light switch in most cars
Content
The light switch is broken if the open door does not turn on the light. This means that the switch in the door jamb is not working.
The dome light switch signals the interior dome light to be on and provides the light you need to see what you are doing, especially on a dark night. The light function either completes or interrupts the electrical signal that turns on the light when you open the door.
A given vehicle may have several switches, usually determined by the number of entry doors to the passenger compartment. They can also be found on some rear cargo doors on minivans and SUVs.
Although most of these courtesy light switches are found primarily in the door frame, they can also be part of the door latch assembly. In this article, we will focus on the courtesy switches located in the door frame.
Part 1 of 3. Locate the light switch.
Step 1: Open the door. Open the door corresponding to the switch to be replaced.
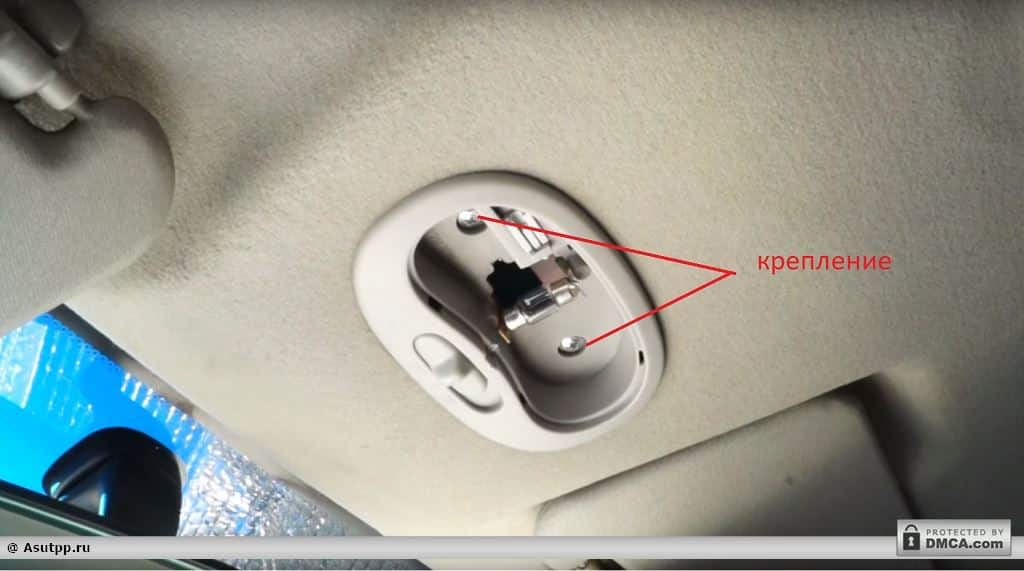
Step 2: Locate the light switch.. Visually inspect the door jamb for a door jamb switch.
Part 2 of 3: Replacing the dome light switch
Necessary materials
- Screwdrivers
- Socket set
- tape
Step 1: Remove the lamp switch bolt.. Using a screwdriver or socket and ratchet, remove the screw that holds the light switch in place.
Set the screw aside so it doesn't get lost.
Step 2: Pull the light switch out of the recess.. Carefully pull the light switch out of the recess in which it is located.
Be careful not to snag the connector or wiring that connects to the back of the switch.
Step 3 Disconnect the electrical connector on the back of the Switch.. Disconnect the electrical connector on the back of the light switch.
Some connectors can be removed by hand, while others may require a small screwdriver to gently pry the connector from the switch.
- A warning: After the light switch has been turned off, make sure that the wiring and/or electrical plug does not fall back into the recess. A small piece of tape can be used to stick the wire or connector to the door jamb so it doesn't fall back into the opening.
Step 4: Match the replacement interior light switch with the replacement.. Visually verify that the replacement light switch is the same size as the old one.
Also, make sure the height is the same and make sure the connector of the new switch matches the connector of the old switch and the pins have the same configuration.
Step 5: Insert the replacement dome light switch into the wiring connector.. Plug the replacement into the electrical connector.
Part 3 of 3. Check the operation of the replaceable dome light switch.
Step 1: Check the operation of the replaceable dome light switch.. It is easier to check the operation of the replacement dome light switch before installing it back into the door frame.
When all other doors are closed, simply press the switch lever and make sure the light goes out.
Step 2. Replace the dome light switch.. Install the dome light switch back into its recess until it is flush with the panel.
Once it is back in the correct position, reinstall the bolt and tighten it all the way.
Step 3: Check if the installation is correct. Take some time to make sure the height you set is correct. Close the door carefully.
Firmly press the door, paying attention to the absence of abnormal locking resistance.
- A warning: If there seems to be more resistance to locking the door than usual, this may be a sign that the dome light switch is not fully seated or that the wrong switch was purchased. Attempting to force close the door may damage the replacement dome light switch.
The work is completed when the door closes with normal force and the operation of the light switch is checked. If at some point you feel that you would do well to replace the interior light switch, contact one of AvtoTachki certified technicians to come to your home or work to perform the replacement.