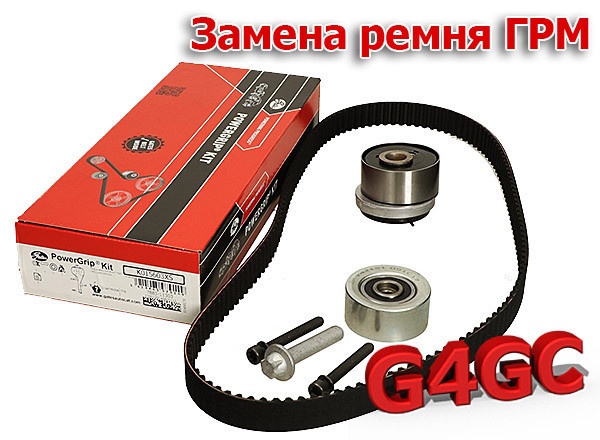
Change the timing belt G4GC
Content

According to the recommendations of the manufacturer of the G4GC power plant, the timing belt (aka timing) should be changed independently or during operation every four years. If the car is used frequently, then a mileage interval of 60-70 thousand km should be observed.
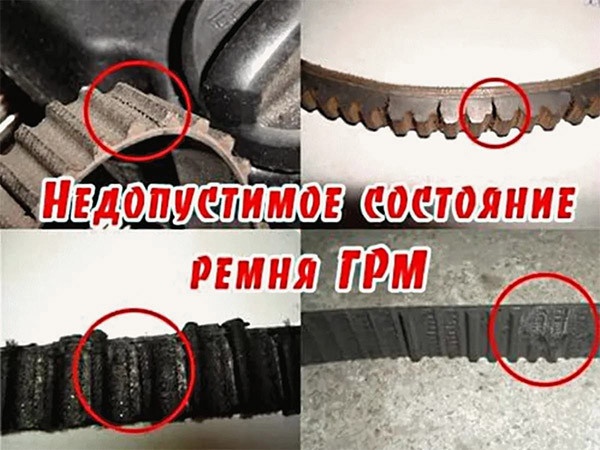
In addition, the G4GC timing belt must be replaced if it has:
- loosening or delamination at the ends;
- signs of wear on the tooth surface;
- traces of oil;
- cracks, folds, damage, delamination of the base;
- holes or bulges on the outer surface of the timing belt.
When replacing, it is better to know the tightening torque of the cylinder head bolts.
Tools and spare parts
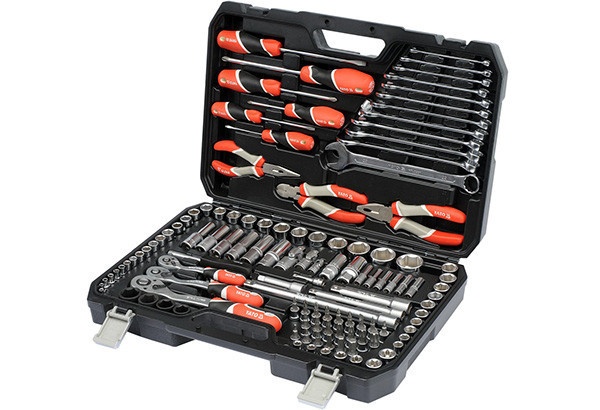
Listed below are the tools and parts you will need to work with the G4GC.
In particular, to replace you need:
- necklace;
- keys "14", "17", "22";
- pliers;
- screwdriver;
- end heads "for 10", "for 14", "for 17", "for 22";
- expansion;
- hex key "5".
Also, to work with the strap, you will need parts with the following article numbers:
- bolt М5 114-061-2303-KIA-HYUNDAI;
- bolt М6 231-272-3001-KIA-HYUNDAI;
- bypass roller 5320-30710-INA;
- crankshaft front oil seal G4GC 2142-123-020-KIA-HYUNDAI;
- timing belt protector 2135-323-500-KIA-HYUNDAI and 2136-323-600-KIA-HYUNDAI;
- timing belt 5457-XS GATES;
- timing roller 5310-53210-INA;
- protective cover gasket 2135-223-000-KIA-HYUNDAI;
- crankshaft flange 2312-323000-KIA-HYUNDAI;
- washer 12mm 2312-632-021 KIA-HYUNDAI;
- hex bolts 2441-223-050 KIA-HYUNDAI.
Change timing G4GC
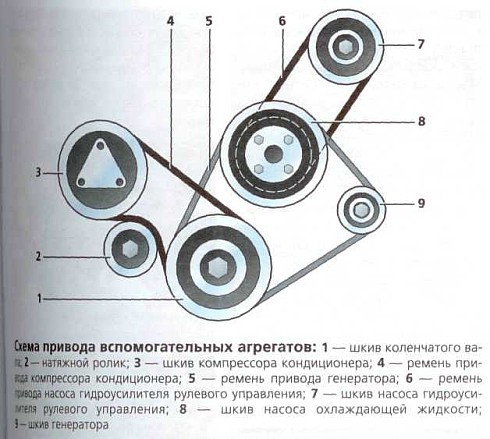
Before removing the accessory drive belts, loosen the four 10 bolts that secure the G4GC pump pulleys. The fact is that if this is not done immediately, it will be extremely difficult to stop the bomb.
Having loosened the upper and lower bolts of the hydraulic booster, it is necessary to change it to the motor. Under the hydraulic booster is a generator.
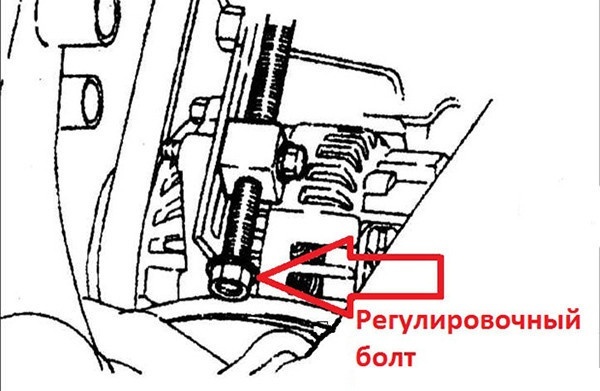
Loosen the adjusting screw as much as possible
After loosening the lower retainer bolt, unscrew the adjusting bolt as much as possible.
Now you can remove the alternator belt and power steering G4GC. By unscrewing the screws securing the pump pulleys, you can remove the latter. Remembering in what order they were located and from which side they turned to the bomb.
By removing the four "10" bolts from the timing cover, you can remove the guard and lift the G4GC engine.
We remove the protection and raise the engine. We unscrew the three nuts and one bolt that hold the engine mount. (Website link) Remove the cover and bracket. (Link)
By unscrewing the three screws and nuts that secure the engine mount, you can remove both the cover and the mount.
Remove the right front wheel and unscrew the plastic fender. (Link)
You can then remove the right front wheel and unscrew the plastic fender.
Before us is the crankshaft pulley and the air conditioning belt tensioner. (Link)
Now you can see the crankshaft pulley and the belt tensioner.
We unscrew the tension screw until the air conditioner belt is loosened and remove it. (Link)
It remains to unscrew the tension bolt until the belt loosens and it can be replaced.
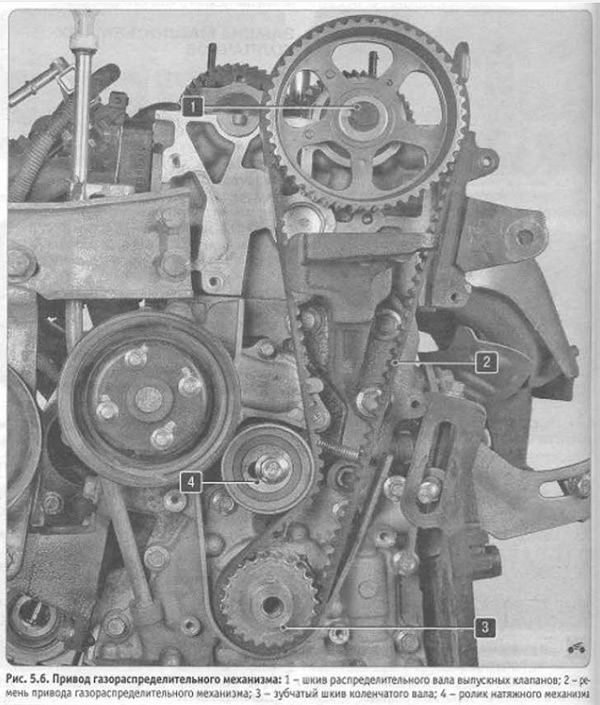
Tags and setting TDC
For the crankshaft bolt, be sure to rotate the crankshaft so that the marks on the pulley and the mark with the letter T on the protective cap match. (Link)
Next, you need to set the so-called "top dead center". Clockwise to the bolt, you need to turn the crankshaft of the G4GC engine so that the marks on the pulley and the mark in the form of the letter T on the timing cover match.
There is a small hole at the top of the camshaft pulley, not a groove in the cylinder head. The hole must line up with the slot. (Link)
There is a small hole in the upper part of the camshaft pulley, it is worth mentioning right away that this is not a groove in the cylinder head. This hole must be located directly opposite the slot. It is not very convenient to look there, but you can check the correctness as follows: insert a suitable metal stick (for example, a drill) into the hole. Looking from the side, it remains to understand how accurately to hit the target.
We unscrew the screw that holds the crankshaft pulley and remove it together with the protective cap. (Link)
After unscrewing the bolt fixing the crankshaft pulley, it must be removed together with the protective cap. To block this part, you can use a cork of your own making.
We unscrew the four screws that hold the bottom protective cover. (Link)
It remains to unscrew the four screws that hold the bottom protective cover, and remove it. The mark on the crankshaft must be in the correct location.
Remove the protective cover. The mark on the crankshaft must match. (Link)
Rollers and timing belt installation G4GC
Having unscrewed the tension roller, you can safely remove it. Just remember how it was installed at first, so that you can correctly return it to its place later.
We unscrew the tension roller and remove it. (Link)
Next, you can remove the G4GC timing belt, and at the same time remove the bypass roller, which is located on the right side, in the center of the cylinder block. You can install new parts.
Posting new videos. The tension roller has tension directions indicated by an arrow and a mark to which the arrow must reach when the tension is correct. (Link)
The tensioner is marked with the direction of tension and there is a mark that the arrow should reach (indicated above) if the tension is correct. It is important to ensure that absolutely all notes match.
And only now is it possible to install a new timing belt. This is required in the following sequence: starting from the crankshaft, continue to the bypass roller, then to the camshaft and end at the tension roller.
The lower branch of the belt must be in a taut position. To fix it, you need to turn the camshaft pulley clockwise a couple of degrees, then put on the belt and return the part to its previous position. For greater reliability, you must once again make sure that the labels are placed correctly.
Using a hex wrench, turn the tension roller until the arrow lines up with the mark.
Using a hex wrench, turn the tension roller until the arrow lines up with the mark. Next, you need to tighten it up and, turning the crankshaft a couple of turns, again make sure that the marks match.
It is also worth checking the timing belt tension in the direction of the arrow. Experts say that the procedure is successful if a load of a couple of kilograms is applied to the strap and it does not sag by more than 5 mm. Of course, it is difficult to imagine how to do this. Yes, in addition, also take action. But, if all the markings match and the stretch is not in doubt, you can assemble the G4GS movement.
Torque


Conclusion
Now you know how to replace the G4GC timing belt without contacting a service. Everything can be done by hand. It is only important to constantly monitor the compliance of the tags. And then everything will be just right!