Description of timing belt replacement for Hyundai Tucson
Content
Hyundai Tucson 2006 with 16-valve G4GC engine (DOHC, 142 hp). Scheduled timing belt replacement at 60 km. Although this engine is equipped with variable intake valve timing (CVVT), no special tools are required to change the timing belt. We also changed all the belts on the assembled units, there are three of them, a tensioner and a bypass roller.
Necessary materials
Since the pump is not driven by the timing belt, we did not change it. The whole procedure lasted two and a half hours, during which time they drank four cups of coffee, ate two sandwiches and cut their finger.
Step-by-step instructions for replacing the timing belt
Let's start.
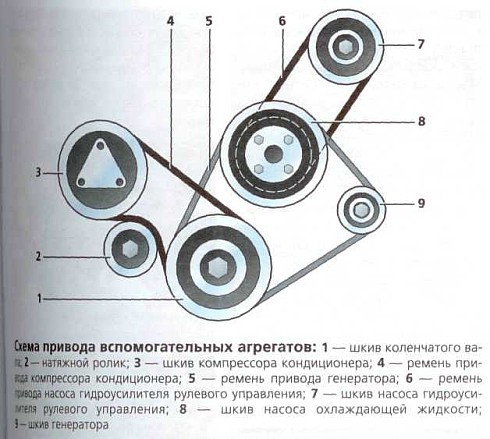
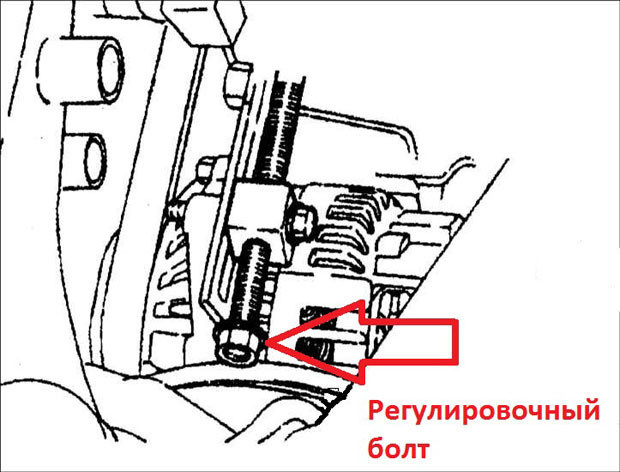
Service belt diagram.
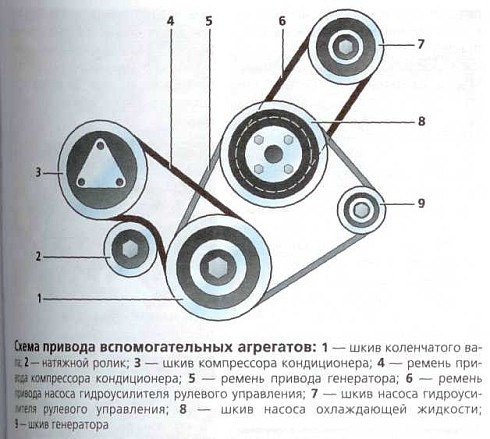
Before removing the accessory drive belts, loosen four of the ten bolts that hold the pump pulleys. If this is not done now, then after removing the belts it will be very difficult to block it. We loosen the upper and lower bolts of the hydraulic booster and transfer it to the engine.
There is a generator under the hydraulic booster, it was not possible to photograph. We loosen the lower mounting bolt and unscrew the adjusting bolt to the maximum.
Remove the alternator and power steering belt. We unscrew the screws that hold the pump pulleys and remove them. We remember that it was small below and from which side they stood to the pump.
We unscrew the four bolts of the top ten of the sewn timing cover.
We remove the protection and raise the engine. We unscrew the three nuts and one bolt that hold the engine mount.
Remove the cover.
And support.
Remove the right front wheel and unscrew the plastic fender.
Before us appeared the crankshaft pulley and the air conditioning belt tensioner.
We unscrew the tension screw until the air conditioner belt is loosened and remove the latter.
And now the fun part.
Set top dead center
For the crankshaft bolt, be sure to rotate the crankshaft so that the marks on the pulley and the mark with the letter T on the protective cap match. Taking pictures is very inconvenient, so we will show the captured details.
There is a small hole at the top of the camshaft pulley, not a groove in the cylinder head. The hole must line up with the slot. Since it is very inconvenient to look there, we check it like this: we insert a flat piece of iron of a suitable size into the hole, I use a thin drill. We look from the side and see how accurately we hit the target. In the photo, the marks are not aligned for clarity.
We unscrew the screw that holds the crankshaft pulley and remove it together with the protective cap. To block the pulley, we use a homemade stopper.
We unscrew the four screws that hold the bottom protective cover.
We are removing it. The mark on the crankshaft must match.
We unscrew the tension roller and remove it. We remember how he got up.
We remove the timing belt and the bypass roller, which is located on the right in the center of the cylinder block.
Posting new videos. The tension roller has tension directions indicated by an arrow and a mark to which the arrow must reach when the tension is correct.
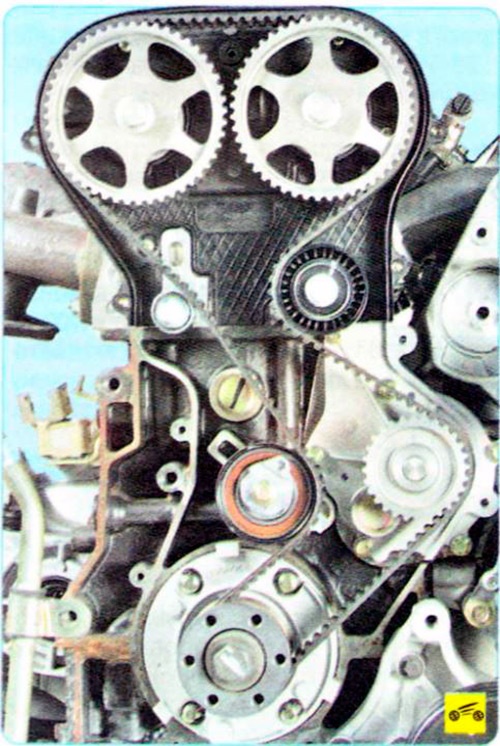
We check the coincidence of milestones.
Installing a new timing belt
First, we install the crankshaft pulley, bypass pulley, camshaft pulley and idler pulley. The descending branch of the belt must be tensioned, for this we turn the camshaft pulley clockwise by one or two degrees, put on the belt, turn the pulley back. Check all labels again. We turn the tension roller with a hexagon until the arrow matches the mark. We tighten the tension roller. We turn the crankshaft twice and check the coincidence of the marks. We also check the timing belt tension in the direction of the arrows on the tension roller. The smart book says that the tension is considered correct if, when a load of two kilograms is applied to the strap, its sagging is five millimeters. It's hard to imagine how to do it.
If all the marks match and the voltage is normal, proceed to assembly. I had to suffer with the pump pulleys, although they have a centering groove, it is very inconvenient to hold them and simultaneously fill the bolts, since the distance to the stringer is about five centimeters. Install all parts in the reverse order of removal. Refill any fluids that have been drained. We start the car and with a feeling of deep complacency we move forward towards adventure. Here is a relatively simple procedure for replacing a timing belt on a Tusan.