Do-it-yourself wheel painting - cast, stamping, photo and video
Wheel disks have to endure the most difficult tests: rain, snow, mud, various chemicals that are used to melt snow and ice. But the worst thing is, of course, the roads are not of the best quality. Drivers do their best to avoid pits and bumps, but over time, the disks come to the point where the question arises of buying new ones or restoring old ones.
Restoring a disc is a complex process and painting plays an important role in this. Let's talk about how to save disks and paint them yourself, without overpaying for car service services.
Disks, as you know, are of three types:
- stamped;
- light alloy;
- forged.
The process of painting them is generally the same, with the only difference being that stamped wheels are painted, rather, not so much for beauty, but for protection against corrosion, because most drivers still put caps on top of them. Cast and forged wheels are quite expensive to change after every run into a pit or a chip.

What do you need to paint wheels?
Before starting work, you need to prepare everything you need.
First, you need paint. Most drivers prefer to buy powder paint in spray cans, it is very easy to apply, it lays down in an even layer without streaks.
You can also buy acrylic paint in jars, but you can hardly apply it with a brush in an even layer, so you need to take care of the spray gun.
Secondly, a primer is required, it prepares the metal surface for paint. If the primer is not applied, then the paint will eventually begin to crack and crumble. Also, don't forget about the lacquer that you use to cover the painted wheels for shine and protection.
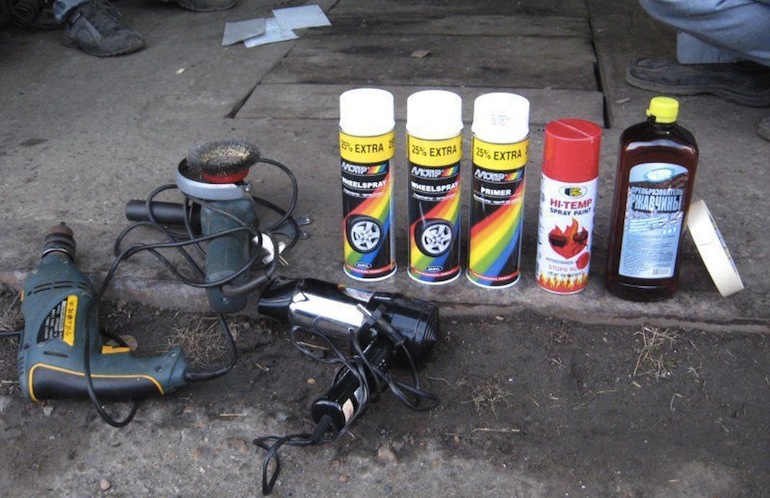
In addition to paint and varnish, you will need:
- Painting tape;
- solvent or white spirit for degreasing the surface;
- sandpaper for sanding and removing small bumps.
To make your hard work easier, you can also use a drill with attachments for faster surface treatment of the disc, a hair dryer to dry the paint faster.
It is best, of course, to have sandblasting equipment in your garage, after which there will be no traces of rust or old paintwork, but, unfortunately, not every driver can boast of having a sandblaster.
Surface preparation
Before you start painting, you need to remove the old coating from the disk. This can be done with sandpaper, a drill with a nozzle or sandblasting. The first option is the most difficult, but you should try to completely remove the old paint. If possible, it is better to disassemble the wheel, although many drivers work with the disc without removing the tire.
It may also turn out that the disk has chips and minor defects. You can get rid of them thanks to automotive putty. It is necessary to putty after removing the old layer of paint and degreasing the surface with a solvent or gasoline. After the defects are hidden under a layer of putty, it will be necessary to sand these places until they become even and invisible.
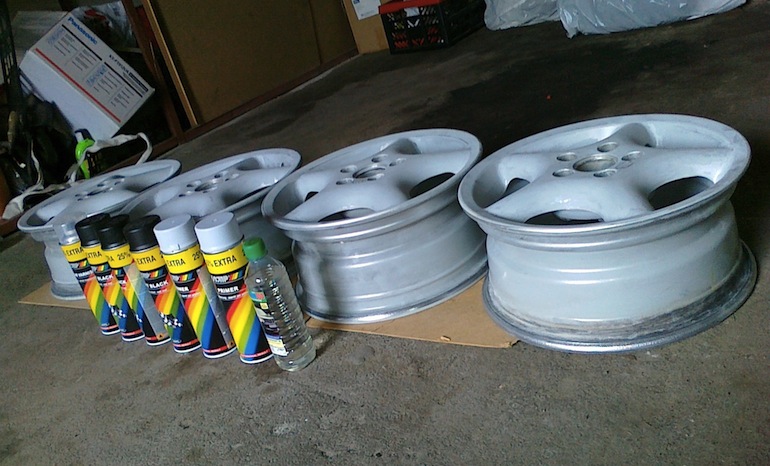
Applying a primer is also a preparatory stage. The primer increases the adhesion of the paintwork to the metal, it is sold in cans. You need to apply it in two or three layers.
Do not forget that the next layer must be applied after the previous one has dried. Fortunately, these automotive primers and paints dry very quickly - 20-30 minutes, so you don't have to wait long.
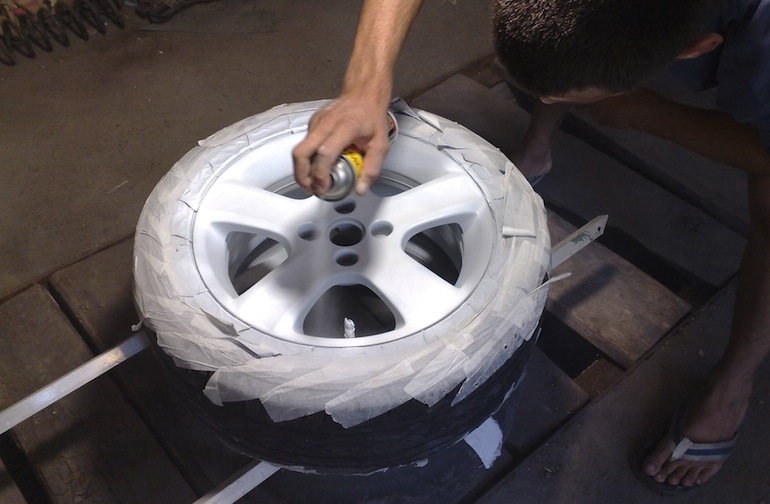
Fully primed wheels look absolutely like new. Remember to cover the tires with masking tape and cellophane if you paint without removing the rims.
Painting and varnishing
It is advisable to start painting after the primer is completely dry - leave the discs overnight in the garage at a temperature not lower than +5 - +10 degrees. But if you are in a hurry, you can start painting immediately after the last coat of primer has dried.
The color usually chosen is silver metallic, although the choice is now very large, any idea can be realized, yellow discs look beautiful, or multi-colored when the spokes and rim are painted black, and the inside of the disc is red.
Hold the can at a distance of 20-50 centimeters and spray the paint evenly. You need to go through everything very carefully so that there are no unpainted places left. Apply paint in several layers - usually three. Wait for complete drying. When the last layer has been applied, leave them to dry completely.
Varnishing is carried out in the same order - using a spray can, we spray the varnish, wait for one layer to dry, then apply the next one, and so on three times. Do not forget that the final result depends on the quality of varnishing. If you are stingy and buy a cheap varnish, then it will begin to become cloudy over time, especially on the front wheels due to the increase in temperature during braking.
But the best test will be winter - in the spring you will see if you managed to paint the wheels well.
The best video compilations showing how self-made alloy wheels. Including steps: Preparation, application of paint, drying.
Loading…