Checking and repairing the VAZ 2107 generator
Content
A simple VAZ 2107 device allows drivers to independently maintain and repair their car. However, there may be problems with some nodes. For example, with a generator set, since not all motorists have the appropriate knowledge in working with electrical appliances.
VAZ 2107 generator: purpose and main functions
Like on any other car, the generator on the "seven" is paired with a battery. That is, these are two power sources in a car, each of which is used in its own modes. And if the main task of the battery is to maintain the operability of electronic devices during the period when the engine is turned off, then the generator, on the contrary, generates current only when the engine is running.
The main task of the generator set is to generate electrical energy by feeding the charge of the battery. That is, in many ways (if not all), the performance of the machine depends on how well the generator and battery work.
Generator sets on the VAZ 2107 have been produced since 1982. Their factory marking is G-221A.
Technical characteristics of the G-221A generator
Two types of generators (carburetor and injection) were installed on the VAZ 2107, each of which had its own factory marking: 372.3701 or 9412.3701. Therefore, the characteristics of the operation of devices may differ, since injection models consume more electricity, respectively, and the generator power should be higher.
All VAZ 2107 generators have the same nominal voltage - 14 V.
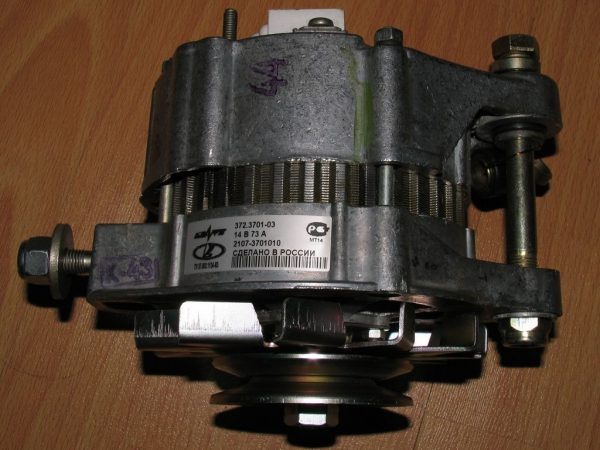
Table: comparison of the characteristics of different modifications of generators for the VAZ 2107
| Generator name | Maximum recoil current, A | Power, W | Weight, kg |
| VAZ 2107 carburetor | 55 | 770 | 4,4 |
| VAZ 2107 injector | 80 | 1120 | 4,9 |
What generators can be installed on the "seven"
The design of the VAZ 2107 allows you to install not only the G-221A generator. Therefore, the driver, if necessary, can supply a more powerful device, however, in this case, some changes will have to be made to the electrical circuit of the car. The question arises: what is the reason for the desire of a motorist to change the “native” generator?
G-221A was the optimal device for equipping cars in the era of the beginning of their mass production. However, a lot of time has passed since the 1980s and today almost every driver uses modern electronic devices:
- acoustic system;
- navigators;
- additional lighting devices (tuning), etc.
 Freelance lighting devices consume the most electricity.

Accordingly, the G-221A generator cannot cope with high loads, which is why drivers begin to look for more powerful installations.
On the "seven" you can install at least three more powerful devices:
- G-222 (generator from Lada Niva);
- G-2108 (generator from the GXNUMX);
- G-2107–3701010 (injector model for a carburetor machine).
It is important that the last two models do not require changes in the design of both the generator housing and its mounts. When installing a generator from the Niva, you will have to do some refinement.
Video: the principle of the generator

Connection diagram G-221A
As an electronic device, the generator needs to be used correctly. Therefore, the scheme of its connection should not cause ambiguous interpretation. It should be noted that the drivers of the "sevens" can usually easily connect all the terminals of the generator themselves, since the circuit is accessible and understandable to everyone.
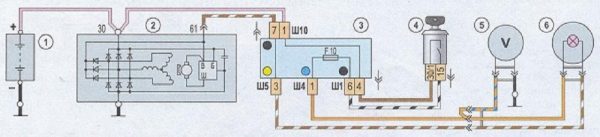
Many car owners are wondering where which wire should be connected when replacing the generator. The fact is that the device has several connectors and wires, and when replacing it, you can easily forget which wire goes where:
- orange is not useful for connecting, you can leave it as it is or connect it directly to gray to autostart the car;
- a gray thick wire goes to the brushes from the relay-regulator;
- gray thin wire connects to the relay;
- yellow - control light coordinator on the control panel.
When working independently with the G-221A, it is better to sign the purpose of the wires, so that later you do not connect them by mistake.
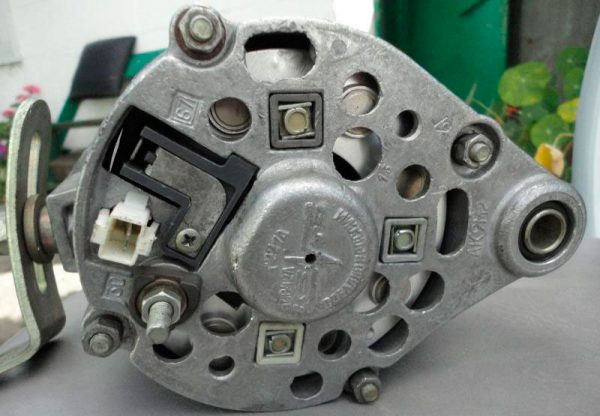
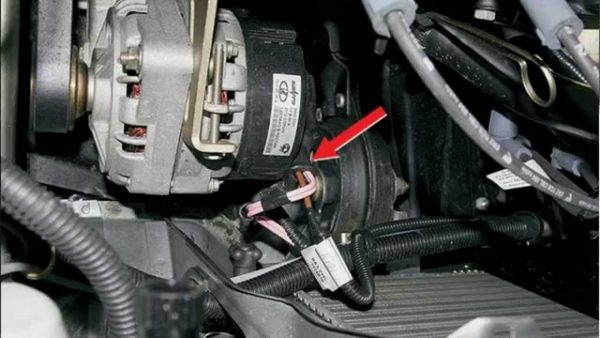
Generator device VAZ 2107
Structurally, the generator on the "seven" has the shape of a cylinder. There are many small parts hidden in the cast case, each of which performs its own function. The main elements of the G-221A are the rotor, stator and covers, which are cast only from a special aluminum alloy.
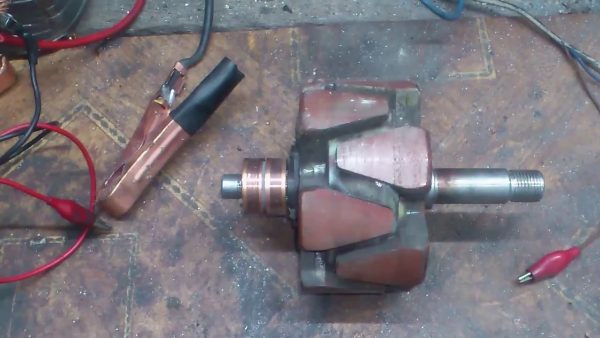
Rotor
The G-221A rotor consists of a shaft with a corrugated surface, on which a steel sleeve and poles are pressed. The sleeve and beak-shaped poles together form the so-called core of an electromagnet. The core just generates an electromagnetic field during the rotation of the rotor shaft.
The excitation winding is also located inside the rotor. It is placed between the poles.
The movable element of the rotor - the corrugated shaft - rotates thanks to two ball bearings. The rear bearing is mounted directly on the shaft, and the front bearing is fixed on the generator cover.
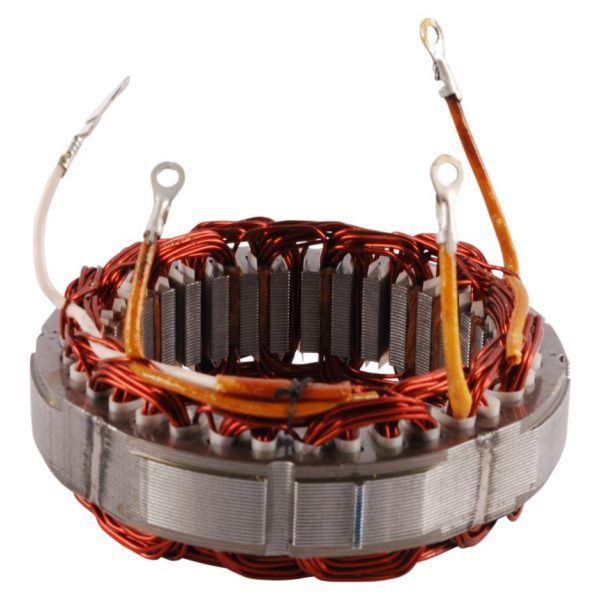
Stator
The stator is assembled from special plates 1 mm thick. The plates are made from electrical steel. It is in the grooves of the stator that the three-phase winding is placed. Winding coils (there are six in total) are made of copper wire. In fact, the electromagnetic field coming from the rotor core is converted by the coils into pure electricity.
Rectifier
The generator in the described configuration produces only alternating current, which is clearly not enough for the smooth operation of the car. Therefore, in the G-221A case there is a rectifier (or diode bridge), the main task of which is to convert AC to DC.
The diode bridge has the shape of a horseshoe (for which it received the corresponding nickname among motorists) and is assembled from six silicon diodes. On the plate, three diodes have a positive charge and three have a negative charge. A contact bolt is installed in the center of the rectifier.
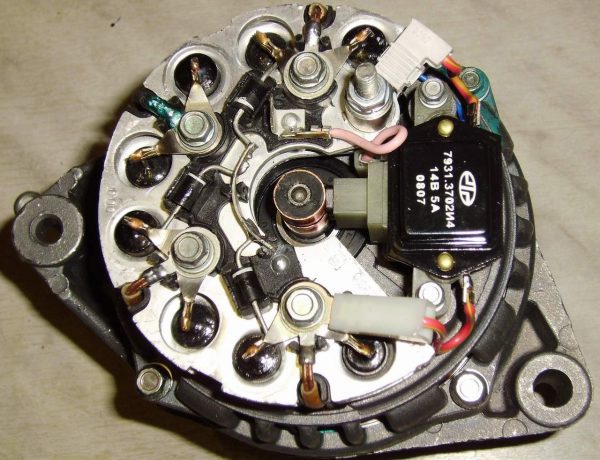
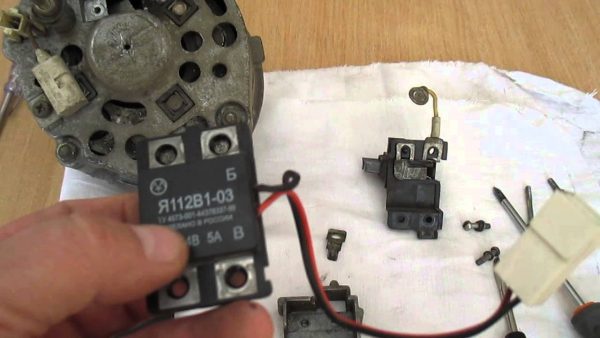
Voltage regulator
The voltage regulator on the VAZ 2107 is made together with the brush holder. The device is a non-separable unit and is fixed to the rear cover of the generator. The regulator is designed to maintain the rated voltage in the network in any mode of engine operation.
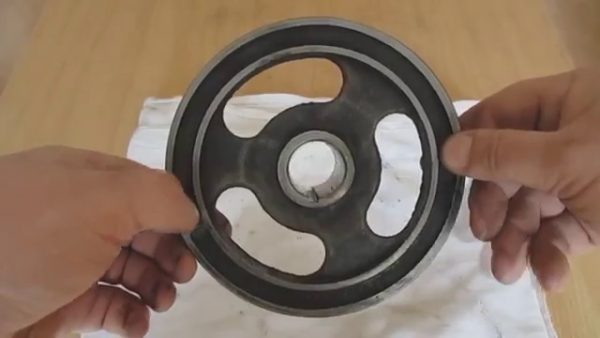
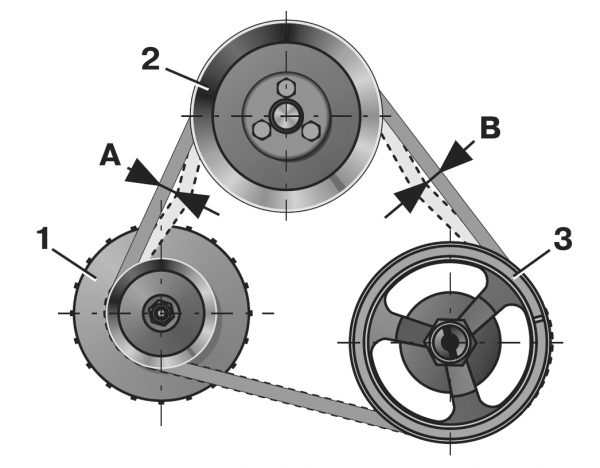
Pulley
The pulley is not always considered an integral part of the generator, since it is mounted separately on the already assembled housing. The main task of the pulley is the transfer of mechanical energy. As part of the generator, it is connected by a belt drive to the pulleys of the crankshaft and pump. Therefore, all three devices work inextricably linked with each other.
Generator malfunctions
Unfortunately, such mechanisms have not yet been invented that would not fail under the influence of time and constant loads. The VAZ 2107 generator is designed for many years of operation, but in some cases this is prevented by minor breakdowns and malfunctions of its components.
It is possible to identify malfunctions in the operation of the generator without the help of service station specialists: you just need to carefully monitor all the changes that occur with the car while driving.
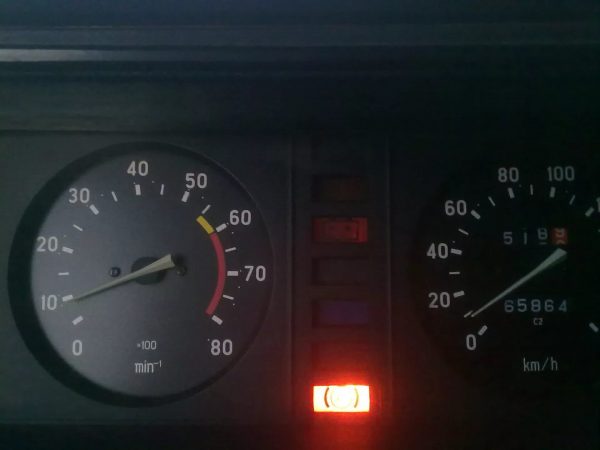
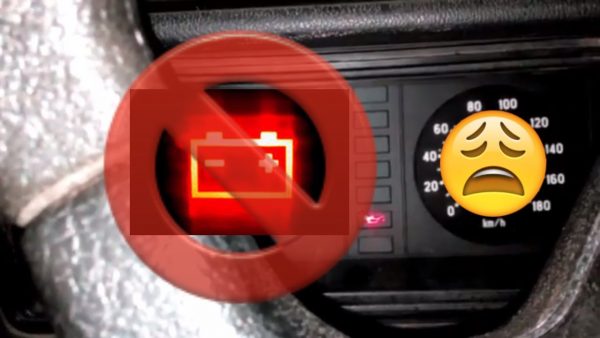
Charging indicator light on the instrument panel
In the interior of the VAZ 2107 on the dashboard there is an output of several signaling devices. One of them is the battery charging indicator light. If it suddenly lights up red, it means that there is not enough charge in the battery, there are problems with the generator. But the signaling device does not always indicate problems with the generator itself, most often the lamp works for other reasons:
- slippage of the generator belt drive - you will need to stop the machine and adjust the degree of belt tension;
- damage to the control lamp relay, so it does not work correctly - it is recommended to “ring” the relay in the mounting block and, if necessary, replace it;
- breakage of contacts in the excitation winding is a more serious damage that requires the generator to be removed from the car, disassembled and search for a break;
- strong wear of the brushes in the brush holder - they will need to be replaced, which is quite simple;
- short circuit in the rectifier (most likely, one of the silicon diodes burned out) - it is recommended to disassemble the generator, ring the diodes and replace the failed element.
The battery is not charging
Drivers of the VAZ 2107 often encounter such a problem: the generator seems to be working properly, but there is no power to the battery. The problem may lie in the following malfunctions:
- the alternator belt is stretched - it is necessary to check the degree of its tension or replace it with a new one;
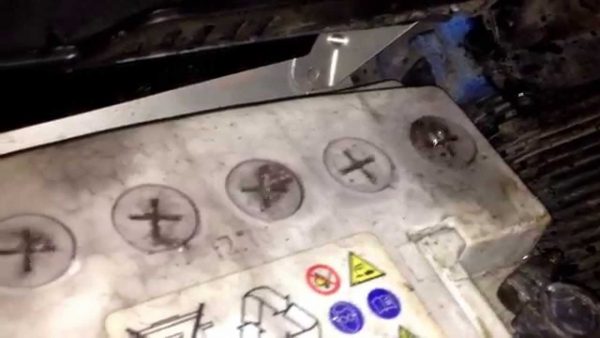
- loosening of the fastening of the wire lugs - just tighten all the fastening connections and carefully clean the contacts and connectors;
- malfunction of the battery itself;
- damage to the wiring - it is recommended to ring all the wires between the battery and the generator and replace the damaged sections.
Battery boils away
A battery that boils away is a sign that the battery does not have long to live. After that, the battery will not be able to fully work, so it will soon have to be replaced. However, so that the replacement does not lead to the same unfortunate consequences, it is necessary to find the cause of the boil, which may be:
- contamination of the contact between the "mass" and the body of the generator regulator - it is necessary to clean the contact;
- damage to the voltage regulator board itself - board replacement is recommended;
- defective battery - if the battery began to boil away immediately after replacement.
When driving, there is a noise and rattle from the generator
The generator has a rotating rotor, so it must make noise during operation. However, if these sounds become increasingly loud and unnatural, you should deal with the cause of their occurrence:
- loosening the nut on the pulley - you need to tighten the nut and check the degree of belt tension;
- bearing wear - in this case, the driver may hear a loud rattle and even a howl while driving, you will need to press the old bearings off the shaft and install new ones;
- short circuit in the winding - the stator must be completely replaced;
- squeaking of brushes - it is recommended to clean the brushes from adhering dirt.
Generator check
Malfunctions with the generator set can be avoided by periodically diagnosing the condition of this unit. Checking the performance of the generator gives the driver confidence in its proper operation and that there is no cause for concern.
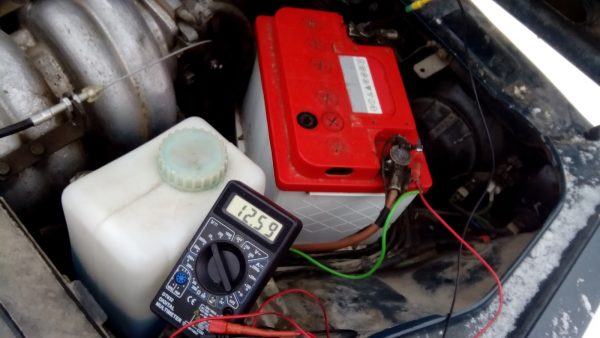
Do not test the alternator by disconnecting it from the battery while the engine is running. This is fraught with power surges in the network and a short circuit.. The easiest way is to contact the specialists of the service station to check the performance of the generator at the stand. However, the convinced "seven-guides" have long adapted to check the G-221A on their own with a multimeter.
For diagnostics, you will need a multimeter of any type - digital or indicator. The only condition: the device must work correctly in the measurement mode of both AC and DC.
Operating procedure
Two people are required to diagnose the health of the generator. One of them should be in the cabin and start the engine on a signal, the second should directly monitor the readings of the multimeter in different modes. The order of work will be as follows.
- Switch the instrument to DC mode.
- With the engine off, connect the multimeter first to one battery terminal, then to the second. The voltage in the network should not be less than 11,9 and more than 12,6 V.
- After the initial measurement, start the engine.
- At the time of starting the engine, the measurer must carefully monitor the readings of the device. If the voltage has dropped sharply and does not rise to a working state, this indicates the development of the generator resource. If, on the contrary, the voltage indicator is higher than normal, then soon the battery will boil away. The best option - when starting the motor, the voltage dropped a little and immediately recovered.If the voltage measured with the engine running is between 11.9 and 12.6 V, then the alternator is OK.
Video: test procedure for a generator with a light bulb

Generator repair on VAZ 2107
You can repair the generator without outside help. The device is easily disassembled for spare parts, so you can replace old parts even without the appropriate work experience. However, it should be borne in mind that the generator is primarily an electrical device, so in no case should you make a mistake during assembly.
The standard procedure for repairing a generator on a VAZ 2107 fits into the following scheme.
- Dismantling the device from the car.
- Generator disassembly (at the same time troubleshooting is carried out).
- Replacement of worn parts.
- Assembly of the structure.
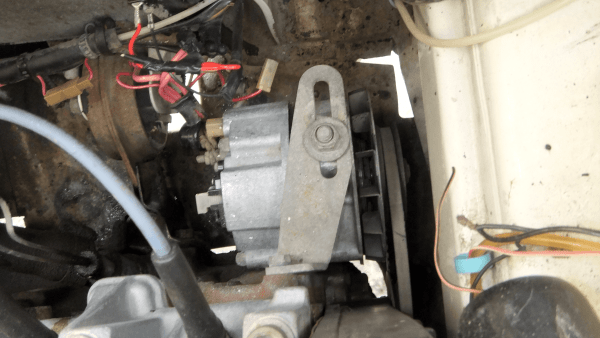
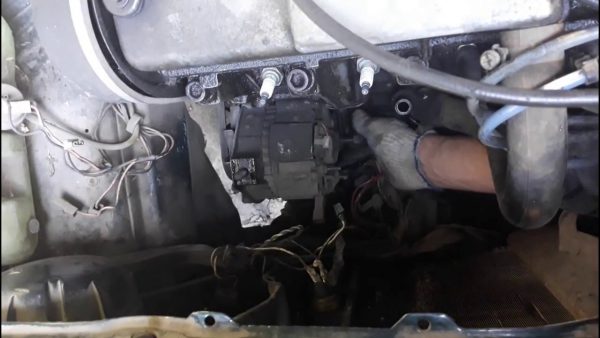
- Mounting on a car.The generator is located in the engine compartment on the right side of the engine
Removing the generator from the car
Dismantling works take about 20 minutes and require a minimum set of tools:
- open-end wrench for 10;
- open-end wrench for 17;
- open-end wrench for 19;
- mounting spatula or pry bar.
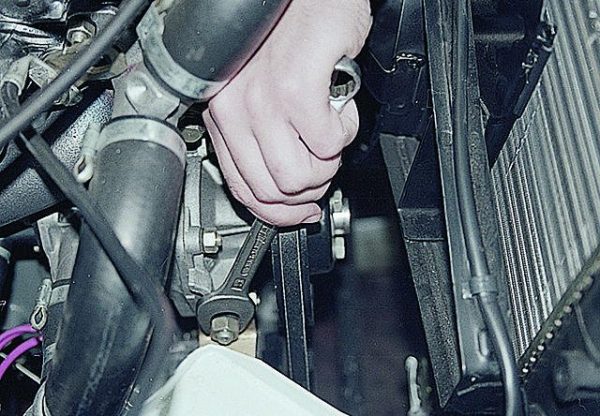
It is best to remove the generator from the car when the engine is cold, as the device gets very hot during operation. In addition, you will need to jack up the car in advance and remove the front right wheel so that it is convenient to work with the body and generator mounts.
- Remove the wheel, make sure that the car is securely on the jack.
- Find the generator housing and its fastening bar.
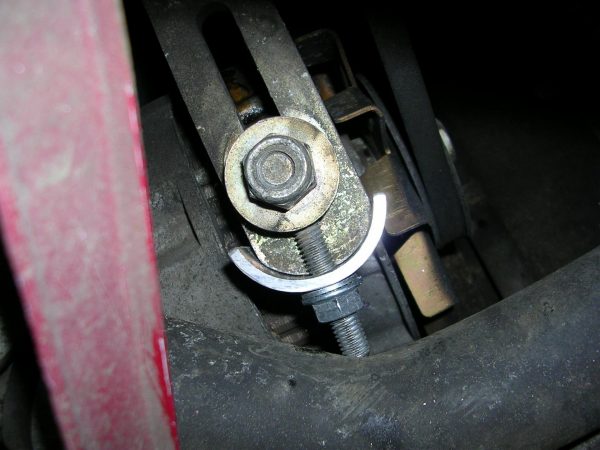
- Use a wrench to loosen the lower fixing nut, but do not unscrew it completely.The lower nut must be loosened, but not completely unscrewed.
- Unscrew the nut on the bar, also leaving it on the stud.
- Slightly move the generator housing towards the motor.
- At this time, the alternator belt will loosen, allowing it to be removed from the pulleys.After loosening all the fixing nuts, the generator housing can be moved and the drive belt removed from the pulley
- Disconnect all wiring from the generator.
- Remove loose nuts.
- Pull the generator housing towards you, remove it from the studs.The removal of the generator takes place in not very comfortable conditions: the driver has to work reclining
Immediately after dismantling, it is recommended to wipe the generator attachment points and its housing, as the surfaces can become very dirty during operation.
Video: generator dismantling

We disassemble the device
To repair the generator, you need to disassemble it. During work you will need:
- open-end wrench for 19;
- spanner key for 19;
- ratchet (you can add an extension cord);
- head 8;
- head 10;
- small hammer.
If disassembly is carried out for the first time, it is recommended to sign which part was removed from which mechanism. So, when assembling, there will be more confidence that everything is done correctly. The generator contains many different nuts, bolts and washers, which, despite their external similarity, have different characteristics, so it is of great importance where to install which element.

Disassembly of the G-221A generator is carried out in accordance with the following algorithm.
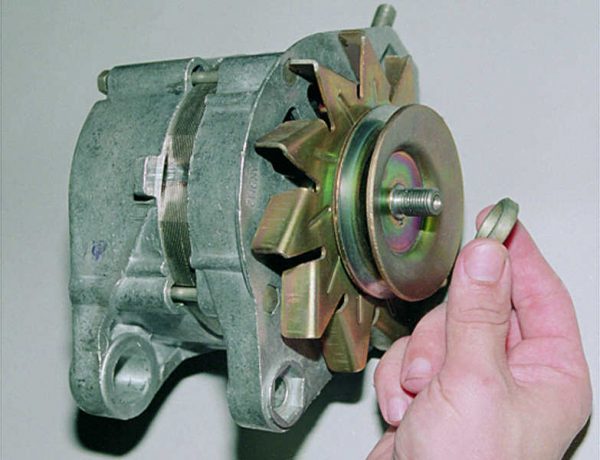
- Unscrew the four nuts from the rear cover of the generator, remove the cover.
- Remove the pulley by unscrewing the fixing nut.In order to remove the pulley, it is necessary to unscrew the fixing nut and remove the lock washer
- After dismantling the pulley, the housing is divided into two parts: one part comes out of the other. The rotor should remain in one hand, the stator in the other.
- Remove the pulley from the rotor shaft. If the pulley is tight, you can gently tap it with a hammer.
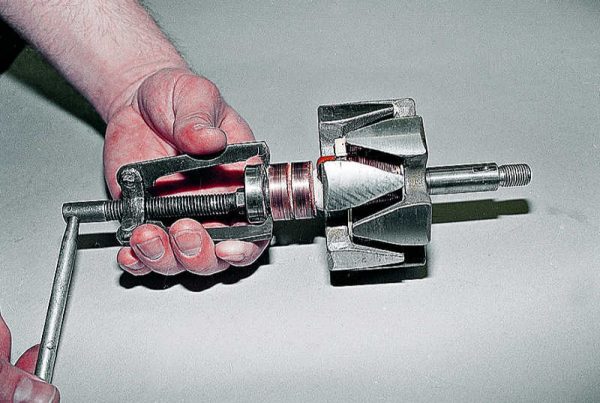
- Remove the shaft with bearings from the rotor housing.
- Press out the bearings.Bearings are most conveniently dismantled using a special puller
- Disassemble the stator for spare parts, trying not to touch the winding.
In the process of disassembly, you can immediately identify the main malfunctions of certain nodes. Accordingly, all those parts that are subject to replacement are:
- covered with strong soot;
- worn out;
- have notches, cracks and deformations on the surface.
Video: generator disassembly

Repair by own hands
The generator repair procedure is the replacement of those parts that have not passed troubleshooting. Changing bearings, diodes, windings and other components is simple: the old part is removed, a new one is installed in its place.
Spare parts for repairing a VAZ 2107 generator can be bought at almost any car dealership.
Before starting the repair, it is necessary to calculate how much the purchase of components will require. It is possible that the repair of the old generator will be impractical, since the parts will actually cost the cost of a new generator.
Video: VAZ 2107 generator repair

Generator set belt for VAZ 2107
The VAZ 2107 car was produced from 1982 to 2012. Initially, the model was equipped with a smooth drive belt (old model). Over time, the "seven" was repeatedly modified, and in the late 1990s, the generator began to work with a new type of belt with teeth.
The most popular among car owners are rubber products from the German company Bosch. These belts fit perfectly into the work of a domestic car and serve for the entire period specified by the manufacturer.
The design numbers and sizes of the belts are indicated in the operating book for the car:
- 2101-1308020 (smooth surface), dimensions - 10,0x8,0x944,0 mm;
- 2107–1308020 (serrated surface), dimensions - 10,7x8,0x944,0 mm.
How to tighten the belt on the generator
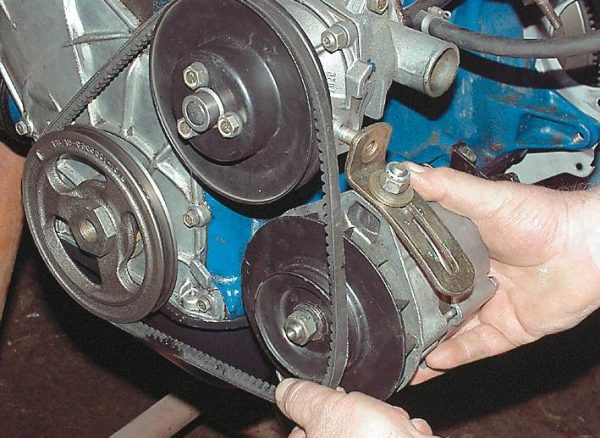
The operation of the generator, as well as the water pump, primarily depends on the correct tension of the belt on the pulley. Therefore, the existing rules cannot be neglected. The belt is installed and tensioned in the following order.
- Install the assembled generator in place by slightly tightening the fixing nuts.
- Take a pry bar and use it to fix the gap between the generator housing and the pump.
- Put a belt on the pulley.
- Without releasing the pressure of the mount, pull the belt over the pulley.
- Tighten the upper nut securing the generator until it stops.
- Check the degree of belt tension - the rubber should not sag, but a strong stretch should not be allowed.
- Tighten the lower alternator mounting nut.A well-tensioned drive belt should give a little flex when pressed, but not be excessively loose.
Video: how to tighten the alternator belt

Checking the degree of tension is carried out with two fingers. It is necessary to press on the free part of the belt and measure its deflection. The optimal deflection is 1–1,5 centimeters.
Thus, we can say that self-maintenance of the generator on the VAZ 2107 is quite possible and does not belong to the category of impossible tasks. It is important to follow the recommendations and algorithms of a particular work in order to carry out repairs or diagnostics in a quality manner. However, if you have doubts about your skills and abilities, you can always turn to professionals for help.

