Checking and replacing steering column bearings
Content
- Check the condition and adjustment of the steering column bearing.
- Checking and replacing the steering column bearing - let's get started
- 01 - Release the steering column bearing
- 02 - Remove the upper triple clamp
- 03 - Remove triple tree from below
- 04 - Remove bearing cups
- 05 - Press in new bearing cups
- 06 - Remove the old bearing
- 07 – Insert the tapered roller bearing using the steering column bearing mandrel.
- 08 - Lubricate well, assemble, then adjust
The steering column bearing connects the front wheel to the rest of the motorcycle. It is clear that this important component has a decisive influence on road behavior and requires regular maintenance.
Check the condition and adjustment of the steering column bearing.
If you feel like you are on the back of a rattlesnake at high speeds or in long corners, the steering column bearing may be misaligned or defective. Even if, fortunately, you have never had this feeling, it is advisable to check the bearing from time to time for correct alignment.
For optimal control of the steering column bearing, consult a third party. Raise the motorcycle so that the front wheel is slightly off the ground (without a front wheel stand). If you have a center stand, have a helper sit as far back into the saddle as possible. Then grasp the bottom end of the fork with both hands and pull it back and forth. If there is play, the bearing needs to be adjusted. To do this, loosen the sliding tube clamping screws (bottom triple clamp) and the large center screw of the upper triple clamp. To adjust, lightly tighten the adjusting nut (located under the upper triple clamp) with a hook wrench. After adjustment, the bearing should be free of play and should rotate easily.
The second test checks the condition of the bearing. Set the fork straight, turn the steering wheel slightly to the right, then turn it to the left from the right position. If the fork is difficult to turn, loosen the adjuster slightly. If you feel any latching points (even very slight ones), you should replace the bearing.
However, be aware that cables, shafts and other hydraulic hoses can falsify the measurement result. The switch-on point is especially noticeable in the upright position, because this is the most commonly used position. Many motorcycles (especially older models) are still equipped with ball bearings. In the case of ball bearings, the load is only taken up by a small point on the ball; this is why the trigger point becomes noticeable over time. We recommend purchasing stronger tapered roller bearings; In fact, each roll supports the load along its entire length. Thus, the contact with the bearing cup is much wider and the load is better distributed. In addition, tapered roller bearings are often more economical than original ball bearings.
The note : To insert a new bearing when replacing, you will need a headset bearing mandrel or suitable tube.
Checking and replacing the steering column bearing - let's get started
01 - Release the steering column bearing
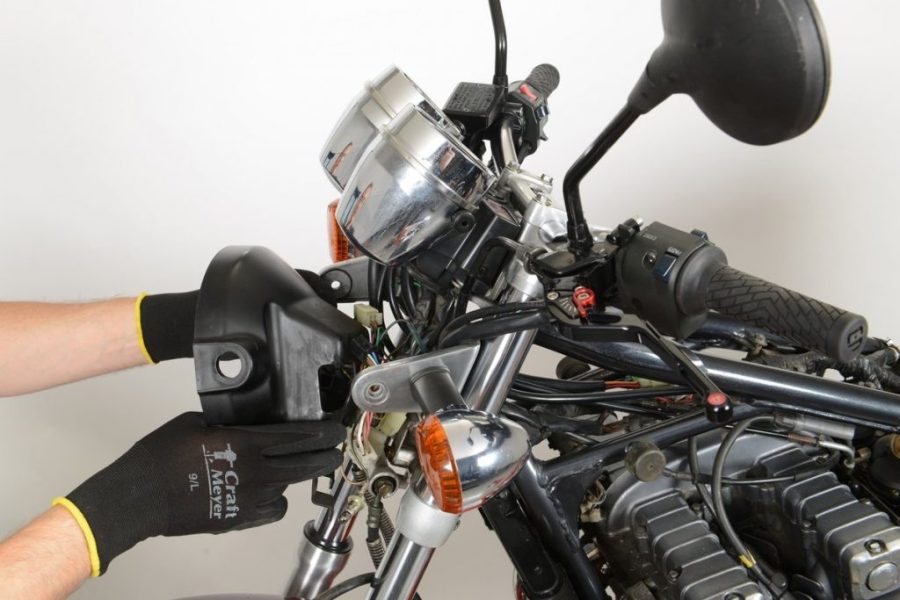
Most of the time required to complete this repair is spent removing the steering column bearing. There are two possibilities for this: either dismantle all the components piece by piece (front wheel, brake system, fork arms, handlebars, possibly a fairing, tools, etc.), or leave the various modules assembled; the second solution saves several work steps. Delete eg. steering wheel without unscrewing the various components; Set it aside carefully, along with the cables, any tools, Bowden cables and the entire brake system. Leave the brake fluid reservoir upright so that you do not have to open the brake system at any time, which will prevent air release. Whichever method you choose, we always recommend removing the tank to avoid scratches and dents. Unscrew the center triple clamping screw while the fork tubes are still in place; This way you can use a rotation limiter between the bottom triple tree and the frame.
02 - Remove the upper triple clamp

When there are only two triplet trees remaining on the top of the frame, you can remove the center nut from the top triplet tree. Then remove the top triple clamp to get a good view of the adjusting nut.
03 - Remove triple tree from below
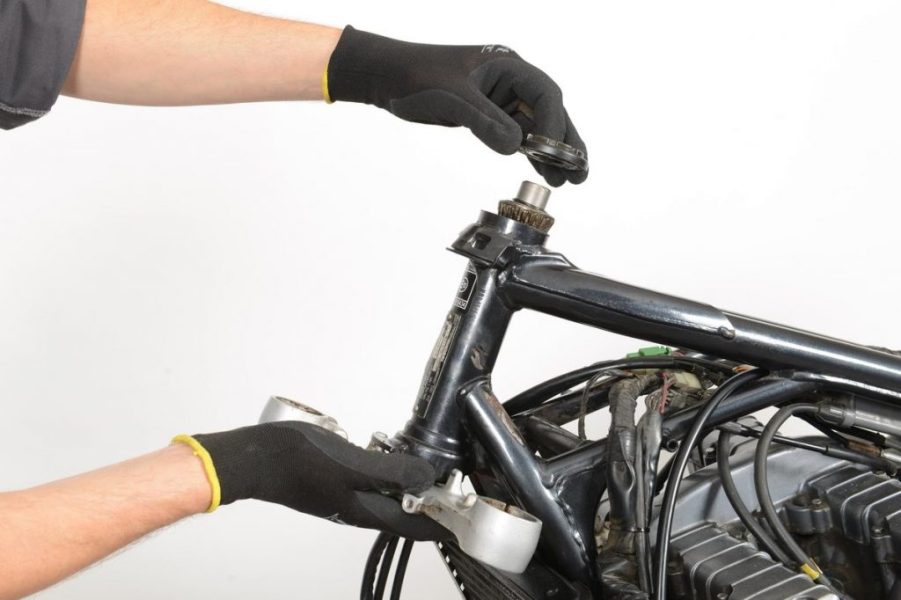
Unscrew the adjusting nut with a hook wrench while holding the lower triple clamp with your free hand so it does not fall to the ground. If you don't already have a tapered roller bearing, removing the triple tree from the bottom will drop the various balls of the lower bearing onto you.
04 - Remove bearing cups
First remove the old grease, then inspect the upper and lower bearing cups in the steering column. Use a pinhole punch to remove them. For models with built-in ball bearings, the area is large enough for the punch to be used. Models with factory fitted tapered roller bearings often have two punch slots in the frame. Bearing cups must be removed from the inside to the outside, avoiding deformation, so as not to damage the bearing support. Knock alternately left and right, in stages and without force, on the edge of the bearing cups.
05 - Press in new bearing cups
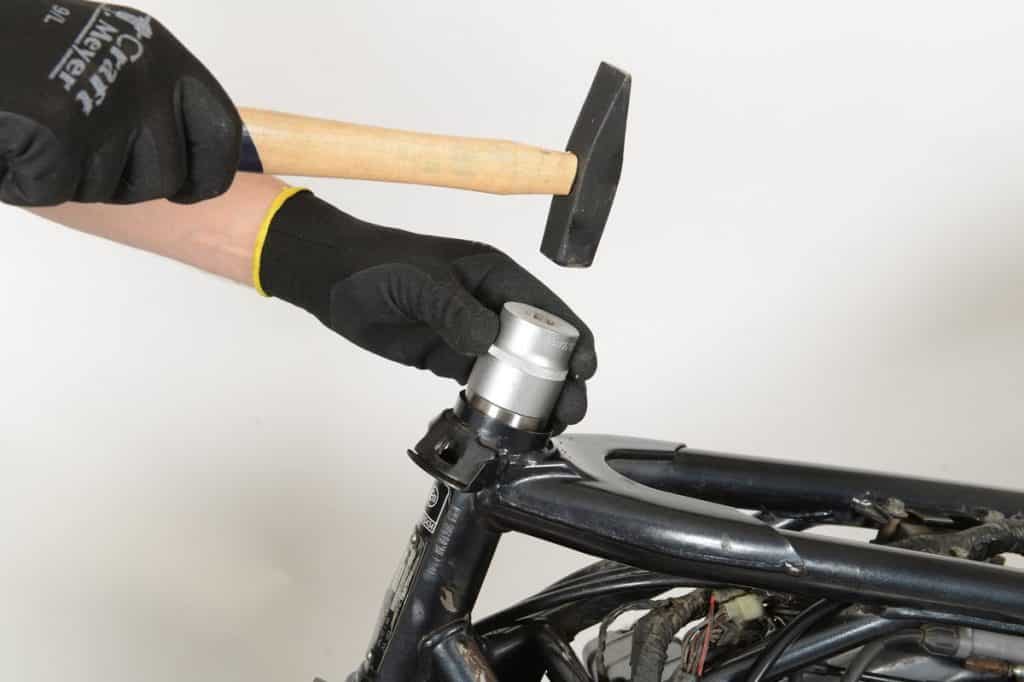
Then insert the new bearing cups into the steering column. Tip: cool the bearing cup (for example by placing the part in the freezer) and heat the steering column (with a hair dryer). Heat expansion and cold shrinkage facilitate assembly. If you don't have a dedicated tool, you can make one yourself. Take a 10mm threaded rod, two thick discs about the size of a bearing cup and press the bearings with two nuts into the cup. If you do not have a threaded rod, drive the bearing cups straight and evenly using a socket or piece of tubing that you will tap with a hammer. To avoid damage, the tool used must fit perfectly to the edge of the bearing; please note that this one is very narrow. Never hit the treadmill. Then make sure that the bearing cups are fully seated and seated perfectly in the frame head. If the bearing cups themselves do not fit into the frame head, the bearing bracket is expanded or damaged. All you have to do is go to the workshop where a technician will take a detailed look at the frame and if the bearing is too big or the cups are glued on.
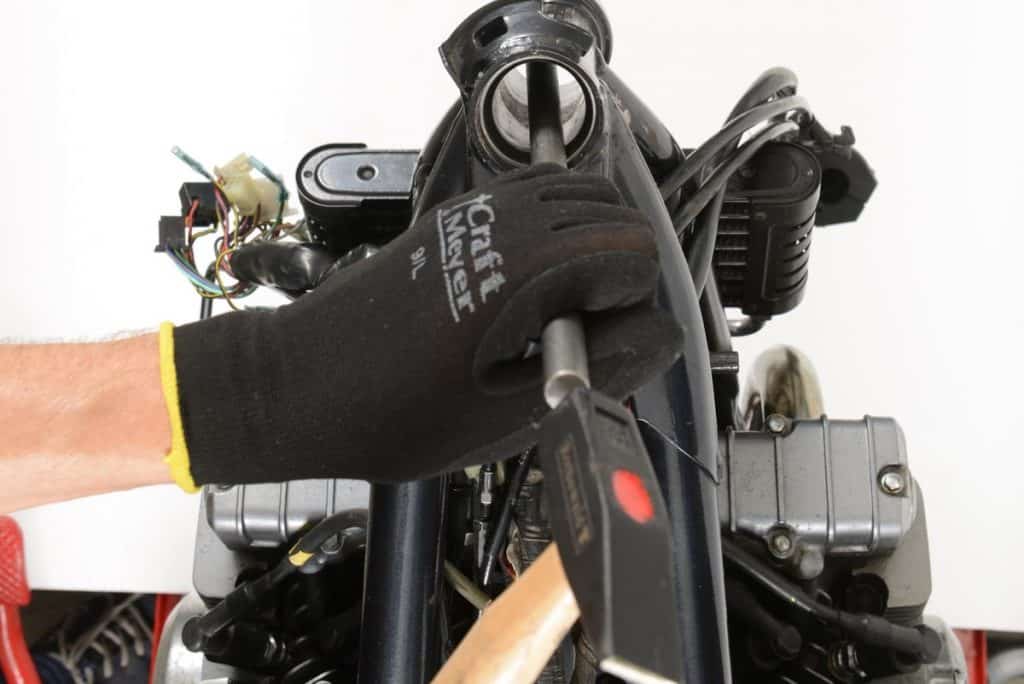
06 - Remove the old bearing
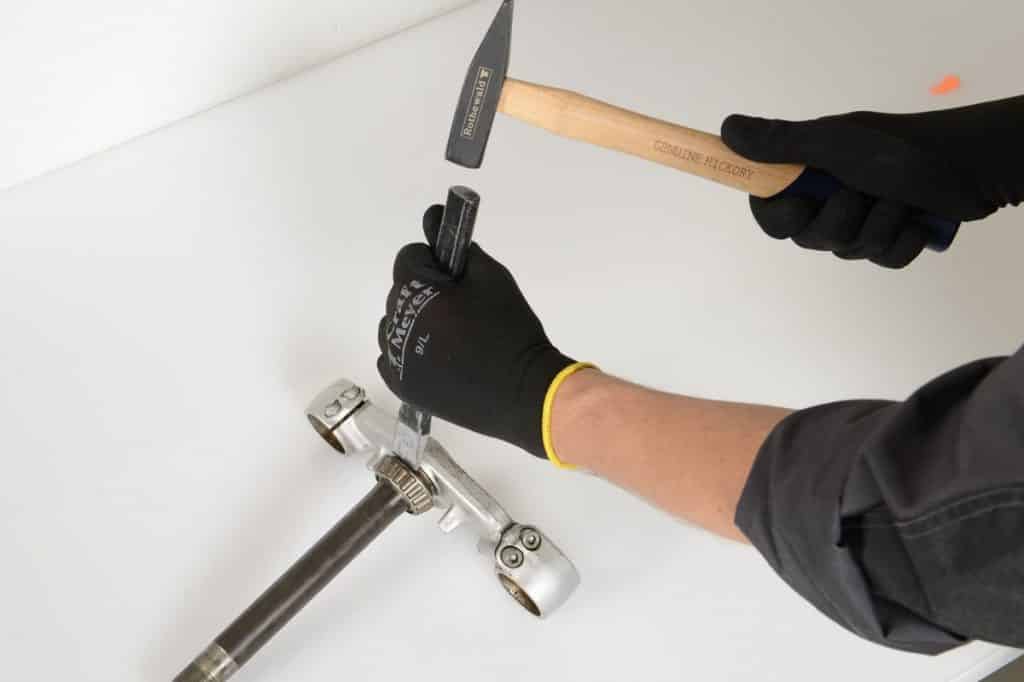
Then it is necessary to replace the pressed-in bearing of the lower triple clamp. To do this, insert the chisel into the slot between the bearing and the triple tree and press down on it with a hammer until it rises a few millimeters. You can then remove the bearing by prying it off with two large screwdrivers or tire levers.
07 – Insert the tapered roller bearing using the steering column bearing mandrel.
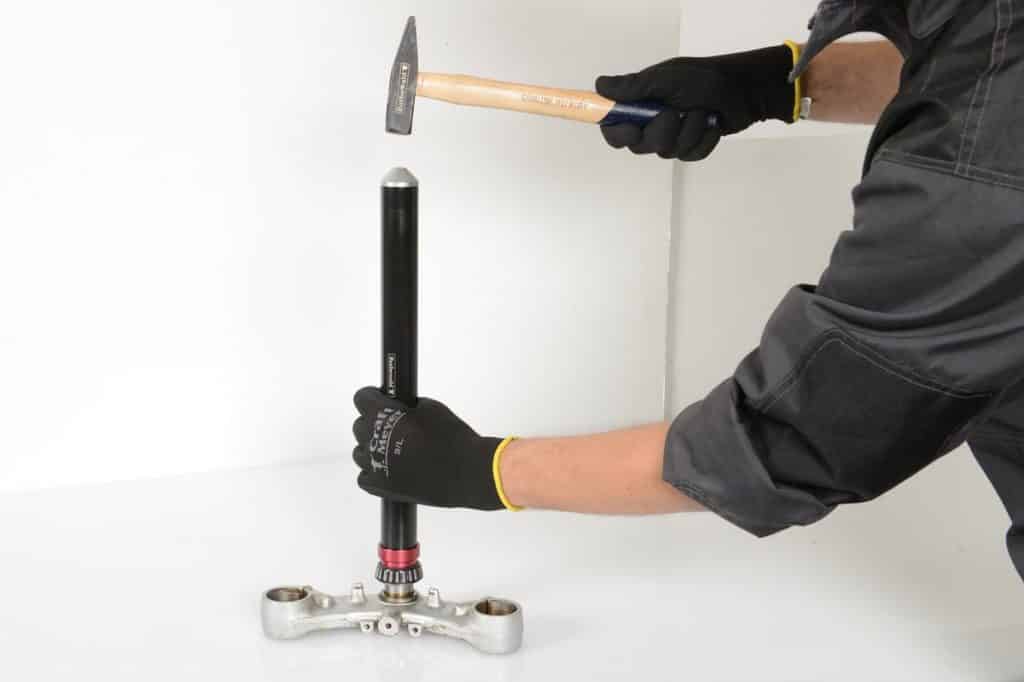
To install a new bearing, you will need a suitable headset bearing support. Start by installing a dust seal, then, if you have one, a shim (often supplied as an accessory with tapered roller bearings), and finally a new bearing. You should only knock on the inner ring, never on the bearing cage. The slightest damage to the bearing cage can cause the wheels to stop spinning perfectly and the bearing can be destroyed. After installing the bearing, lubricate it sufficiently, for example. with Castrol LM2. Check again that the dust cover is fully closed.
08 - Lubricate well, assemble, then adjust
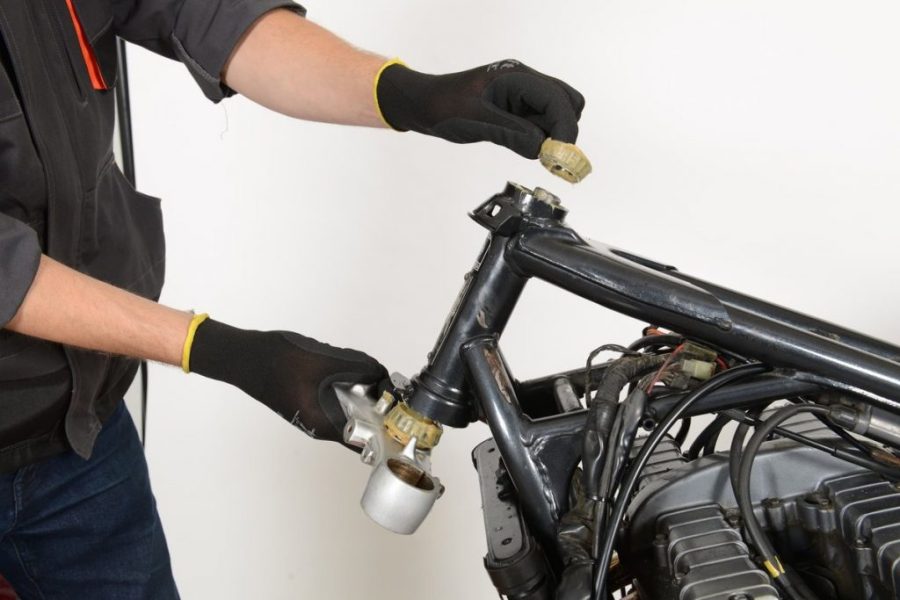
Also lubricate the top bearing sufficiently. Press the bottom triple tree into the steering column and place the lubricated bearing on top. Then install the adjusting nut and tighten by hand (actual adjustment only takes place after the fork is fully assembled). Install the top triple clamp, then lightly tighten the large center screw. Install the fork levers; wait before tightening the bottom triple set screws. Then adjust the steering bearing with a hook wrench so that the bearing has no play and rotates easily. If you cannot find the correct setting and the bearing is sticking, it is possible that the new bearings or the rudder tube have been damaged. Only now tighten the center screw and then the clamping screws of the lower triple tree, observing the tightening torque specified by the manufacturer. Recheck the adjustment as the bearing clearance may have decreased after tightening the center nut.
Complete the assembly of the motorcycle, observing the tightening torques specified by the manufacturer. Bleed the brake if necessary. On your next road test, check that the fork works without deformation and that the steering does not vibrate or clap.
The note : After 200 kilometers, we recommend checking the game again. The bearings could still settle slightly. The note : After 200 kilometers, we recommend checking the game again. The bearings could still settle slightly.