Adjusting valve clearances VAZ 2106 and replacing oil seals with your own hands
Content
The design difference of most domestic cars produced in the last century is the need to manually adjust many parameters. The VAZ 2106 is no exception, to maintain which in good condition it is important to carry out maintenance of all systems in a timely manner, including periodically adjusting the thermal clearances of the valves.
The purpose of the valves of the VAZ 2106 engine
One of the most important systems that require adjustment during operation is the gas distribution mechanism (GRM). The design of this mechanism allows timely supply of the fuel-air mixture to the combustion chamber and removal of exhaust gases from the engine cylinders.
The composition of the timing includes the camshaft and crankshaft and the chain connecting them. Due to the timing, the synchronous rotation of the two shafts occurs, which, in turn, allows you to strictly observe the sequence of opening and closing the valves in all cylinders.
The camshaft cams act on special levers that push the valve stems. As a result, the valves open. With further rotation of the camshaft, the cams return to their original position and the valves close.
Thus, the result of the operation of the gas distribution mechanism is the consistent and timely opening and closing of the valves.
Valves are of two types:
- Inlet (open the supply of fuel to the combustion chamber).
- Exhaust (provide the removal of exhaust gases).
 Each cylinder of the VAZ 2106 engine has its own inlet and outlet valve
Adjustment of valve clearances VAZ 2106
Adjusting the valve clearances of the VAZ 2106 can be done by hand. This will require only a standard set of locksmith tools and a few simple fixtures.
Reasons for adjusting clearances
The engine is constantly running at high temperatures. This leads to wear of its elements and a change in the value of the thermal clearances of the valves. External signs of incorrectly installed gaps are:
- the appearance of a characteristic noise (knocking) at idle;
- reduction in engine power and loss of dynamics during acceleration;
- increased fuel consumption;
- long-term operation of the car without carrying out the clearance adjustment procedure.
Adjustment intervals and clearances
The manufacturer recommends adjusting the thermal clearances of the VAZ 2106 valves every 30 thousand kilometers, and checking their values every 10 thousand km. In addition, experts advise adjusting the gaps every time you dismantle the cylinder head (cylinder head) with the replacement of its gasket. If this is not done, the clearances of some valves will be reduced, while others will be increased. As a result, engine noise will increase, its power will decrease and fuel consumption will increase.
The clearance value regulated by the automaker for intake and exhaust valves is 0,15 mm.
Required Tools
To adjust the valve clearances, you will need the following tools and fixtures:
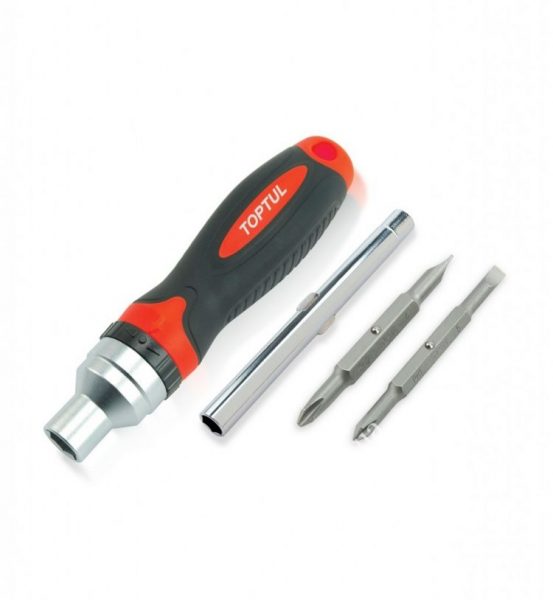
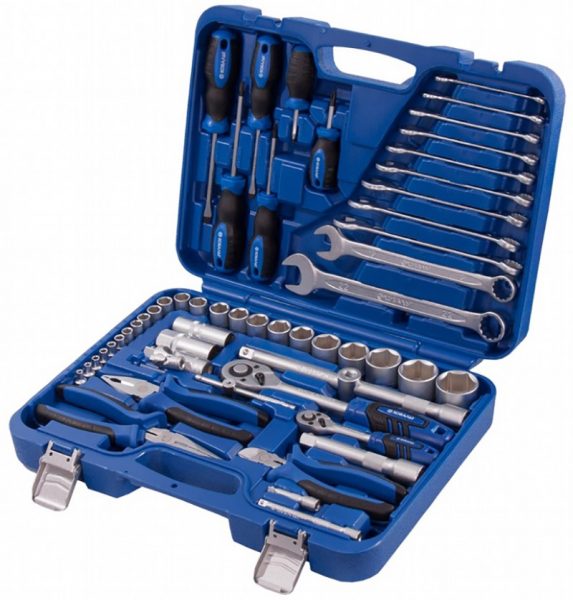
- set of socket wrenches;You will need a set of socket wrenches to adjust the valve clearances.
- several screwdrivers with flat blades;To adjust the valve clearances, you will need several screwdrivers with flat blades.
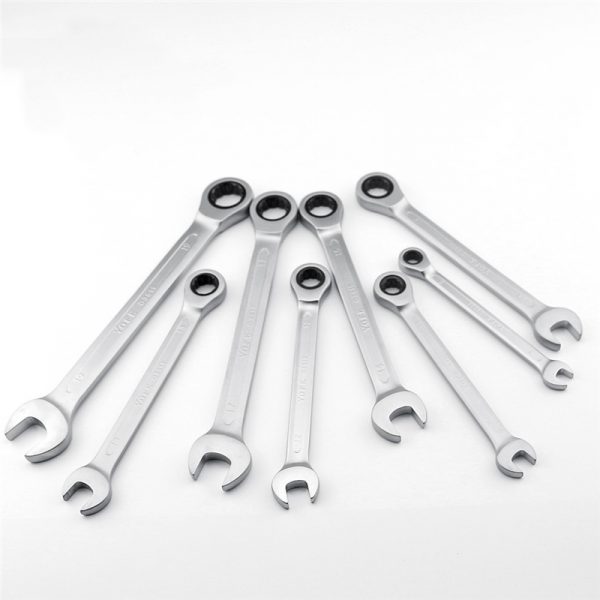
- open-end wrenches for 10, 14 and 17;To adjust the thermal clearances of the valves, you will need open-end wrenches for 10, 14 and 17
- a special key for turning the crankshaft;
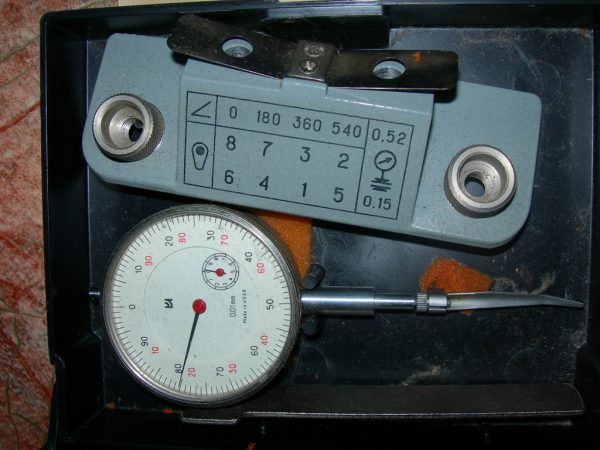
- adjusting probe for VAZ engines 0,15 mm thick (for intake and exhaust valves) or a special micrometer.To set the valve clearances, a 0,15 mm thick adjusting probe is required

The dipstick case usually indicates the scheme and sequence of valve adjustment. However, a standard 0,15 mm feeler gauge cannot cover the entire width of the gap, so fine adjustment of the valves using this tool is not possible. Moreover, the gap width during operation gradually changes due to wear of valves, cylinder head seats and other elements of the power unit. As a result, the adjustment accuracy is further reduced.
For a more accurate setting of the gaps, it is recommended to use a micrometer. In this case, the measurement results are practically independent of the condition and wear of the engine elements.
Valve clearance adjustment procedure
To gradually rotate the crankshaft to a certain angle in order to sequentially adjust all the valves, a special key is used. The numbering of valves, like cylinders, starts from the front of the engine, that is, from left to right.
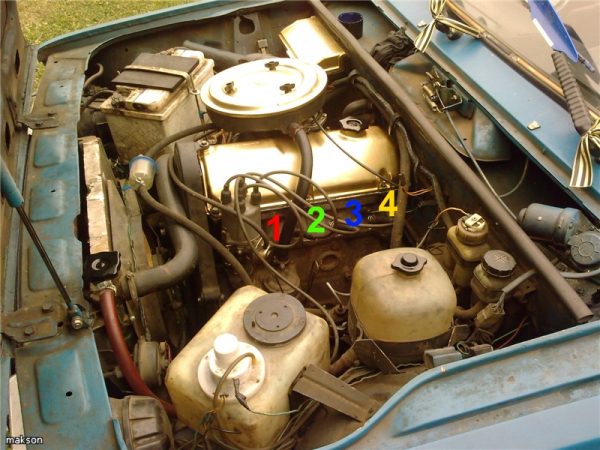
The valve adjustment procedure is as follows:
- when the crankshaft is stationary, valves 8 and 6 are adjusted;
- when turning the crankshaft 180о valves 7 and 4 are regulated;
- when turning the crankshaft 360о valves 3 and 1 are regulated;
- when turning the crankshaft 540о valves 2 and 5 are adjusted.
You can also control the angle of rotation of the crankshaft by observing the movement of the distributor or camshaft slider. The only difference is that valves 7 and 4 are adjusted by turning 90о, not by 180о, as mentioned above. The angle of subsequent turns should also be half as much - 180о instead of 360о and 270о instead of 540о. For convenience, marks can be applied to the distributor body.
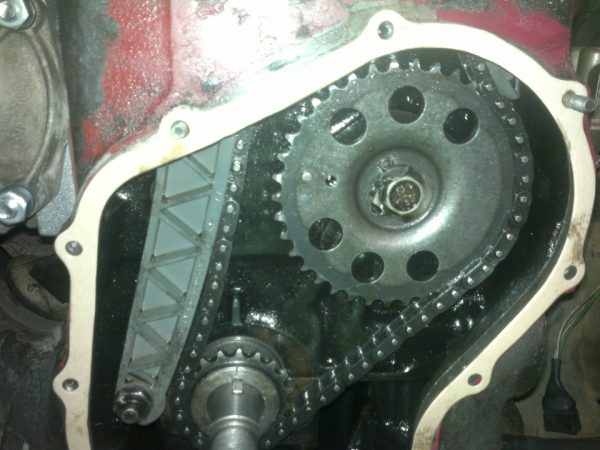
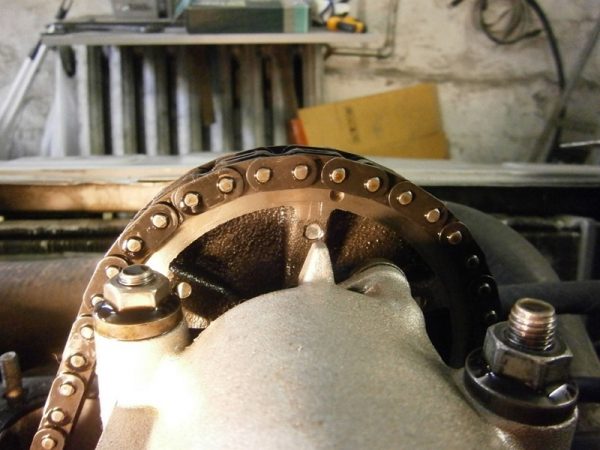
Timing Chain Tension Check
Before setting the valve clearances, check the timing chain tension and adjust it if necessary. During the operation of the car, the chain gradually stretches. As a result:
- an unpleasant knock occurs when the engine is running;
- the chain wears out quickly;
- the chain jumps on the teeth of the camshaft sprocket, which leads to a violation of the phases of the timing.
Chain tension can be checked in two ways:
- Open the hood and listen to the running engine. If there are extraneous noises that disappear when you briefly press the accelerator pedal, it can be stated that the chain has weakened.
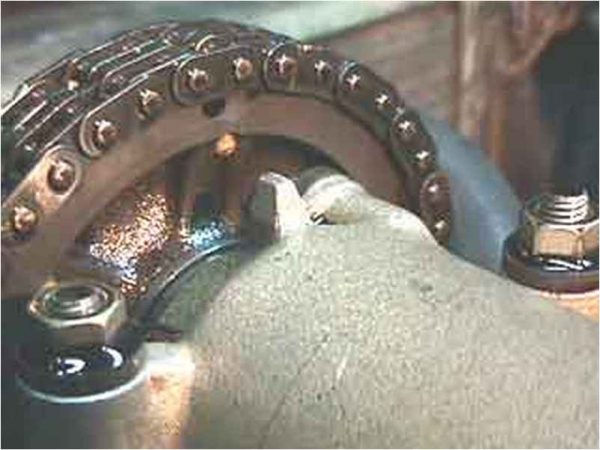
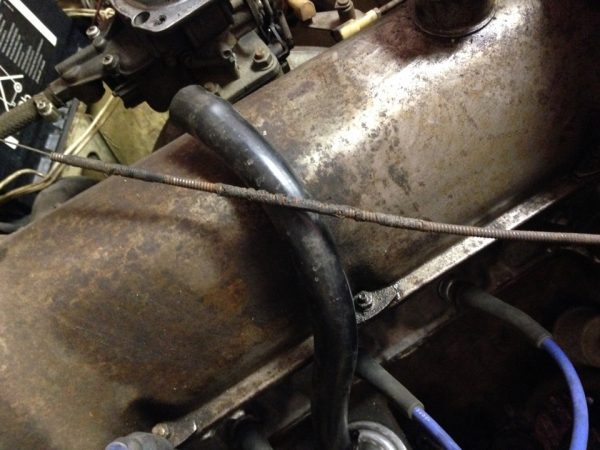
- Remove the protective cover from the engine. We insert a screwdriver into the chain, like a lever, and try to bend the chain in at least two places where there is free space under it. The chain must not bend. A similar operation can be performed by hand. At the same time, it is not recommended to press hard on the chain in order to avoid damage to it.
When the chain is loosened, its tension is adjusted using a special tensioner.
Video: timing chain tension check procedure

The procedure for adjusting valve clearances VAZ 2106 with a micrometer
The algorithm for adjusting valve clearances with a micrometer is as follows:
- We put the car on a flat area and open the hood.
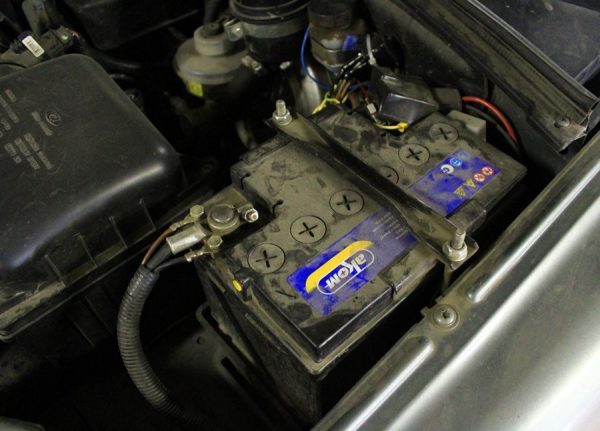
- Turn off the onboard power supply. To do this, disconnect the negative terminal of the battery.Disconnect battery when adjusting valves
- We fix the car by placing special stops under the rear wheels.
- Set the gear lever to the neutral position.
- Let the engine cool down to a temperature of about 20°C. Valve adjustment should only be carried out on a cold engine - these are the manufacturer's recommendations.
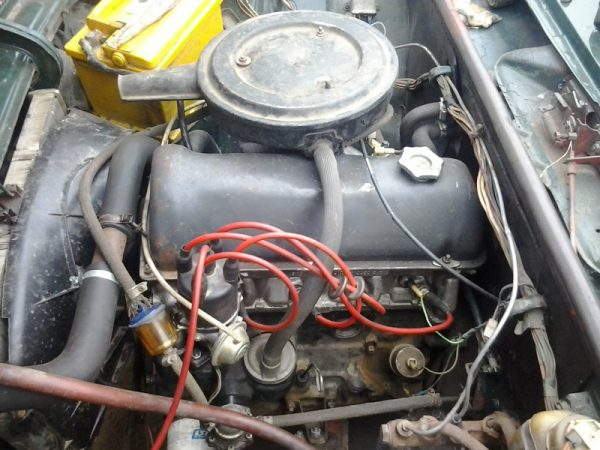
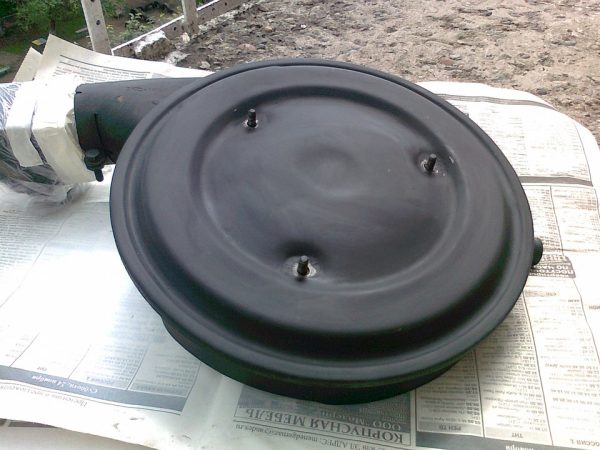
- Remove the air filter from the engine along with the housing.To gain access to the valves, you need to remove the air filter housing from the engine.
- Disconnect the rubber hose from the air filter housing.
- Remove the accelerator cable.Disconnect the throttle cable before adjusting the valves.
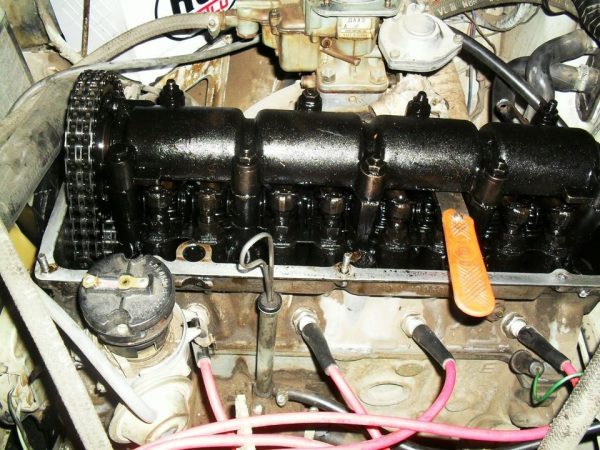
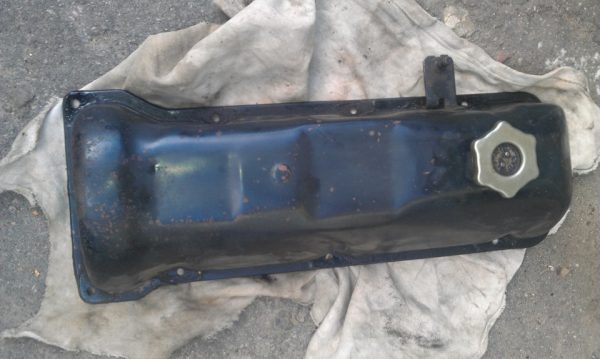
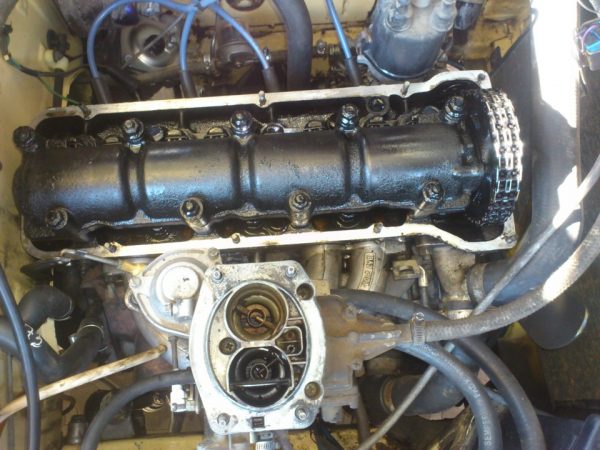
- We unscrew the nuts securing the valve cover to the cylinder head and remove it.To dismantle the valve cover, unscrew the nuts securing it to the cylinder head
- Having unfastened two latches, we remove a cover of the distributor of ignition.To remove the cover of the distributor, you need to unfasten the two fixing latches
- Unscrew and remove the spark plugs. This will make it much easier to turn the crankshaft during subsequent adjustments.Before adjusting the valves, to facilitate the rotation of the crankshaft, it is necessary to unscrew the spark plugs.
- Check the timing chain tension.Valve adjustment is carried out at normal timing chain tension.
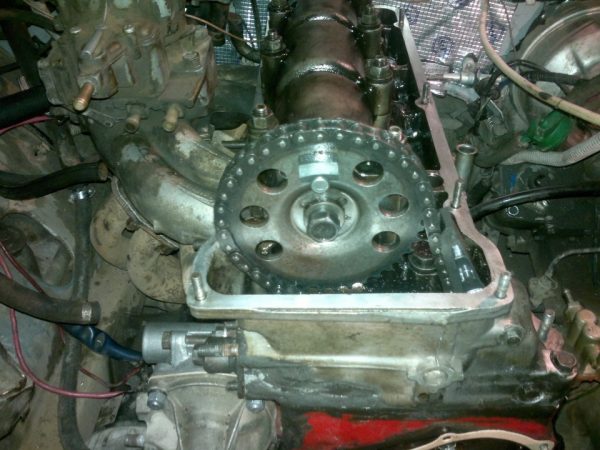
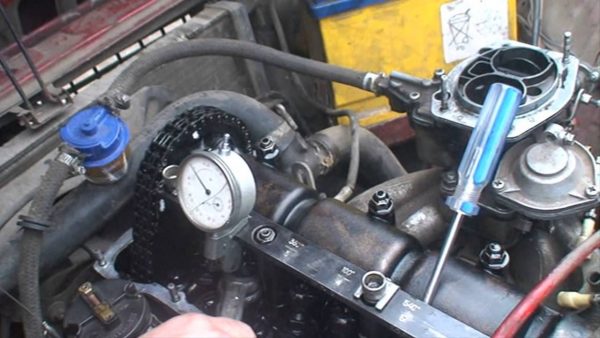
- Turning the crankshaft with a special key for the flywheel, we combine the factory marks of the camshaft drive sprocket and the bearing housing. As a result, the fourth cylinder will rise to top dead center (TDC), and it will be possible to adjust valves 6 and 8.On the camshaft drive sprocket, it is recommended to apply additional marks with a marker
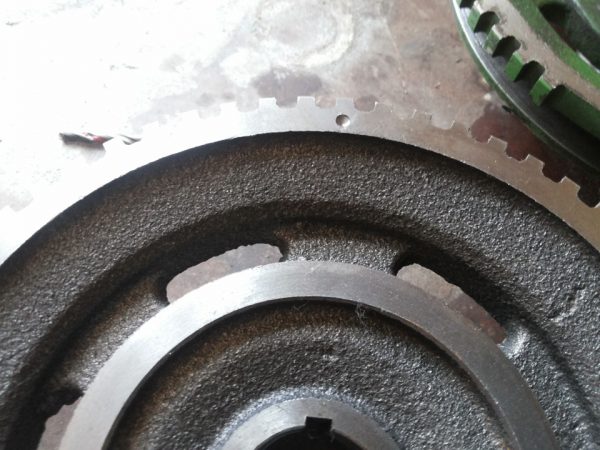
- We check the correspondence of the marks on the crankshaft pulley and the engine block.Control over the correct setting of the timing is carried out using a mark on the crankshaft pulley
- In addition to the factory ones, we make additional marks with a marker every quarter of a turn of the camshaft.The camshaft sprocket is chained to the crankshaft
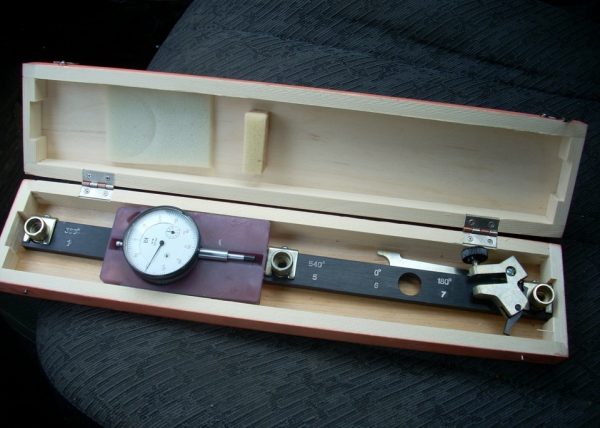
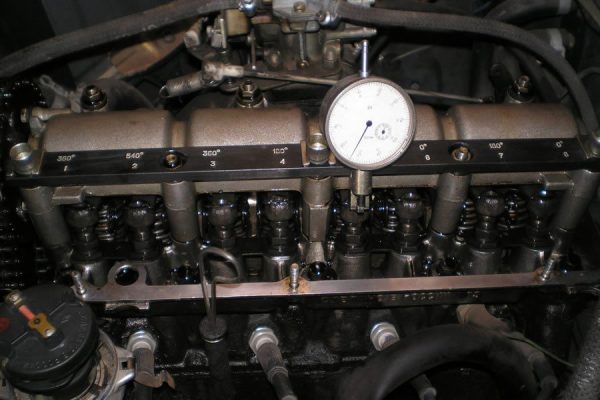
- We securely fix the rail with the help of fastening the camshaft bed.The micrometer allows you to adjust the valve clearances with high accuracy
- We install the indicator on the rail.
- We fix the indicator on the edge of the adjustable valve cam.
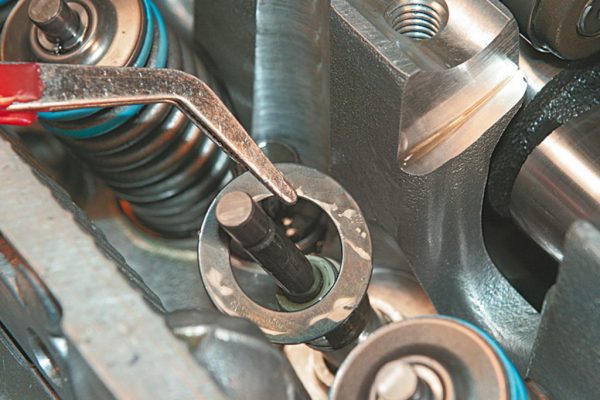
- We hook this cam with a special grip and push it up. This should lead to a change in the indicator indicators by 52 divisions at once.
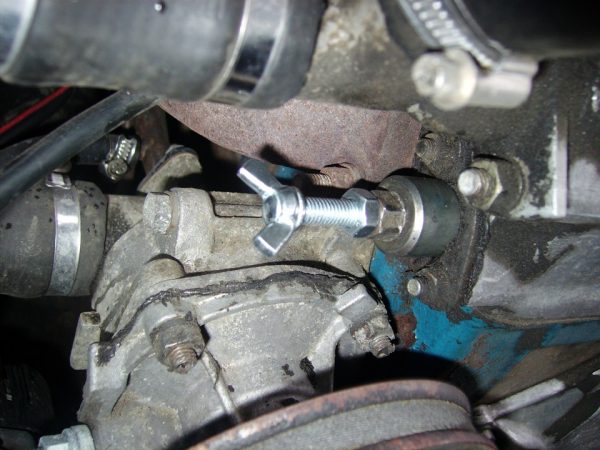
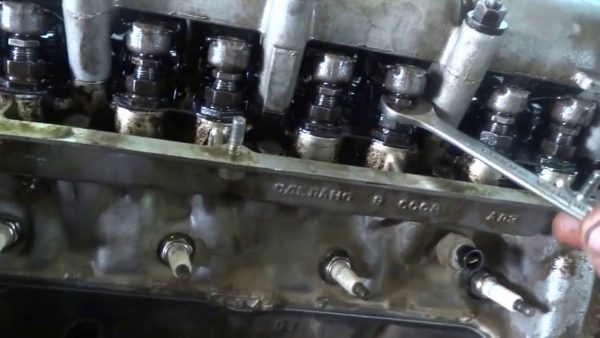
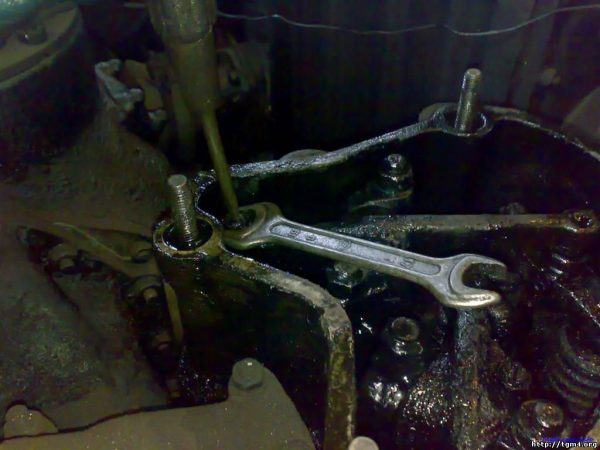
- In case of deviations, we adjust the clearance of this valve. Using a 17 key for 1–2 turns, we loosen the fastening locknut, while holding the head of the adjusting mechanism with a 14 key.
- With a 14 wrench and a flat screwdriver, adjust the gap.When adjusting the valves with a key of 17, the fastening locknut is loosened, and the head of the adjusting mechanism is held with a key of 14
- Check the gap with a micrometer.The micrometer allows you to accurately and quickly set the desired gap
- If the gap is set correctly, tighten the lock nut with a 17 key, while holding the nuts on the adjusting device with a 14 key.
- Once again, we check the size of the gap - when tightening the locknut, it could change.
- We turn the crankshaft 180 degrees with a special key.
- We set the next cylinder to TDC and, turning the crankshaft at a certain angle, adjust the clearance of the next valve.
- After adjusting, turn the crankshaft several times and check the set clearances again.
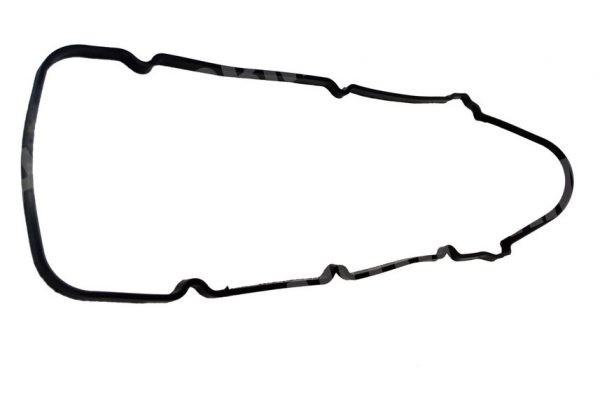
- In the reverse order, we install all the previously removed components and parts. In this case, it is recommended to replace the valve cover gasket with a new one.Each time the valve cover is removed, its gasket is replaced with a new one.
The procedure for adjusting valve clearances with a feeler gauge
Adjusting the gaps with a feeler gauge is performed in the same way in the following order:
- By turning the crankshaft flywheel, we achieve the coincidence of the marks of the camshaft sprocket and its bearing cover. As a result, the piston of the fourth cylinder will rise to TDC, and it will be possible to adjust valves 6 and 8.
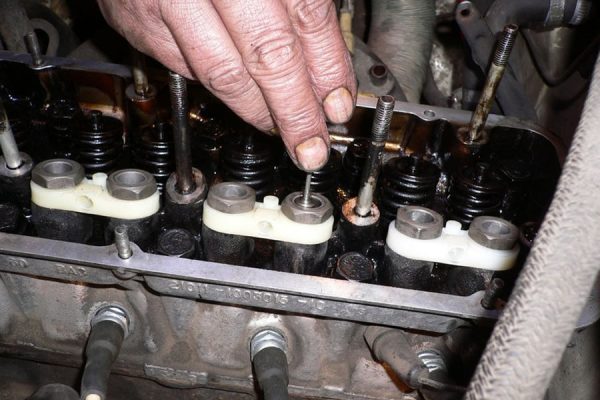
- Install a standard feeler gauge (0,15 mm) between the camshaft and valve rocker 8.The accuracy of adjusting the gaps with a feeler gauge is noticeably lower than when using a micrometer
- Similarly to the procedure using a micrometer, we adjust the valves, loosening the lock nut with a 17 wrench and setting the gap with a 14 wrench and a screwdriver.In addition to the open-end wrench, you can use a flat screwdriver to adjust the valves - the adjusting bolt is equipped with a special slot
- After setting the gap, tighten the lock nut and check the gap again.
- The gaps are adjustable with a small margin - the probe should freely enter the gap between the rocker and the camshaft.
- Repeat the adjustment process for the rest of the valves.

Video: adjusting valve clearances VAZ 2106

Valve stem seals
Oil scraper caps (valve seals) are designed to seal the valve. They trap excess lubricant (engine oil), preventing them from entering the combustion chamber.
The mechanical pair in the cylinder head is the valve stem and its guide sleeve. Technologically, it is almost impossible to connect these parts without a gap. Valve seals are used to seal the connection. A high-quality and serviceable cap should sit tightly on the valve stem and pass only the amount of oil that is necessary for the normal operation of the system.
If earlier the caps were made of fluoroplastic, now special reinforced and oil-resistant rubber is used in their production. The upper part of the cap is pressed against the valve stem by a special spring.
On the market there are valve stem seals of various manufacturers and brands, differing in quality, reliability and durability.
After prolonged operation of the engine, the oil scraper cap may collapse due to:
- physical aging of the material from which it is made;
- loss of initial elasticity of rubber under the influence of oil and high temperature;
- layering of the material.
This causes excess lubricant to enter the combustion chamber and increase oil consumption. Valve stem seals on domestic cars are usually replaced every 80 thousand kilometers. The last figure can increase noticeably as a result of:
- the use of caps made of modern high-quality materials;
- use of high-quality original engine oil;
- preventing engine overheating;
- constant monitoring of the oil level in the engine.
Signs of failure of oil scraper caps
The main signs of a malfunction of the VAZ 2106 valve seals are:
- increased oil consumption (more than one liter per thousand kilometers);
- exhaust gases of a light shade;
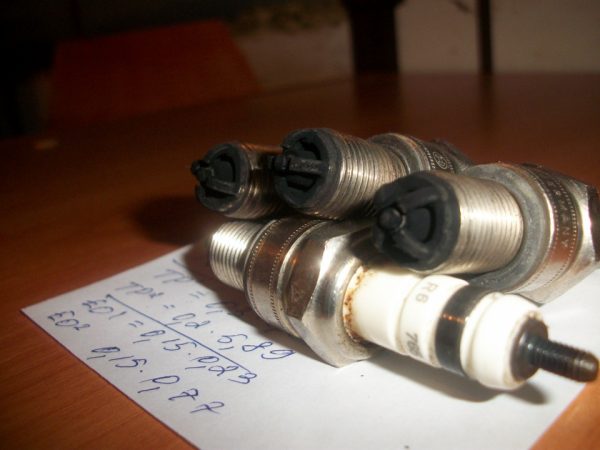
- oil coating on candles;
- a significant decrease in the dynamic characteristics of the engine;
- increase in fuel consumption.
Such problems are solved by replacing the caps. It's pretty easy to do it yourself.
Selection of oil seals
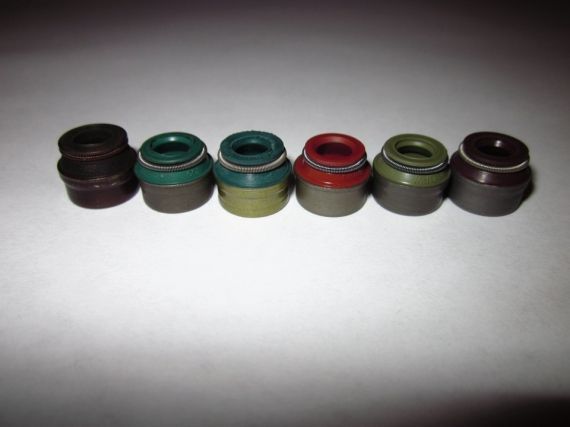
Until the end of the 80s, caps manufactured by the Kursk plant were installed on all domestic cars. They did not differ in high quality, since they could not withstand high temperatures, and they had to be changed every 30 thousand kilometers. Then a new rubber-like material (fluoroelastomer) was developed, from which the leading manufacturers began to make caps. The material from which they are made may differ in color, but its basis should be rubber (secondary or acrylate), which ensures the durability of the part.
The presence of impurities in the material of the caps leads to their rapid failure. This applies primarily to fakes. Therefore, when buying, first of all, you should pay attention to the manufacturer and be able to identify original products. The cost and service life of the caps of the leading brands are approximately the same.
When replacing VAZ 2106 caps, we can recommend the products of the following companies:
- Elring is a German company that produces not only rubber caps, but also a number of other parts, and supplies its products to more than 140 countries.
- Glazer is a Spanish company with a rich history producing caps that are ISO9001/QS9000 certified.
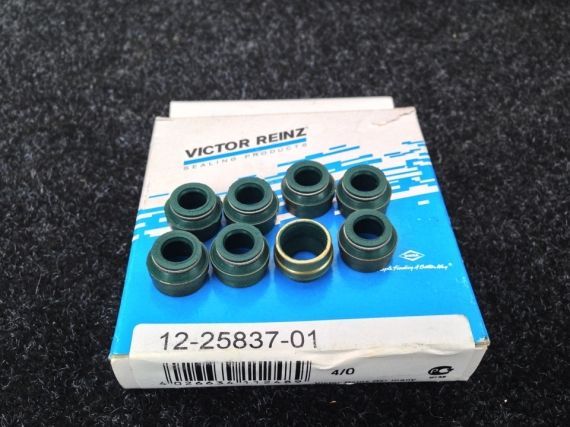
- Reinz is a German company whose products experts recommend installing on a worn-out valve-guide sleeve pair.
- Goetze is a German company recognized by car manufacturers all over the world. Since 1987, Goetze has been a supplier of quality automotive and marine parts, including valve stem seals with innovative technology.
- Payen and other manufacturers.
The quality of original domestic products is significantly inferior to foreign counterparts. In any case, the choice remains with the car owner, his wishes and capabilities.
Replacement of valve stem seals VAZ 2106
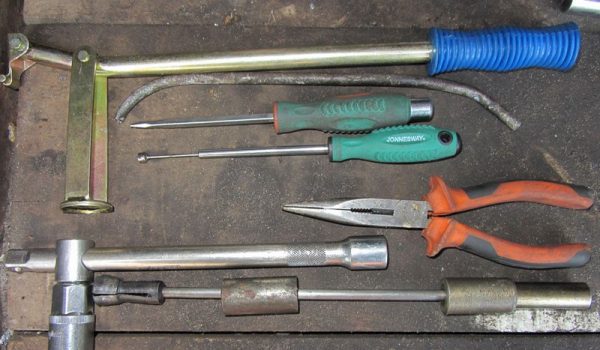
To replace caps you will need:
- a special cracker for crackers (fasteners) of valves;Drying out the valves when replacing the seals is carried out using a special tool
- puller for oil seals;Valve seals can be easily removed with a puller
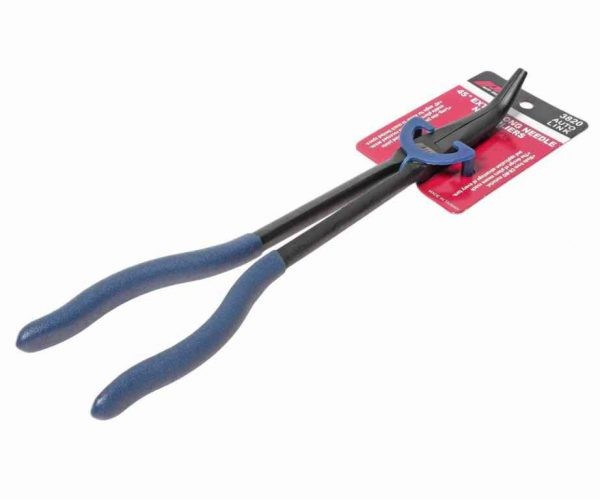
- long-nose pliers or a handle with a magnet.It is convenient to pull out fasteners (crackers) from the seats with long-nose pliers
The procedure for replacing valve stem seals is as follows:
- Remove the valve cover from the cylinder head.
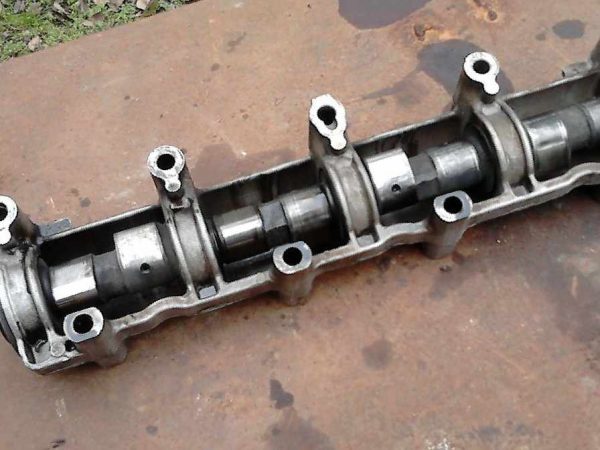
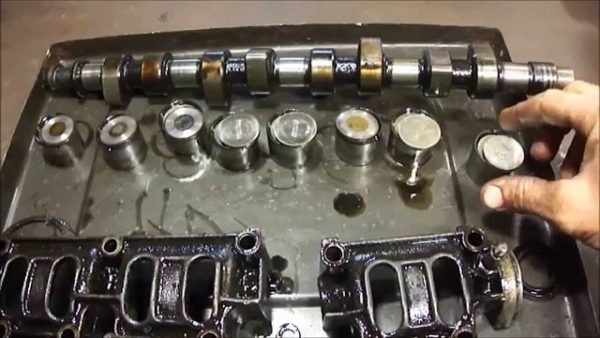
- We remove the camshaft and rocker.When replacing valve seals, the camshaft must be removed.
- We unscrew the candles from the seats in the cylinders.
- We install the piston of the first cylinder at TDC.
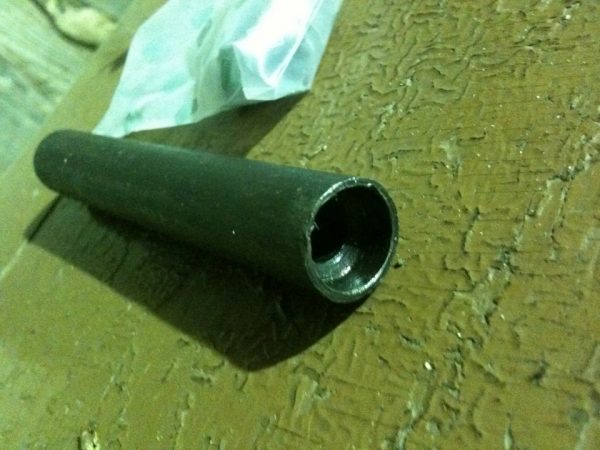
- We insert a curved soft metal tube into the candle technological hole of the first cylinder. The end of the tube should be between the top of the piston and the expanded part of the valve.Replacing valve seals requires a minimum set of tools and fixtures
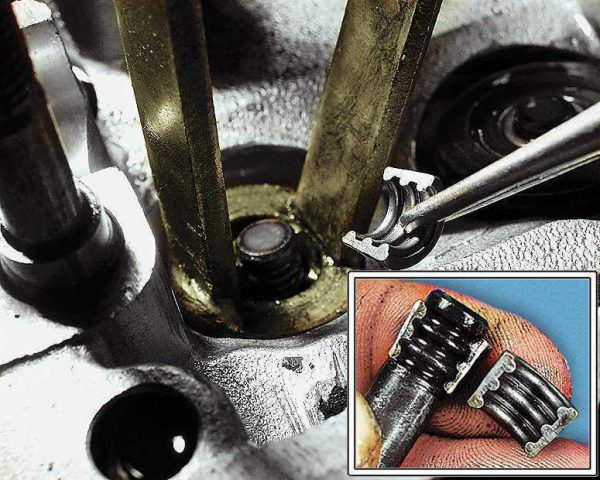
- We screw the nut onto the end of the camshaft mounting stud. This is necessary to stop the cracker.
- We press on the lever, compressing the valve spring.With a valve cracking tool, replacing valve stem seals is quite easy.
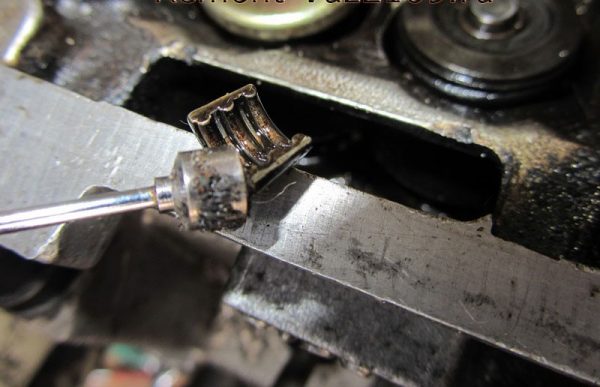
- Using a magnet or long-nose pliers, remove the fastening crackers.With the help of a magnet, it is convenient to dry out the valves
- We remove the dryer.
- Remove the plate and valve springs.
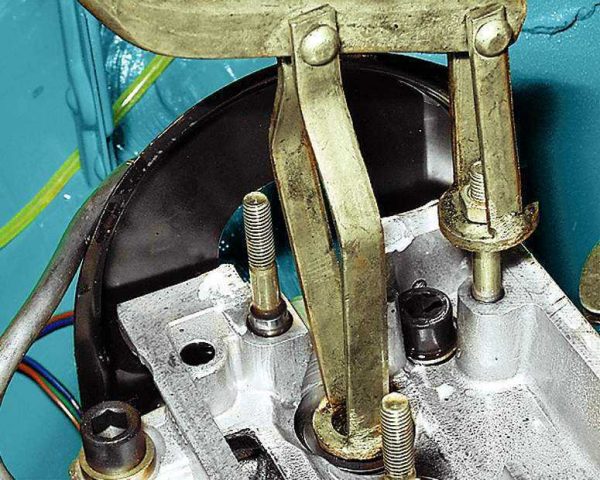
- We put a special puller on the cap.A special puller allows you to install new valve stem seals
- Carefully, trying not to scratch the stem, remove the faulty cap from the valve.Valve seals must be removed very carefully.
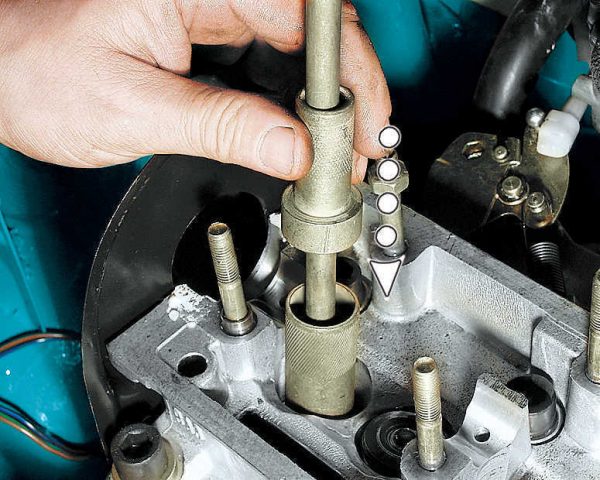
- With the other end of the puller, we press in new caps, richly lubricated with engine oil. In this case, first, protective plastic caps (available in the kit) are put on the stem, which allow pressing without the risk of damaging the valve stem.
- Installation of caps on other valves is carried out in the same way.
- All removed components and parts are assembled in the reverse order.
Video: replacing valve stem seals VAZ 2106

Replacing the valve cover gasket
The need to dismantle the cylinder head cover occurs in the following situations:
- when tensioning the chain in the engine;
- when replacing the valve cover gasket;
- when adjusting valves;
- when replacing other engine parts.
The process is simple and with minimal plumbing skills will not take much time. This will require:
- heads for 8 and 10;
- extension for keys;
- knob or ratchet;
- pliers.
Valve cover gasket replacement procedure
The valve cover gasket is changed as follows:
- We unscrew the three nuts and remove the cover from the metal air filter housing.
- Remove the air filter from the housing.
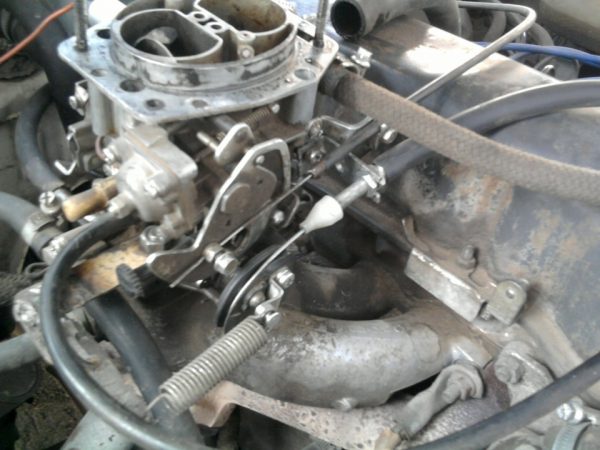
- We unscrew the four nuts securing the filter housing to the top of the carburetor.When replacing the valve cover gasket, the air filter housing must be removed.
- Disconnect the hose going from the breather to the air intake.
- We dismantle the carburetor damper drive rod by lifting it up and slightly pushing it to the side. First remove the retaining ring (if provided by the design).
- We loosen the nut and disconnect the air damper actuator (suction).
- Loosen the cable clamp slightly with pliers.
- Remove the air damper cable.To access the valve cover, you must remove the air damper cable
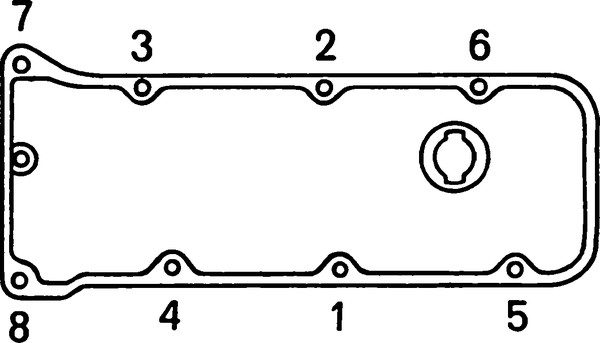
- Unscrew the eight nuts securing the valve cover.The valve cover is mounted on eight studs and secured with nuts through special metal gaskets
- Carefully remove the cover from the studs, having previously determined the position when it can be easily removed.
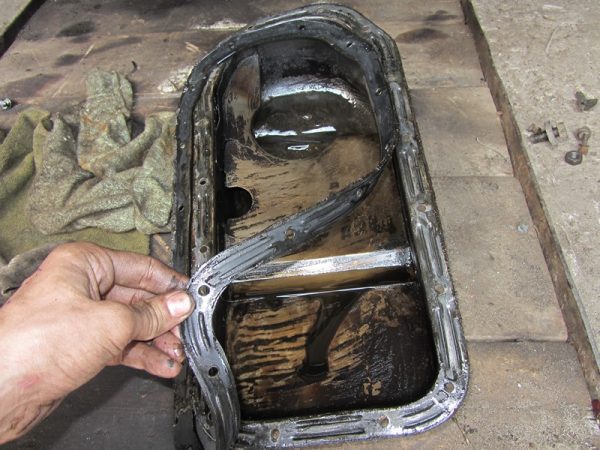
- We remove the remnants of the gasket on the cover and cylinder head.
- We carefully wipe the seats with a rag.
- We install a new gasket on the studs.When installing a new gasket, it is not necessary to use sealant.

After replacing the gasket, reassemble in the reverse order.
Video: valve cover gasket replacement

The procedure for tightening the nuts on the valve cover
The nuts on the valve cover must be tightened in a strictly defined sequence very carefully, as excessive force can strip the threads on the studs. First you need to tighten the nuts in the middle of the cover, and then gradually move to its edges.
Correctly and timely adjusted valves will allow the owner of the VAZ 2106 to avoid much more serious problems. You can do this yourself, having a standard set of tools and fixtures and carefully studying the recommendations of professionals.

