Repair and replacement of the dashboard VAZ 2105
Content
The instrument panel is equipped with all cars, because it contains indicators and instruments that allow the driver to monitor the status of the machine's systems. The instrument panel of the Zhiguli fifth model is not a complex device. Therefore, it can be repaired, modified or replaced without outside help.
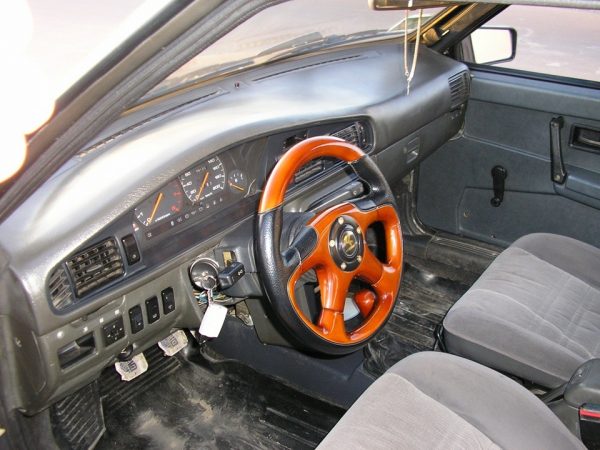
Description of the torpedo on the VAZ 2105
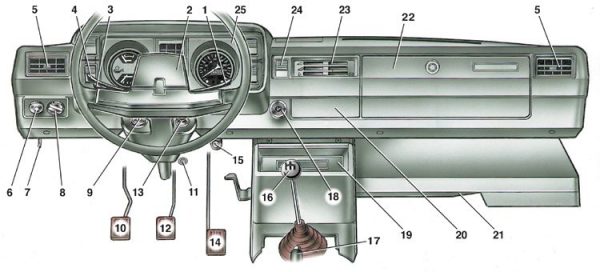
The front panel is a metal frame covered with polyurethane foam and a special film, mounted in the front of the cabin. The product contains a combination of instruments, a radio receiver panel, a glove box and a shelf, air ducts, levers and switches.
What front panel can be put instead of the standard one
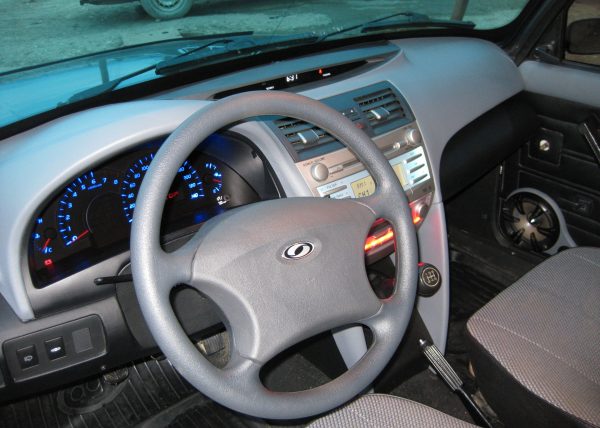
The torpedo of the VAZ "five" today does not look very beautiful: angular shapes, minimal instrumentation, black and not very high-quality finishing material, which cracks and warps over time. For this reason, many owners seek to improve the interior and functionality of their car by installing a panel from other cars. On the VAZ 2105, with some modifications, you can introduce a torpedo from such cars:
- VAZ 2105–07;
- VAZ 2108–09;
- VAZ 2110;
- BMW 325;
- Ford Sierra;
- Opel Kadett E;
- Opel Vectra A
Before installing a particular front panel, you should evaluate whether it is suitable in size, what alterations are to be made and how to connect it.
How to remove a torpedo
The need to dismantle the panel may be due to various reasons:
- repairs;
- replacement;
- tuning.
From the tools you will need a Phillips and slotted screwdriver, as well as a key or head for 10. The dismantling process is performed as follows:
- We de-energize the onboard network.
- We unscrew the screws securing the plastic lining of the steering shaft and remove them.
- We dismantle the instrument panel.
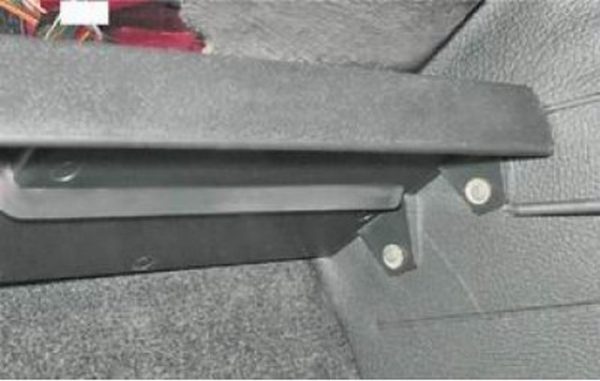
- We unscrew the fasteners and remove the shelf.
 The shelf is held by the appropriate fasteners, unscrew it
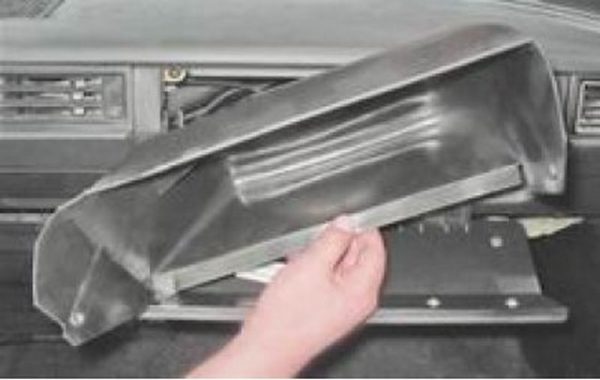
 - We unscrew the screws and take out the glove box.Unscrew the fastener and take out the glove compartment
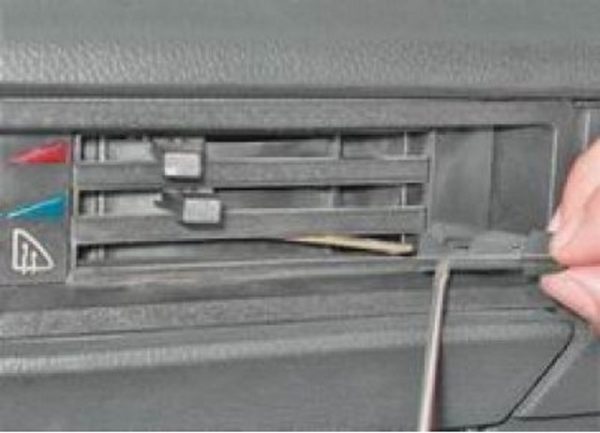
- We pull the handles from the control levers of the heating system.We remove the handles from the heater control levers
- We remove the element of the lining of the levers.We dismantle the lining of the heater control levers
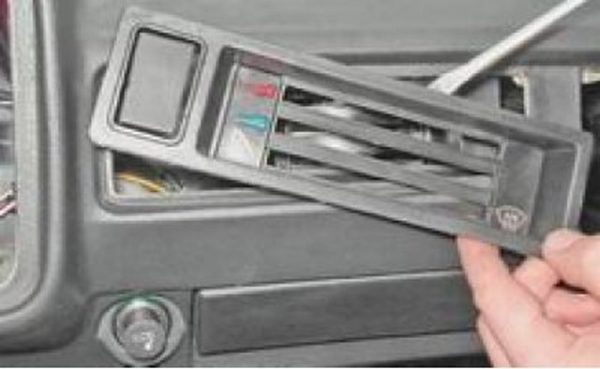
- We unscrew the mount and dismantle the radio receiver panel.
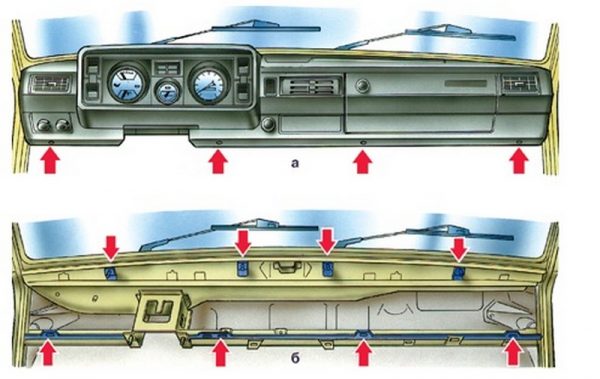
- We unscrew the lower mount of the torpedo.The front panel is attached at several points
- In the places of installation of the glove box and tidy, unscrew the fastening nuts.
- We take out the panel from the passenger compartment.
- After the work is done, we collect everything in the reverse order.
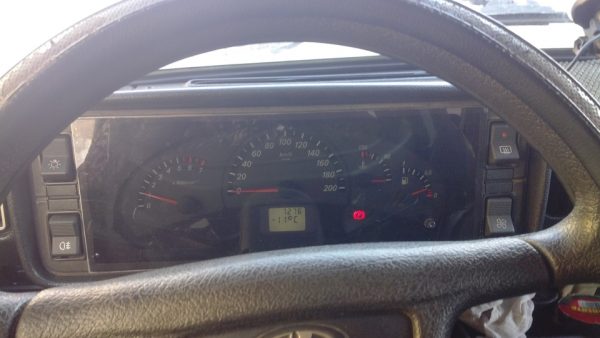
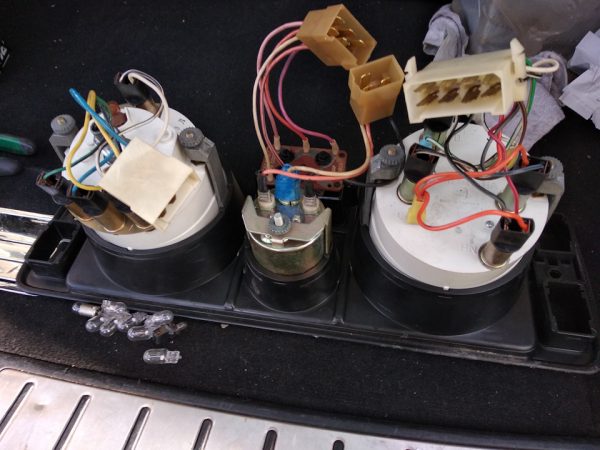
Dashboard
The dashboard of the VAZ "five", as in any other car, is an integral part, since it contains devices for monitoring the technical condition of the car while driving. The tidy is installed on the left side of the torpedo opposite the steering wheel, which makes it easy to read information. The device is equipped with the following elements:
- 4 pointers;
- 6 indicator lights;
- 1 digital indicator (odometer).
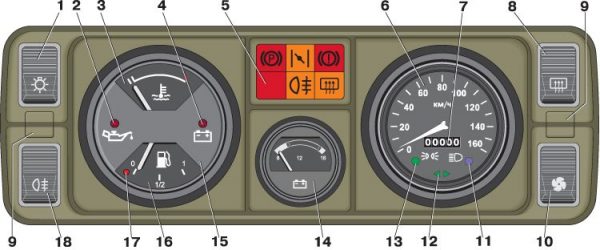
The following devices are used in the instrument panel:
- speedometer;
- block of signal lamps;
- car mileage counter;
- voltmeter;
- coolant temperature sensor;
- fuel level sensor in the tank.
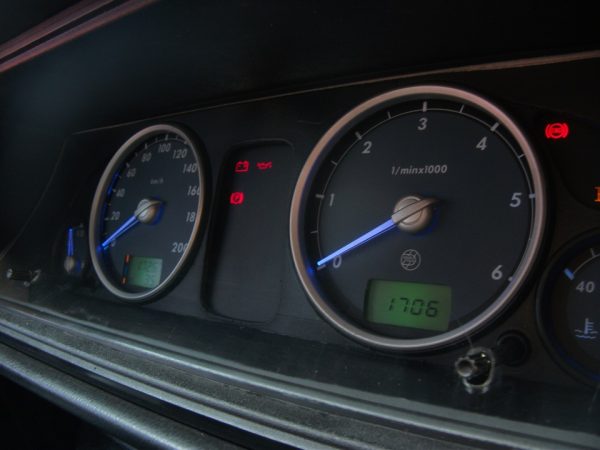
What dashboard can be installed
The dashboard of the "five" can be improved in several ways:
- perform tuning using new lighting elements, scales and instrument arrows;
- implement a combination of devices from another machine;
- make tidy yourself by setting the necessary pointers.
It is possible to modify the shield by replacement, but only with careful selection and fitting of the device for a standard torpedo, as well as after preliminary study of the connection diagram.
From another VAZ model
Some owners install a panel from Kalina on the fifth Zhiguli model. The product looks modern, and the information from the devices is read much better. The essence of the refinement comes down to installing a new shield in a standard case, for which it needs to be filed, trimmed, and assembled with a new mechanism. After completing the mechanical work, it is necessary to dock the new dashboard with wiring, checking the performance of all pointers and indicators.
From "Gazelle"
If you like the instrument cluster from the Gazelle, then you can also install it. At the same time, you need to understand that you will have to redo the wiring by making adapters due to the mismatch of the connectors, and then install the product in a standard case with the accompanying adjustment and refinement steps.
From a foreign car
Many owners of the classic "Lada" in the process of tuning their car install a dashboard from foreign cars. Basically, products from cars manufactured in the late 1980s - early 1990s are suitable for these purposes. One of these is the BMW E30, Audi 80.
Malfunctions of the dashboard VAZ 2105
In equipping the dashboard of the car in question, a minimal set of indicators is used, but they can also work intermittently at times. Therefore, you need to be aware of possible malfunctions and be able to eliminate them, especially since this does not require special tools.
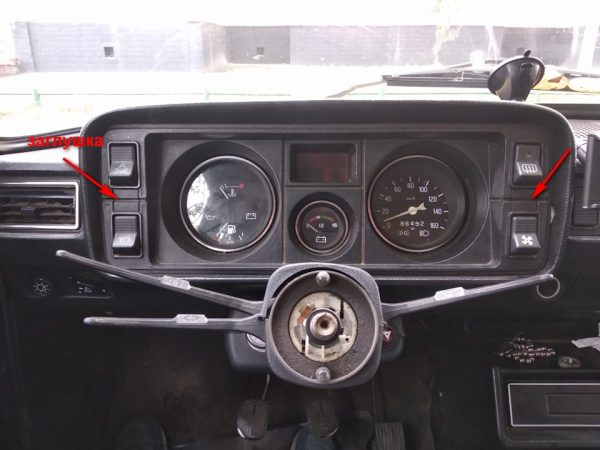
Removing the instrument panel
To dismantle the device in question, you will need a slotted and Phillips screwdriver, and the procedure itself consists of the following steps:
- We de-energize the onboard network.
- Using a screwdriver, pry off the plugs of the self-tapping screws.Dashboard fasteners closed with plugs
- Unbolt the shield.Using a Phillips screwdriver, unscrew the dashboard mount
- Having pulled the tidy out a little towards ourselves, we disconnect the wiring from the stove fan switch.Pulling out the dashboard a little, disconnect the block from the stove fan switch
- We shift the tidy to the left and unscrew the fastening of the cable to the speedometer, after which we take out the flexible shaft.
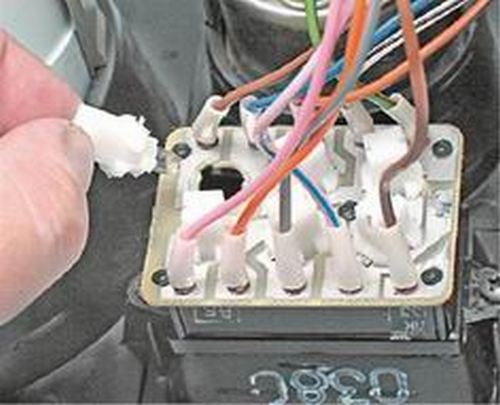
- We disconnect three pads with wires.To dismantle the instrument panel, disconnect the three pads
- We dismantle the instrument cluster.


Replacing light bulbs
One of the most common tidy malfunctions is the burnout of the backlight bulbs. Their replacement consists of the following steps:
- We remove the dashboard.
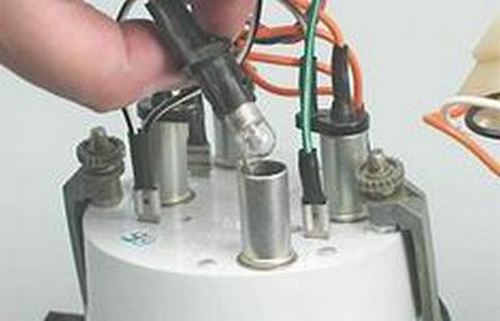
- We remove the defective light bulb from the device along with the cartridge.We take out the light bulb from the device together with the cartridge.
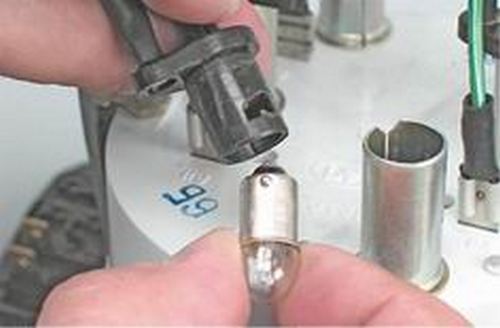
- Remove the light bulb from the socket by turning it counterclockwise. In its place, we install a working part.Remove the light bulb from the socket and replace it with a good one.
- We replace the light bulbs in the signaling device block by turning the cartridge, aligning the protrusion with the slot in the board, and removing it from the hole. We change the lamp together with the cartridge.In the signaling unit, the light bulb changes with the cartridge
Video: replacing the instrument panel lights on the VAZ 2105

Diagnostics and replacement of individual devices
Since each of the indicators in the dashboard displays the state of a particular vehicle system, the occurrence of problems causes inconvenience during operation. Therefore, it is desirable to eliminate any malfunctions as soon as possible.
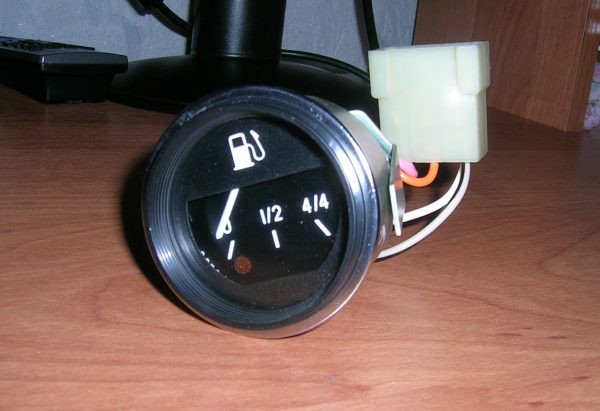
Fuel gauge
The "five" uses a fuel sensor BM-150, located in the fuel tank. Structurally, the device consists of a variable resistor, the resistance of which varies from a moving lever with a float. Also on the lever is a contact that turns on the lamp on the tidy, signaling a small amount of fuel in the tank (4–6,5 liters). The instrument panel has an arrow pointer that displays the level of gasoline.
If there is a suspicion that the fuel sensor is not working correctly (constantly full or empty tank), then you need to check its resistance:
- with an empty tank, the resistance should be in the range of 315–345 ohms;
- when half filled - 108-128 ohms;
- at full - 7 ohms.
If the sensor needs to be replaced, it is enough to remove the wires, unscrew the fasteners and remove it from the gas tank. There are practically no problems with the arrow pointer.
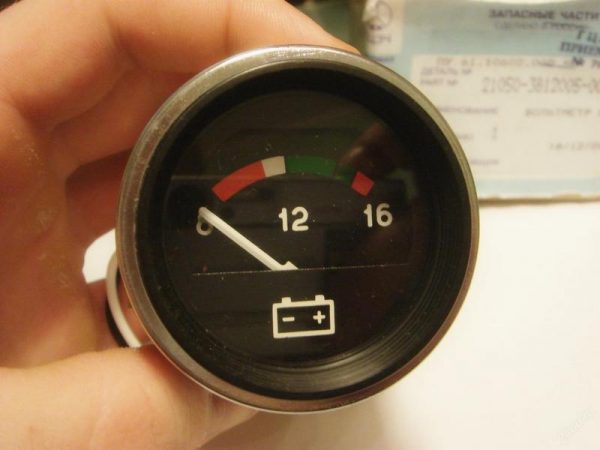
Voltmeter
The voltmeter provides voltage control at the battery terminals when the engine is not running, and during its operation it shows the voltage that the generator produces. When the arrow is in the green zone, this means that the voltage of the on-board network is normal. When the pointer moves into the red zone, this indicates a weak alternator belt tension or a malfunction. The white area of the indicator indicates an unsteady charge-discharge mode. The occurrence of problems with the readings of the voltmeter, as a rule, is caused by a break in the wiring. Therefore, you need to check the power supply circuit to the device with a multimeter.
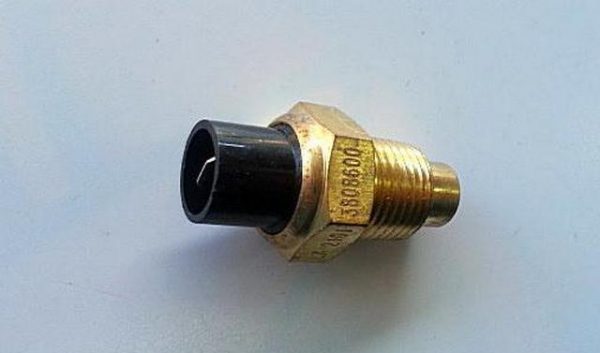
temperature gauge
VAZ 2105 is equipped with a TM-106 temperature sensor, which is wrapped in the cylinder head on the left side. The sensor consists of a resistor whose resistance changes depending on the temperature of the antifreeze. Readings are displayed by a temperature gauge on the dashboard.
If the device does not work or there are suspicions about the correctness of the readings, you need to diagnose the sensor. To do this, turn on the ignition, pull the conductor from the sensor and close it to ground. If the arrow deviates to the right, the checked element is considered non-working. If there are no deviations of the pointer, then a break has occurred in the wiring, which will require a dial-up with a multimeter. In case of problems with the sensor, we replace it as follows:
- Remove the negative terminal from the battery.
- Drain the coolant from the engine.
- We tighten the rubber cap from the sensor and disconnect the wire.Only one terminal is connected to the sensor, remove it
- We unscrew the sensor with a deep head and an extension cord and install a serviceable one in its place.We unscrew the coolant sensor with a deep head
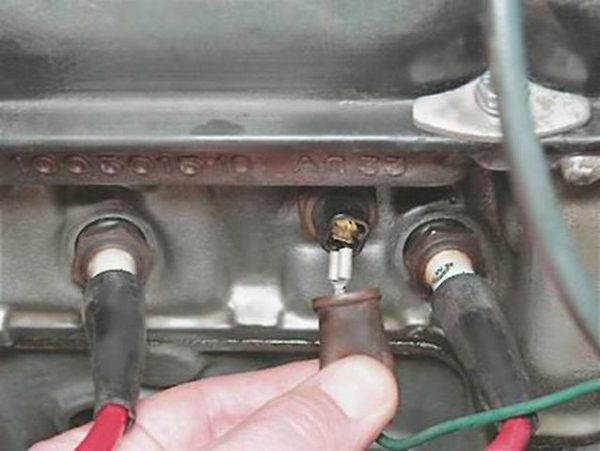
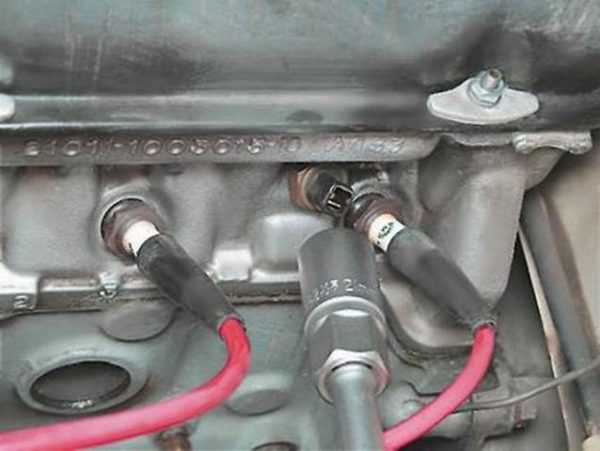
Table: temperature sensor test data
| Temperature, °C | Voltage supplied to the sensor, V | Sensor Resistance, Ohm |
| 30 | 8 | 1350 – 1880 Feet |
| 50 | 7,6 | 585 – 820 Feet |
| 70 | 6,85 | 280 – 390 Feet |
| 90 | 5,8 | 155 – 196 Feet |
| 110 | 4,7 | 87 – 109 Feet |
Oil gauge
Pressure control in the lubrication system of the Zhiguli fifth model is carried out by means of a sensor on the engine block, as well as a light bulb in the tidy. The indicator lamp lights up when the ignition is turned on and goes out a couple of seconds after starting the power unit. If the lamp indicates insufficient oil pressure in the system while the engine is running, you first need to check the oil level with a dipstick and only then proceed with troubleshooting. The absence of a glow of the lamp may indicate its burnout. If the oil level is normal, the lamp is working, but at the same time it glows all the time, you need to replace the sensor.

This will require a 21 ratchet socket and a new part. Replacement consists of the following step-by-step actions:
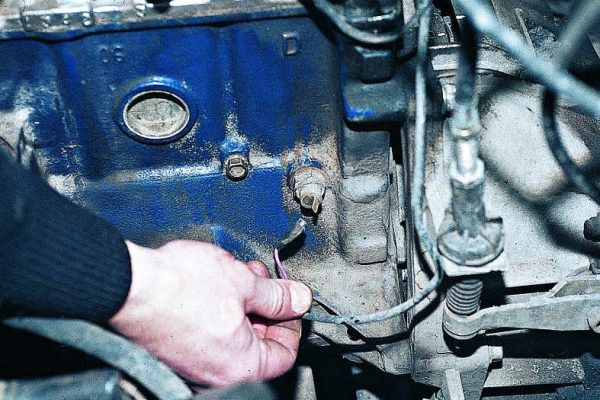
- Remove the rubber boot and terminal from the sensor.To dismantle the oil sensor, remove the cover and wire from it.
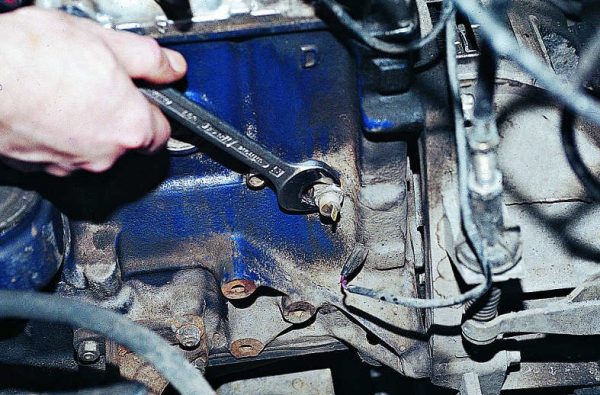
- We unscrew the element with a head or a key.Unscrew the sensor with a key or head
- Install the new sensor in reverse order.
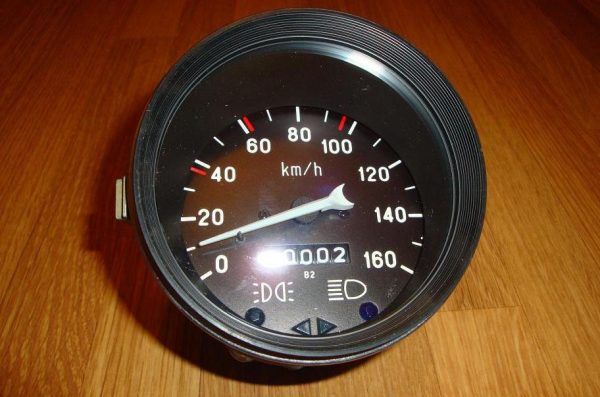
Speedometer
Using the speedometer, the driver can control the speed and distance traveled (tachometer). The main malfunctions that occur with the speedometer are due to cable malfunctions, through which rotation is transmitted to the device from the gearbox. The flexible shaft frays over time or its tips wear out. As a result, speed readings are missing or inaccurate.
To replace the cable, you need to prepare the following tools:
- flat screwdriver;
- passages;
- spanners;
- wire or cord up to 2 meters long;
- new drive cable.
To replace, you need to do the following:
- We de-energize the onboard network.
- We remove the instrument cluster.
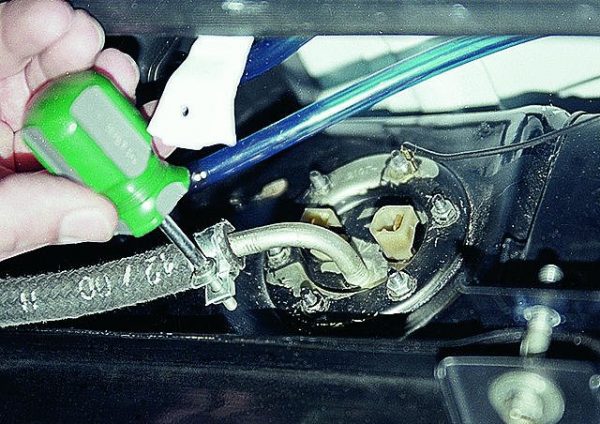
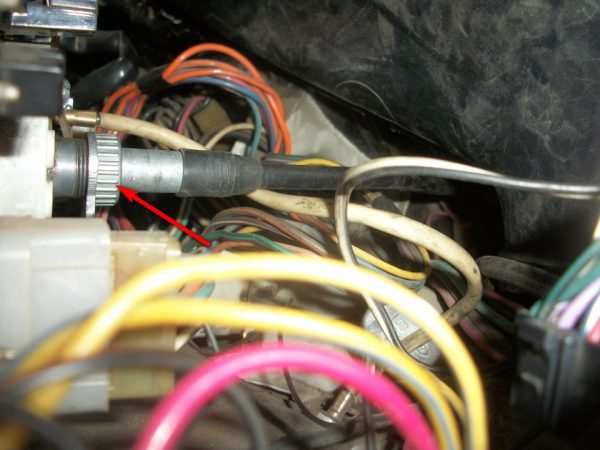
- Using pliers, unscrew the fastening of the cable to the speedometer.The speedometer cable is attached to the device with a nut.
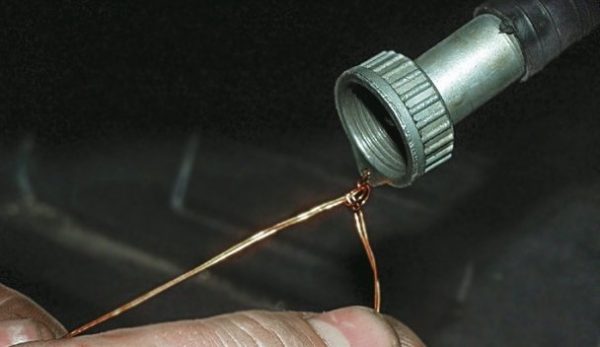
- We tie the wire to the cable nut.We tie a piece of wire to the eye of the speedometer cable
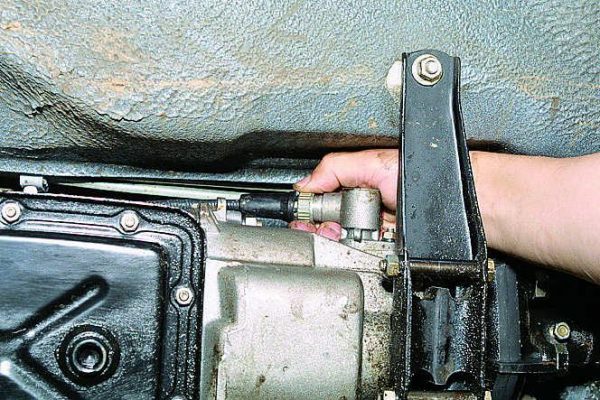
- Having lowered under the car, we unscrew the nut securing the cable to the drive, after which we pull the part towards ourselves.From below the cable is fixed to the speedometer drive
- We tie the wire to a new cable and pull it into the salon.
- We untie the wire and collect everything in its place.
Before installing a new flexible shaft, it is recommended to disassemble and lubricate it, for example, with Litol.
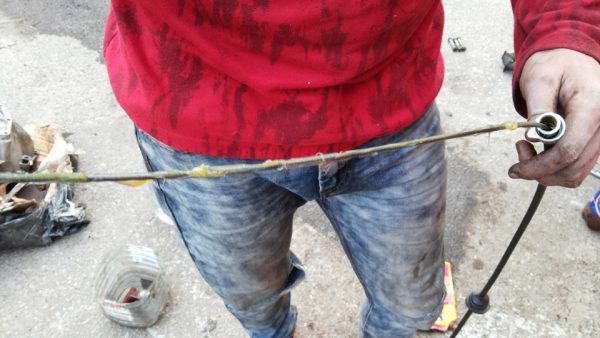
Table: Speedometer Check Values
| Drive shaft speed, min-1 | Speedometer readings, km/h |
| 500 | 31 – 35 Feet |
| 1000 | 62 – 66,5 Feet |
| 1500 | 93 – 98 Feet |
| 2000 | 124 – 130 Feet |
| 2500 | 155 – 161,5 Feet |
Video: Speedometer Troubleshooting

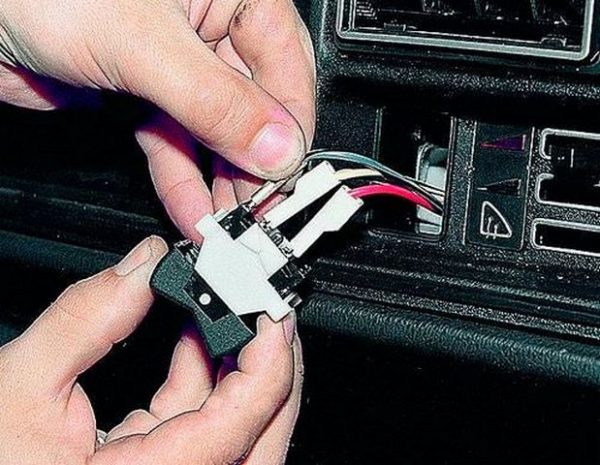
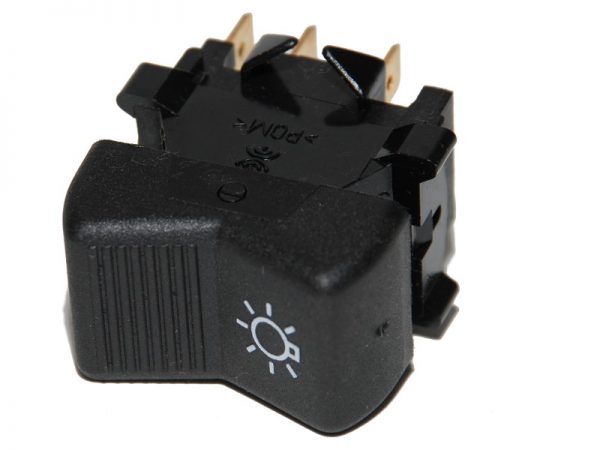
Switches
Switches located on the tidy sometimes fail. This manifests itself in the form of a lack of fixation, jamming in one of the positions, or poor contact of the internal mechanism. In this case, the part must only be replaced. Due to the low cost of the switches (50–100 rubles), their repair is impractical. To replace a failed switch, follow these steps:
- Disconnect the wire from the battery negative.
- Pull the key out of its seat.
- We disconnect the wires.Remove the wires from the switch one by one.
- Installing a new part.The new switch is installed in the reverse order
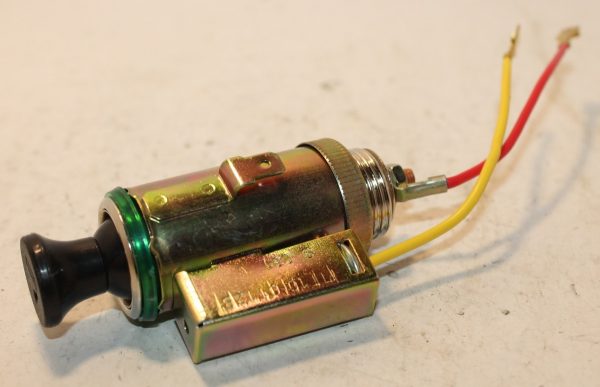
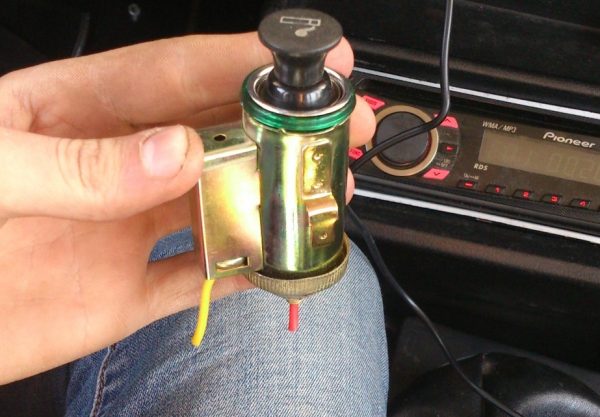
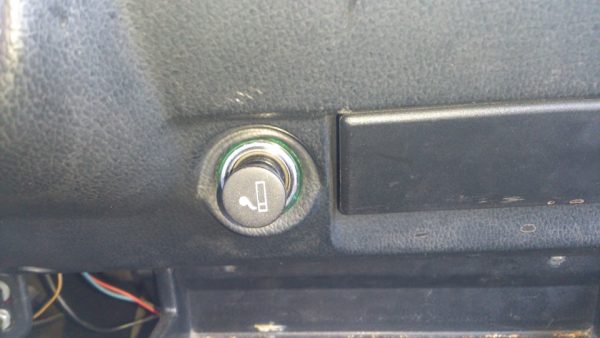
Cigarette lighter
If earlier the cigarette lighter was used for its intended purpose, today it is possible to connect various modern devices through it (chargers, a compressor for pumping wheels, a vacuum cleaner, etc.). Sometimes it happens that the cigarette lighter stops working.
The main causes of malfunctions are:
- burnt out spiral;
- poor contact;
- blown fuse (F6 10 A);
- wiring problems.
With a burnt contact in the socket, you can try to clean it or simply replace the assembly part. To do this, do the following:
- We dismantle the instrument.
- We remove the wires that supply voltage to the cigarette lighter.
- Unscrew the nut and remove the device.Unscrew the mount and disconnect the wires, remove the cigarette lighter
- We install a new part by reassembly.We install the new cigarette lighter in a regular place
Understeering's shifter
The steering column switch VAZ 2105 is located on the steering column and consists of three levers. On all classic Zhiguli, this device works on the same principle.
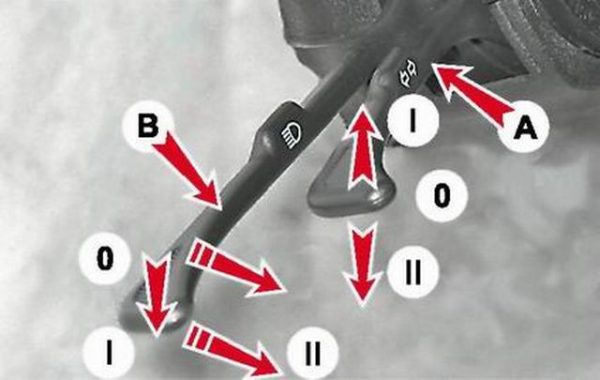
Positions of the lever "A" of the turn signal switch:
- 0 - direction indicators are off;
- I — indicators of the right turn are included;
- II - left turn indicators are on.
Lever "B" is activated when the outdoor lighting switch on the tidy is turned on to the second fixed position:
- 0 - outdoor lighting and dipped headlights are on;
- I - outdoor lighting and high beam headlights are on;
- II - high beam headlights are on (non-fixed position).
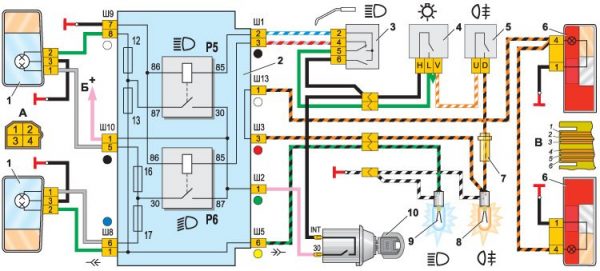
Lever "C", mounted to the right of the steering column, controls the wipers and the windshield washer.
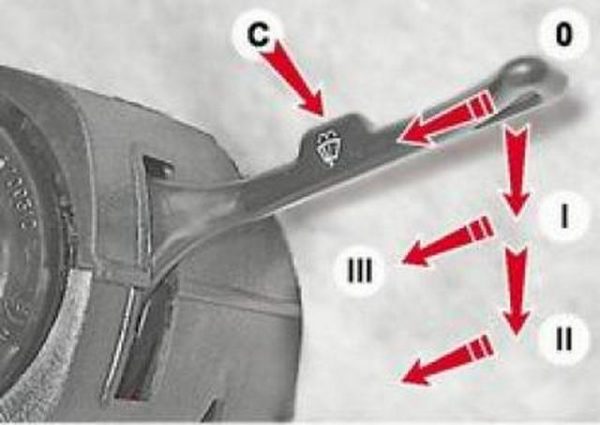
Wiper lever "C" positions:
- 0 - windshield wiper off;
- I - the windshield wiper operates in intermittent mode;
- II - the windshield wiper operates continuously;
- III - the windshield washer is turned on, and when the headlights are on, the wipers and washers of the block headlights are simultaneously turned on.
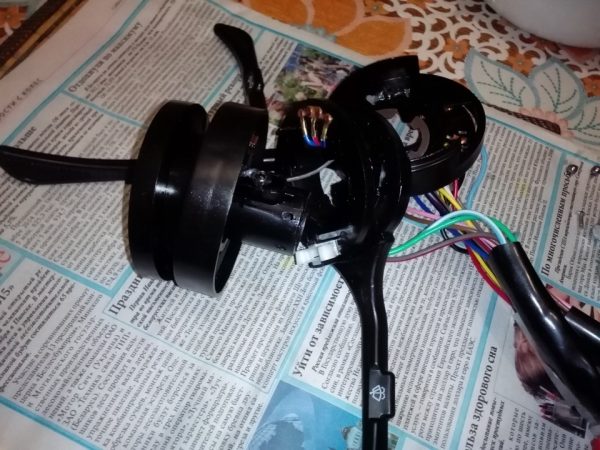
How to disassemble
If the switch breaks down, as a rule, it is replaced with a new device, since it is non-separable. If you wish, you can try to disassemble and repair the mechanism. To do this, you will need to drill out the rivets, separate the product into parts, clean the contacts, replace the damaged springs. If there is no desire to engage in such a procedure, a steering column switch can be bought for 700–800 rubles. and change it yourself.
How to replace
To replace the switch you will need:
- Phillips and flat screwdrivers;
- key on 8.
The process is performed in the following sequence:
- Pull the negative wire from the battery.
- Remove the steering wheel by unscrewing the mounting nut.
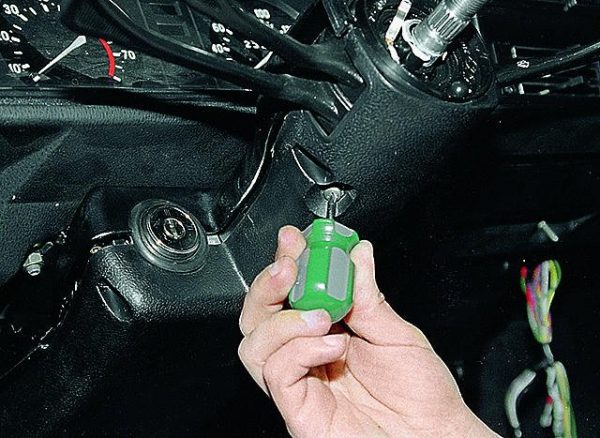
- We unscrew the screws and remove the plastic trim.We unscrew the fastening of the decorative casing of the steering shaft and remove the lining
- We dismantle the instrument cluster.
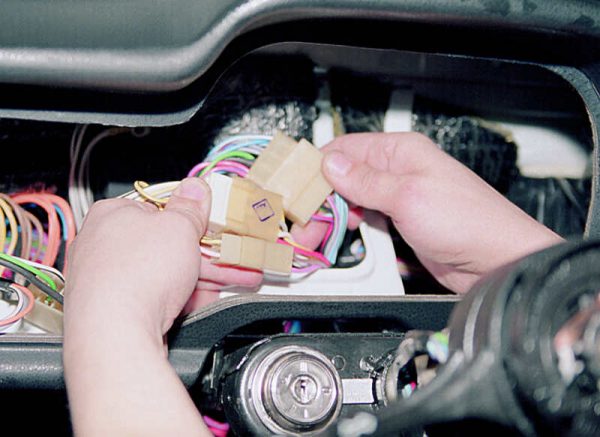
- In the niche of the tidy, we disconnect the pads of the steering column switch.We remove the pads with wires from the switch (for example, VAZ 2106)
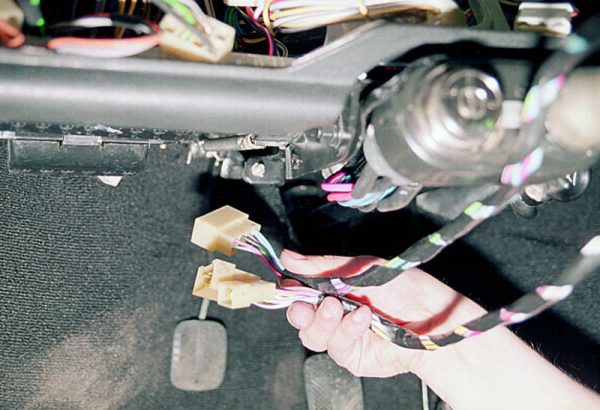
- We take out the connectors.Under the panel we take out the wires with connectors
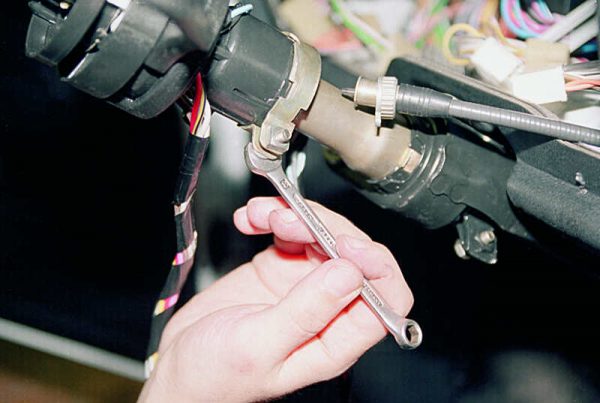
- We unscrew the fastening of the clamp of the switches and remove the mechanism from the shaft.We loosen the fasteners of the clamp holding the switches
- Installation is carried out in the reverse order.
Video: replacing the steering column switch on the classic Zhiguli

Problems with the dashboard of the VAZ 2105 occur infrequently. However, in the event of malfunctions, they can be identified by simple actions without special tools. A set of screwdrivers, wrenches, pliers and a multimeter will be enough for repair work.

