Carburetor repair on OKA car
Content
A clogged car carburetor becomes a source of headache for any car owner. The OKA car driver is no exception in this regard. If the carburetor is not repaired in time, then you can forget about a comfortable ride. Is it possible to repair this device on my own? Of course.
Models of carburetors for OKA cars
There are various modifications of OKA cars. The first car of this brand was model 1111. It was produced at the VAZ and KamAZ plants. This model had a 0,65 liter engine and was equipped with a DMZ carburetor, which was produced at the plant of automatic units in Dimitrovgrad.
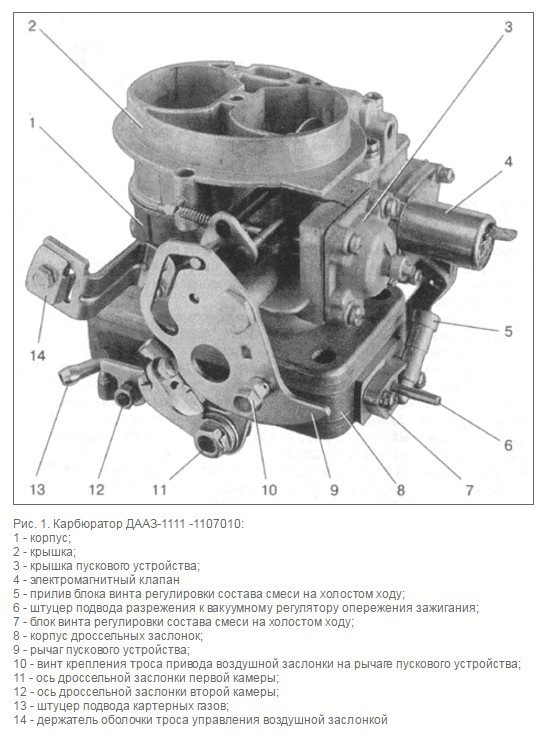
The main elements of the DAAZ 1111 carburetor for the OKA car
Then a new model of the OKA car appeared - 11113. The engine capacity of this car was slightly larger and amounted to 0,75 liters. Consequently, the carburetor has also changed slightly. Model 11113 is equipped with DAAZ 1111 carburetors. This unit is produced at the same plant in Dimitrovgrad. This carburetor differs from its predecessor only in the increased size of the mixing chamber. In all other respects, the device has not undergone any changes.
Common carburetor malfunctions and their causes
- carbohydrates are burned. This is the most common malfunction associated with OKA carburetors. Usually the problem occurs due to low-quality gasoline. Because of this, too lean fuel mixture begins to flow into the carburetor, after which the driver hears a loud knock under the hood, reminiscent of a pistol shot. To fix the problem, drain low-quality fuel, change the service station and clean the carburetor jets;
- excess gasoline in the carburetor. If too much gasoline enters the device, it is very difficult to start the car - the engine starts, but immediately stops. To fix this problem, you need to adjust the carburetor and, if the problem persists, install a new set of spark plugs;
- There is no gasoline in the carburetor. If the carburetor does not receive gasoline, then the car simply will not start. Usually, fuel stops flowing due to clogging of one of the chambers of the device or due to poor adjustment. There is only one way out: remove the carburetor, completely disassemble it and rinse it;
- Condensation has formed in the carburetor. This problem is rare, but it is impossible not to mention it. Most often, condensate in the carburetor appears in winter, in severe frost. After that, the car starts very badly. If you still managed to start, you need to warm up the engine thoroughly for 10-15 minutes. This is usually sufficient to completely remove the condensate.
Dismantling car carburetor OKA 11113
Before proceeding with the disassembly of the carburetor, you need to decide on the necessary tools.
Tools and materials
- a set of fixed keys;
- medium-sized flat screwdriver;
- keys set.
Sequence of operations
- The hood of the car opens, the negative terminal of the battery is removed.
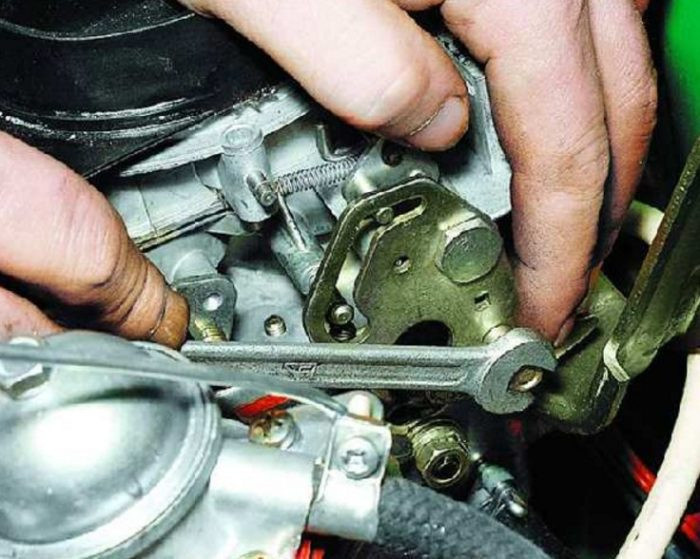
- The air spring is attached to the stem with a 12mm bolt. This bolt is slightly loosened with an open end wrench.
 The air damper bolt of the OKA car carburetor is unscrewed with an open-end wrench
 - Now you need to loosen the bolt with which the air damper actuator housing is bolted to the bracket. This is done with the same open-end wrench. The OKA carburettor bracket bolt is unscrewed with an open-end wrench
- After that, the air vent screw is completely unscrewed. The stem is disconnected from the damper. The draft of the air damper of the OKA car carburetor is removed manually
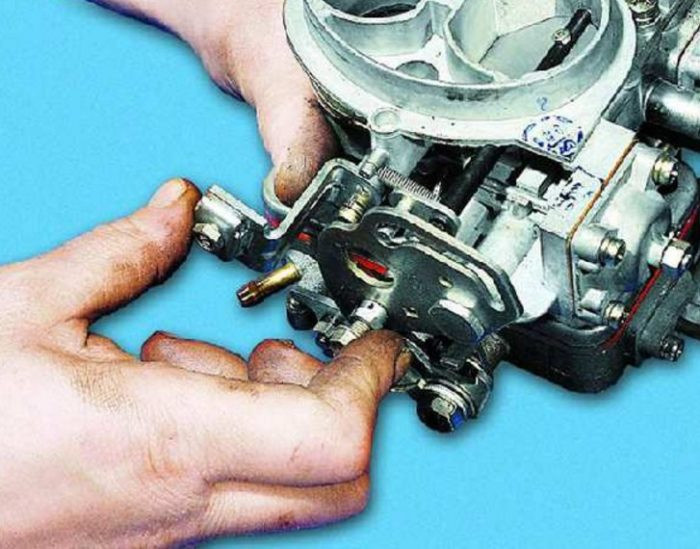
- Using a flathead screwdriver, unscrew the end of the intermediate rod from the throttle lever. The intermediate rod of the OKA automobile carburetor is removed with a flat screwdriver
- Now the ventilation hose is manually removed from the carburetor fitting. Carburetor ventilation hose OKA removed manually
- All cables are manually removed from the forced idle economizer. The wires of the idle economizer of the OKA car are disconnected manually
- The vacuum control hose is manually removed from the carburetor fitting. Manually remove the vacuum regulator hose on the OKA automobile carburetor
- Use a flathead screwdriver to loosen the clamp on the main fuel hose from the carburetor. This hose is then manually removed from the fitting. A screwdriver loosens the clamp of the main fuel hose of the carburetor on the OKA car
- With a 10 key, unscrew the 2 bolts that hold the bracket with the air filter. The support has been removed. Car air filter holder OKA is removed manually
- Now the carb rests only on the two front nuts. They are unscrewed with a 14 wrench.
- The carburetor is manually removed from the mounting bolts. After unscrewing the fastening nuts, the carburetor is manually removed from the OKA car
- Installing the carburetor is carried out in the reverse order.
 The air damper bolt of the OKA car carburetor is unscrewed with an open-end wrench
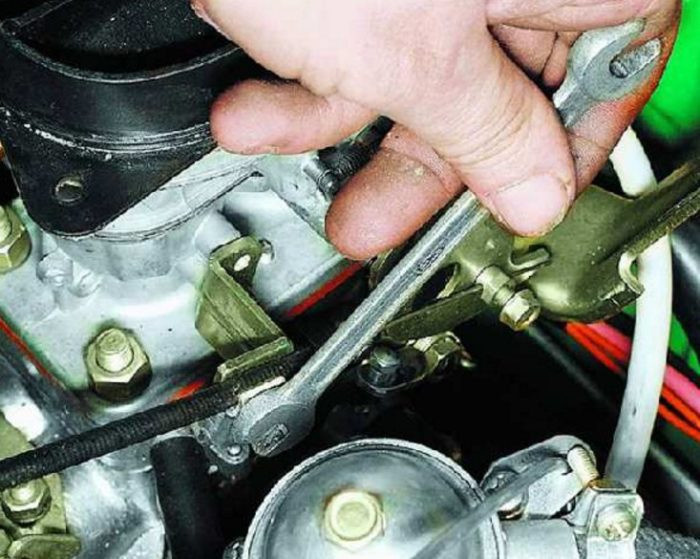 The OKA carburettor bracket bolt is unscrewed with an open-end wrench
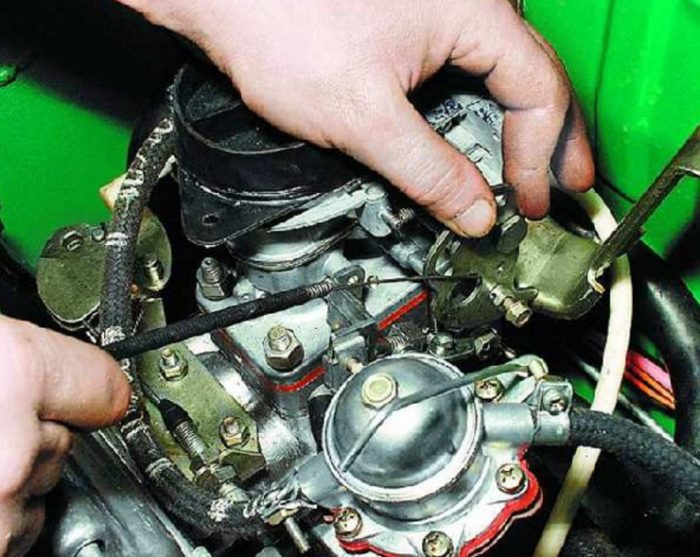 The draft of the air damper of the OKA car carburetor is removed manually
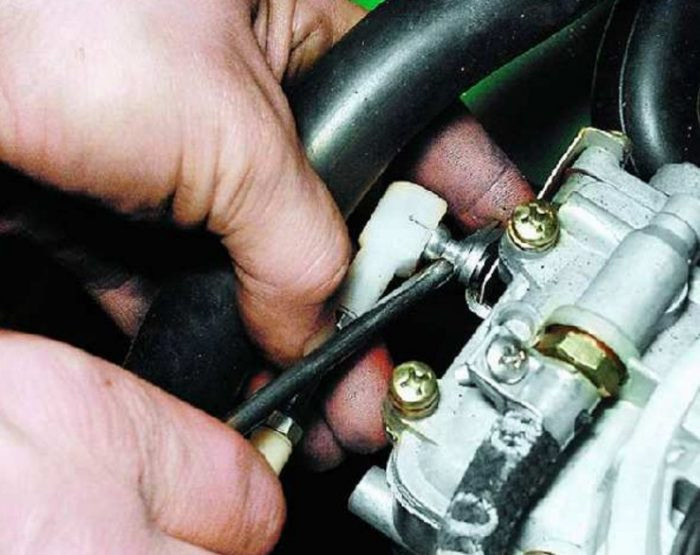 The intermediate rod of the OKA automobile carburetor is removed with a flat screwdriver
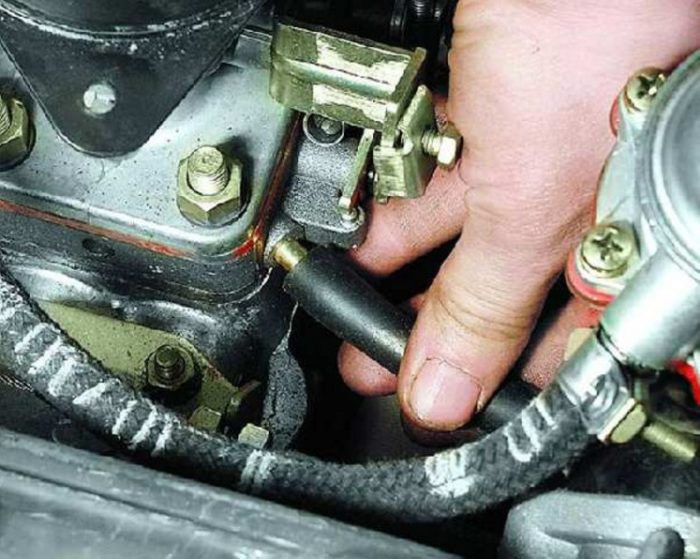 Carburetor ventilation hose OKA removed manually
 The wires of the idle economizer of the OKA car are disconnected manually
 Manually remove the vacuum regulator hose on the OKA automobile carburetor
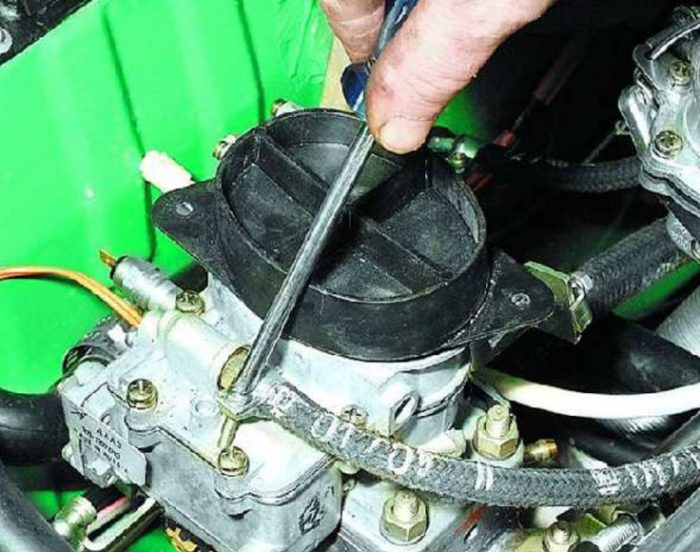 A screwdriver loosens the clamp of the main fuel hose of the carburetor on the OKA car
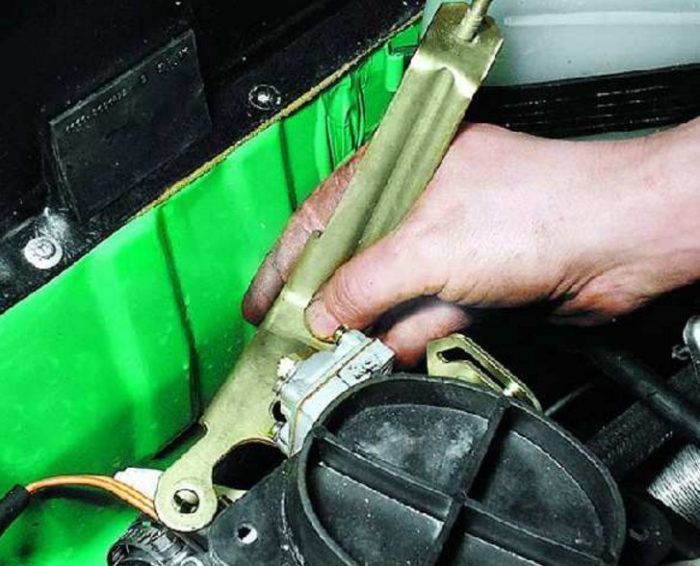 Car air filter holder OKA is removed manually
 After unscrewing the fastening nuts, the carburetor is manually removed from the OKA car
Cleaning the carburetor from soot and dirt
Most carburetor problems are due to poor fuel quality. This is what causes the appearance of plaque, soot. This also leads to blockage of the fuel lines. To remove all this, you will have to use a special liquid for cleaning carburetors. This is an aerosol can. A set of nozzles for flushing the carburetor channels is usually attached to the cylinder. There are many manufacturers of liquids, but the HG3177 liquid is especially popular with motorists, which allows you to perfectly flush the carburetor in a few minutes.
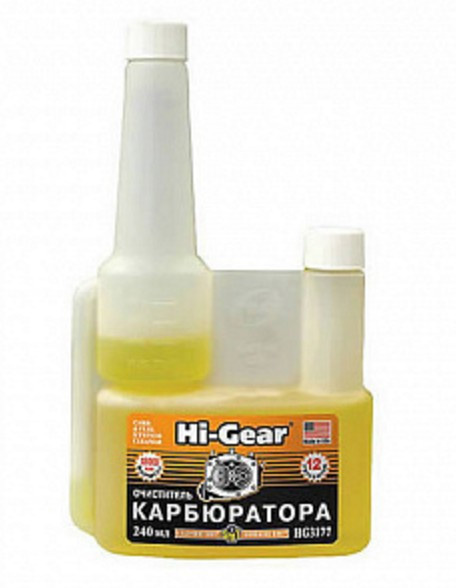
Carburetor cleaner HG3177 is very popular among car enthusiasts
Tools and supplies
- rags;
- several toothpicks;
- a piece of thin steel wire 30 cm long;
- compressed air cylinder;
- rubber gloves and goggles;
- a set of fixed keys;
- screwdriver;
- carburetor cleaner.
Sequencing
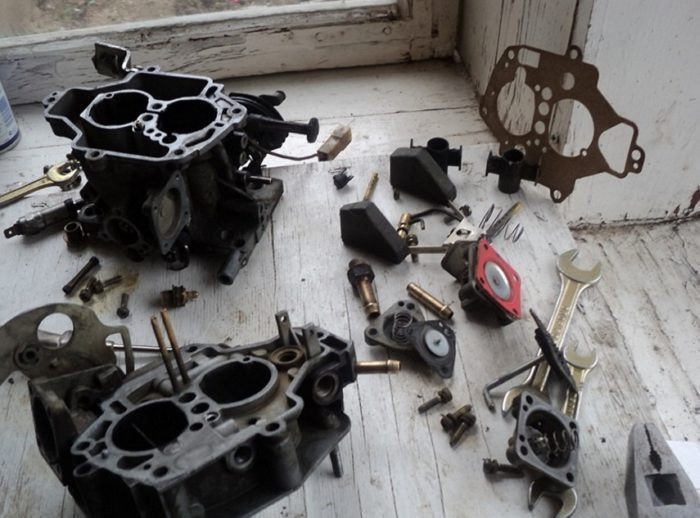
- The carburetor removed from the car is completely disassembled. Completely disassembled and prepared for cleaning carburetor DAAZ 1111 OKA car
- All clogged channels and holes are thoroughly cleaned with toothpicks. And if the soot is too welded to the walls of the fuel channel, then steel wire is used to clean it.
- After preliminary cleaning, a nozzle with the thinnest tube is inserted into the jar of liquid. The liquid is poured into all fuel channels and small holes in the carburetor. After that, the device should be left alone for 15-20 minutes (the exact time depends on the type of flushing fluid used, and to clarify it, you need to read the information on the can). The thinnest nozzle for a canister of carburetor flushing liquid
- After 20 minutes, the fuel channels are purged with compressed air from a canister.
- All other contaminated carburetor parts are treated with liquid. The spray is sprayed without a nozzle. After 20 minutes, the parts are thoroughly wiped with a rag and the carburetor is assembled back.
 Completely disassembled and prepared for cleaning carburetor DAAZ 1111 OKA car
 The thinnest nozzle for a canister of carburetor flushing liquid
OKA car carburetor adjustment
- The choke lever is fully turned counterclockwise and held. In this position, the carburetor choke should be fully closed. In the lowest position of the lever, the carburetor damper of the OKA car must be completely closed.
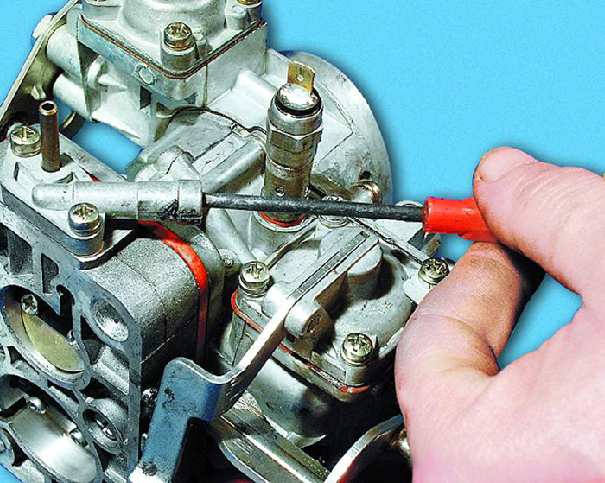
- Next, the carburetor starter rod, indicated in the photo by the number 2, must be completely drowned with a screwdriver 1. In this case, the air damper should only be slightly ajar. The carburetor starter rod in the OKA car is sunk with a flat screwdriver until it stops
- Now use a feeler gauge to measure the gap between the damper edge and the chamber wall. This gap should not exceed 2,2 mm. The gap in the air damper of the OKA car carburetor is measured with a feeler gauge
- If it turns out that the gap exceeds 2,2 mm, the lock nut holding the set screw on the starter is loosened. After that, the screw must be turned clockwise until the damper gap is the desired size. After that, the locknut is tightened again. The air damper clearance on the OKA vehicle is adjusted by turning the locking screw
- The carburetor is rotated so that the throttle body is at the top (while the choke lever is held in the lowest position all the time). After that, the gap between the edges of the throttle valves and the walls of the fuel chambers is measured with a probe. It should not exceed 0,8 mm. The throttle valve clearance on the OKA automobile carburetor is measured with a feeler gauge
- If the throttle clearance is greater than 0,8 mm, it should be reduced by turning the adjusting screw located on the throttle lever clockwise. This is done with a key. The gap in the throttle valves of the OKA automobile carburetor is regulated by turning the locking screw
 In the lowest position of the lever, the carburetor damper of the OKA car must be completely closed.
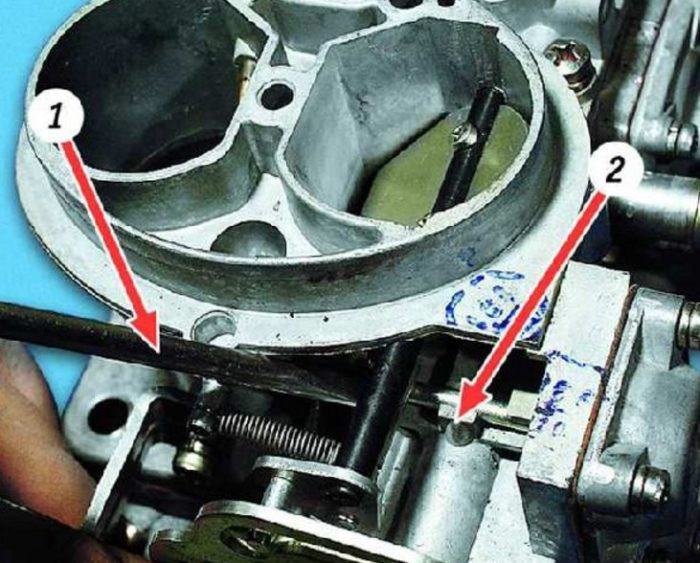 The carburetor starter rod in the OKA car is sunk with a flat screwdriver until it stops
 The gap in the air damper of the OKA car carburetor is measured with a feeler gauge
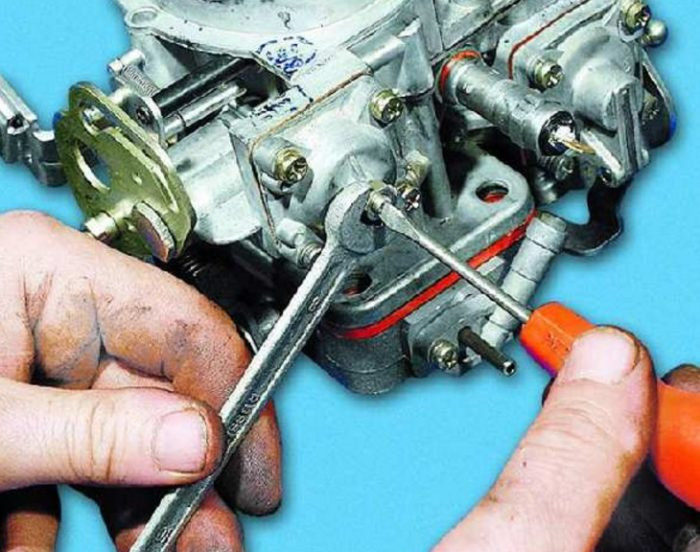 The air damper clearance on the OKA vehicle is adjusted by turning the locking screw
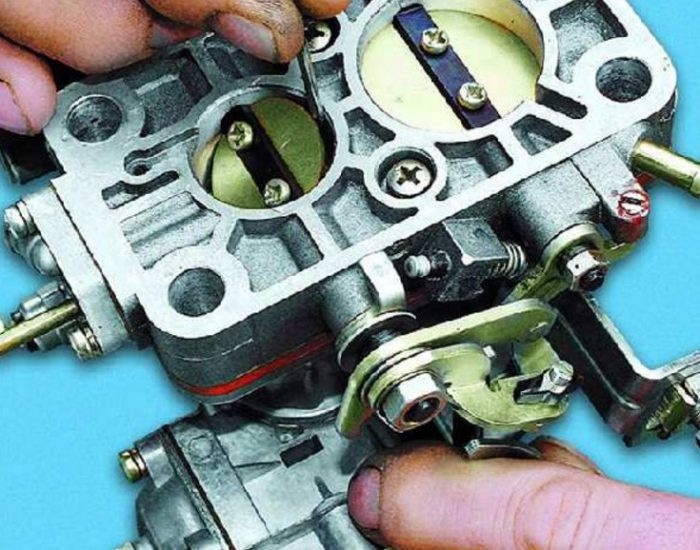 The throttle valve clearance on the OKA automobile carburetor is measured with a feeler gauge
 The gap in the throttle valves of the OKA automobile carburetor is regulated by turning the locking screw
OKA car carburetor clearance adjustment - video
Dismantling and adjusting the OKA car carburetor is not an easy task. However, even a novice motorist is quite capable of doing it. As long as you follow these instructions exactly. Particular attention should be paid to checking the clearances of the carburetor. If at least one of them is set incorrectly, new problems with the carburetor cannot be avoided.