Manual for the repair and replacement of the pump of the car VAZ 2106
Content
Compared with current cars, the VAZ 2106 engine cooling system is simple in design, allowing the owner of the car to make repairs on his own. This includes the replacement of the coolant pump, which is performed at intervals of 40–60 thousand kilometers, depending on the quality of the installed spare part. The main thing is to notice signs of critical wear in time and immediately install a new pump or try to restore the old one.
The device and purpose of the pump
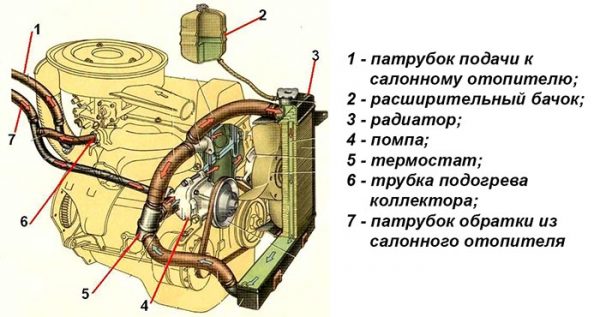
The principle of operation of the cooling system of any car is to remove excess heat from the heating elements of the engine - combustion chambers, pistons and cylinders. The working fluid is a non-freezing liquid - antifreeze (otherwise - antifreeze), which gives off heat to the main radiator, blown by the air flow.
The secondary function of the cooling system is to warm the passengers in winter by means of a small saloon heater core.
Forced coolant circulation through the engine channels, pipes and heat exchangers is provided by a water pump. The natural flow of antifreeze inside the system is impossible, therefore, in the event of a pump failure, the power unit will inevitably overheat. The consequences are fatal - due to the thermal expansion of the pistons, the engine jams, and the compression rings get thermal tempered and become soft wire.
In classic VAZ models, the water pump is rotated by a belt drive from the crankshaft. The element is located on the front plane of the motor and is equipped with a conventional pulley, designed for a V-belt. The pump mount is conceived as follows:
- a light alloy body is screwed to the flange of the cylinder block on three long M8 bolts;
- a flange is made on the front wall of the housing and a hole is left for the pump impeller with four M8 studs along the edges;
- the pump is put on the indicated studs and fastened with 13 mm wrench nuts, there is a cardboard seal between the elements.
Poly V-belt drive rotates not only the shaft of the pumping device, but also the generator armature. The described scheme of operation is the same for engines with different power systems - carburetor and injection.

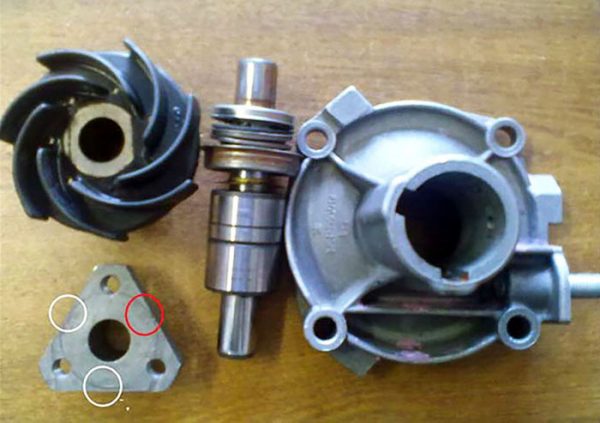
The design of the pump unit
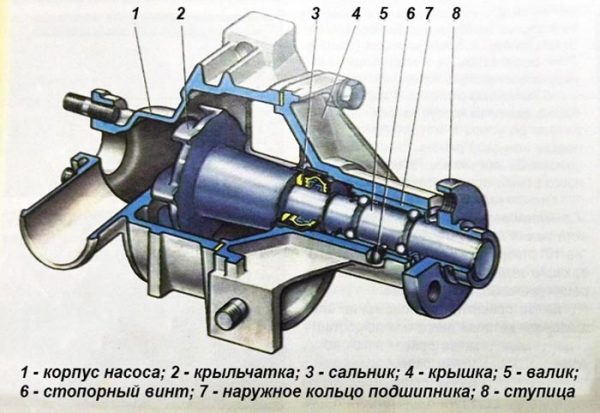
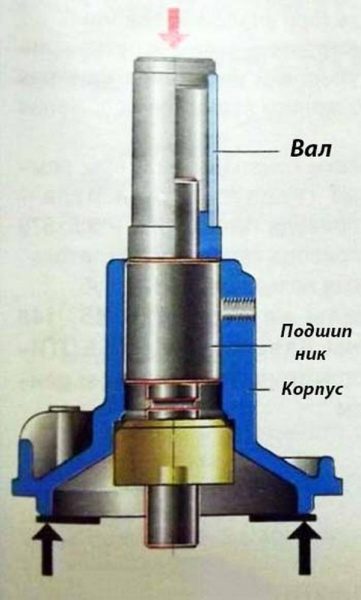
The pump housing is a square flange cast from aluminum alloy. In the center of the case there is a protruding bushing, inside of which there are working elements:
- ball bearing;
- pump shaft;
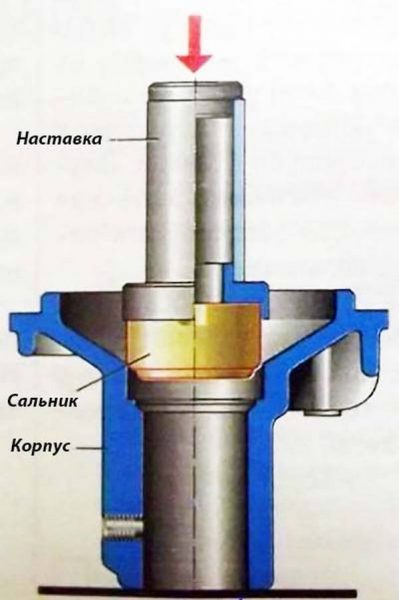
- an oil seal that prevents antifreeze from flowing out over the surface of the roller;
- locking screw for fixing the bearing race;
- impeller pressed onto the end of the shaft;
- a round or triangular hub on the opposite end of the shaft, where the driven pulley is attached (with three M6 bolts).
 For free rotation of the shaft, a closed-type rolling bearing is installed in the bushing.
The principle of operation of the water pump is quite simple: the belt turns the pulley and shaft, the impeller pumps the antifreeze coming from the nozzles into the housing. The friction force is compensated by the bearing, the tightness of the assembly is provided by the stuffing box.
The first impellers of the VAZ 2106 pumps were made of metal, which is why the heavy part quickly wore out the bearing assembly. Now the impeller is made of durable plastic.
Symptoms and causes of malfunction
The weak points of the pump are the bearing and the seal. It is these parts that wear out the fastest, causing coolant leakage, play on the shaft and subsequent destruction of the impeller. When large gaps form in the mechanism, the roller begins to dangle, and the impeller begins to touch the inner walls of the housing.
Typical breakdowns of the water pump:
- loss of tightness of the connection between the two flanges - the pump and the housing - due to a leaky gasket;
- bearing wear due to lack of lubrication or natural wear;
- gland leakage caused by shaft play or cracked sealing elements;
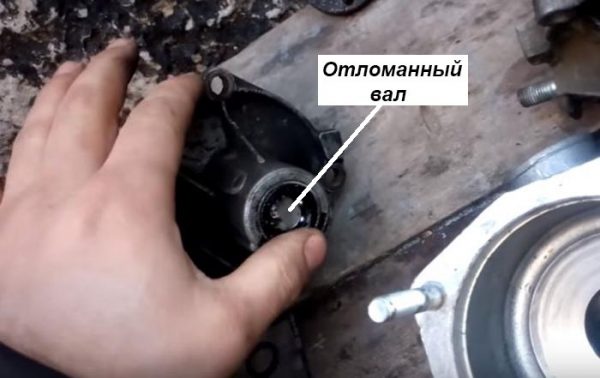
- breakage of the impeller, jamming and destruction of the shaft.If the bearing is jammed, the shaft may break into 2 parts
Critical wear of the bearing assembly leads to the following consequences:
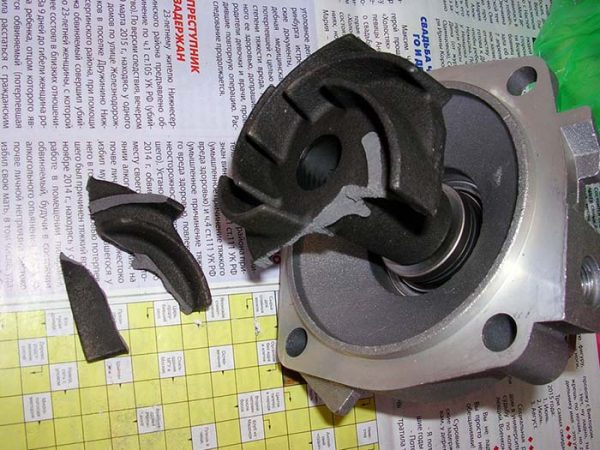
- The roller is strongly warped, the impeller blades hit the metal walls and break off.
- The balls and separator are ground, large chips jam the shaft, which can cause the latter to break in half. At the moment the pulley is forced to stop, the belt drive begins to slip and squeak. Sometimes the alternator drive belt flies off the pulleys.
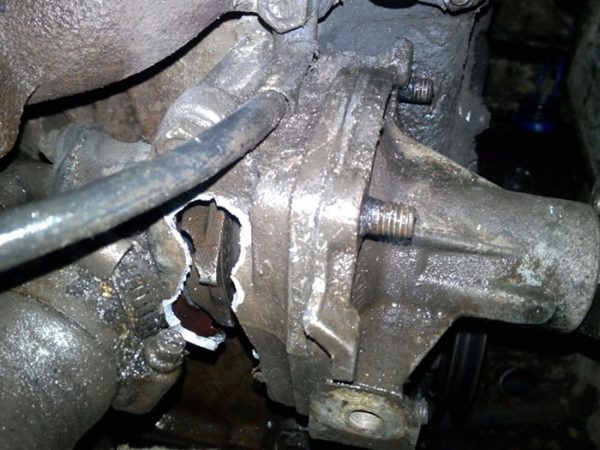
- The worst scenario is a breakdown of the housing itself by the impeller of the pump and the instant release of a large amount of antifreeze to the outside.From hitting the walls of the housing, the impeller blades break off, the pump loses its efficiency
The breakdowns described above are hard to miss - the red battery charging indicator flashes on the instrument panel, and the temperature gauge literally rolls over. There is also a sound accompaniment - a metallic knock and crackle, the whistle of a belt. If you hear such sounds, immediately stop driving and turn off the engine.
How to identify symptoms of pumping unit wear in the early stages:
- a worn bearing makes a distinct hum, later it starts to rumble;
- around the pump seat, all surfaces become wet from antifreeze, the belt often gets wet;
- roller play is felt by hand if you shake the pump pulley;
- a wet belt can slip and make an unpleasant whistle.
It is unrealistic to detect these signs on the go - the noise of the bearing assembly is hard to hear against the background of a running motor. The best way to diagnose is to open the hood, look at the front of the engine, and shake the pulley by hand. At the slightest suspicion, it is recommended to loosen the belt tension by unscrewing the nut on the generator bracket and try the shaft play again. Permissible movement amplitude - 1 mm.
When the pump run reaches 40-50 thousand km, checks must be performed before each trip. This is how long the current pumps serve, the quality of which is much worse than the original spare parts that have been discontinued. If a backlash or leakage is detected, the problem is solved in two ways - by replacing or repairing the pump.
How to remove the pump on a VAZ 2106 car
Regardless of the method of troubleshooting chosen, the water pump will have to be removed from the vehicle. The operation cannot be called complicated, but it will take a lot of time, especially for inexperienced drivers. The whole procedure is performed in 4 stages.
- Preparation of tools and place of work.
- Dismantling and dismantling of the element.
- The choice of a new spare part or a repair kit for an old pump.
- Restoration or replacement of the pump.
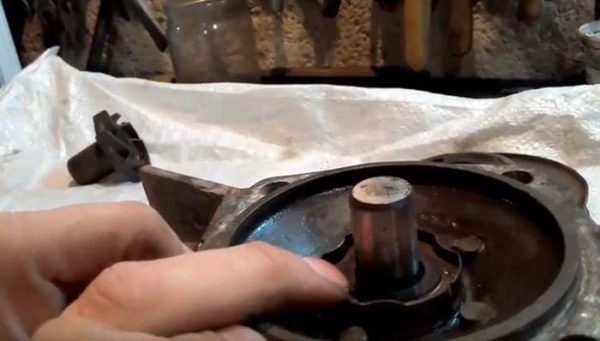
After disassembly, the removed pumping unit should be examined for restoration. If only the primary symptoms of wear are noticeable - a small shaft play, as well as the absence of damage to the body and main sleeve - the element can be restored.
Most motorists tend to completely replace the unit. The reason is the fragility of the restored pump, low savings on restoration and the lack of repair kits on sale.
Required tools and supplies
You can remove the water pump of the "six" on any flat area. The inspection ditch simplifies only one task - unscrewing the generator fastening nut in order to loosen the belt. If desired, the operation is performed lying under the car - it is not difficult to reach the bolt. The exceptions are the machines on which the side casings have been preserved - anthers screwed from below on self-tapping screws.
No special pullers or tools are required. From the tools you need to prepare:
- a set of heads with a crank equipped with a ratchet;
- a wide container and a hose for draining antifreeze;
- a set of cap or open-end wrenches with dimensions of 8-19 mm;
- mounting blade;
- flat head screwdriver;
- knife and brush with metal bristles for cleaning flanges;
- rags;
- protective gloves.When disassembling the pump unit, it is more convenient to work with socket heads than with open-end wrenches
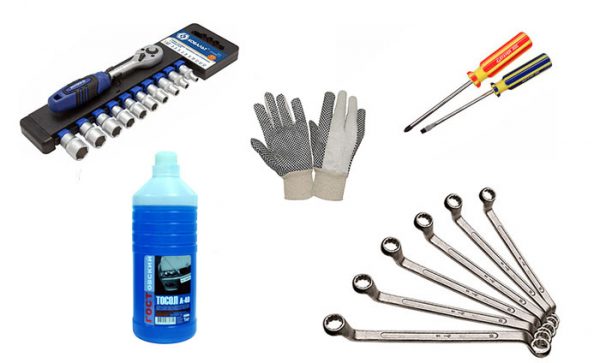
From consumables, it is recommended to prepare an antifreeze, a high-temperature sealant and an aerosol lubricant such as WD-40, which facilitates the loosening of threaded connections. The amount of antifreeze purchased depends on the loss of coolant due to a pump failure. If a small leak was observed, it is enough to purchase a 1 liter bottle.
Taking advantage of the opportunity, you can replace the old antifreeze, since the liquid will still have to be drained. Then prepare a full filling volume of antifreeze - 10 liters.
Disassembly Procedure
The procedure for dismantling the pump on the "six" is greatly simplified compared to the newer front-wheel drive VAZ models, where you have to remove the timing belt and disassemble half of the drive with markings. On the "classic" the pump is installed separately from the gas distribution mechanism and is located outside the engine.
Before proceeding with disassembly, it is advisable to cool the warm engine so that you do not have to burn yourself with hot antifreeze. Drive the machine to the workplace, turn on the handbrake and disassemble according to the instructions.
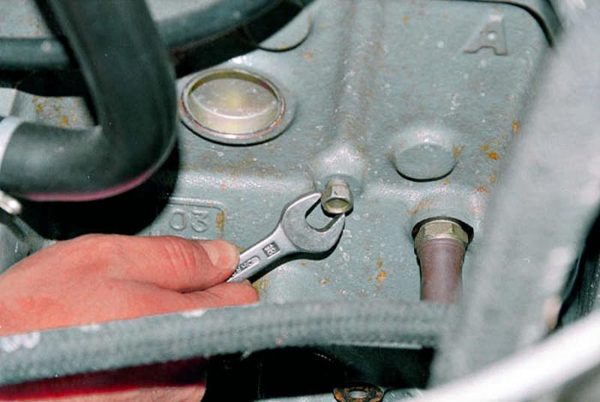
- Raise the hood cover, find the drain plug on the cylinder block and substitute the trimmed canister below to drain the antifreeze. The aforementioned plug in the form of a bolt is screwed into the left wall of the block (when viewed in the direction of the car).The drain plug is a bronze bolt that can be easily unscrewed with a wrench.
- Partially empty the cooling system by unscrewing the plug with a 13 mm wrench. To prevent antifreeze from splashing in all directions, attach the end of a garden hose lowered into the container to the hole. While draining, slowly open the radiator and expansion tank caps.After removing the radiator cap, air begins to enter the system and the fluid drains faster
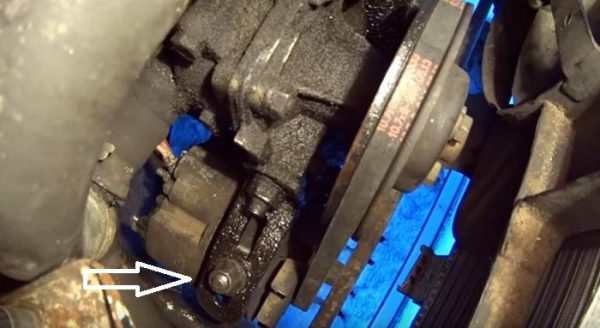
- When the main volume of antifreeze flows out, feel free to wrap the cork back, tightening it with a wrench. It is not required to completely drain the fluid from the system - the pump is located quite high. After that, loosen the lower generator mounting nut.To unscrew the lower nut securing the generator, you have to crawl under the car
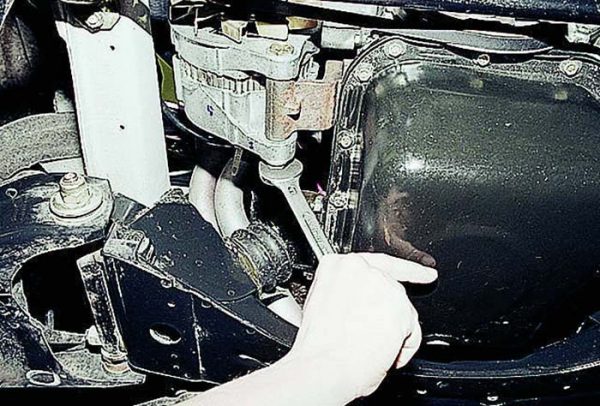
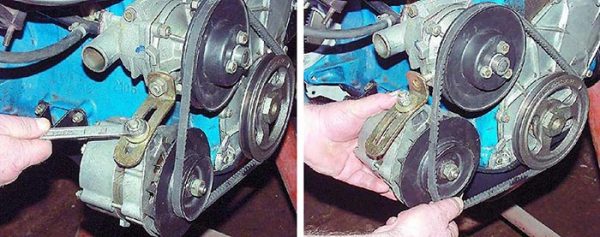
- Remove the belt drive between the crankshaft, pump and generator. To do this, loosen the second nut on the adjusting bracket with a 19 mm wrench. Move the body of the unit to the right with a pry bar and drop the belt.The alternator drive belt is removed manually after unscrewing the tension bracket nut
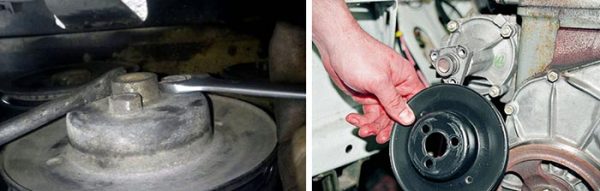
- With a 10 mm spanner, unscrew the 3 M6 bolts holding the belt pulley on the pump hub. To prevent the shaft from spinning, insert a screwdriver between the bolt heads. Remove the pulley.To prevent the pulley from spinning, hold the screw heads with a screwdriver
- Separate the belt tension adjusting bracket from the pump body by unscrewing the 17 mm nut on the side.
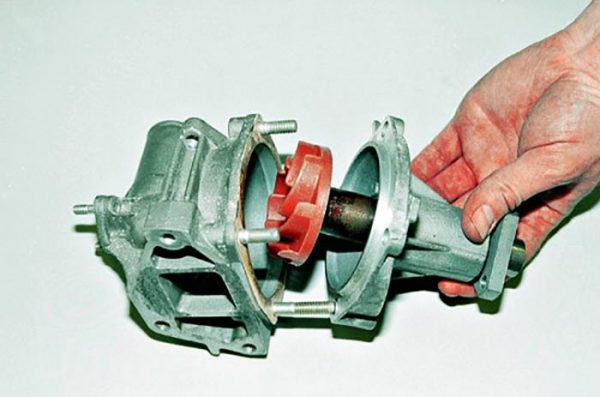
- With a 13 mm socket, loosen and twist the 4 pump mounting nuts. Using a flathead screwdriver, separate the flanges and pull the pump out of the housing.When the pulley is removed from the hub of the unit, 4 fastening nuts are easily unscrewed with a 13 mm head with a wrench
There is an easier way to remove the pulley. Without a tensioned belt, it rotates freely, which creates inconvenience when loosening the mounting bolts. In order not to fix the element with a screwdriver, loosen these fasteners before removing the belt drive by inserting a screwdriver into the pulley slot on the crankshaft.
After removing the pumping unit, perform the 3 final steps:
- plug the open opening with a rag and clean off the remnants of the cardboard strip from the landing area with a knife;
- wipe the block and other nodes where antifreeze was previously sprayed;
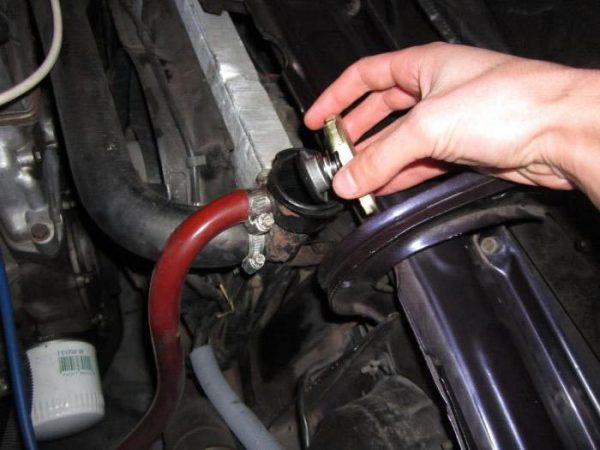
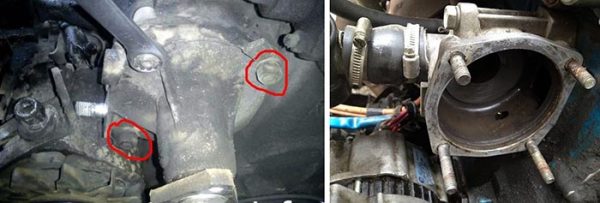
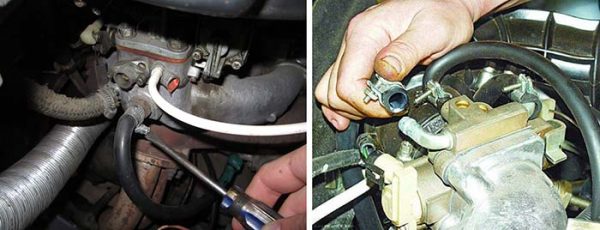
- remove the pipe of the highest point of the cooling system connected to the intake manifold fitting (on the injector, the heating pipe is connected to the throttle valve block).It is better to remove the heating pipe immediately after draining the antifreeze from the cylinder block
The branch pipe at the highest point is turned off for one purpose - to open the way for the air displaced by antifreeze when the system is filled. If you ignore this operation, an air lock may form in the pipelines.
Video: how to remove the water pump VAZ 2101-2107

Selection and installation of a new spare part
Since the VAZ 2106 car and parts for it have long been discontinued, original spare parts cannot be found. Therefore, when choosing a new pump, it is worth considering a number of recommendations.
- Check part markings for part number 2107-1307011-75. The pump from Niva 2123–1307011–75 with a more powerful impeller is suitable for the “classic”.
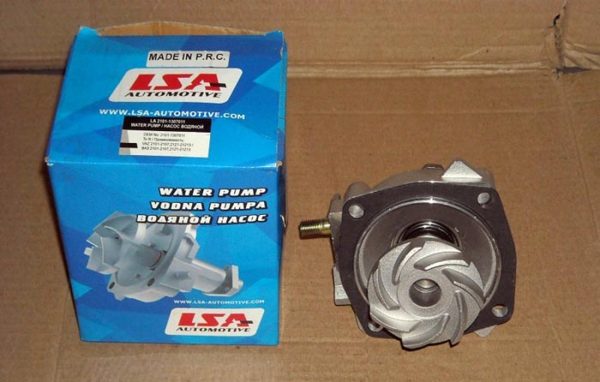
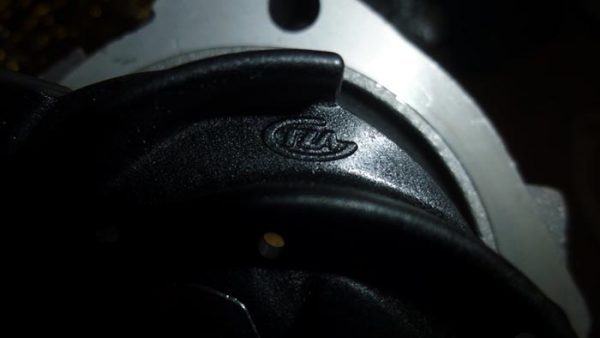
- Buy a pump from trusted brands - Luzar, TZA, Phenox.The imprint of the logo between the impeller blades indicates the quality of the product
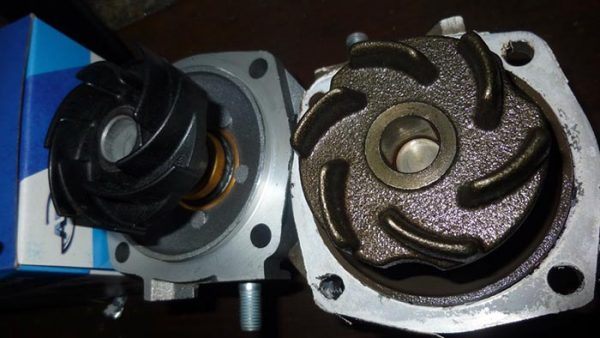
- Remove the spare part from the package, inspect the flange and impeller. The above manufacturers make an imprint of the logo on the body or impeller blades.
- On sale there are pumps with plastic, cast iron and steel impeller. It is better to give preference to plastic, since this material is light and quite durable. Cast iron is second, steel is third.Plastic blades have a larger working surface and lighter weight
- A cardboard or paronite gasket should be included with the pump.
Why not take a pump with an iron impeller? Practice shows that among such products there is a large percentage of fakes. Making handicraft cast iron or plastic is much more difficult than turning steel blades.
Sometimes a fake can be identified by a mismatch in size. Put the purchased product on the mounting studs and turn the shaft by hand. If the impeller blades start to cling to the housing, you have slipped a low-quality product.
Install the water pump in reverse order.
- Coat the gasket with high temperature sealant and slide it over the studs. Coat the pump flange with the compound.
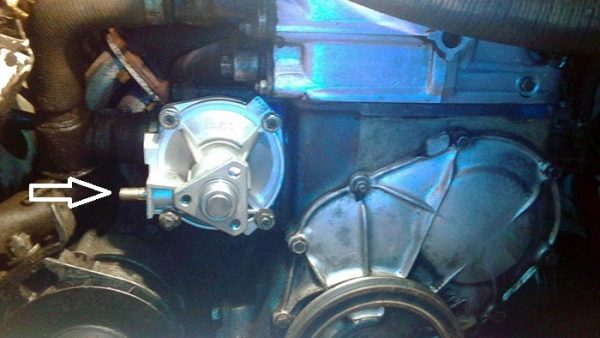
- Insert the element into the hole correctly - the generator bracket mounting stud should be on the left.In the correct position of the pump, the generator mounting stud is on the left side
- Install and tighten the 4 nuts holding the pump to the housing. Fasten the pulley, install and tension the belt.
The cooling system is filled through the radiator neck. When pouring antifreeze, watch the tube disconnected from the manifold (on the injector - throttle). When the antifreeze runs out of this tube, put it on the fitting, clamp it with a clamp and add fluid to the expansion tank to the nominal level.
Video: how to choose the right coolant pump

Worn part repair
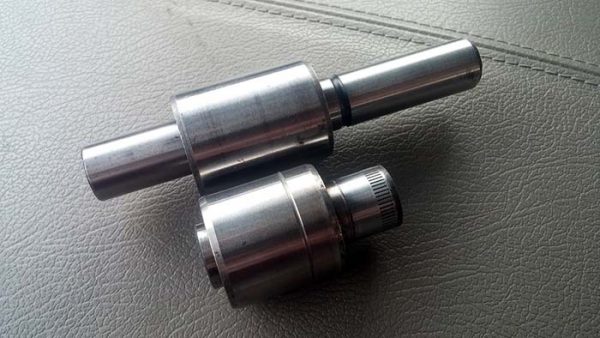
To restore the pump to working capacity, it is necessary to replace the main parts - the bearing and the seal, if necessary - the impeller. The bearing is sold complete with the shaft, the stuffing box and the impeller are sold separately.
If you are going to buy a repair kit, be sure to take the old shaft with you. Products sold in the store may vary in diameter and length.
To disassemble the pump, prepare the following tools:
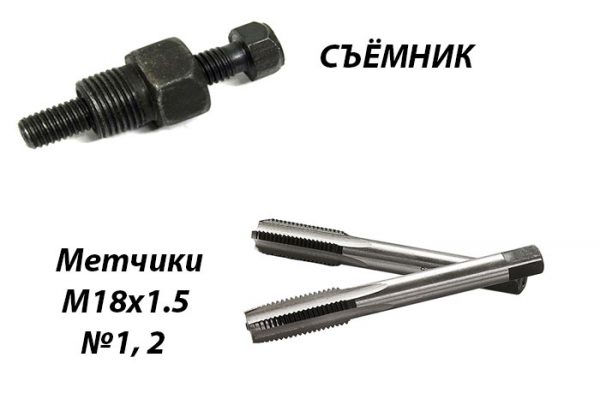
- puller type "bolt inside the bolt", external thread - M18 x 1,5;
- knob and tap M18 with a thread pitch of 1,5 mm - the first and second numbers;
- vice;
- a hammer;
- wooden guide.Taps will be needed for an impeller made of plastic, in cast iron a factory thread is provided
The essence of the procedure is to alternately remove the impeller, shaft with bearing and stuffing box. Work is carried out in the following sequence.
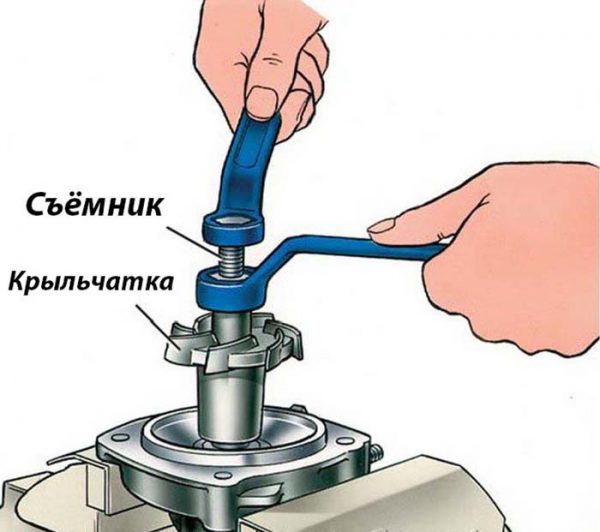
- Using a puller, push the shaft out of the impeller. If the impeller is made of plastic, pre-cut the M18 x 1,5 thread in it for the puller.Carefully clamp the part with a vise - the aluminum alloy may crack
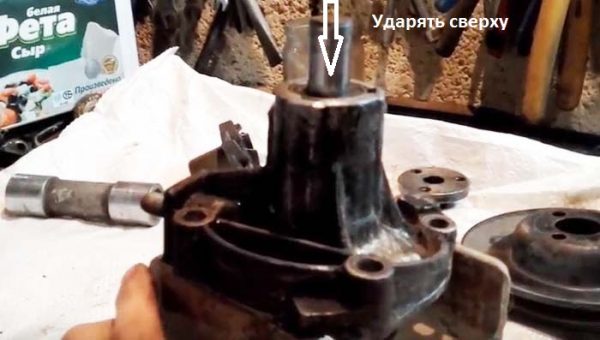
- Loosen the set screw of the bearing assembly and drive the shaft out of the bearing sleeve. Try to hit on weight, but if the roller does not give in, rest the flange on the unclenched vise and hit through the adapter.Limit the impact force on the roller to prevent damage to the seat sleeve
- Turn the released shaft with the bearing over, place the hub on the jaws of the vise and, using the adapter, separate these parts.The hub is easily knocked off the shaft by hammer blows through the spacer
- The worn oil seal is knocked out of the socket with the help of an old shaft, whose short end of the larger diameter is used as a guide. Clean the bearing race with sandpaper first.To dismantle the stuffing box, the old shaft is used, turned upside down

As a rule, the functional elements of the pump do not fail one by one. The impeller blades break off due to play on the shaft and impact on the housing, for the same reason the stuffing box begins to leak. Hence the advice - disassemble the pump completely and change the entire set of parts. The undamaged impeller and pulley hub can be left.
Assembly is performed in the following order.
- Carefully press the new oil seal into the seat using a suitable diameter pipe tool.The gland is seated with light blows of a hammer through a round adapter.
- Slide the hub onto the new shaft with bearing.
- Clean the inner walls of the bushing with fine sandpaper, insert the shaft into it and hammer it in with a hammer until it stops. It is better to hit the end of the roller on weight. Tighten the lock screw.
- Put the impeller in place using a wooden spacer.After pressing the end of the impeller should rest against the graphite ring on the stuffing box
When driving the shaft, make sure that the hole in the bearing race matches the hole for the set screw in the body of the bushing.
Upon completion of the repair, install the water pump on the car, using the instructions above.
Video: how to restore a VAZ 2106 pump

The pump plays a key role in the VAZ 2106 engine cooling system. Timely detection of a malfunction and replacement of the pump will save the power unit from overheating, and the owner of the car from expensive repairs. The price of the spare part is negligible compared to the cost of the elements of the piston and valve groups.

