Tie rods of a VAZ 2107 car: device, malfunctions and replacement
Content
In modern cars, the front wheels are turned by means of a gear rack connected to the steering wheel shaft. The VAZ 2107 and other classic Zhiguli models use an outdated system of articulated rods - the so-called trapezoid. The reliability of the mechanism leaves much to be desired - parts wear out literally in 20–30 thousand km, the maximum resource is 50 thousand km. A positive point: knowing the design and disassembly techniques, the owner of the "seven" can save money and replace the elements on his own.
Purpose and scheme of operation of the trapezoid
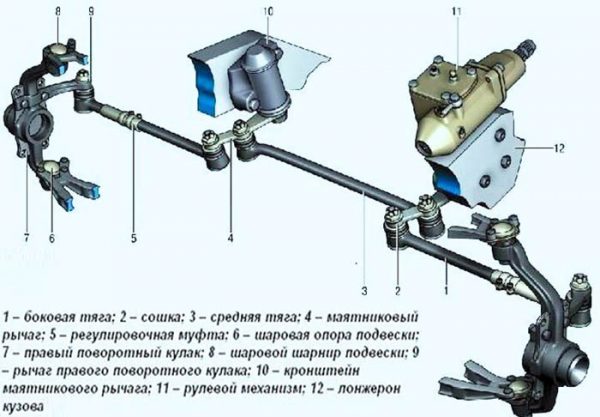
The linkage system serves as an intermediary between the steering shaft and the steering knuckles of the front hubs. The task of the mechanism is to simultaneously turn the wheels in one direction or another, obeying the rotation of the steering wheel. The trapezoid is located under the engine at the level of the bottom of the car, attached to the body stiffeners - the lower spars.
The considered part of the steering mechanism consists of 3 main parts:
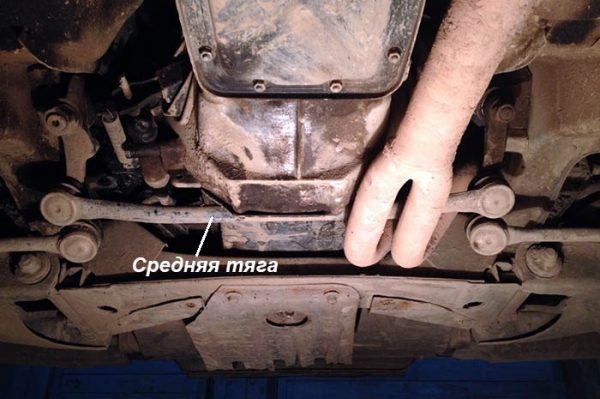
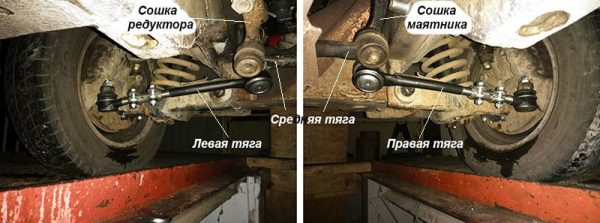
- the middle link is bolted to two bipods - the pendulum lever and the worm gear;
- the right rod is attached to the swing arm of the pendulum and the pivot of the steering knuckle of the front right wheel (in the direction of the car);
- the left link is connected to the bipod of the gearbox and the fist of the left front hub.

The method of connecting the swivel brackets with the details of the trapezoid is a conical pin inserted into the reciprocal hole of the bipod and fixed with a nut. The pendulum lever and gearbox are rigidly attached to the spars with long bolts.
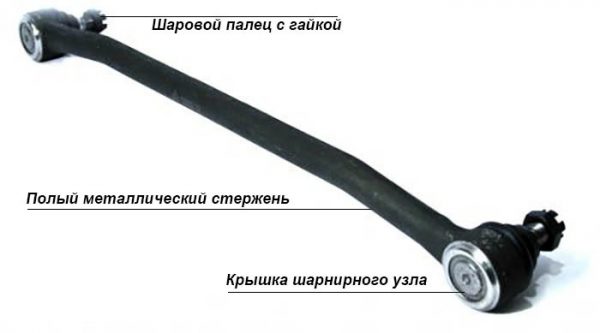
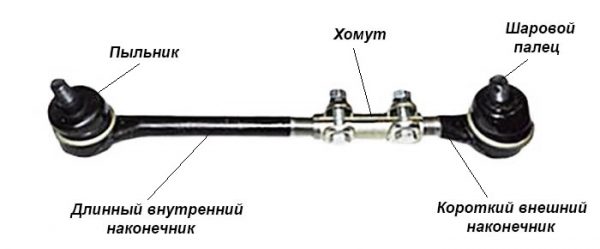
The middle link is a hollow metal rod with two hinges. Two side rods are prefabricated elements consisting of 2 tips - long and short. The parts are connected to each other by a threaded collar, tightened by two bolts.
How the trapezoid works:
- The driver turns the steering wheel by rotating the shaft and the gearbox shank. The worm gear transmits fewer revolutions to the bipod, but increases the torque (force).
- The bipod begins to turn in the right direction, dragging the left and middle traction with it. The latter, through the pendulum bracket, transmits the force to the right thrust.
- All 3 elements move in one direction, forcing the front wheels to turn synchronously.
- The pendulum lever, fixed on the second spar, acts as an additional articulated suspension of the system. In older versions of pendulums, the bipod rotates on a bushing, in new elements - on a rolling bearing.
- Ball pins at the ends of all rods allow the trapezoid to move in one horizontal plane, regardless of the compression of the front suspension springs.
The increase in torque by a worm gear eliminates the need for hydraulic and electric power steering. On the other hand, the driver physically feels problems with the chassis - it is worth turning sour to the ball joint or the tie rod end, and it becomes much harder to rotate the steering wheel.
The device of rods and tips
The middle solid element of the trapezoid is distinguished by the simplest design - an iron rod with two hinges at the ends. The traction pins are inserted into the second holes of the bipod (if you count from the end of the lever), screwed with 22 mm castellated nuts and fixed with cotter pins.
Note that the medium link rod is slightly bent forward to bypass the gearbox. If you insert the part the other way around, problems are inevitable - the bend will begin to rub against the gearbox housing, making it very difficult to control the machine.
Side traction consists of the following parts:
- short (outer) tip with a ball pin;
- long (internal) tip with a hinge;
- connecting clamp with 2 bolts and nuts M8 turnkey 13 mm.
The element is made detachable to adjust the toe angle of the front wheels. The length of the lever can be changed by turning the threaded collar and thus adjusting the position of the wheel for straight movement. The threads of the tips and inside the clamp are different - right and left, therefore, when rotating, the rod lengthens or shortens.
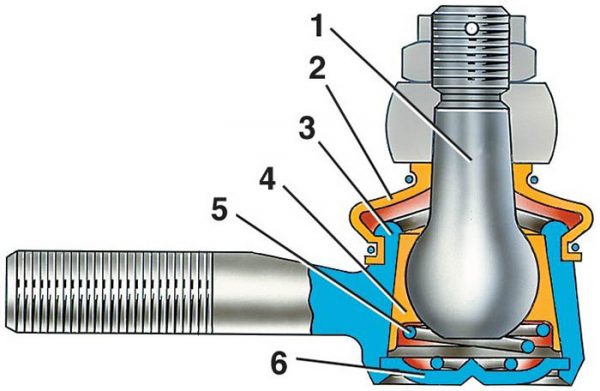
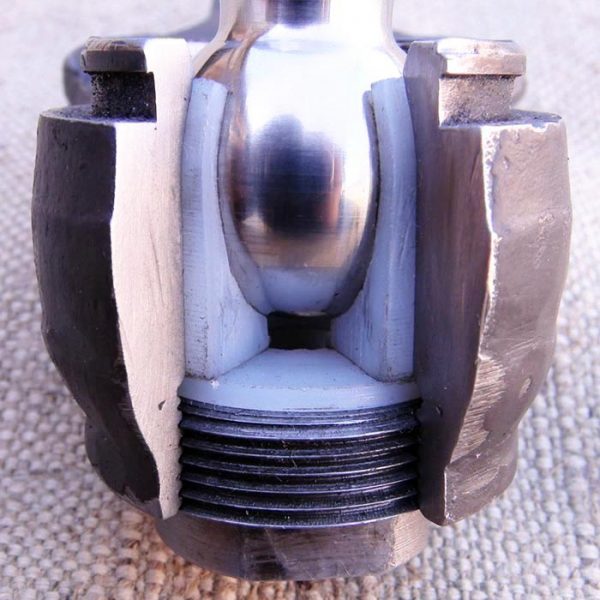
The design of all hinged tips is the same and includes the following parts (the numbering is the same as the diagram):
- Ball pin with M14 x 1,5 thread for slotted nut 22 mm. The radius of the sphere is 11 mm; a hole for the cotter pin is made in the threaded part.
- Cover rubber (or silicone) dirt-proof, it is also anther;
- Metal body welded to M16 x 1 threaded rod.
- Support insert made of composite material, otherwise - cracker.
- Spring.
- Lid pressed into body.
 The thrust joint works on the principle of a plain bearing - a metal sphere rotates inside a plastic sleeve
Some lever manufacturers cut a small fitting into the cover for periodic lubrication - a grease gun.
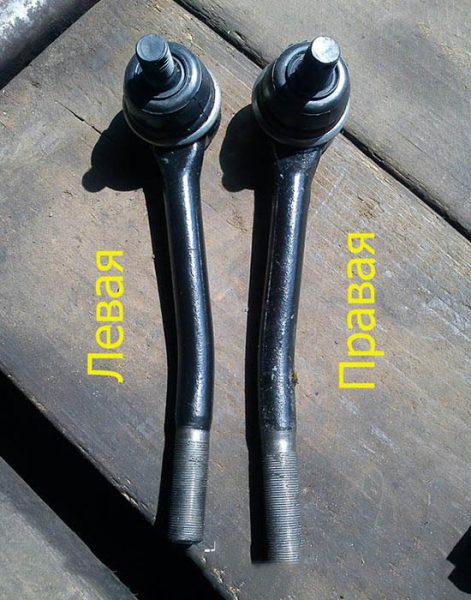
The short outer ends of the side rods are the same, but the long ones are different. It is possible to distinguish the belonging of the part by the bend - a lever bent to the right is installed on the right side. The ball pins of the side rods are attached to the first holes of the pendulum bipods and the gearbox.
Video: design of the VAZ 2101-2107 thrust tip
Fault Diagnosis
During the movement of the car, the ball pins turn in different planes and gradually abrade the crackers, which causes play. The following signs indicate the critical wear of the tip (or several):
- a distinct dull tapping when driving over any bumps;
- vibration from the play of the ball fingers is transmitted to the steering wheel;
- on a flat stretch of road, the car spontaneously leaves a straight path;
- the rotation of the steering wheel is difficult, a creak is heard from below.
When a lot of force is required to turn the steering wheel, a worn tip must be changed immediately. The symptom indicates that the ball pin is jammed inside the housing. If measures are not taken in time, the hinge may pop out of the socket - the car will become uncontrollable.
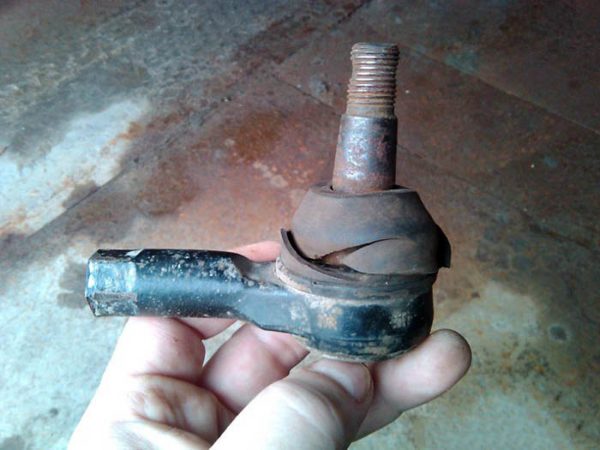

Tie rods "Zhiguli" become unusable for a number of reasons:
- Natural wear. Backlash and knocking appears at 20-30 thousand kilometers, depending on the conditions and driving style.
- Operation with torn hinge anthers. Water flows through the holes inside the assembly, dust and sand penetrate. Corrosion and abrasive effect quickly disables the ball pin.
- Lack of lubrication leads to increased friction and accelerated wear. The presence of lubricant must be checked before installing the part on the car.
- Bending of the rod due to impact with a stone or other obstacle. With a successful outcome, the element can be removed and leveled by heating with a burner.
When the development of all tips reaches a critical limit, the front wheels have a large free play in the horizontal plane. To go straight, the driver has to "catch" the car along the entire road. How to diagnose tie rod wear and not confuse it with suspension malfunctions:
- Put the car on a viewing ditch or overpass and brake with a handbrake.
- Go down into the hole and carefully inspect the trapezoid, especially after hitting the bottom.
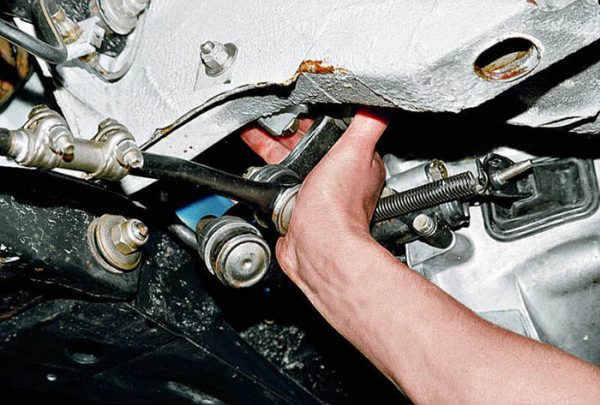
- Grasp the rod near the tip with your hand and shake it up and down. If you feel free play, change the worn element. Repeat the operation on all hinges.

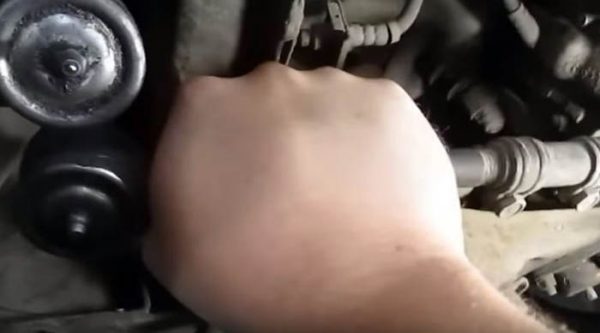 To check the lever, you need to swing it in a vertical plane, grabbing near the hinge
Of great importance is the method of buildup of thrust in the diagnosis. It is pointless to turn the lever around its own axis - this is its normal working stroke. If the test shows a small tight play, the hinge is considered to be in good condition - this is triggered by an internal spring.

Video: how to check the steering trapezoid "Lada"


Watch this video on YouTube
Selection of new trapezium parts
Since the VAZ 2107 car has been discontinued, it is becoming increasingly difficult to find original spare parts. On the roads of the CIS countries, tie rods become unusable quite often, so the supply of "native" parts has long been exhausted. In recent years, trapezium parts kits have been supplied to the market by several well-known manufacturers:
- "Belmag";
- "Cedar";
- "Track";
- Fenox;
- Delphi;
- "VIS".
A feature of the repair of the steering trapezoid is that worn tips can be changed one by one. Few Zhiguli owners install complete sets because of one broken ball pin. As a result, the "seven" trapezoid is often assembled from spare parts from different manufacturers.
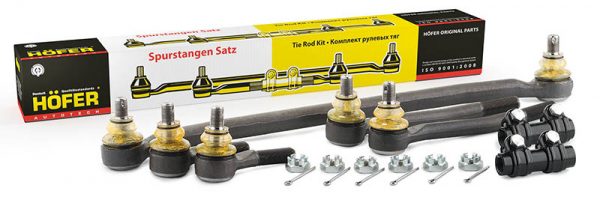

The quality of the steering rods of these manufacturers is approximately the same, as evidenced by the reviews of motorists on the forums. Therefore, the choice of a new spare part comes down to observing 3 rules:
- Beware of fakes and do not buy parts from dubious outlets.
- Avoid tie rods of unknown brands that are sold at bargain prices.
- Do not confuse the left long tip with the right one if you change part of the trapezoid.
Replacing the outer short handpiece
Since the outer part of the trapezoid can be reached from the side of the wheel, disassembly can be performed without an inspection ditch. What tools and materials will be required:
- cap wrenches size 13 and 22 mm;
- passages;
- a hammer;
- puller - vypressovchik type "glass";
- a ruler with a length of at least 20 cm or a tape measure;
- wheel removal tools - jack, wheel wrench, wheel chock;
- rags, fabric gloves.
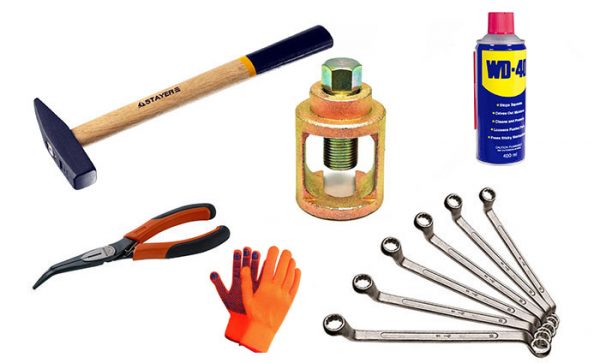

Also, prepare a new cotter pin, WD-40 spray lubricant and a metal bristle brush in advance to remove adhering dirt from the rod before starting work.
Why it is customary to change tips rather than repair them:
- High-quality factory parts are made non-separable, in garage conditions it is unrealistic to remove the worn cracker - the hinge cover is tightly pressed into the body.
- Collapsible rods made in a handicraft way using a lathe are considered unreliable. The reason is the “licked” thread profile inside the body, under load the ball pin is able to squeeze out the cover and jump out.

Preparatory stage
Before removing the tip, perform a number of preparatory operations:
- Fix the car on the site and unscrew the desired wheel. To maximize access to the tip, turn the handlebar to the right or left until it stops.

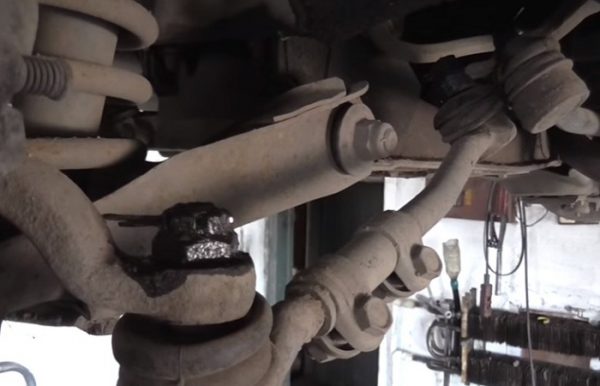 Spray threads with WD-15 40 minutes before loosening nuts.
 - Clean the threaded connections of the clamp and ball pin from dirt with a brush, spray with WD-40.
- Measure the distance between the centers of both rod ends with a ruler. The goal is to ensure the initial length of the lever during the replacement process, otherwise you will have to adjust the toe angle of the front wheels.

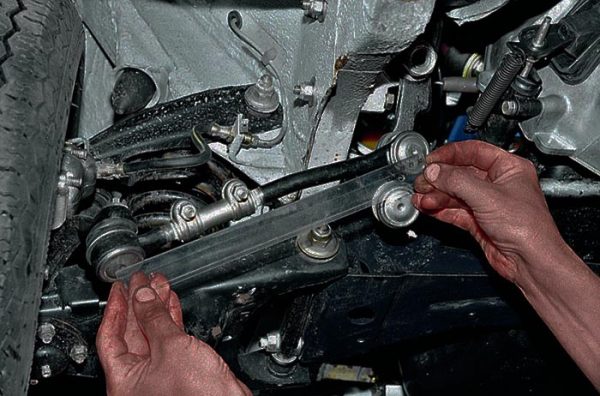 The initial length of the lever is determined by the distance between the centers of the hinges
 - Unbend and remove the cotter pin from the castle nut.

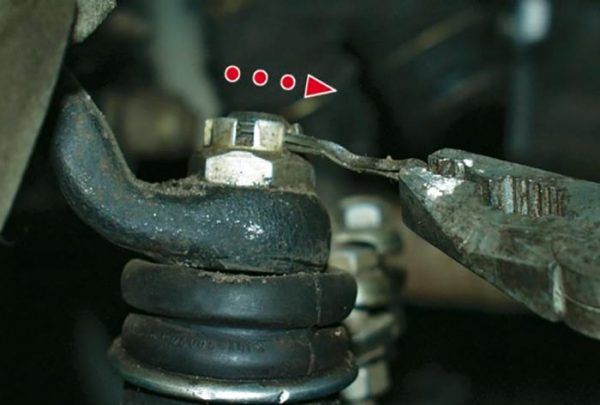 Before removing the cotter pin, bend its ends together
Take this opportunity to examine the condition of the anthers on other tips. If you notice breaks, disassemble the trapezoid completely and install new silicone covers.
Disassembly instructions
Dismantling the old part and installing a new tip is carried out in the following order:
- Use a 13mm wrench to loosen one tie-down nut closest to the wheel. Don't touch the second nut.

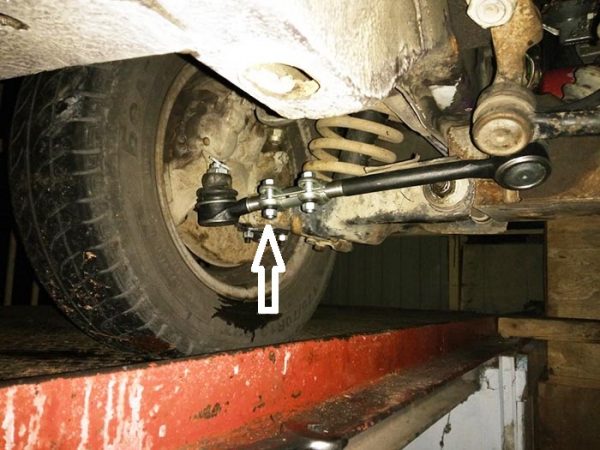 To remove the short hinge, just loosen the outer clamp nut
 - Using a 22 mm wrench, unscrew the nut securing the ball pin to the trunnion.

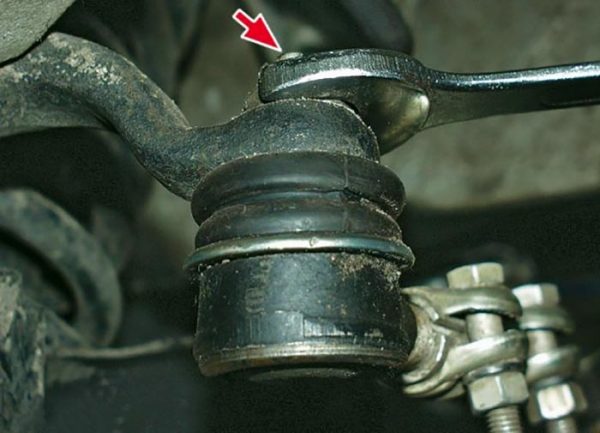 The ball stud nut must be loosened and unscrewed to the end
 - Put on the puller (tapping with a hammer is allowed) and turn the central bolt with a wrench until it rests against the ball pin and squeezes it out of the eye.

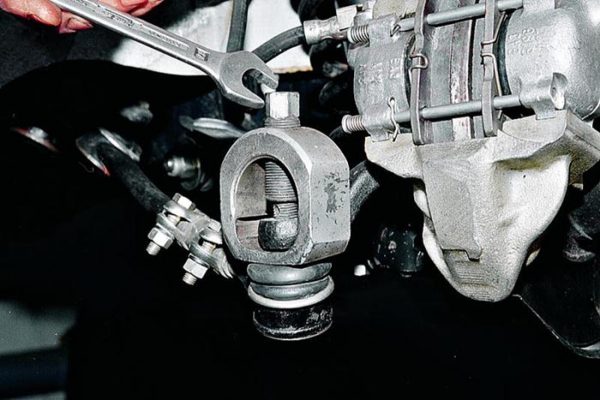 In the process of tightening the pressure bolt, it is better to support the puller with your hand
 - Unscrew the tip from the clamp by hand, turning it counterclockwise.

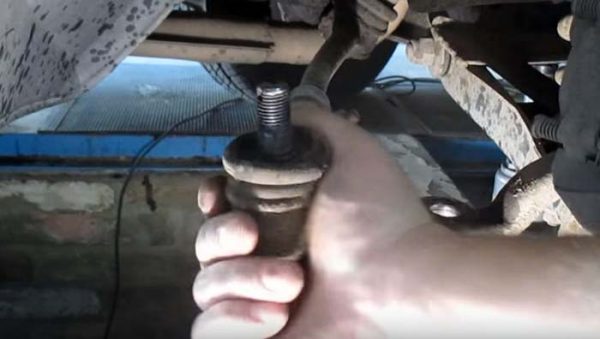 If the clamp is sufficiently loosened, the tip can be easily unscrewed by hand (to the left)
 - After checking the presence of grease inside the new part, screw it in place of the old tip. By turning the hinge and using a ruler, adjust the length of the rod.
- Tighten the clamp fastening, insert the finger into the trunnion and tighten with the nut. Install and unbend the pin.

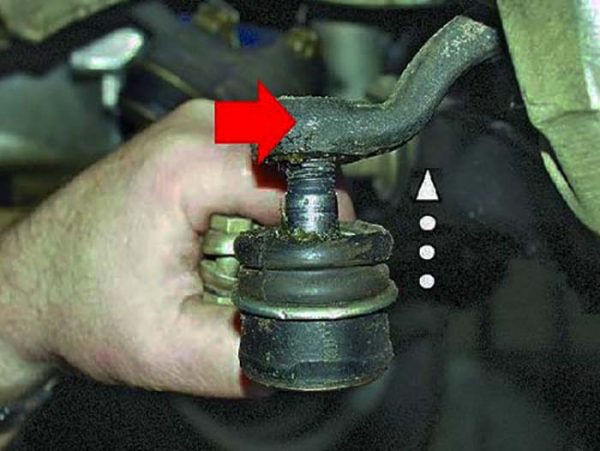 Before installing the tip, the hinge should be well lubricated
If you can't find a puller, try knocking your finger out of the lug by hitting the trunnion with a hammer. Method two: lower the wheel hub onto the block, screw the nut onto the finger thread and hit it with a hammer through a wooden spacer.
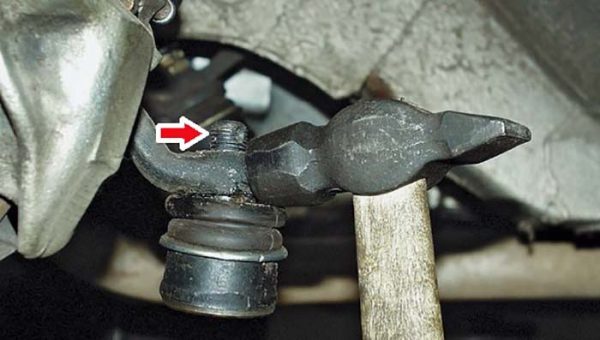

Knocking out is not the best way to disassemble a connection. You can accidentally rivet a thread, in addition, shocks are transmitted to the hub bearing. Better buy an inexpensive puller - it will come in handy for replacing other hinges.
Video: how to change the tie rod end


Watch this video on YouTube
Complete disassembly of the trapezoid
The removal of all rods is practiced in two cases - when replacing the assembled levers or a complete set of anthers on hinges. The technology of work is similar to the dismantling of the external tip, but is performed in a different order:
- Perform the preparatory stage - put the car in the pit, clean the hinges, lubricate and remove the cotter pins. There is no need to turn or remove the wheels.
- Using a 22 mm spanner, unscrew the nuts securing the two ball pins of the side rod, do not touch the clamp bolts.

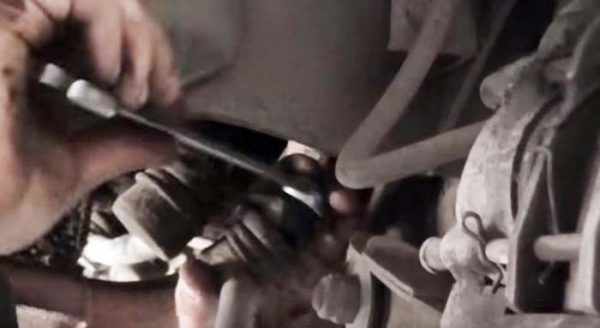 The inner nuts for fastening the rods can only be reached with a curved box wrench.
 - With a puller, squeeze both fingers out of the pivot of the steering knuckle and the pendulum bipod. Remove traction.
- Remove the remaining 2 levers in the same way.
- After loosening the clamps of the new rods, clearly adjust their length to the size of the removed elements. Secure the ties with nuts.

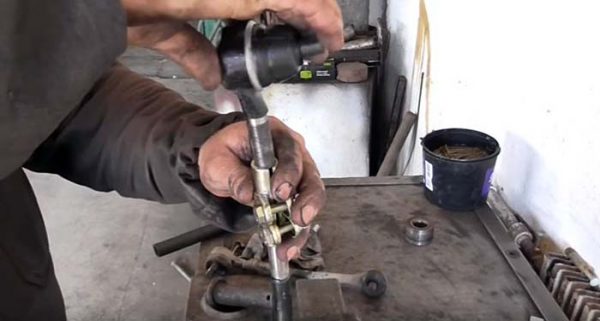 The length of the rod is adjusted by screwing in / unscrewing the short tip
 - Install new trapezoid parts, screw nuts and fix them with cotter pins.
Remember to correctly position the middle section - bend forward. After replacing, it is worth driving onto a flat stretch of road and observing the behavior of the car. If the car pulls to the side, go to a service station to straighten the camber angles - toe-in of the front wheels.
Video: replacement of steering rods VAZ 2107


Watch this video on YouTube
The operation of replacing tips or rod assemblies cannot be called complicated. With a puller and some experience, you will change the details of the VAZ 2107 trapezoid in 2-3 hours. The main thing is not to confuse the right lever with the left and correctly install the middle section. There is a reliable way to protect yourself from mistakes: before disassembling, take a picture of the position of the rods on your smartphone camera.


