We independently change the diode bridge on the VAZ 2107
Content
A modern car is literally crammed with complex electronics, which is not so easy to fix. It is for this reason that car owners, at the slightest problem with on-board electrical devices, do not fool themselves, but immediately turn to the nearest car service. However, there are exceptions to this rule. For example, if a diode bridge burned out on a VAZ 2107, then it is quite possible to refrain from visiting a car service and change the burned-out device with your own hands. Let's figure out how it's done.
The main function of the diode bridge on the VAZ 2107
The diode bridge is an integral part of the VAZ 2107 generator. The car's generator generates alternating current. And the main task of the diode bridge is to convert the alternating current of the generator into the direct current of the on-board network, followed by charging the battery. That is why motorists usually call a diode bridge a rectifier unit. The peculiarity of this block is that it allows direct current to pass only towards the battery. The current passing through the diode bridge is further used to ensure the operation of the heater, dipped and main beam headlights, parking lights, audio system, etc.
The charging voltage in a VAZ 2107 car ranges from 13.5 to 14.5 volts. To provide the necessary voltage, 2D219B brand diodes are most often used in the diode bridges of this car.
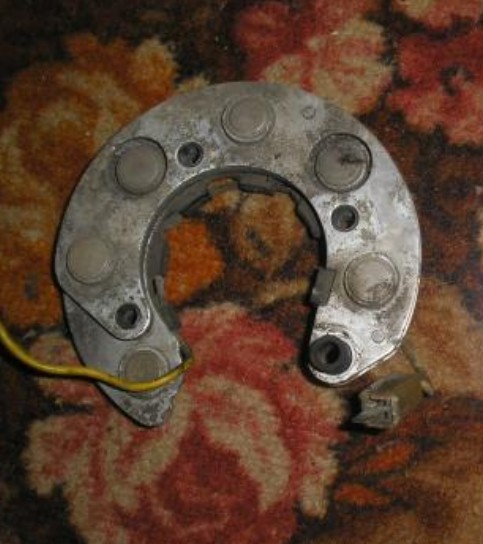
And there is a diode bridge inside the VAZ 2107 generator. And in order to get to the bridge, the car owner will first have to remove and disassemble the generator. There are no other options.
Signs and causes of failure of the diode bridge
As mentioned above, a generator equipped with a diode bridge is the most important part of a car. If the alternator fails for any reason, the battery will stop charging. And this is the only sign of a diode bridge malfunction. Without additional recharge, the battery will work on the strength of several hours, after which the car will be completely immobilized. A diode bridge fails when one or more diodes burn out in it. Here are the reasons why this happens:
- Moisture has entered the generator. Most often, this is condensate that forms on the internal surfaces of the generator in the autumn-spring period, when relatively warm weather alternates with frosts;
 The diode bridge burned out due to moisture entering the VAZ 2107 generator
 - the diode has simply exhausted its resource. Like any other part, a diode has its own lifespan. The manufacturer of diodes 2D219B claims that the service life of their products is about 10 years, but after this period no one guarantees anything to the car owner;
- the diode burned out due to the negligence of the car owner. This usually happens when a novice car enthusiast tries to "light" his car from another car and at the same time confuses the battery poles. After such an error, the entire diode bridge and part of the generator in addition usually burn out.
How to ring a diode bridge on a VAZ 2107
To find out if the diode bridge is working, the car owner does not need to have any special skills. All he needs is basic knowledge of electrical engineering and a couple of devices:
- household multimeter;
- 12 volt incandescent bulb.
We check the diode bridge with a conventional light bulb
Before starting the test, make sure that the battery is charged. It is desirable that the battery charge level be as high as possible.
- The base of the diode bridge (i.e., a thin plate into which the diodes are screwed) is connected to the negative terminal of the battery. The plate itself must be firmly fixed to the generator housing.
- Two wires are connected to the bulb. Then one of them should be connected to the positive terminal of the battery, and the second wire is first connected to the output provided for the additional diode, and then the same wire should be touched to the bolt of the positive output of the diode and to the connection point of the stator winding.The red color shows the circuit for checking the bridge with a light bulb, the green color shows the circuit for checking for a break, which is discussed below
- If the diode bridge is working, then after assembling the above circuit, the incandescent lamp will not light. And when connecting the wire to various points of the bridge, the light should also not light. If at some stage of the test the light comes on, then the diode bridge is faulty and needs to be replaced.

Checking the diode bridge for a break
This verification method is similar to the one described above, with the exception of two nuances.
- The negative terminal of the bulb is connected to the positive terminal of the battery.
- The second wire of the bulb is connected to the negative terminal of the battery. Then the same points are checked as indicated above, but here the control light should be on. If the light is not on (or on, but very dimly) - there is a break in the bridge.
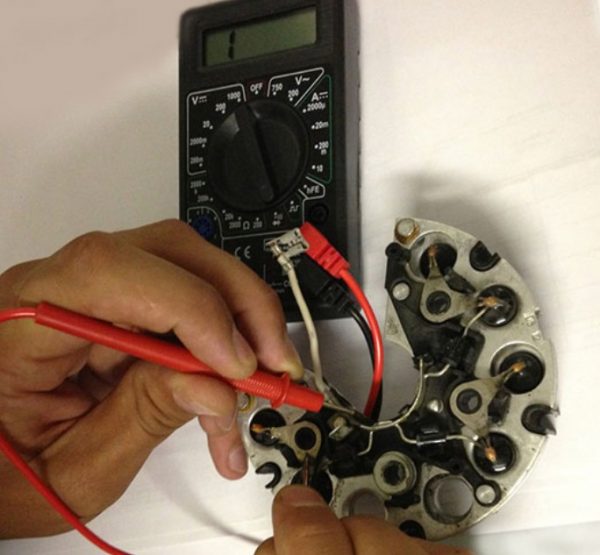
We check the diode bridge with a household multimeter
Before checking the diode bridge in this way, it will need to be completely removed from the generator. There are no other options. With this method of checking, each diode will have to be called separately.
- The multimeter switches to ringing. In this mode, when the electrodes come into contact, the multimeter starts to beep (and if the design of the multimeter does not provide for the supply of sound signals, then in the ringing mode, its display should show a resistance of 1 kOhm).In ringing mode, the display of the multimeter shows the unit
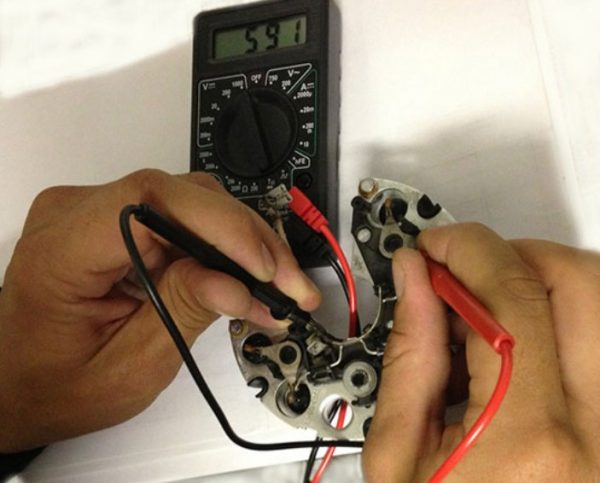
- The electrodes of the multimeter are connected to the two contacts of the first diode in the bridge. Then the electrodes are swapped and connected to the diode again. The diode is working when the resistance on the display is 400-700 ohms on the first connection, and on the second connection it tends to infinity. If both during the first and the second connection of the electrodes, the resistance on the multimeter display tends to infinity - the diode burned out.The multimeter shows a resistance of 591 ohms. Diode OK
The process of replacing the diode bridge on the VAZ 2107
Before starting work, we will select the necessary tools. Here's what we need:
- open-end wrench for 17;
- open-end wrench for 19;
- socket head 8;
- socket head for 10 with a long crank;
- flat screwdriver;
- a new diode bridge for the VAZ 2107 (cost about 400 rubles);
- a hammer.
Sequencing
Getting started, you should understand the following: before removing the diode bridge, you first have to remove the generator and disassemble it almost completely. Without this, it will not be possible to get to the diode bridge.
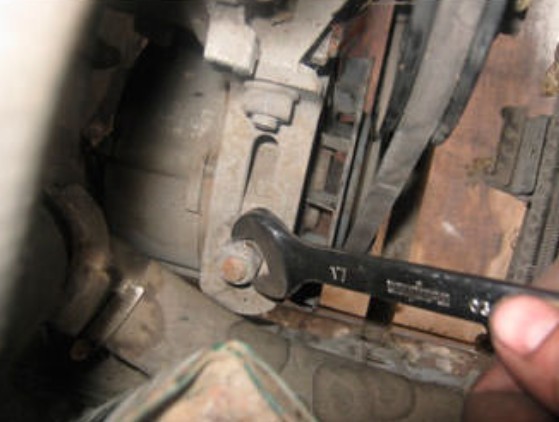
- With an open-end wrench, the fixing nut holding the generator bracket is unscrewed by 19. The generator is removed.The mounting bracket of the VAZ 2107 generator rests on just one nut for 17
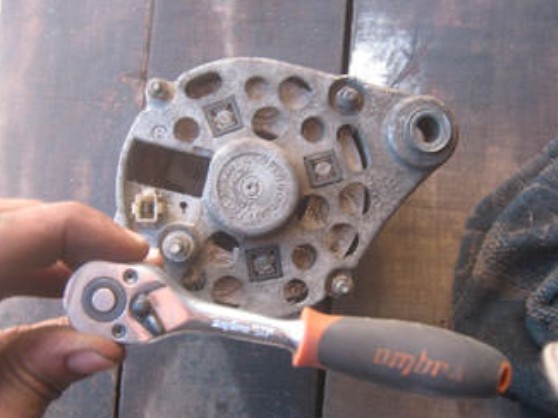
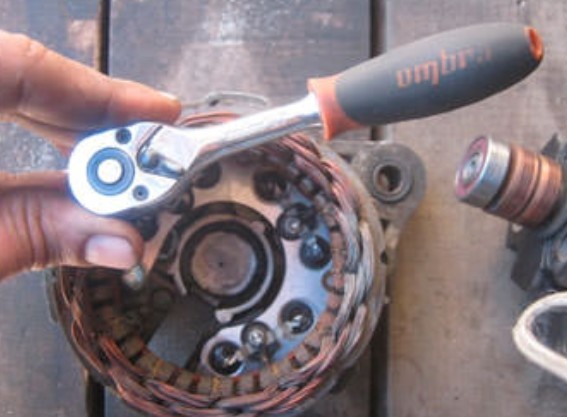
- There are four nuts on the back cover of the generator. They are unscrewed with a socket head by 10 (and it is better if this head is equipped with a ratchet).It is better to unscrew the nuts on the back cover of the VAZ 2107 generator with a ratchet
- After unscrewing the nuts, the halves of the generator must be separated. To do this, lightly tap with a hammer on the protruding rim in the middle of the case.When disconnecting the housing of the VAZ 2107 generator, you cannot do without a hammer
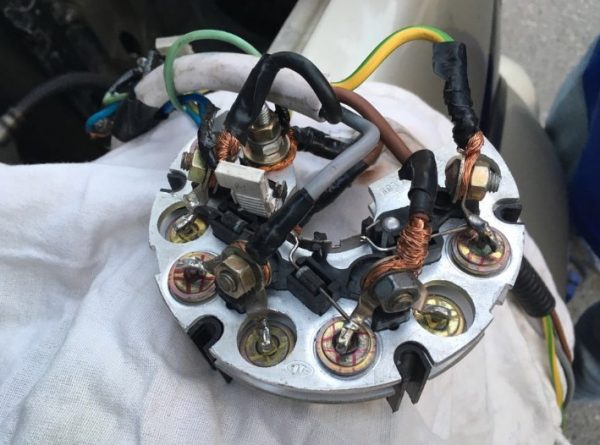
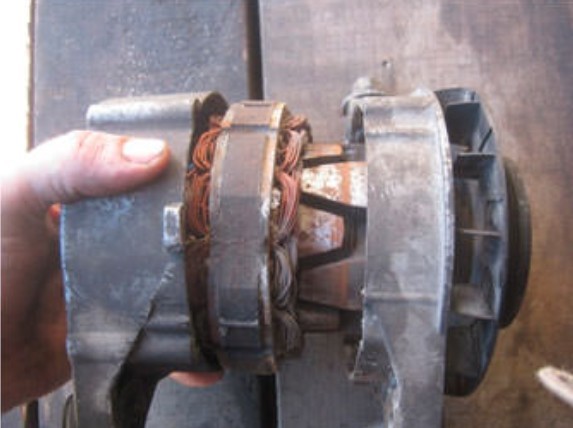
- The generator is divided into two halves: one contains the rotor, the other the stator. The diode bridge we are about to replace is right below the stator coil. Therefore, the stator will also have to be removed.To get to the diode bridge, you have to disassemble the stator
- The stator coil is held on by three nuts by 10. To unscrew them, you will need a socket head with a very long knob, without it you can’t reach the nuts.To remove the stator coil, you will need a socket with a very long collar
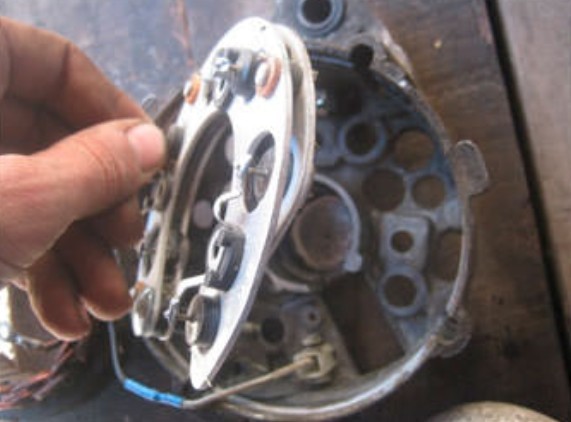
- After unscrewing the nuts, the stator is removed from the generator housing. Access to the diode bridge is opened. To remove it, lightly press your finger on the three protruding bolts.The bolts of the diode bridge are easy to drown in the sockets. All you need to do is press your finger
- The bolts are easily moved down, the diode bridge is completely freed from fasteners, removed from the generator housing and replaced with a new one.The diode bridge is completely released from fasteners and is removed from the generator housing


Video: changing the diode bridge on the VAZ 2107

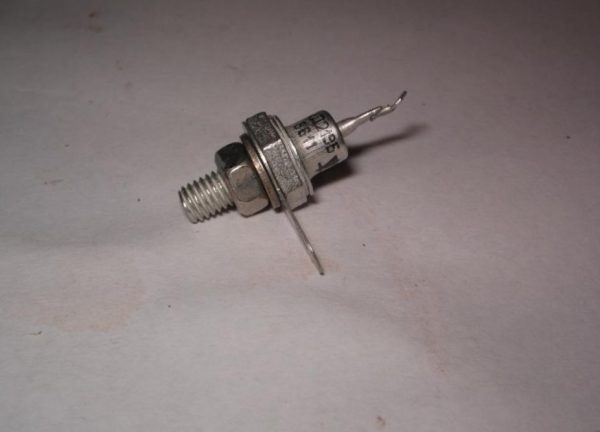
About installing an additional diode
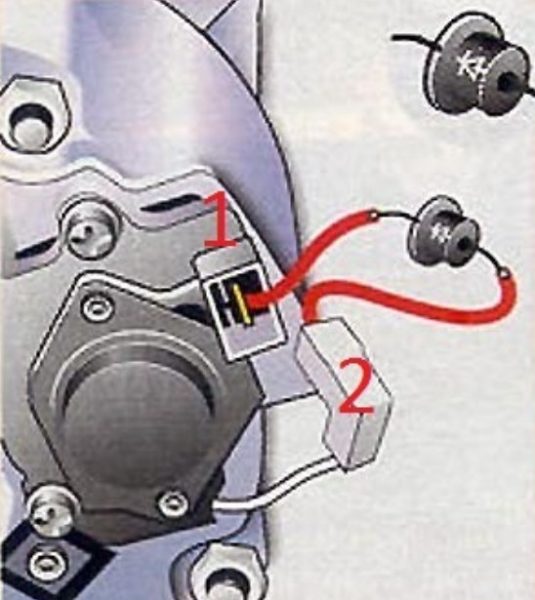
Installing an additional diode is a rather rare phenomenon. Why is this being done? In order to slightly increase the voltage of the on-board network. The need for this increase arose due to new laws. As you know, in 2015, changes were made to the traffic rules, forcing drivers to constantly drive with running lights on. And the owners of classic VAZ models are forced to constantly drive with the dipped beam on. In such a situation, both battery charging and the voltage of the on-board network sag significantly. To somehow solve this problem, craftsmen install additional diodes, which are located between the voltage regulator terminals and the common output wires for the additional diode, as shown in the figure below.
For installation, KD202D diodes are usually used, which can be found in any radio parts store.
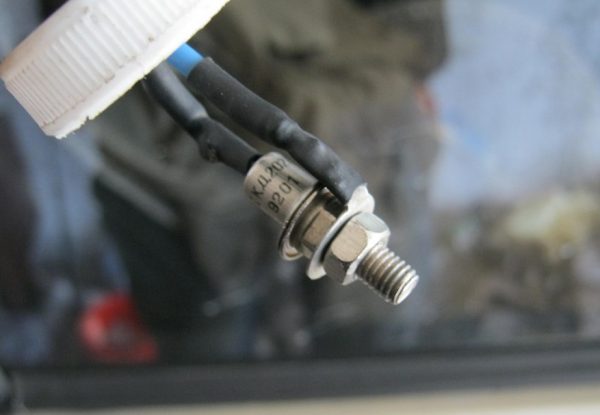
If the above diode is not found, you can choose any other. The main thing is that the direct current should be at least 5 amperes, and the maximum allowable reverse voltage should be at least 20 volts.
So, in order to change the diode bridge to the VAZ 2107, you do not need to go to the nearest service center and pay the auto mechanic 800 rubles. Everything can be done on your own, and in a fairly short time. To remove and disassemble the generator, an experienced motorist will have enough for 20 minutes. It will take a beginner more time, but in the end he will cope with the task. All you have to do is follow the instructions above exactly.

