How to replace the cylinder head gasket on a VAZ 2107 with your own hands
Content
- Cylinder head gasket VAZ 2107
- Cylinder head
- Replacement and repair of the cylinder head VAZ 2107
The cylinder head gasket VAZ 2107 does not apply to those engine parts that become unusable due to wear. If the motor is operating in normal mode, it will last without problems until its first or next overhaul. But in the event of serious violations in the operation of the power plant, the gasket may fail one of the first.
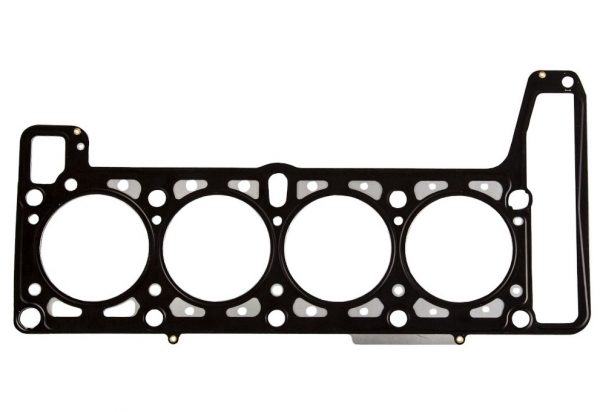
Cylinder head gasket VAZ 2107
The cylinder head gasket is a one-time use part, since its physical properties and geometry change during installation.
What is the cylinder head gasket used for?
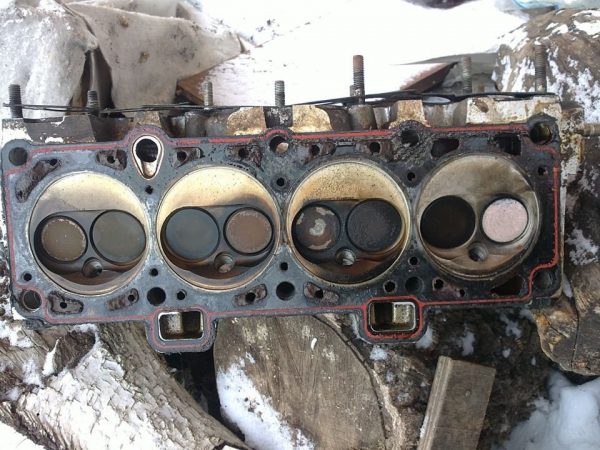
The cylinder head gasket is designed to seal the connection between the cylinder block and the head. Even taking into account the fact that these engine components have perfectly flat mating surfaces, it will not be possible to achieve complete tightness without it, because the pressure in the combustion chambers reaches more than ten atmospheres. In addition to this, the seals also require the connection of oil channels, as well as channels of the cooling jacket. Tightness is achieved due to uniform pressing of the gasket during tightening of the connecting elements.
What are cylinder head gaskets made of?
The cylinder head gasket can be made from different materials:
- metal (copper and aluminum alloys);
- asbestos;
- combinations of metal and asbestos;
- combinations of rubber and asbestos;
- paronitis.
The main requirements for the gasket are resistance to high temperatures and the ability to compress. Each of these materials has its pros and cons. Products made from several layers of metal or asbestos, for example, are better able to withstand high temperatures, but they may not provide the best tightness. Parts made of rubber and paronite, on the contrary, maximize the connection between the head and the block, but their temperature stability is lower.
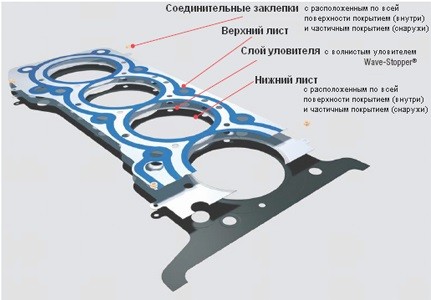
When choosing a gasket, it is better to give preference to a combined product, for example, made of asbestos and metal. Such seals are made of sheet asbestos, but the holes for the cylinders are reinforced with metal rings. The holes for fasteners are reinforced with the same rings.
What to consider when choosing a cylinder head gasket
If you are going to replace the gasket, you need to know exactly the characteristics of the engine. The fact is that the “sevens” were equipped with three types of power plants: VAZ 2103, 2105 and 2106, which have different cylinder diameters. For the first one, it is 76 mm, for the last two - 79 mm. Gaskets are manufactured according to these dimensions. Therefore, if you purchase a cylinder head seal for a 2103 engine and put it on a 2105 or 2106 power unit, the pistons will naturally break the edges of the product with all the ensuing consequences. If a gasket with a cylinder hole diameter of 79 mm is installed on a VAZ 2103 engine, the seal will not provide the necessary tightness due to the fact that the part will not completely block the cylinder holes.
Causes and signs of destruction of the cylinder head gasket
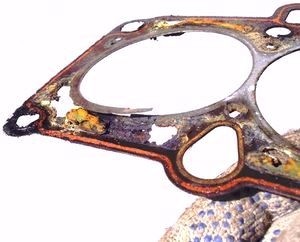
The destruction of the seal is characterized by its breakdown or burnout. In the first case, there is a slight damage to the part, which in some cases cannot even be seen with the naked eye. When the product burns out, the scale of damage is much greater. The part deforms and loses its integrity, leaving the joints without sealing.
Causes of destruction
The main reasons why the cylinder head gasket fails prematurely include:
- overheating of the power unit;
- incorrect order or tightening torque of the mounting bolts during installation;
- manufacturing defect or low quality of the material for the manufacture of the part;
- use of low-quality coolant;
- engine malfunctions.
Overheating of the engine most often causes the destruction of the gasket. It usually occurs due to interruptions in the operation of the cooling system (malfunction of the thermostat, radiator fan, fan on sensor, clogged radiator, etc.). Should the driver drive half a kilometer in a car with an overheated engine, the gasket will burn out.
When installing a new seal on a repaired power unit, it is important to follow the order of tightening the bolts that secure the head to the block. In addition, it is necessary to adhere to the specified tightening torque of the fasteners. In the event of undertightening or overtightening of the bolts, the gasket will inevitably deform and subsequently be pierced.
When choosing a seal for replacement, you should pay attention not only to its parameters, but also to the manufacturer. In no case should you buy cheap parts from unknown companies. The result of such savings may be an unplanned overhaul of the motor. This also applies to coolant. Poor-quality refrigerant can cause corrosion and damage not only the gasket, but also the head itself.
As for violations in the operation of the power plant, processes such as detonation and glow ignition also have a destructive effect on the seal. Therefore, it is worth monitoring the quality of the fuel and the correct adjustment of the ignition timing.
Signs of damage to the cylinder head gasket
Breakdown or burnout of the gasket can manifest itself in the form of:
- rapid heating and overheating of the engine;
- unstable operation of the power unit;
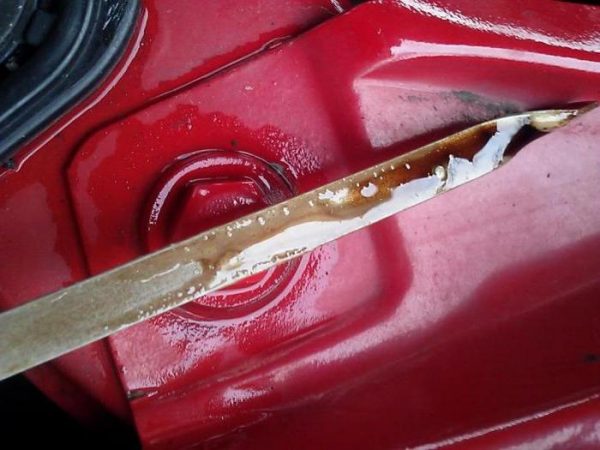
- drips of oil or coolant from under the head of the block;
- traces of coolant in the oil and grease in the refrigerant;
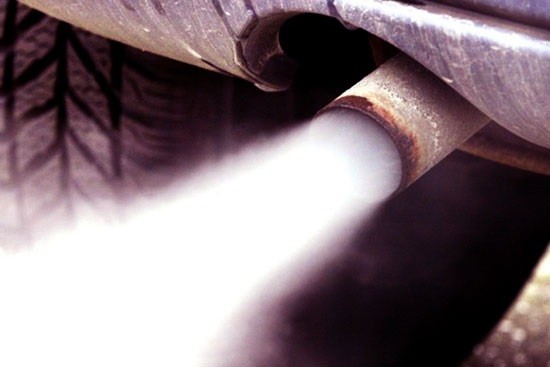
- steam in exhaust gases;
- pressure increase in the cooling system, accompanied by the appearance of smoke in the expansion tank;
- condensation on the spark plug electrodes.
Symptoms will vary from case to case. It depends on exactly where the integrity of the seal was violated. If the gasket is damaged around the edge of the cylinder bore, then most likely there will be an overheating of the power plant with an increase in pressure in the cooling system. In this case, hot exhaust gases under pressure will break through at the site of damage to the seal into the cooling system. Naturally, antifreeze or antifreeze will begin to heat up quickly, raising the temperature of the entire engine. This will increase the pressure in the system, and gas bubbles will appear in the expansion tank.
There will definitely be an opposite effect. Refrigerant entering the combustion chambers will interfere with the normal operation of the engine. The motor will start to triple, due to the fact that the fuel-air mixture, diluted with coolant, will not be able to burn. As a result, we get a noticeable violation of the engine idling, accompanied by exhaust gases in the cooling system, refrigerant in the combustion chambers and thick white smoke with a characteristic smell from the exhaust pipe.
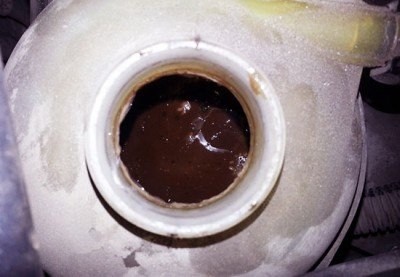
If the gasket burns out somewhere between the windows of the cooling jacket and the oil channels, it is possible that these two process fluids will mix. In this case, traces of grease will appear in the expansion tank, and antifreeze or antifreeze will appear in the oil.
If the gasket is damaged along the edge, there is usually leakage of oil or coolant at the junction of the cylinder head and cylinder block. In addition, a breakthrough of exhaust gases between the main parts of the engine is also possible.
Self diagnosis
The diagnosis of a gasket malfunction must be approached comprehensively. In other words, you should not immediately start removing the head when you see white smoke from the exhaust pipe, or oil leaks from under the head. To check for a seal failure, follow these steps:
- Inspect the junction of the head and cylinder block around the perimeter. If you find oil or coolant leaks, make sure it's coming from under the head.
- Start the engine and pay attention to the color of the exhaust and its smell. If it really looks like thick white steam, and smells like antifreeze or antifreeze, turn off the engine and carefully unscrew the cap of the expansion tank. Smell it. If exhaust gases enter the cooling system, the smell of burnt gasoline will come from the tank.
- Without tightening the caps of the expansion tank, start the engine and look at the state of the coolant. It must not contain any gas bubbles or traces of grease.
- Shut off the power plant, let it cool down. Remove the dipstick, inspect it and check the oil level. If there are traces of a white-brown emulsion on the dipstick, or the oil level suddenly rises, mixing process fluids is taking place.
- Let the engine run for 5-7 minutes. Silence it. Remove the spark plugs, inspect the electrodes. They must be dry. If there are traces of moisture on them, most likely, refrigerant enters the cylinders.
Video: signs of damage to the cylinder head gasket

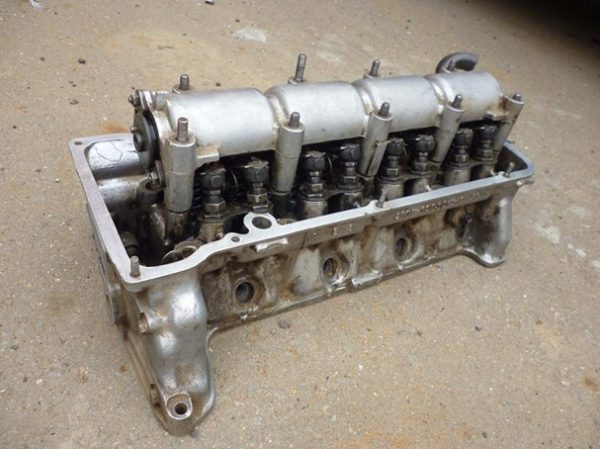
Cylinder head
In fact, the head is a cylinder block cover that closes the cylinders. It contains the upper parts of the combustion chambers, spark plugs, intake and exhaust windows, as well as the entire gas distribution mechanism. The cylinder head of the VAZ 2107 is a monolithic part cast from an aluminum alloy, but inside it there are channels where oil and coolant circulate.
Are there any differences in the design of the cylinder head for carburetor and injection engines VAZ 2107
The cylinder heads of the carburetor and injection engines of the "seven" are almost the same. The only difference is the shape of the inlets. In the first it is round, in the second it is oval. The manifold from the carburetor machine without alterations will not be able to completely block the inlet windows. Therefore, if there is a need to replace the head, this point should be taken into account.
The device of the cylinder head VAZ 2107
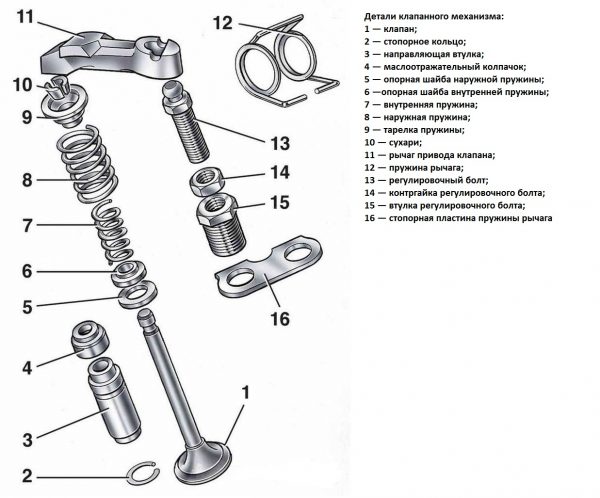
The main task of the cylinder head is to ensure the operation of the gas distribution mechanism. It serves as a body for all its elements:
- camshaft assembly with "bed";
- levers;
- valves;
- valve seats;
- guide bushings;
- oil caps;
- springs;
- "plates";
- "crackers";
- retaining rings;
- adjusting bolts with bushings, etc.
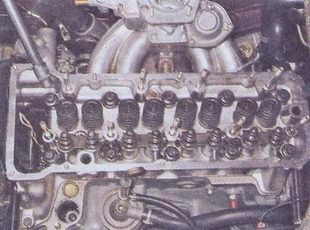
 The valve train is part of the cylinder head
Replacement and repair of the cylinder head VAZ 2107
Given that the cylinder head is an all-metal part, it rarely fails. Another thing is if it has mechanical damage. Most often, the head can be damaged or destroyed due to:
- road traffic accident;
- malfunctions of the timing drive (when the valves collided with the pistons during engine operation);
- failure of parts of the piston group;
- severe overheating (cracks form);
- corrosion caused by the use of low-quality coolants.
In all of these cases, the cylinder head must be replaced. If the malfunction of the cylinder head consists in the breakdown of some parts of the gas distribution mechanism, it can be repaired. To repair the head, it will need to be disconnected from the cylinder block.
Removing the cylinder head VAZ 2107
The process of dismantling the cylinder head for a carburetor and injection engine is somewhat different. Let's consider both options.
Dismantling the cylinder head on a carburetor engine
To remove the head, you will need the following tools and tools:
- wrenches on "8", "10", "12", "13", "17";
- candle key;
- Phillips and slotted screwdrivers;
- a container for collecting drained coolant;
- a piece of aluminum wire or a strong rope.
The order of work is as follows:
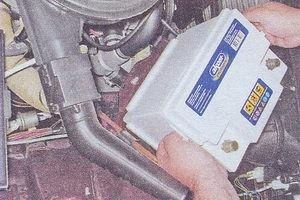
- Using the keys on "10" and "13", we disconnect the terminals from the battery, remove it and put it aside.The battery will interfere with the dismantling of the head
- We unscrew the plugs of the expansion tank and radiator.To make the liquid glass faster, you need to unscrew the plugs of the radiator and expansion tank
- Using the key to "10", unscrew the bolts securing the engine protection and remove it.
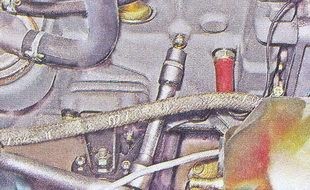
- Find the drain plug on the cylinder block. We substitute a container from the bottom of the car so that the drained liquid can get into it. We unscrew the cork with a key to "13".The cork is unscrewed with a key to "13"
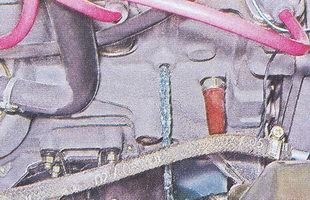
- When the liquid drains from the block, move the container under the radiator cap. Unscrew it and wait for the coolant to drain.The container must be substituted so that the liquid flows into it.
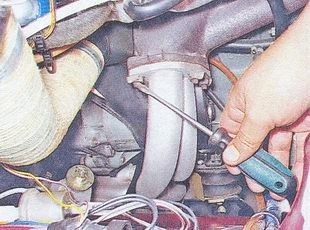
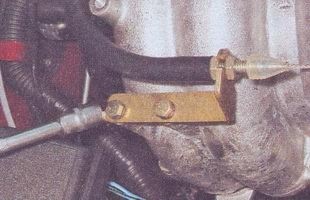
- Using a slotted screwdriver, we bend the edges of the locking plates of the nuts securing the exhaust pipe to the exhaust manifold. With the key on “13”, we unscrew the nuts, take the exhaust pipe away from the collector.Before unscrewing the nuts, you need to bend the edges of the retaining rings
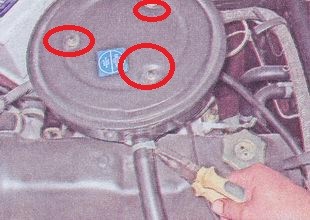
- With a key of “10”, we unscrew the nuts securing the cover of the air filter housing. Remove the cover, remove the filter element.The cover is secured with three nuts.
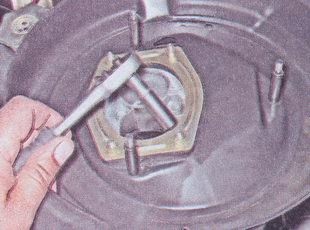
- Using a socket wrench on “8”, we unscrew the four nuts that fix the filter housing mounting plate.The body is mounted on four nuts
- Using a Phillips screwdriver, loosen the hose clamps suitable for the filter housing. Disconnect the hoses, remove the housing.
- Open-end wrench to "8" loosen the fastening of the air damper cable. Disconnect the cable from the carburetor.The cable is loosened with the key to "8"
- Using a Phillips screwdriver, loosen the fuel line hose clamps that fit the carburetor. Disconnect the hoses.To remove the hoses, you need to loosen the clamps
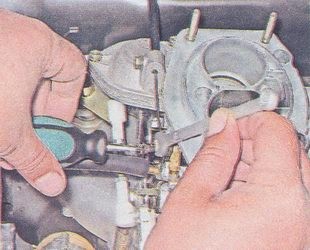
- With the key to “13”, we unscrew the three nuts on the carburetor mounting studs. Remove the carburetor from the intake manifold along with the gasket.The carburetor is attached with three nuts
- With a 10 wrench (preferably a socket wrench), we unscrew all eight nuts securing the valve cover.The cover is pressed with 8 nuts
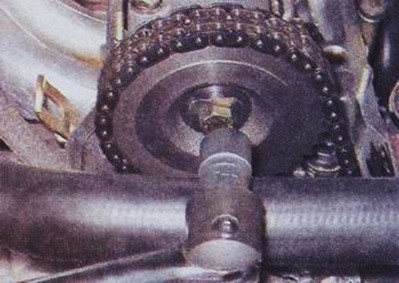
- Using a large slotted screwdriver or a mounting spatula, we bend the edge of the lock washer that fixes the camshaft star mounting bolt.To unscrew the bolt, you must first bend the edge of the lock washer
- With a spanner wrench on “17”, we unscrew the bolt of the camshaft star.The bolt is unscrewed with a key to "17"
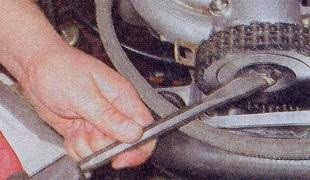
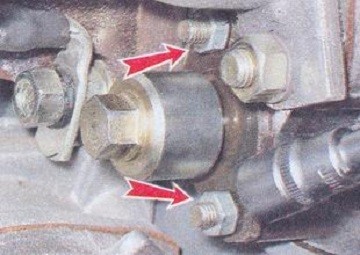
- Using the key to "10", unscrew the two nuts that hold the chain tensioner. We remove the tensioner.To remove the chain tensioner, you need to unscrew the two nuts
- We dismantle the camshaft star.
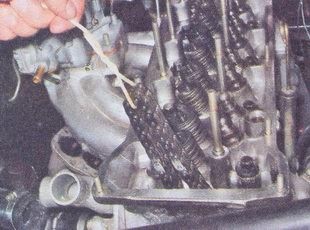
- Using a wire or rope, we tie the timing chain.So that the chain does not interfere, it must be tied with wire
- We disconnect high-voltage wires from the ignition distributor.
- Using a Phillips screwdriver, unscrew the two screws that secure the distributor cover. We remove the cover.
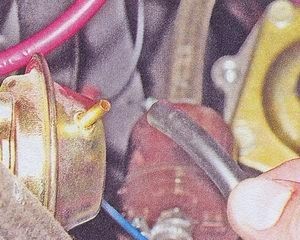
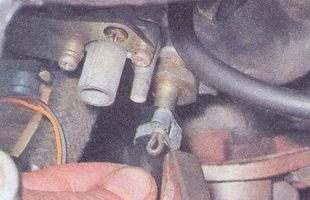
- Disconnect the vacuum hose from the regulator.The hose is simply removed by hand
- Using the key to "13", unscrew the nut holding the distributor housing.To remove the distributor, you need to unscrew the nut with a wrench to "13"
- We remove the distributor from its socket in the cylinder block, disconnect the wires from it.The wires from the distributor must be disconnected
- Unscrew the spark plugs.
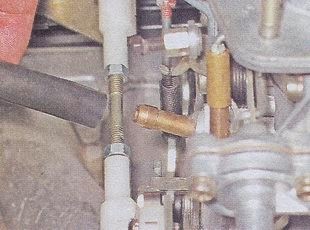
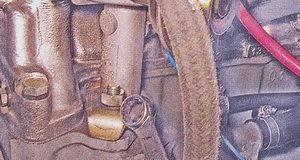
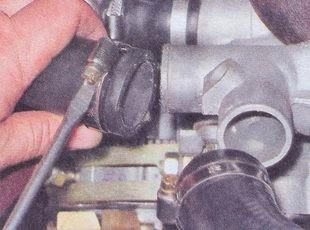
- We disconnect from the intake manifold the coolant supply hose, the tubes of the vacuum booster of the wires and the economizer.The hose is attached with a clamp
- Using a screwdriver with a Phillips bit, loosen the clamps on the thermostat pipes. Disconnect pipes.The pipes are also fixed with worm clamps.
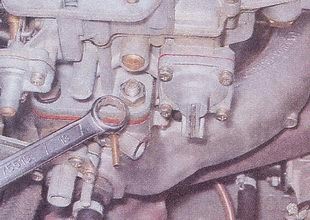
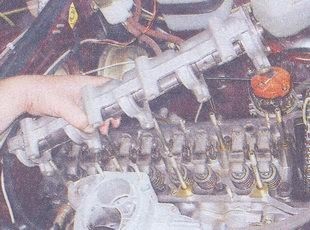
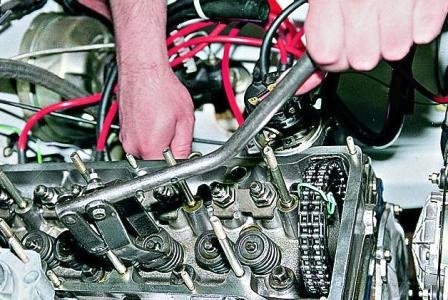
- With the key on “13”, we unscrew the nine nuts securing the camshaft bed.The bed is fixed with 9 nuts
- We remove the bed assembly with the camshaft.The camshaft is removed with the bed assembly
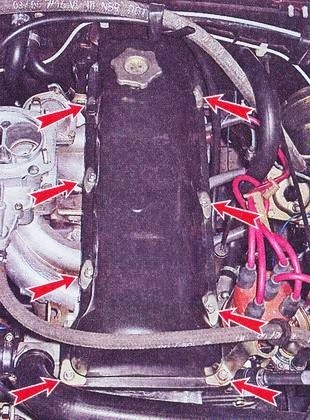
- We unscrew all ten bolts of the internal fastening of the cylinder head to the block using the key to "12". With the same tool, we unscrew one bolt of the external fastening of the head.Internal fastening of the cylinder head is carried out with 10 nuts
- Carefully disconnect the head from the block and remove it along with the gasket and intake manifold.


Video: dismantling the cylinder head VAZ 2107

Dismantling the cylinder head on an injection engine
Removing the head on a power unit with distributed injection is carried out according to the following algorithm:
- We dismantle the battery, drain the coolant, disconnect the downpipe in accordance with paragraphs 1-6 of the previous instructions.
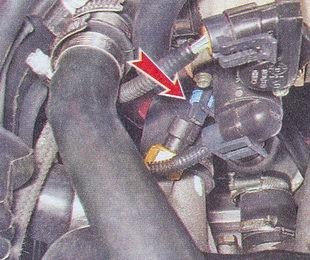
- Disconnect the power wire of the coolant temperature sensor.The wire is connected with a connector
- Unscrew the spark plug from the head.
- We dismantle the valve cover, chain tensioner, star and camshaft bed in accordance with paragraphs 13-8 of the previous instructions.
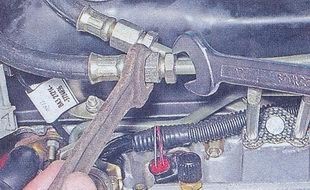
- Using the key on "17", we unscrew the fitting of the fuel pipe coming from the ramp. In the same way, disconnect the fuel supply pipe.The tube fittings are unscrewed with a key of 17
- Disconnect the brake booster hose from the receiver.The hose is fixed to the fitting with a clamp
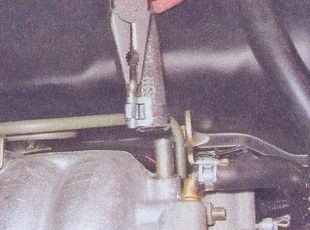
- Disconnect the throttle control cable.To disconnect the cable, you need a key on "10"
- Using a screwdriver, loosen the clamps and disconnect the pipes of the cooling system from the thermostat.
- We carry out dismantling work in accordance with paragraphs 27–29 of the previous instructions.
- Remove the head assembly with the intake manifold and ramp.
Troubleshooting and replacement of cylinder head parts VAZ 2107
Since we have already dismantled the head, it will not be superfluous to troubleshoot the elements of the gas distribution mechanism and replace faulty parts. This will require a number of special tools:
- desiccant;
- mandrel for pressing out valve guides;
- tweezers;
- ruler;
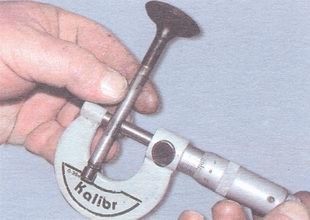
- micrometer;
- calipers;
- screwdriver;
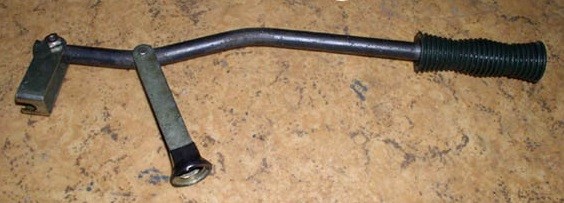
- a hammer.The cracker is a tool for extracting the "crackers" of the valve
The process of disassembling the valve mechanism is as follows:
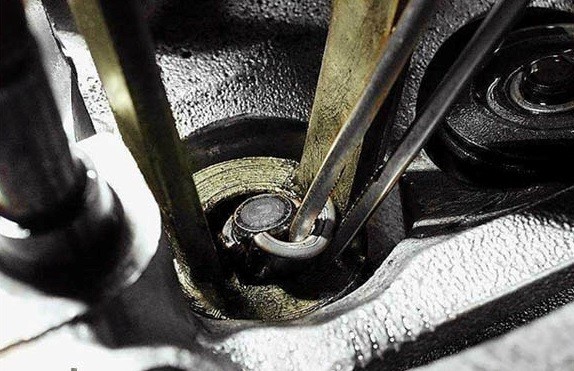
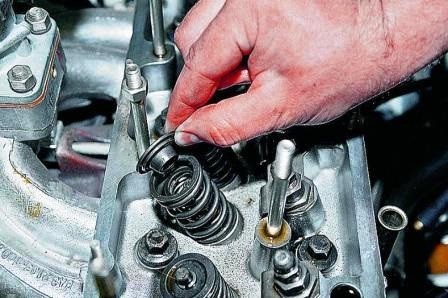
- We screw the nut onto one of the camshaft bed mounting studs. We put a dryer under it.The cracker must be fixed on the cylinder head stud
- By pressing the lever of the cracker, we remove the valve crackers with tweezers."Crackers" are more convenient to remove with tweezers
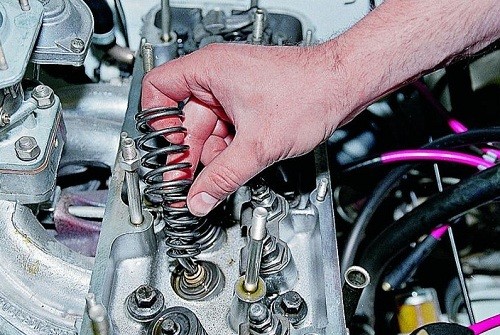
- Take off the top plate.The plate holds the spring in its upper part
- Dismantle the outer and inner springs.Each valve has two springs: external and internal
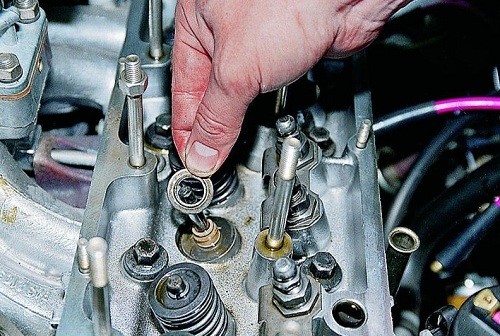
- Take out the top and bottom washers.To remove the washers, you need to pry them with a screwdriver.
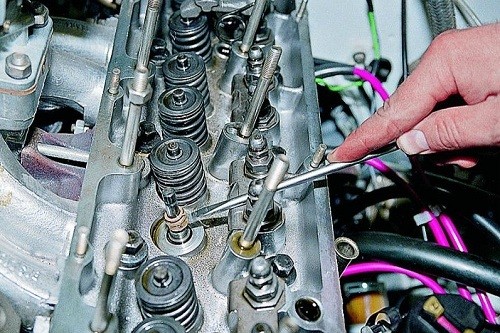
- Using a thin slotted screwdriver, pry off the valve seal and remove it from the stem.The gland is located on the valve stem
- We push the valve by pressing on it.
- Turn the head over so as to gain access to the top of the combustion chambers.
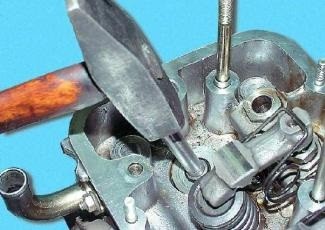
- We install the mandrel on the edge of the guide bushing and knock out the guide bushing with light blows of the hammer.It is better to press out the bushings using a special mandrel
- We repeat the process for each of the valves.
Now that the parts have been removed, we carry out their troubleshooting. The table below shows the allowable sizes.
Table: main parameters for troubleshooting parts of the valve mechanism
| Element | Value, mm |
| Valve stem diameter | 7,98 – 8,00 Feet |
| Guide bush inner diameter | |
| intake valve | 8,02 – 8,04 Feet |
| exhaust valve | 8,03 – 8,047 Feet |
| The distance between the arms of the outer spring of the lever | |
| in a relaxed state | 50 |
| under load 283,4 N | 33,7 |
| under load 452,0 N | 24 |
| Distance between the arms of the inner spring of the lever | |
| in a relaxed state | 39,2 |
| under load 136,3 N | 29,7 |
| under load 275,5 N | 20,0 |
If the parameters of any of the parts do not correspond to those given, the part must be replaced and reassembled.
Valves, like guide bushings, are only sold in sets of eight. And not in vain. These elements are also complex. It is not recommended to replace only one valve or one sleeve.
The process of replacing a valve is to remove the damaged one and install a new one. There are no difficulties here. But with the bushings you have to tinker a little. They are installed using the same mandrel that we knocked them out. We need to turn the head with the valve mechanism towards us. After that, a new guide is installed in the socket, a mandrel is placed on its edge and the part is hammered in with a hammer until it stops.
Video: VAZ 2107 cylinder head repair

Cylinder head grinding
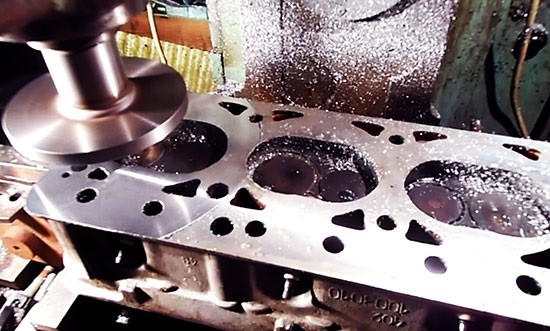
Cylinder head grinding is required in order to correct its geometry or restore it after welding. The head may lose its shape if the engine is overheated. Welding operations with cracks, corrosion also cause a change in the normal geometric parameters of the part. The essence of grinding is to level its mating surface as much as possible. This is necessary to ensure a better connection with the cylinder block.
It is impossible to determine by eye whether the cylinder head has lost its soy form. For this, special tools are used. Therefore, the grinding of the head is usually carried out at each dismantling. To do this at home will not work, because here you need a machine. The advice of "specialists" who claim that the cylinder head can be sanded by hand on an emery wheel should not be taken into account. It is better to entrust this business to professionals. Moreover, such work will cost no more than 500 rubles.
Installing a new gasket and assembling the engine
When all defective parts have been replaced and the cylinder head has been assembled, you can proceed with its installation. Here it is necessary to indicate that with each installation of the head, it is better to use new bolts for its fastening, since they are stretched. If you do not have a particular desire to buy new fasteners, do not be too lazy to measure them. Their length should be no more than 115,5 mm. If any of the bolts is large, it must be replaced. Otherwise, you will not be able to properly "stretch" the cylinder head. It is recommended to soak both new and old bolts in engine oil for at least half an hour before installation.
Video: replacing the cylinder head gasket VAZ 2107

Next, install a new gasket not on the head, but on the block. No sealants need to be applied. If the cylinder head is ground, it will already provide the desired tightness of the connection. After mounting the head, we bait the bolts, but in no case do not tighten them with force. It is important to adhere to the established order of tightening (in the photo), and with a certain effort.
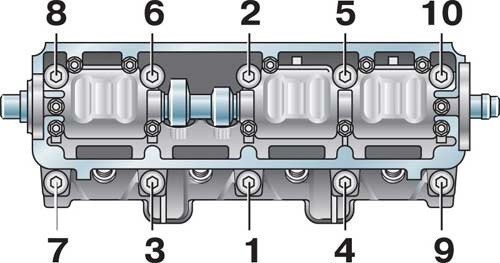
To begin with, all bolts are tightened with a torque of 20 Nm. Further, we increase the force to 70–85,7 Nm. After turning all the bolts another 900, and at the same angle. The last to tighten the bolt of the external fastening of the head. The tightening torque for it is 30,5–39,0 Nm.
Video: order and tightening torque of the cylinder head bolts

When everything is done, we assemble the engine in the reverse order of the above instructions. When the car has traveled 3-4 thousand kilometers, the tightening of the bolts must be checked and those that will stretch over time must be tightened.
Naturally, any work related to the disassembly of the engine is costly and time consuming. But in any case, repairing the power unit will be cheaper if you do it yourself. In addition, this practice will definitely come in handy in the future.

