We independently repair the front and rear hubs on the VAZ 2107
Content
For a car to move, its wheels must rotate normally. If problems begin with the rotation of the wheels, then the driver immediately has problems with the control of the machine, which can cause an accident. This applies to all cars, and the VAZ 2107 is no exception. The most important element that ensures the correct rotation of the wheels of the "seven" is the hub. The driver can repair it himself. Let's figure out how to do it.
Front hub and its purpose
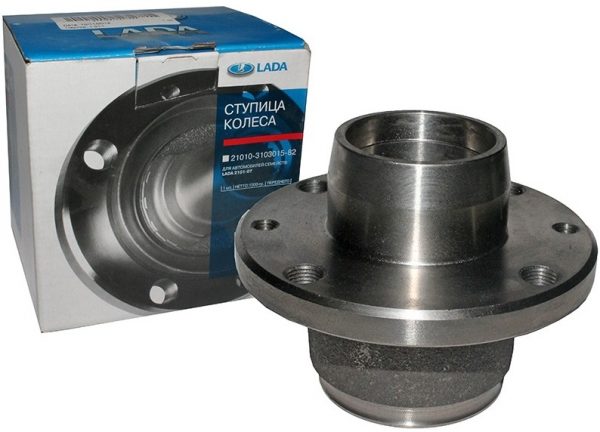
The front hub on the VAZ 2107 is a massive steel disc with a hole in the middle. In this hole is a large bushing in which the wheel bearing is installed. Along the perimeter of the hub disk there are holes for fastening the wheel. And on the reverse side, the hub is connected to the steering knuckle.
That is, the hub is an intermediate link between the movable wheel and the fixed part of the suspension. It provides not only the normal rotation of the front wheel, but also its normal rotation. Therefore, any malfunction of the hub can have very sad consequences for the driver and his passengers. For example, if the wheel bearing becomes completely unusable, the wheel may jam or simply come off on the go if the speed is high. It is not difficult to guess where this will lead. That is why experienced drivers check the condition of the front hub at least once a month by holding the upper part of the wheel and slightly shaking it away from themselves and towards them. If at least a slight play is felt when rocking, you can’t drive such a car.
Rounded fist
The steering knuckle, which was mentioned above, is another important element of the VAZ 2107 suspension. Its purpose is easy to guess from the name. This detail provides a smooth turn of the front wheels of the car. The knuckle has two lugs that attach it to the twin suspension arms. On the reverse side of the knuckle there is a king pin, on which the hub is put together with the wheel bearing.
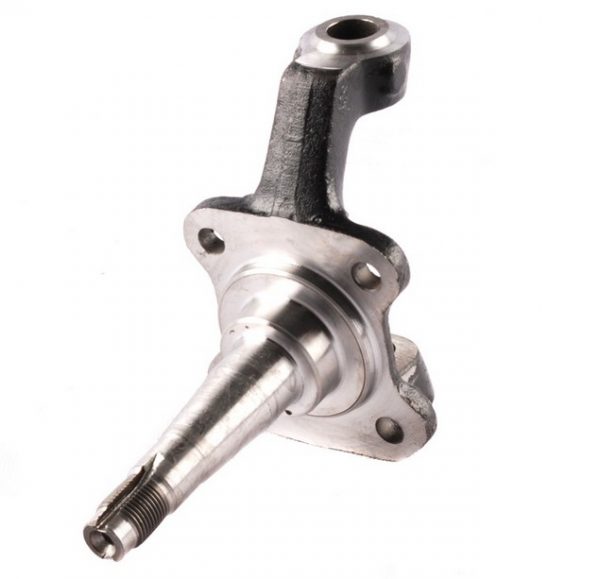
The hub, put on the knuckle pin, is fixed with a nut. It should also be said here that turning the wheels is not the only thing the fist is responsible for. It also has an additional function: it limits the rotation of the wheels. For this, special protrusions are provided on the fists of the "seven". When cornering too hard, the suspension arms hit these lugs and the driver can no longer turn the steering wheel. The fist must have a huge margin of safety, since it is it that accounts for most of the shock loads that occur when the car is moving, especially on rough roads. However, sometimes the fist is deformed (as a rule, this happens after the front wheels hit a very deep hole or after an accident). Here are the main signs that something is wrong with the fist:
- when driving, the car leads strongly to the side, and with an increase in speed this manifests itself more strongly;
- the driver suddenly notices that the turning radius has become smaller, and it has become more difficult to “fit” into very sharp turns. This indicates a decrease in the angle of rotation of the wheels. And this phenomenon occurs after a serious deformation of one fist;
- wheel spin. There are situations when one of the lugs of the fist breaks. This is a rarity, but it is impossible not to mention it. So, when the lug breaks, the wheel turns out almost at a right angle to the body of the "seven". If this happens while driving, the car instantly loses control.
Increasing the eversion of the wheels
Sometimes drivers want to increase the handling of their car. The standard turning angle of the VAZ "classic" has always raised many questions from motorists. So drivers increase this angle on their own with a few simple operations. Especially often this is done by lovers of the so-called drift: the increased eversion of the wheels makes it easier for the car to enter a controlled skid, and this can be done at maximum speed.
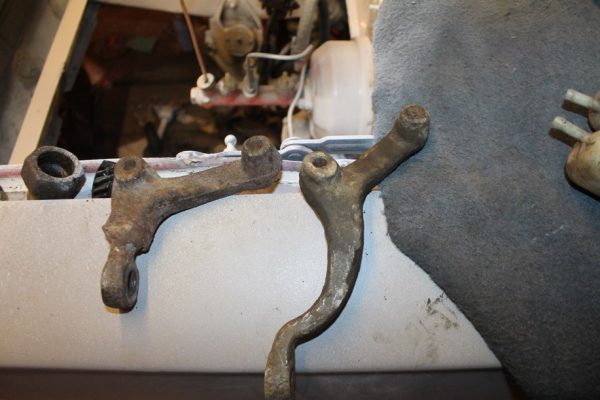
- The machine is installed on the pit. One of the wheels is jacked up and removed. After that, the steering arms, which are located behind the hub, are unscrewed from the suspension. There are two of these pods.
 Initially, the "seven" is equipped with two steering bipods of different lengths
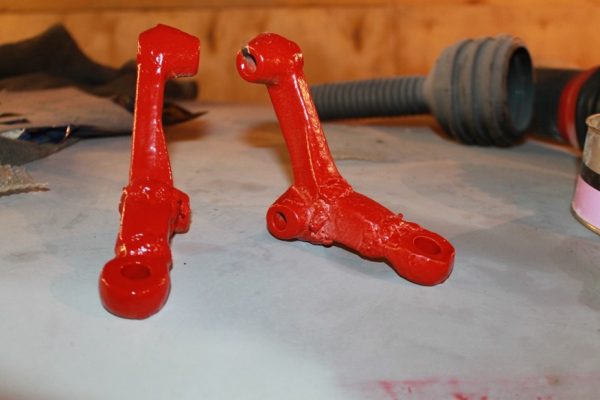
 - One of the bipods is sawn in half with a grinder. The sawn-off top is thrown away. The rest is welded to the second bipod. The result is shown in the photo below.By shortening one of the bipods, the owners of the "sevens" seek to increase the eversion of the wheels
- Welded bipods are installed in place.
- In addition, there are small restrictive lugs on the lower suspension arms. They are carefully cut with a hacksaw for metal. After performing all of the above operations, the eversion of the "seven" wheels becomes about a third larger compared to the standard one.After installing new bipods, the eversion of the wheels increases by about a third
It should also be noted that some car owners prefer not to engage in independent welding and installation of bipods. Instead, they buy ready-made tuning kits for the VAZ “classics”, which allow them to increase the eversion of the wheels without any extra labor. Unfortunately, finding such a set for sale is not so easy. Therefore, the above technology for increasing the eversion of the wheels will be popular among the owners of the "sevens" for a very long time.
Front hub bearing
To ensure uniform rotation of the front wheels, special bearings are installed in their hubs. These are double row roller bearings that do not require regular maintenance and lubrication.
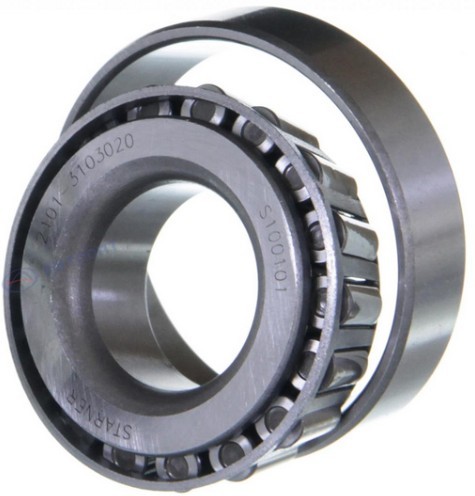
The reason is simple: they are pressed into the hub, so they can break if you try to remove them. Therefore, the driver removes the wheel bearings only when he decides to change them. Here are the main signs of wheel bearing failure:
- the front wheels rotate with a characteristic low rumble. This indicates wear on one or more rollers in the wheel bearing. Worn rollers dangle inside the cage, and when the hub rotates, a characteristic hum occurs, which becomes louder with increasing wheel speed;
- crackling or creaking coming from behind the wheel. Usually the driver hears this sound when cornering. He says that one of the wheel bearing rings has collapsed. As a rule, the inner ring of the bearing breaks, and it usually breaks in two places at once. When turning, the hub carries a huge load, as does the bearing in it. At such moments, the fragments of the inner ring begin to rub against each other at the fracture points, resulting in a characteristic crack or creak.
There is only one solution in all of the above cases: replacing the wheel bearing.
Checking the wheel bearing
At the slightest suspicion of a bearing failure, the driver is obliged to check it, especially since there is nothing complicated about it.
- The wheel, due to which characteristic sounds are heard, is jacked up. Then the driver manually spins the wheel so that it spins as fast as possible and listens. If the bearing is worn, a characteristic hum will be clearly audible to anyone who does not have hearing problems. In some cases, bearing hum cannot be detected when the wheel is spinning too fast. Then you need to spin the wheel as slowly as possible. If at least one roller in the bearing is worn out, the wheel will definitely buzz.
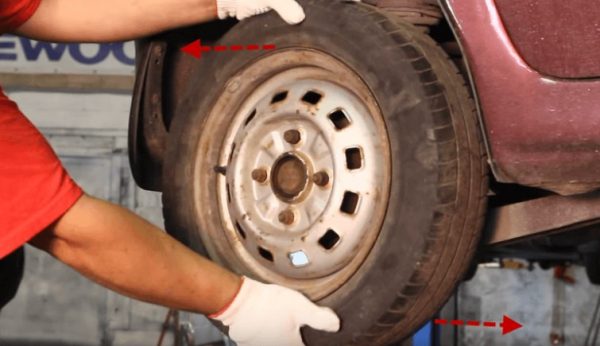
- If manual rotation of the wheel does not reveal the problem, then you should pull the wheel without removing the machine from the jack. To do this, the driver takes the upper and lower parts of the tire and pulls the wheel several times, first away from him, then towards him. If the bearing rings are broken, then a slight play will be clearly felt on the wheel.
- If the play was not detected by pulling the wheel, then the wheel should be shaken. The driver takes the upper part of the tire, and begins to swing it away from himself and towards himself. Then he does the same with the bottom of the tire. Backlash, if any, is almost always detected. Either when rocking the bottom of the tire, or when rocking the top.To identify play, the wheel must be shaken away from you and towards you.
Wheel bearing adjustment
After detecting play, the wheel bearing is carefully inspected. If the play is insignificant, and there were no signs of wear and breakage on the bearing, then this indicates a weakening of the bearing fasteners. In this case, the driver does not have to change the bearing, it will be enough just to adjust it.
- Using a screwdriver, remove the protective plug from the wheel bearing.
- After that, the adjusting nut, located above the bearing, is tightened so that the wheel cannot be turned manually.Sometimes, to eliminate wheel play, it is enough to adjust the hub nut
- Then this nut is gradually loosened by two or three turns. After each loosening, the wheel is rotated and checked for play. It is necessary to achieve a situation where the wheel rotates freely, but no play is observed.
- When the desired position is found, the adjusting nut should be fixed in this position. Drivers usually do this with a simple chisel: hitting the nut with the chisel slightly bends it, and it no longer unscrews.
Replacing the front wheel bearing
To replace the front wheel bearing on the "seven" you will need the following tools:
- jack;
- a set of socket heads and knobs;
- screwdriver;
- set of open-end wrenches;
- new front wheel bearing.
Sequencing
Before starting work, one of the front wheels is jacked up and removed. In this case, the rear wheels of the car must be fixed with the help of shoes.
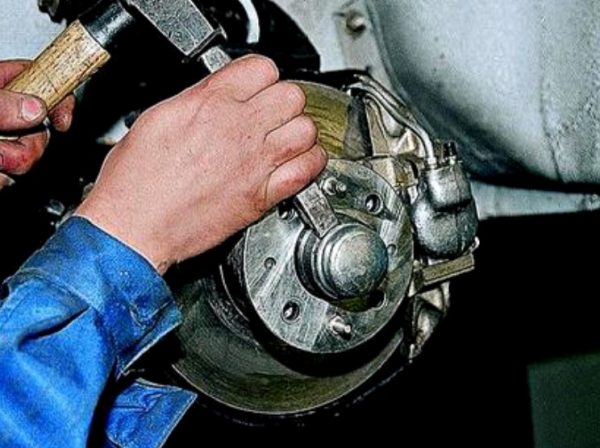
- The front wheel is removed. Opens access to the brake caliper and hub. The brake caliper is also removed.
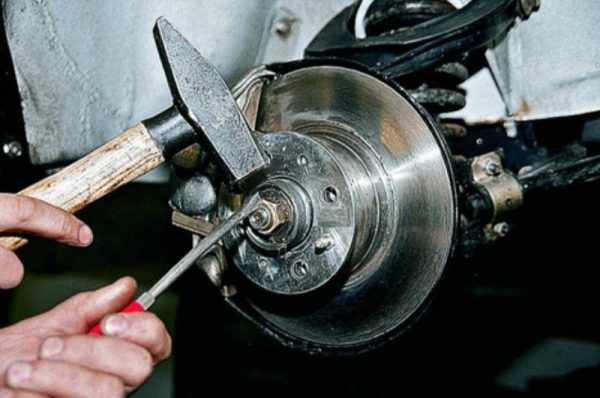
- Now the protective plug located above the wheel bearing is removed. To pry it, you can use a thin chisel or a flat screwdriver.It is most convenient to remove the protective plug on the hub with a thin chisel
- After removing the plug, access to the hub nut is opened. On this nut, the side that was previously deformed by the chisel should be straightened, which prevented the nut from unscrewing. This is done with a screwdriver and a hammer. After straightening the side, the nut is unscrewed and removed together with the spacer washer.To unscrew the fixing hub nut, you must first straighten its side
- A screwdriver pry off and remove the seal that covers the bearing, then the old bearing is removed from the hole. Using a screwdriver and a hammer, the separator ring under the bearing is also removed.
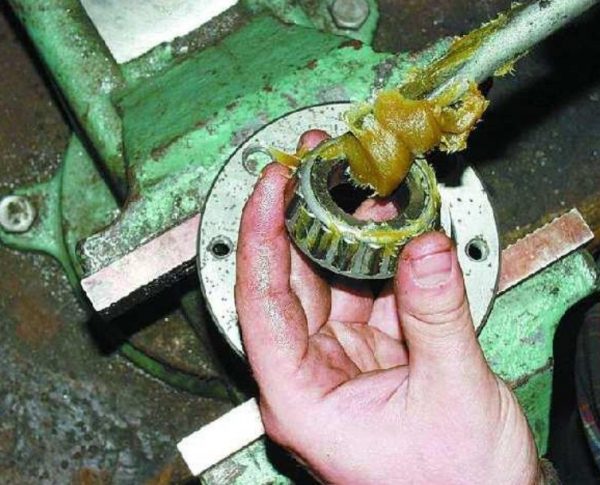
- The bearing installation site is carefully wiped with a rag, after which a new one and a separator ring are pressed into place of the old bearing.
- The installed bearing is lubricated, especially the inner ring should be lubricated. After that, the gland is installed in place.Lubricate the inner ring of the wheel bearing especially generously.
- The lubricated bearing is put on the hub, the hub nut is tightened, after which its sidewall is again bent with a chisel and hammer to prevent loosening.
- The bearing cap is installed in place. Then the caliper and wheel are installed in place.
Video: change the front wheel bearing on the "classic"

Caliper
Speaking about the suspension of the car, one cannot fail to mention the caliper. This device is equipped only with the front wheels of the VAZ 2107. The reason is simple: without a caliper, disc brakes cannot function properly. Structurally, the caliper is a monolithic steel case, which contains the brake disc and pads.
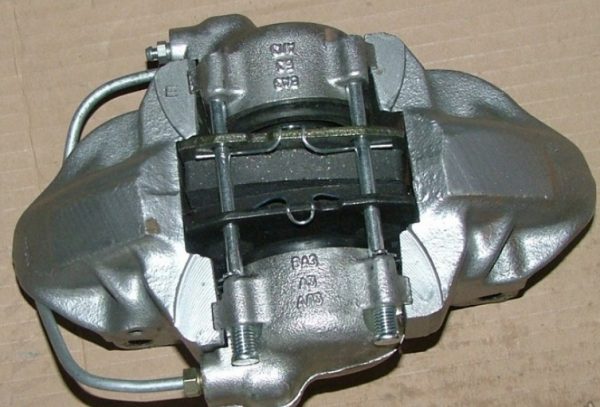
The caliper has several holes. They are necessary for attaching the caliper to the suspension and for installing the brake cylinders. The caliper provides the necessary level of pad pressure on the brake disc and their uniform wear. If the caliper is deformed (for example, as a result of an impact), then the normal wear of the pads is disrupted, and their service life is reduced several times. But mechanical damage is not the only trouble that can happen to a caliper. Here's what else can happen:
- oxidation of moving parts. This is especially true for brake cylinders installed in a caliper. These cylinders eventually become covered not only with an oxide film, but also with dirt. As a result, their rods stop moving normally, and this immediately affects the braking efficiency;
- occurrence of cracks in the caliper. In parts subjected to cyclic alternating loads, fatigue stresses arise, which sooner or later lead to the appearance of fatigue cracks. After their occurrence, the caliper must be urgently replaced. "Tired" parts are not subject to restoration.
Rear hub
The rear hub of the VAZ 2107 differs from the front hub both in design and purpose. No steering knuckles or additional suspension arms are attached to the rear hub.
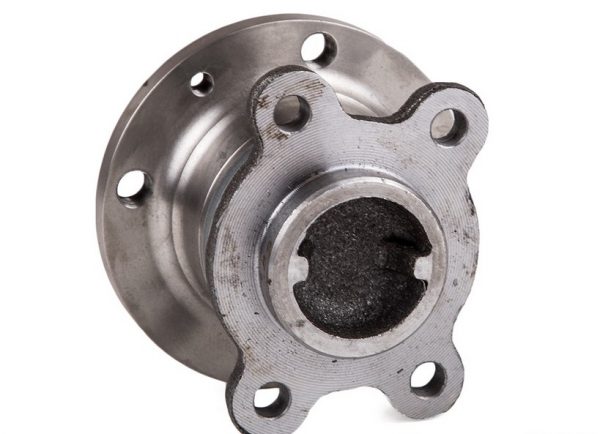
Because the main task of this hub is to ensure uniform rotation of the wheel, and that's it. It does not require a huge margin of safety and resistance to mechanical stress, since it does not participate in the rotation of the wheels, like the front hub.
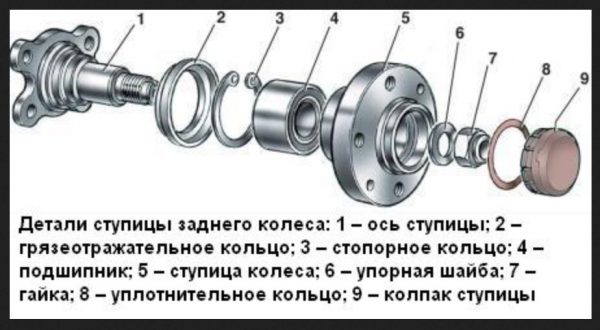
The rear hub is equipped with a rolling bearing, which is closed with a special cap. On the other hand, a dirt-proof inner ring is installed in the hub, which prevents clogging of the bearing. This whole structure is put on the rear axle shaft of the "seven" and fixed with a hub nut at 30.
Replacing the rear wheel bearing
There are bearings not only in the front, but also in the rear hubs of the VAZ 2107. The rear wheel bearings also wear out over time, although not as intensely as the front ones. Nevertheless, the driver has to monitor the condition of these bearings, and if signs of breakdown appear, which have already been mentioned above, change these bearings.
Sequencing
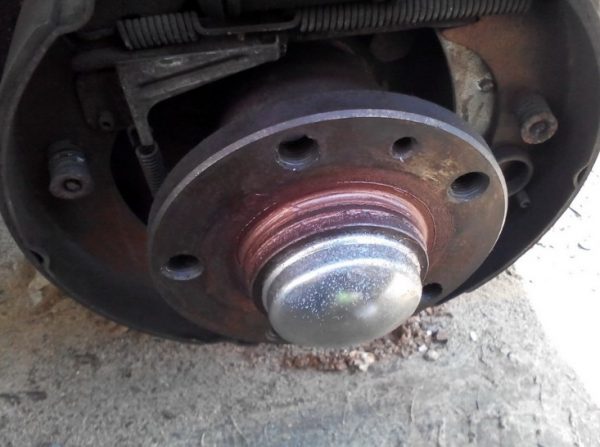
On the rear axles of the "seven" there are no calipers, but there are brake drums. So before replacing the wheel bearings, the driver will have to get rid of the drums.
- The front wheels of the "seven" are fixed with shoes. Then one of the rear wheels is jacked up and removed. Access to the brake drum is opened, which is held on two guide pins. The nuts on the studs are unscrewed, the drum is removed.
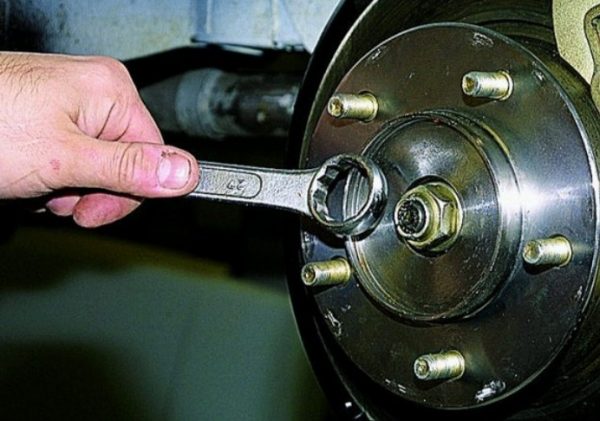
- Now you have access to the rear hub. Its protective plug is pry off with a screwdriver and removed. Then, using a chisel, the side of the hub nut is leveled. After alignment, the nut is unscrewed with a 30 spanner wrench.Under the plug is a mounting nut and a bearing
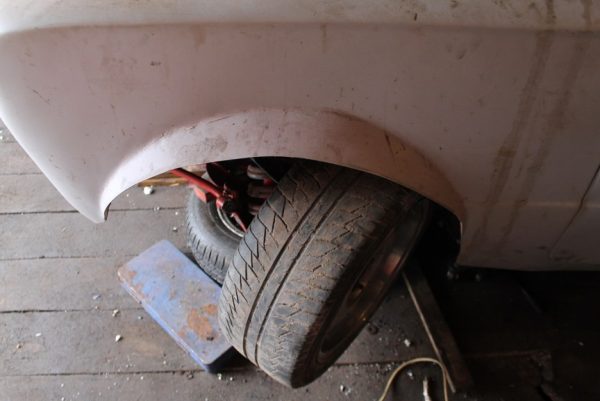
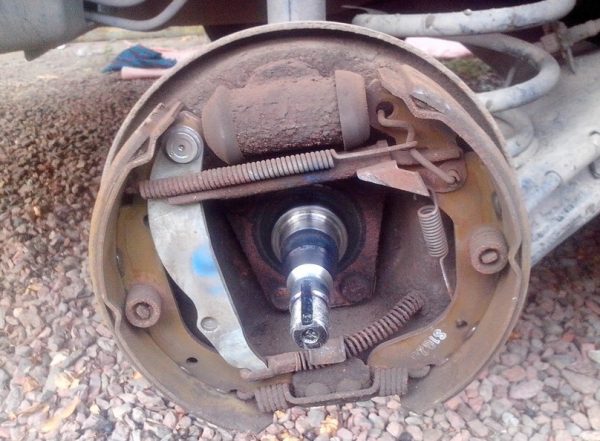
- With the help of a three-legged puller, the hub is pressed out and removed from the axle (if there is no puller at hand, then the hub can be removed using a pair of long bolts, evenly screwing them into the holes on the hub disk).The most convenient way to remove the rear hub is with a three-legged puller.
- After removing the hub, the inner ring will remain on the axle.
- The bearing is knocked out of the hub with a hammer and a pipe cutter used as a mandrel. After pressing out the old bearing, the hub is thoroughly cleaned with a rag and lubricated.
- The same mandrel replaces the old bearing with a new one. It is necessary to act very carefully and hit the mandrel half-heartedly with a hammer.The hub is removed, it remains to press a new bearing into it
- After pressing, the inner ring of the bearing is lubricated, it returns to the axle, where the inner ring is inserted into it. Now it remains only to replace the mounting nut, and then put the brake drum and wheel.

So, the hubs, both rear and front, are the most important parts of the VAZ 2107 suspension. The hubs and their bearings bear a tremendous load and therefore wear out quickly. If there is any suspicion of a breakdown, the driver is obliged to inspect and replace them. You can do it yourself, because no special skills and knowledge are required for such repairs. You just need to be patient and follow the above instructions exactly.

