Self-repair of the carburetor VAZ 2107
Content
Carburetor engines are easier to maintain than injection engines. VAZ 2107 cars were produced from 1982 to 2012. Depending on the year of manufacture, the cars were equipped with Ozone, Solex or DAAZ carburetors. All these models are reliable, high-quality and durable. However, they also require periodic maintenance and repair.
When is it necessary to repair the carburetor VAZ 2107
The VAZ 2107 carburetor has a rather complex device, so only experienced car owners can accurately diagnose its malfunctions. However, if you carefully listen to your car, even a novice driver will be able to understand that the problems are related to the carburetor. The external manifestations of these problems are as follows:
- the car loses momentum when accelerating;
- when you press the accelerator pedal, the engine starts to work with failures;
- jerks are observed when driving at one speed;
- the car starts to sway for no apparent reason;
- black exhaust coming out of muffler.
The following malfunctions are typical for carburetors of all VAZ models:
- wear of gaskets made of rubber and paronite;
- end of valve life;
- flange deformation;
- membrane cracks;
- sinking or wear of the valve needle.
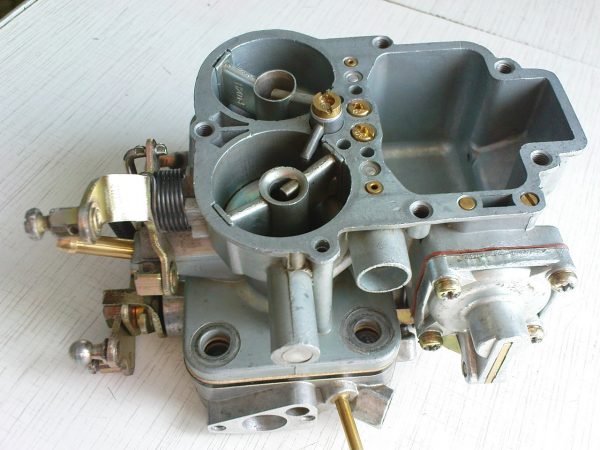
Carburetor device VAZ 2107
Since the release of the first VAZ 2107 to the present, the carburetor device has not changed. Until now, cars are equipped with two-chamber carburetors - in the engine housing there are two chambers where the combustible mixture is burned.
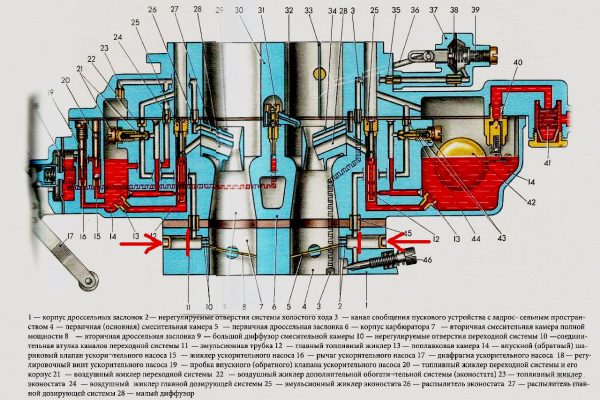
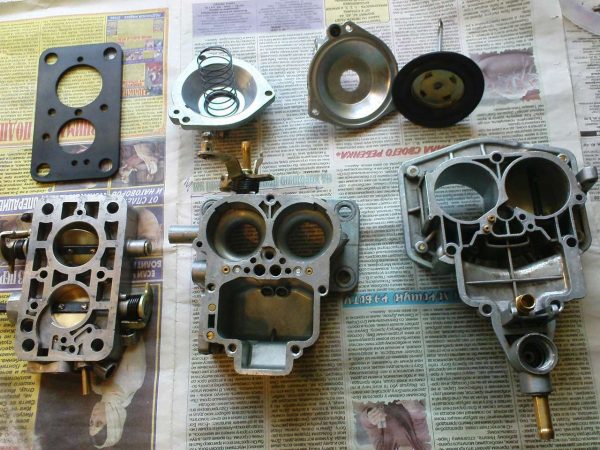
The carburetor consists of:
- top cover;
- housing;
- lower part.
Inside each of these parts are smaller parts that form the continuity of the fuel supply and its combustion.
The top cover is located at the top of the carburetor and protects the engine from dirt and dust from the street. In the body (the middle part of the carburetor) are the main elements of the device - two internal combustion chambers and diffusers. Finally, at the bottom, often referred to as the base of the carburetor, are the throttle flaps and the float chamber.
An ordinary owner of a VAZ 2107 does not need to remember the exact device of the carburetor. It is enough to know the purpose and location of its main elements:
- float chamber. Designed to accumulate gasoline in the amount necessary for engine operation.
- Float. It is located in the float chamber for adjusting the amount of fuel supplied.
- Needle valve mechanism. Designed to start the flow or stop the supply of fuel to the chamber as needed.
- Throttle and air dampers. Regulate the composition of the fuel-air mixture.
- Channels and jets. Designed for supplying and adjusting the composition of the fuel-air mixture entering the internal combustion chamber.
- Spray. Creates a fuel-air mixture of the desired concentration.
- Diffusers. Designed to force air into the carburetor.
- Accelerator pump. Optimizes the performance of all carburetor systems.
In addition, the carburetor has a number of additional functions:
- maintains a certain level of fuel;
- facilitates starting and warming up the engine in the cold season;
- keeps the engine idling.
Carburetor repair VAZ 2107
Repairing a carburetor is considered a rather complicated procedure. Any operation requires care and accuracy. Moreover, to avoid contamination of the carburetor, all work must be carried out under practically sterile conditions.
For self-repair, you will need a repair kit - a factory-prepared set of materials and parts necessary for the work. The standard repair kit is of two types:
- Full. Includes absolutely all possible elements that may be required to replace failed parts. It is usually purchased for major repairs or other serious malfunctions.
- Incomplete. Allows you to carry out only one repair operation (for example, the replacement of jets).
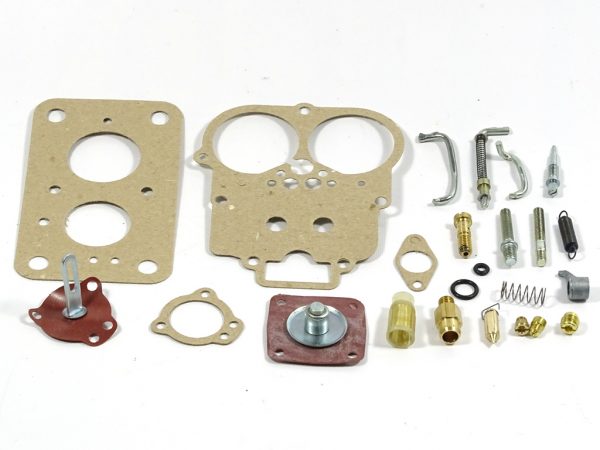
It is more profitable to buy incomplete repair kits, since you can pick up only those kits that you really need.
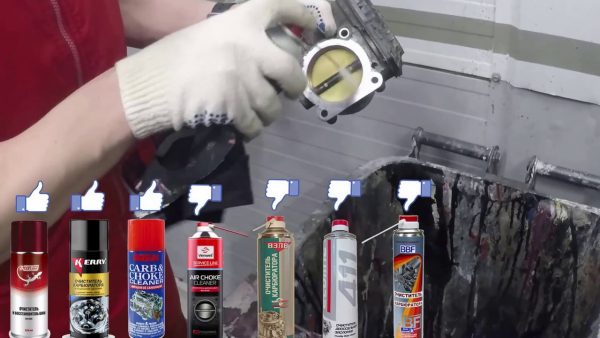
When repairing a VAZ 2107 carburetor, you will need a standard set of tools and a carburetor cleaner, which can be purchased at any car shop.
Carburettors get dirty quickly. In a relatively short time, jets, channels and other small elements can become clogged with dust and impurities in the fuel. The moving parts of the device wear out quickly during aggressive driving. This primarily applies to gaskets.
Typically, the carburetor repair process consists of disassembling, washing all parts, replacing worn and damaged elements, and reassembling.
Recommendations before repair
Before starting repair work, pay attention to the following points.
- Work should be carried out on a cold engine to eliminate the possibility of burns.
- You need to make sure that there is little fuel left in the system. Otherwise, most of the gasoline must be drained.
- Repairs must be carried out outdoors in dry weather or in a well-ventilated area (gasoline vapors can cause nausea and dizziness).
- A clean place should be prepared in advance for disassembling the carburetor and a container for washing it.
Depending on the symptoms of a malfunction, attention should be paid to individual parts and components of the carburetor:
- If the engine idles unsteadily or stalls, then the economizer valve needle is most likely worn out.
- If during disassembly water was found in the cavity, then the carburetor lost its tightness. It is recommended to check all hoses and connections.
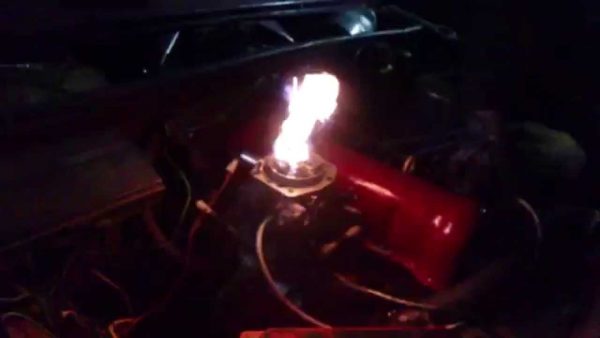
- The appearance of a flame under the hood indicates a fuel leak. A thorough inspection of all elements of the carburetor and the search for gaps or holes will be required.
- If, when self-adjusting the quality and quantity screws, the engine does not react in any way to turning the screws, you should remove them and check if the thread is broken.
- If the carburetor starts to "shoot", it is necessary to check all the wires and terminals for a short circuit.
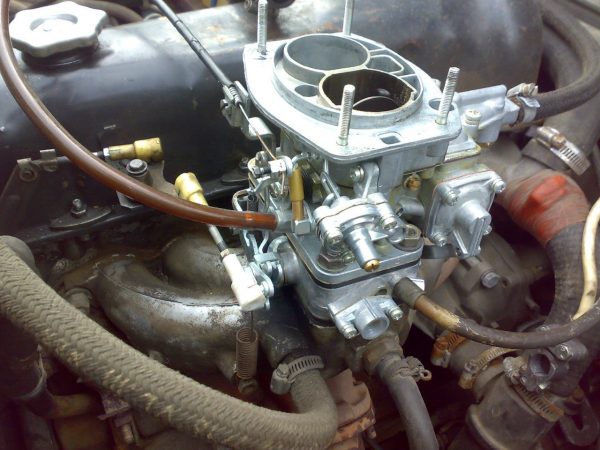
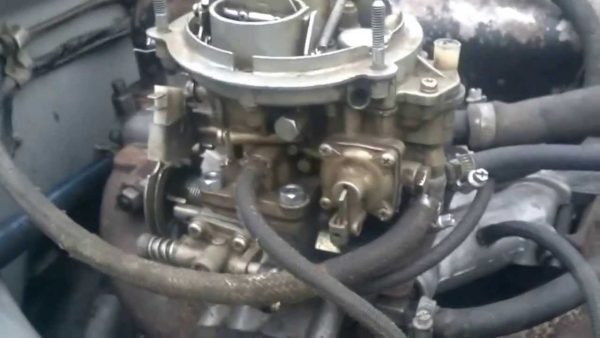
Dismantling the carburetor
Any repair begins with the removal of the carburetor mechanism from the car. The dismantling of the device is carried out strictly according to the scheme:
- Disconnect power from battery.
- Remove the air filter cover (it prevents access to the carburetor).
- Disconnect all fuel and air supply hoses from the carburetor.
- Unscrew the bolts securing the carburetor to the body. If the bolts do not come out, you can apply WD-40 water repellent to them.
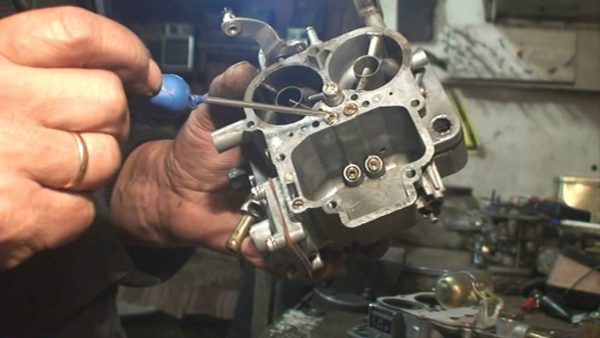
- Place the removed carburetor on a flat surface and clean it of dirt and gasoline smudges.
Video: how to quickly remove the carburetor from the car

The procedure for repairing a VAZ 2107 carburetor
To repair a particular carburetor assembly, you will need to disassemble the entire device, thoroughly rinse all parts, dry, inspect them and decide on a replacement or adjustment. First place the removed carburetor on a clean, level surface. Then you need to follow the steps in the following order.
- Remove return spring.
- Using a Phillips screwdriver, unscrew the screw securing the three-arm lever.
 The lever fastening screw is turned out with a Phillips screwdriver
 - Remove spring bracket.
- You can remove the return spring and lever, along with the rod.If you do not remove the spring at the very beginning of work, then it will be impossible to do this later.
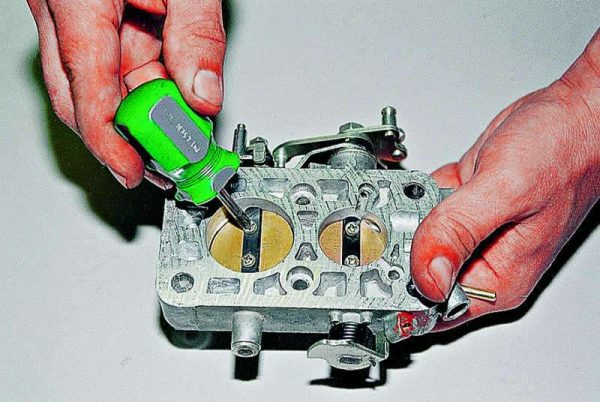
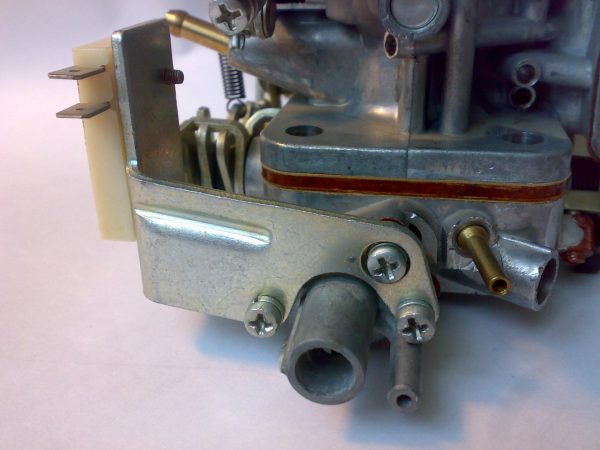
- Unscrew the screws of the throttle valves and remove them from the housing.To remove the throttle body, two screws must be removed.
- Unscrew the fuel jet housing.
- Remove the fuel jet from the housing.
- After removing the rubber seal from the jet, put the jet in acetone. After cleaning, blow the surface with compressed air and replace the seal with a new one.
- Remove thermal pad.
- Unscrew the accelerator pump valve.The accelerator pump is removed together with all fasteners
- Remove the valve on which the atomizer is located.
- Rinse the sprayer in acetone and blow it out with compressed air.
- Unscrew air jets.
- Remove emulsion tubes.
- Unscrew the main fuel jets from the housing.
- Loosen the adjustment screw in the accelerator pump.
- Remove the cover from the pump by unscrewing the fastening screws in its upper part.
- Remove the diaphragm together with the spring and the cover itself.All metal elements of the carburetor are washed and dried
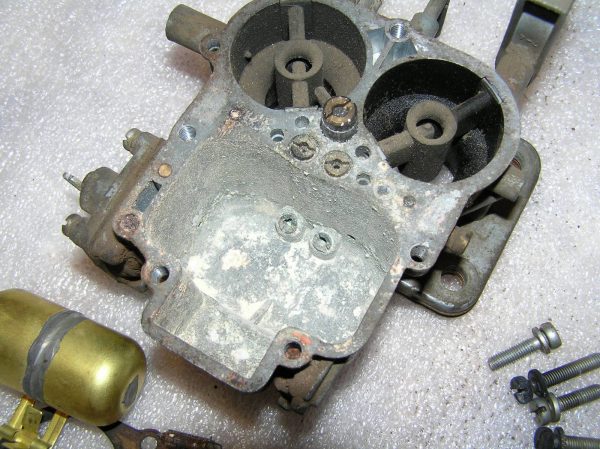
This completes the disassembly of the carburetor. Metal parts are washed from carbon deposits and dirt with acetone or a special liquid for cleaning carburetors and dried with a stream of compressed air. Gaskets and other rubber elements are replaced with new ones.
All components will need to be checked for integrity - there should be no visible signs of wear or mechanical damage. New parts are installed in the reverse order of disassembly. In any case, the following must be replaced:
- accelerator pump diaphragms;
- return springs;
- fuel valve mechanism;
- all rubber seals;
- most paronite gaskets.
Video: do-it-yourself carburetor repair

Electropneumatic valve
The idle valve (or economizer) is designed to stabilize the engine at low speeds. Idling stability is ensured by the electropneumatic valve included in the economizer.
The electropneumatic valve itself works through the control unit. Depending on the number of engine revolutions, the unit gives a signal to open or close the valve. The valve, in turn, increases or decreases the pressure of the fuel in the system, which ensures the stability of idling. In addition, such a scheme can significantly reduce fuel consumption.
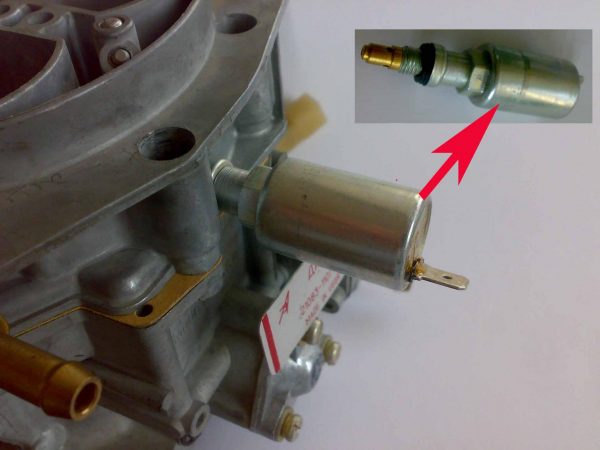
Checking and replacing the electropneumatic valve
To test the electro-pneumatic valve, you will need a simple hose that fits in diameter to the fitting of the valve itself. To quickly remove the hoses, it is recommended to use screwdrivers. To check the valve, you must:
- Make sure the motor is cold.
- Open the hood of the car.
- Clean the surface of the electropneumatic valve from dust and dirt.
- Remove all supply lines from the valve.
- Connect the hose to the fitting in the center of the valve.
- Using a pump, create a vacuum in the hose (this can be done without a pump, sucking air from the hose with your mouth, but be careful).
- Turn on the ignition and make sure that the valve works with characteristic clicks when opening and closing. In working condition, the valve must not let air through. If it is faulty, then even with the ignition off, air will immediately begin to pass through it.
Video: checking the electro-pneumatic valve

Usually, repair of the VAZ 2107 electropneumatic valve is impractical. Having spent a lot of time replacing small parts (in particular, needles), the car owner will not be able to get a guarantee of idling stability. Therefore, most often the faulty valve is replaced with a new one. The replacement procedure is quite simple. To do this, follow these steps.
- Remove all supply hoses from the valve.
- Disconnect the power cable.
- Using an 8 socket wrench, unscrew the nut securing the valve to the stud on the body.
- Pull out the solenoid valve.
- Clean the seat from dirt and dust.
- Install a new valve.
- Connect all hoses and wires.
It is important not to confuse the connection points of the highways: a hose from the manifold to the inlet is put on the central fitting, and from the economizer to the additional one.
Thus, self-repair of a VAZ 2107 carburetor is usually not very difficult. However, when overhauling an old car, it is more advisable to contact specialists.

