Traction On Audi 100 C4
Content
Initially, the car had a branded GCC BOGE with an AUDI nameplate, at some point the pedal travel changed noticeably and it became difficult to move.
(anticipating bewilderment) - yes, there is a repair kit for this GCC that costs about 8-11 dollars. But if you understand the design of this unit, it becomes clear that there is nothing high-tech in it, and in most cases, rubber parts fail due to leakage or airing of the clutch. We will not get carried away with "savings" and take a chance by buying a GKS from JP GROUP, which is much more expensive than a repair kit.
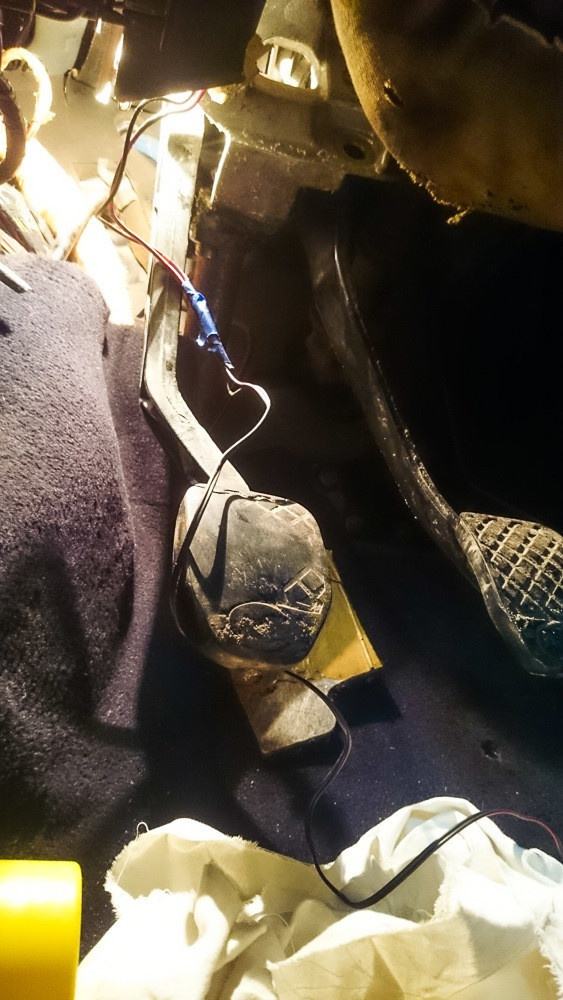
Disassembly is not at all difficult: we drain part of the brake fluid from the reservoir, remove the “lever pan” from the passenger compartment, then unhook the wiring (for convenience) and remove the cardboard near the clutch pedal. They removed the hose from the GCS, after replacing it with a flat container for collecting brake fluid. Then we can unscrew the steel tube from the gcs and 2 fixing screws. Almost ready, it remains to unscrew the threaded part of the NSD. Lucky if you managed to unscrew manually. I had to climb up with a box wrench to slightly turn the "threaded part" and then unscrew it through the case.
Installation is upside-down.
Pumping is the most interesting thing when replacing the GSS with an Audi A6 C4. Trying to pump in the "classic" way, the brake fluid can be removed without air bubbles, but the clutch slave cylinder will not work ... Bleeding must be done on the "return". We take a syringe (I used 500 ml), connect it with a tube to the fitting of the clutch slave cylinder and fill the system with new brake fluid for a long time and carefully, listening to the gurgling in the reservoir. When the bubbles stop flowing into the tank, hold the accessory and test the clutch pedal. Ready.
We do not throw away dismantled NKU! Over time, it will be possible to buy an inexpensive repair kit, and if you have the desire and free time, make a spare part.
Sooner or later, the clutch master cylinder must be replaced.
The reason for replacing the HCC is characterized by such signs as:
- Pedal failed
- Clutch disengagement occurs under the floor;
- when you press the clutch, you need to press hard on the gear lever knob;
- the pedal does not return to its original position after tightening it;
If you have such signs and there is no visible damage to the pedal, or a break in the return spring of the pedal, and bleeding did not help, then your diagnosis is the replacement of the HCC.
In my case, the clutch was squeezed out only under the floor and sometimes the gears turned on with difficulty. Bleeding the clutch helped, but only for a while, after which the described signs returned again.
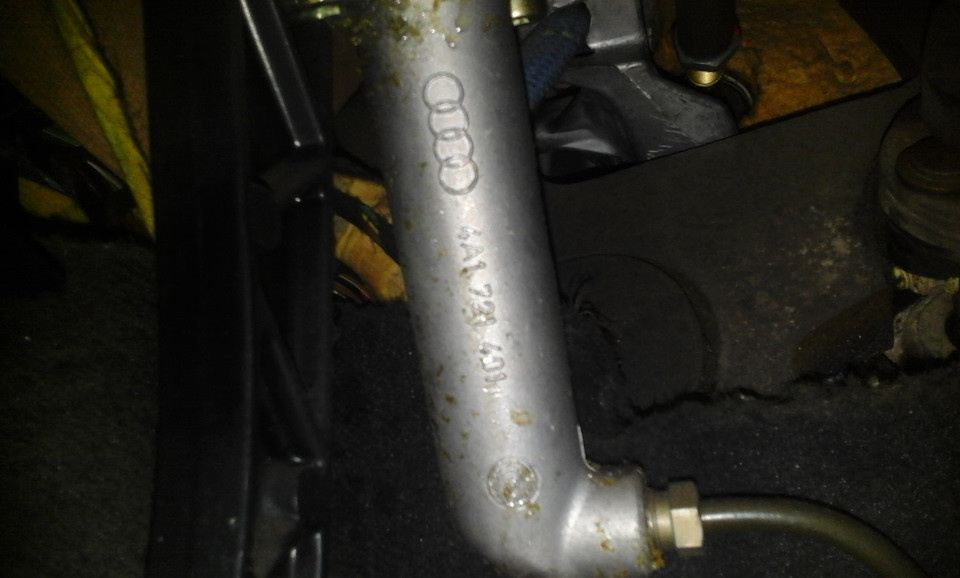
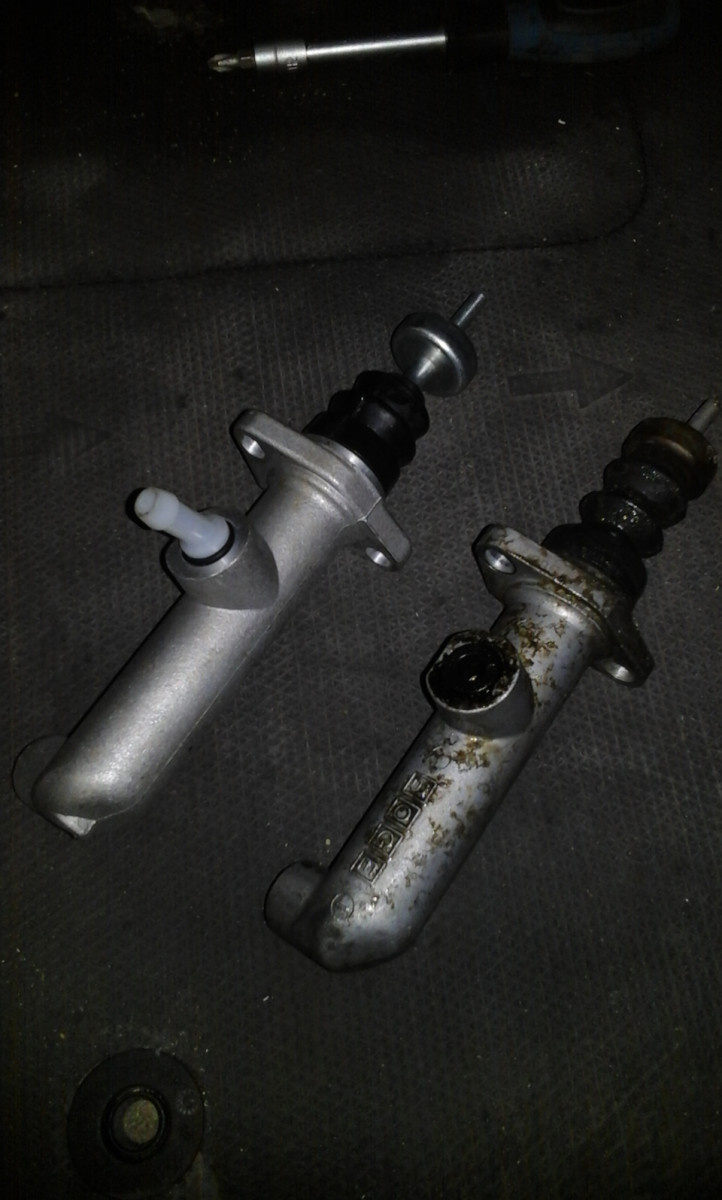
I bought an original Audi a6 c4 BOGE GCC disassembled; Fortunately, this part was dismantled as a consumable and I bought it for only $5:
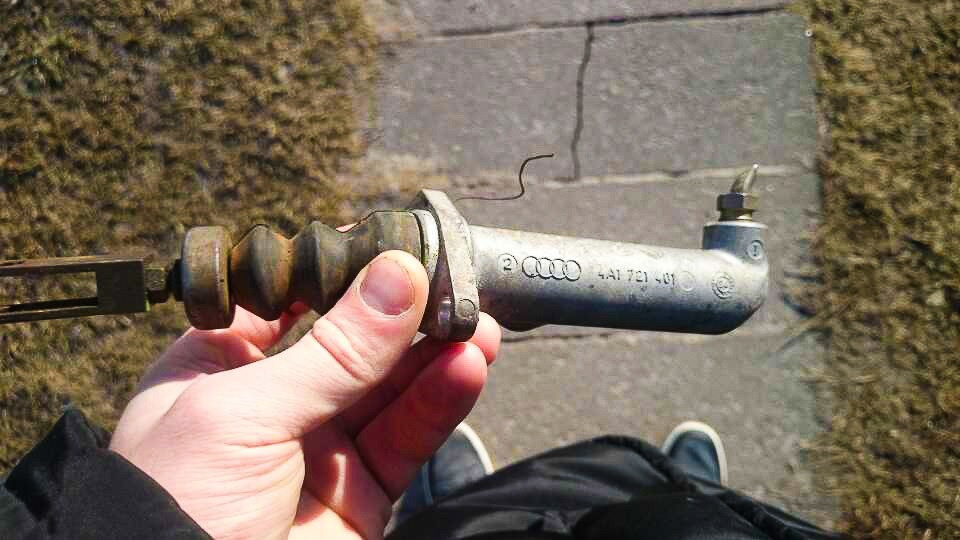
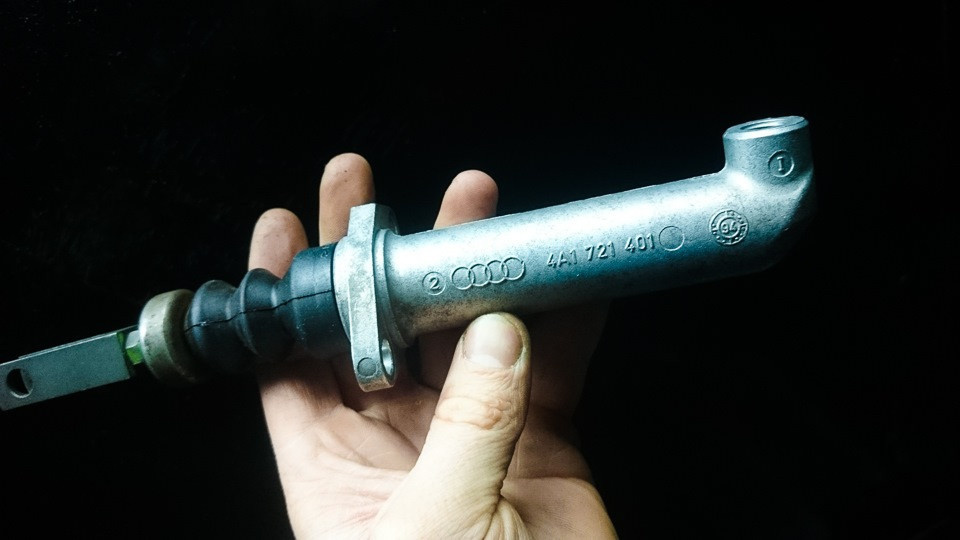
The only difference between the GCC Audi 100 c4 and the GCC Audi a6 c4 is the bent end of the cylinder:
GCC from the Audi a6 c4 has already been installed on the last few hundred Audi 100 c4 crossovers (1994).
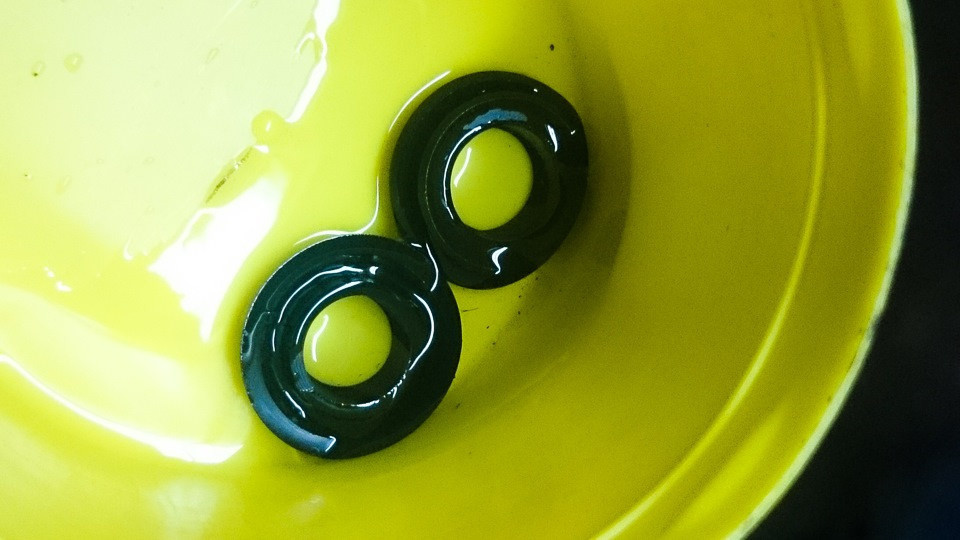
I immediately bought a repair kit from GCC so that in the future I would not climb into the same place twice. Ert chose the company because he solved the calipers with repair kits from this company and there are no complaints about the quality of the material:
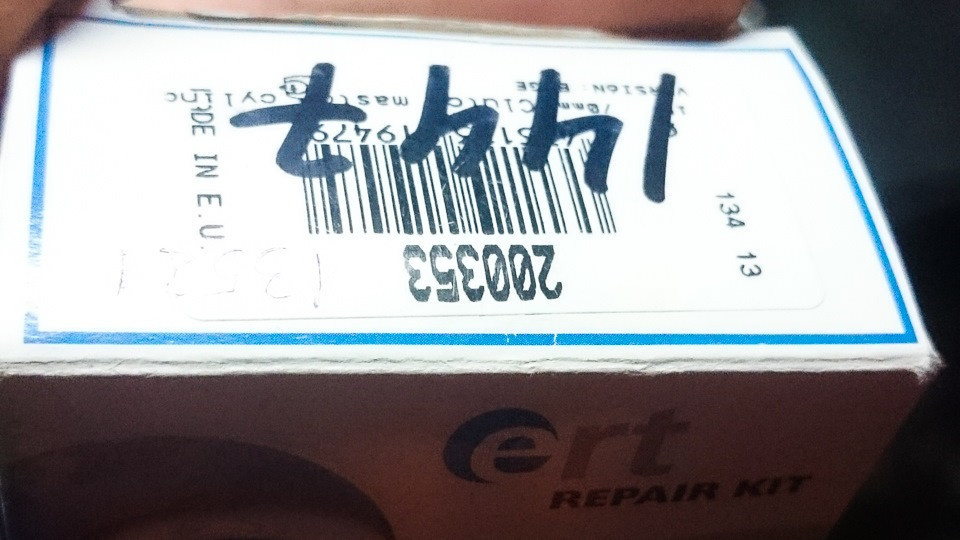
The repair kit includes two cylinder piston gaskets, a retaining ring and a brake fluid inlet adapter gasket.
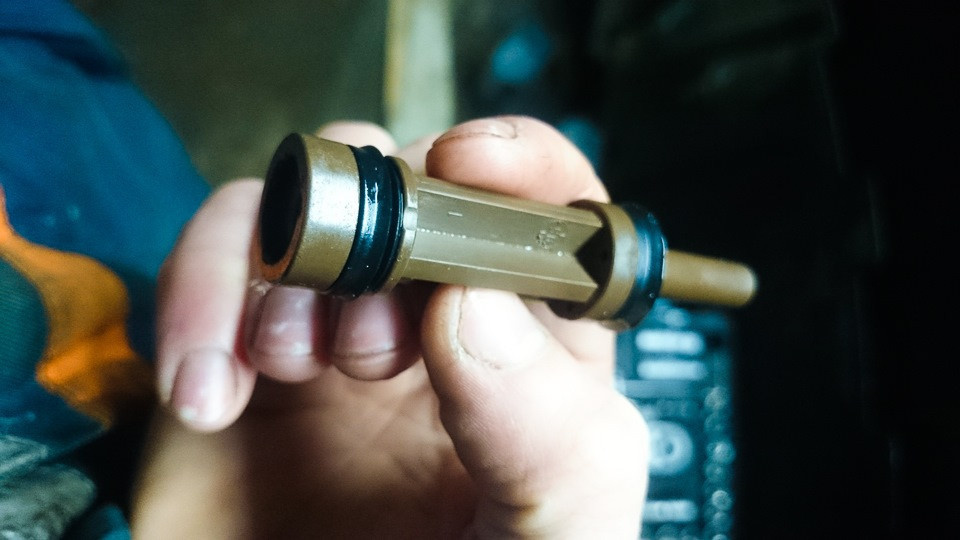
To disassemble the MCC, it is necessary to lift the stem bushing, remove the retaining ring and carefully pull out the piston (ATTENTION, because the piston can shoot into the eye, there is a spring under pressure):
If you don’t want to buy a new repair kit, you can try to wash the old rubber bands: attention, in no case should you wash it with gasoline or solvent: the rubber gaskets will swell and you will never insert the piston without biting the gaskets. Flush with brake fluid.
I immediately soaked the new piston seals for 15 minutes in brake fluid to soften them a little and make them easier to pull on the piston:
In the end it will look like this:
In the FCC bulkhead, the most difficult thing, perhaps, is the installation of the piston in the cylinder. In order for the piston to enter more easily and not crash into the seals, I lubricated the cylinder walls and piston seals with brake fluid. As I inserted the piston, I made sure the seals weren't sticking by rocking it from side to side. It takes a little patience to get the retaining ring back in place. I did it with two hands, a screwdriver and a nail:
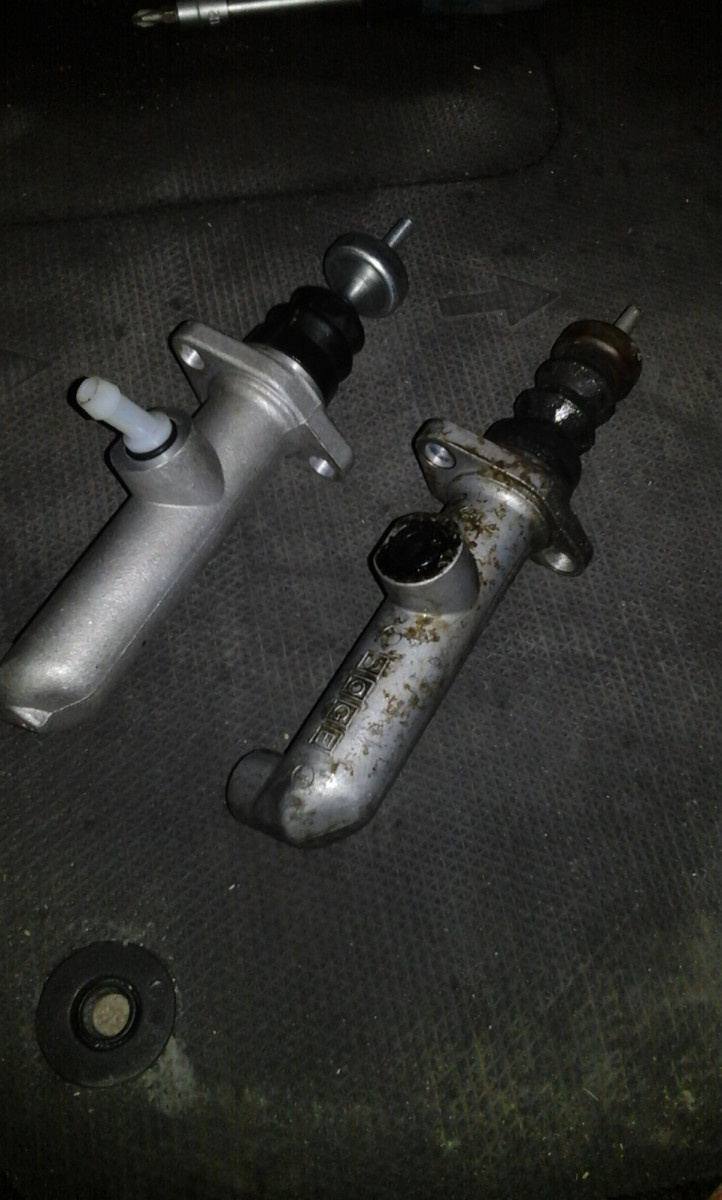
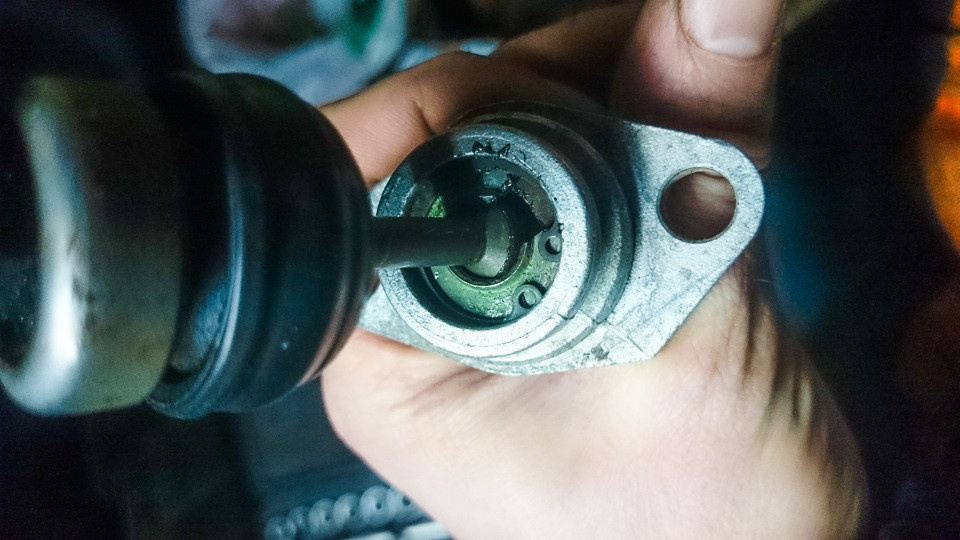
When GCC is ready to install, I removed my old GCC:
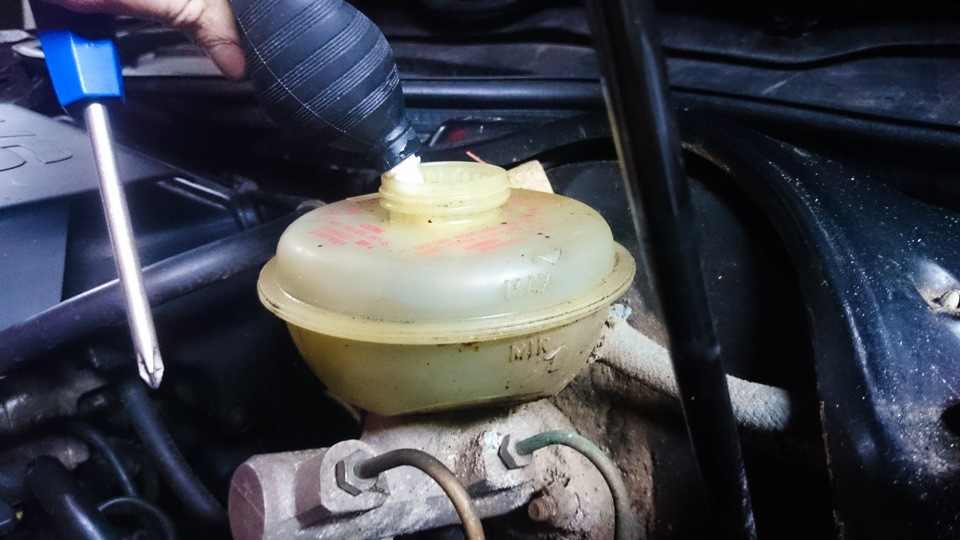
We moved to the hood. With the help of such a pear, I pumped out the brake fluid from the reservoir so that the level was below the hose that comes out on the right in the photo; this is the liquid supply to the MCC:
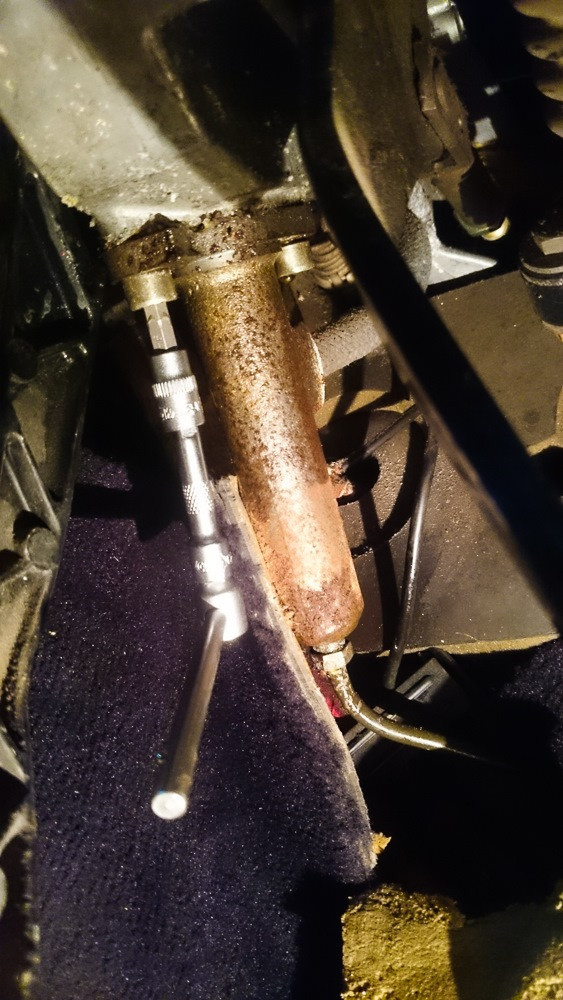
My old GCC already looks tired:
First, for future convenience, I slightly opened the metal tube at the bottom of the cylinder (goes to the working cylinder). He then unscrewed the two bolts that secure the cylinder to the pedal assembly with a hex key, and unscrewed the stem from the bracket at the top with an open end wrench. I did not remove the retaining ring of the bracket that secures the FCC to the pedal, unscrewing only the stem from the bracket).
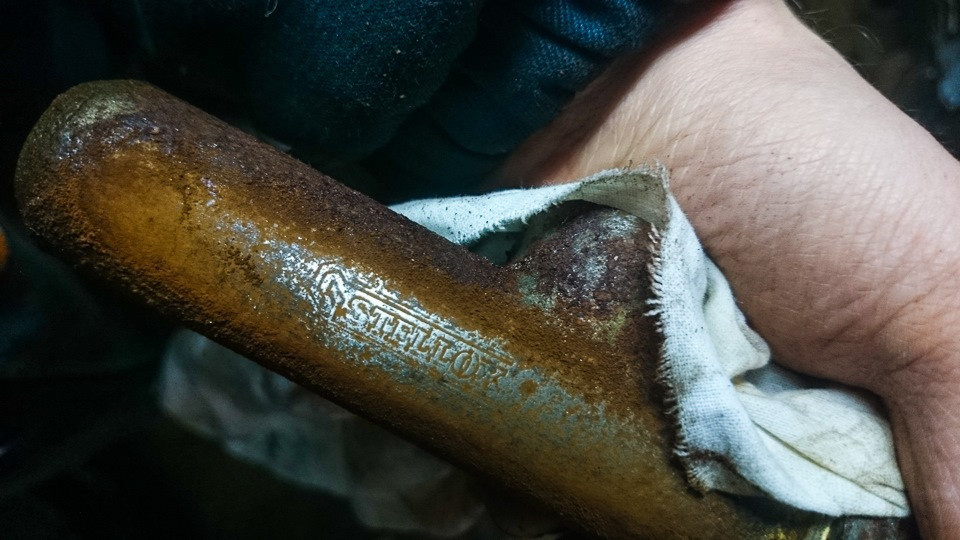
In the hands was the miracle of Stellox:
I immediately found the cause of the malfunction: the upper piston seal dripped, everything under the anther was splashed with brake fluid, that is, the system was constantly ventilated, although the cylinder seemed dry:

And then I remembered the words of a car mechanic friend: “Put on Meili, or cheaper, a kind of washed Stellox.”
No thanks.
Since the metal brake pipe on the old cylinder was screwed from the end, and on the new one it will go in from the side, I bent it a little (only this is a remake for GCC A6> 100).
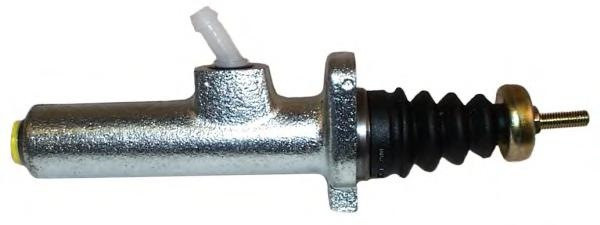
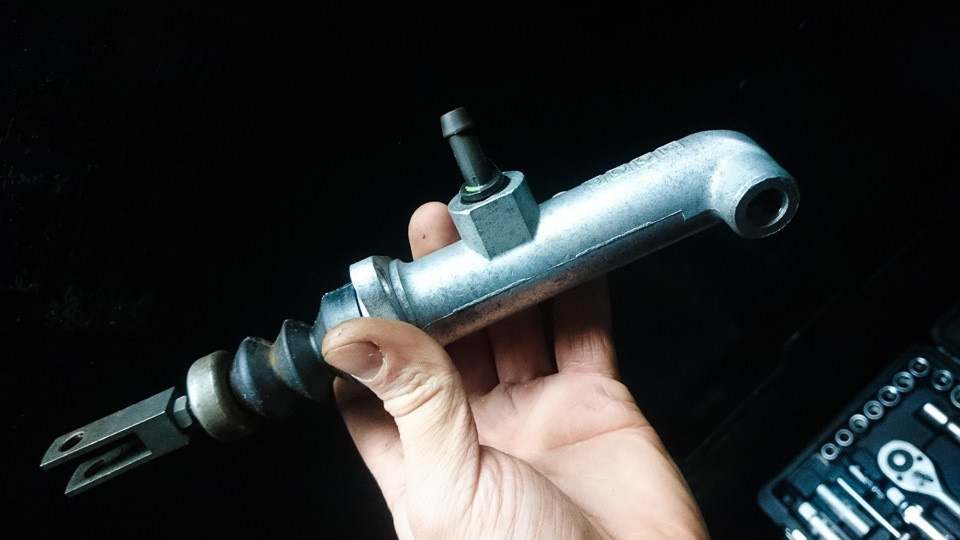
Instead, the new GCC:
I screwed everything up correctly, checked the suitability of the brake fluid with a special device, deduced the norm, poured a new one into the reservoir and bled the clutch:
See also: How to activate smartlink on Skoda Rapid Skoda
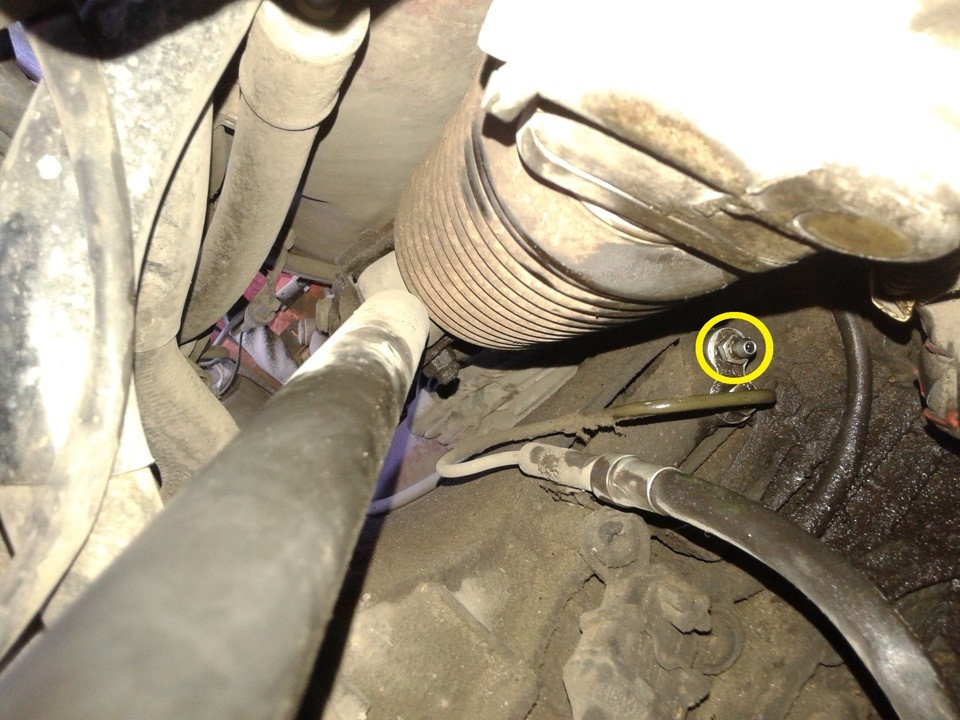
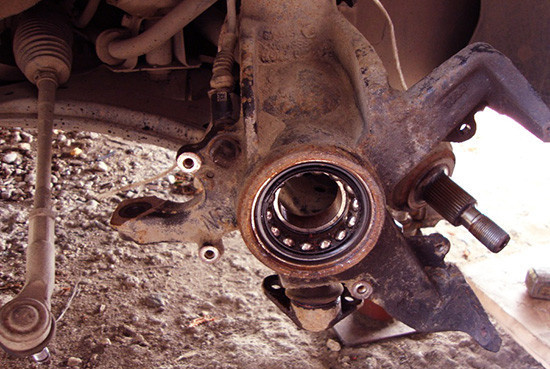
The yellow arrow in the photo indicates the exhaust valve, which is located in the gearbox under the steering rack:
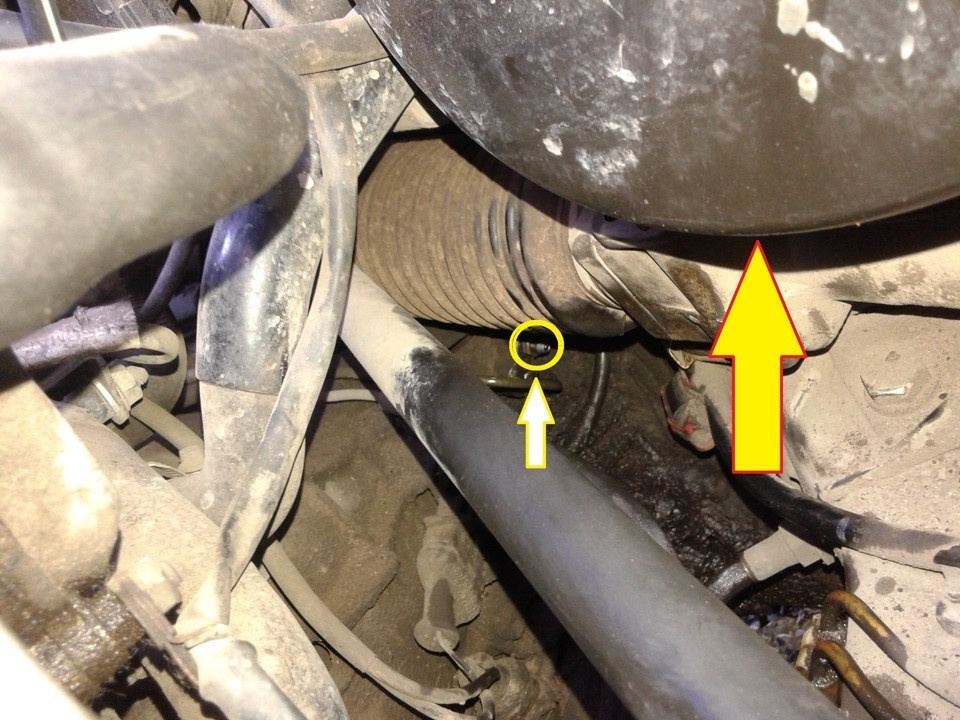
Access is awkward, especially if you have a V-twin, but it's doable:
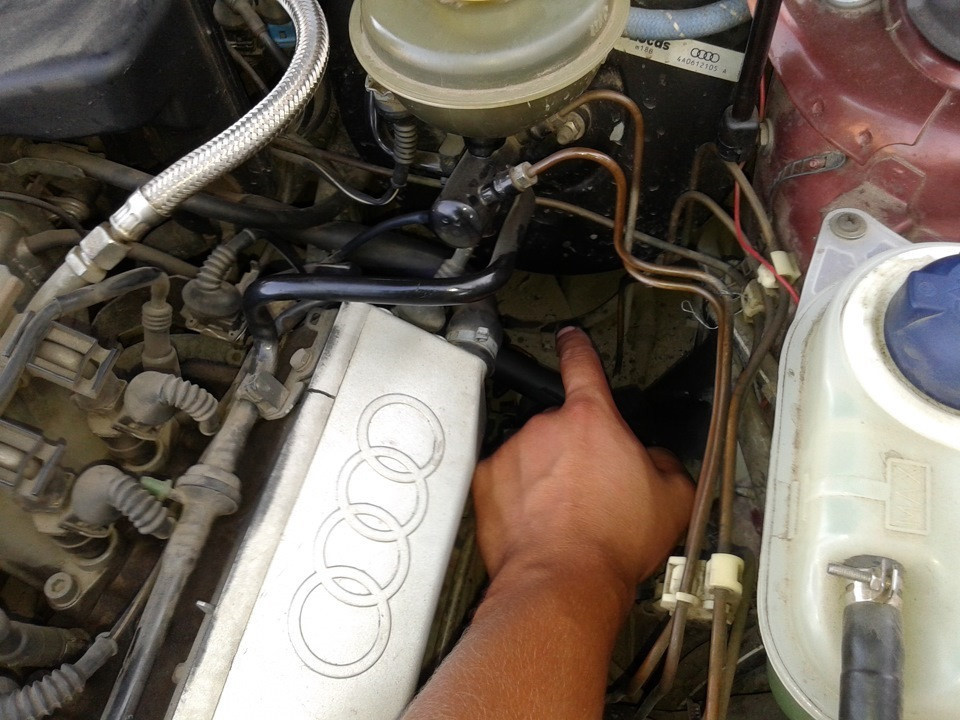
I used a small ratchet with an 11mm long head.
I didn’t have an assistant, so I pumped it myself according to the following scheme:
1. I correctly increased the pressure with the pedal (it will become elastic, although not immediately);
2. Support the pedal on the FLOOR with a board:
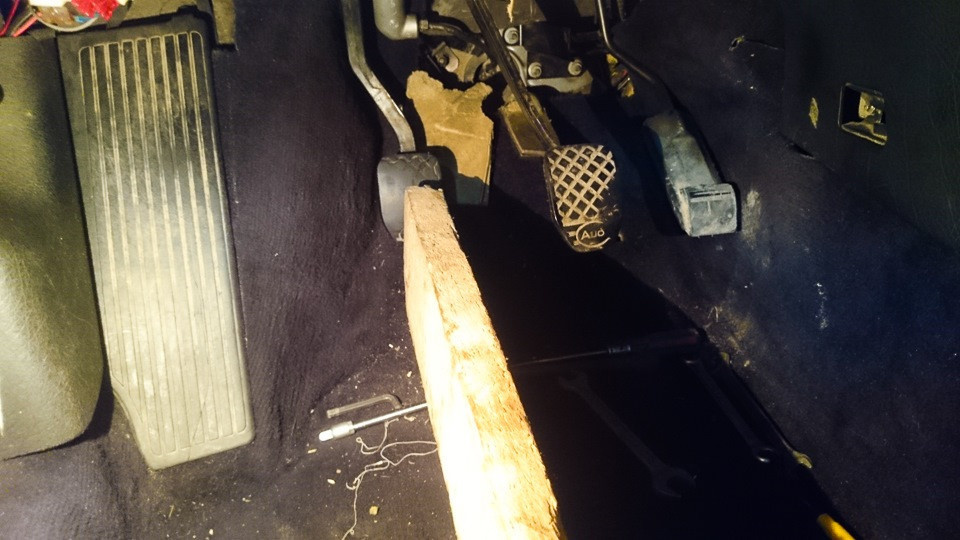
3. He climbed into the hood, unscrewed the fitting, bled the air and twisted it again;
4. Repeated this 10 times adding brake fluid.
A sign of proper clutch bleeding: no bubbles when the pressure is released using the bleeding valve (you can hear it) and the pedal is tight on the second press (maybe on the first.
Be sure to check the suitability of the brake fluid with a special device (bought here). Showed the rules.
Thanks to Adelmann for the illustrated report that helped me find the clutch bleeding tool.
After the work done, gear shifting became possible already somewhere on 2/3 of the way from the pedal to the floor, and it became easy to shift.
If for some reason the replacement of the GCU did not help you, then you should turn your attention to the anti-ship missiles.
Bleeding and adjusting the hydraulic clutch on the Audi 80 b3 and b4
The clutch adjustment of the Audi 80 series b3 and b4 is identical. The principle of operation is very simple, as in all classic Audis since the 70s, but there are stages when it is difficult to do without certain tools and fixtures. And they are not in every garage. Because of this, some areas of work may not be available to everyone (even an experienced driver). But below we will try to explain everything as clearly as possible, because everything that is described has been tested in practice.
By order of work
Start by disengaging the clutch. When the pedal fails without resistance (no kickback), this may mean that air has entered the hydraulic actuator. The usual extrusion of air will not improve the situation, you need to find and get rid of the crack, due to which the tightness is broken. When the tightness is restored again, you need to squeeze out the air.
You can also check the clutch hydraulic drive - carefully inspect the master cylinder for leaks (just above the clutch pedal) and the working cylinder area (near the crankcase). If oil condensate is found in the cylinder, it should be immediately replaced with a new one. As for the working cylinder, you need to clean the area around it well to make sure everything is in order there and there are no leaks.
Although brake fluid enters the clutch system from the same reservoir as the brakes, when the leak only affects the hydraulic drive, the brake is not in danger. Since the connection to the clutch is higher than the connection to the brake system, there is always an additional supply of fluid for them.
How to dismantle the clutch master cylinder?
This operation must be carried out as follows:
- With the help of improvised means, you need to remove the maximum amount of liquid from the tank (syringe or hose).
- Under the dashboard, remove the shelf on the left side (in the cockpit).
- Place an unnecessary flat container or rag under the master cylinder. After removing the inlet tube, wait until the remaining liquid flows out.
- On the left side of the brake booster, remove the pressure line going to the power cylinder (engine compartment).
- Remove the 2 screws (hex) on the master cylinder mount).
- Press out the pin by first lifting the circlip on the clutch lever and master cylinder clutch.
- Carefully remove the barrel (pry it out with a drift if it is tight).
- Before installing a new cylinder, it is necessary to adjust the connecting rod, as it presses on the master cylinder piston. In this case, the clutch lever should be located 1 cm above the brake lever.
- Also make sure that the spring resets the pedal well and does not get stuck in the pedal block bracket in its original position.
- To adjust the lever, loosen the control nut on the pushrod by turning it clockwise or counterclockwise. Then don't forget to tighten the locknut.
- And finally, pump out the air from the hydraulic drive.
In the Audi 80, the clutch lever is installed with a spring that, when pressed, returns the pedal back. But the pedal may not rise; this means that air has entered the hydraulic actuator (or the spring has stuck).
How to remove the slave cylinder from the clutch?
- Raise the left front of the machine, lock it in this position.
- Then unscrew the pressure pipe from the working cylinder (before the brake fluid flows out, a clean container must be replaced).
- And loosen the fixing screw of the working cylinder (you need to remove the cylinder from the crankcase).
- Apply pry bar and rust and corrosion remover.
- Apply some lubricant to the cylinder (to the exposed body walls) and then apply a paste (MoS2) to the actuating plunger).
- Insert the slave cylinder into the box body, pushing until the screw is screwed into the box body.
- Then bleed the clutch hydraulics.
Let's take a closer look at clutch bleeding
For pumping you need a special tool. Most ordinary drivers do not have such a device (many workshops and services have it), so you can use the same bleeding method as with the brake system, that is, with a minimal loss in the quality of the procedure:
- Unscrew the valve of the working cylinder and the valve of the front wheel (right or left, it does not matter) about (1,5) turns;
- Connect these two valves with one hose;
- After connecting the hose and fixing it, press the brake pedal as slowly as possible 2-3 times: the brake fluid will flow from the brake system to the clutch hydraulic drive;
- Again, since this is important, gently and gently press on the lever so that the hose does not fly off from pressure;
- Don't forget to look at the brake fluid level in the reservoir;
- When the air stops passing through the liquid in the tank, you can disconnect the hose and tighten the shock absorbers;
- Recheck the brake fluid.
This is not a difficult way to bleed the clutch on an Audi 80. The sequence for replacing, removing the main and working cylinders was also described above. When you have done all this, you can check the reaction of the clutch lever. Now you are much more familiar with this system and will be able to identify the problem as quickly as possible.