Clutch on a 1991 Honda Accord
Content
The clutch in your Honda Accord transfers torque between the engine and transmission to keep the vehicle moving. Both the clutch discs and the pressure plate work in unison to deliver power. But as soon as the assembly begins to slip, pull or grab, you need to replace the clutch disc and pressure plate. Follow the steps below to replace the old block with the new one.

Step 1
Park your car in a safe place with enough space around the car, especially in the front where you can move the jack and tools around it.
Step 2
Disconnect the black negative battery cable.
Step 3
Raise the front of the car with a jack and secure it to the jacks.
Step 4
Support the gearbox with a jack and remove the bolts securing the gearbox to the engine using wrenches, ratchets and sockets. Store bolts, nuts and other parts in order so that they can be easily assembled.
Step 5
Move the transmission to the side just enough to leave enough room to work with the clutch assembly.
Step 6
Mark the alignment marks with a scratch or a small screwdriver on the clutch pressure plate and mounting base if you plan to reuse the same pressure plate; however, installing a new pressure plate now will save you a lot of time and keep the clutch pack performing much better over a longer period of time.
Step 7
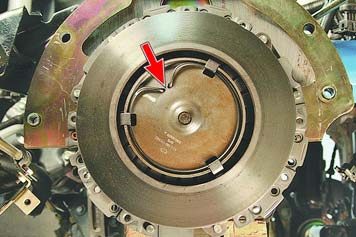
Turn the pressure plate mounting bolts two turns counterclockwise, one after the other, working in a criss-cross pattern until you can remove the bolts by hand. This method will prevent compression of the pressure plate. Also, make sure you have a good grip on the clutch assembly when you're ready to remove it; the combined weight of the clutch disc and pressure plate makes assembly cumbersome.
Step 8
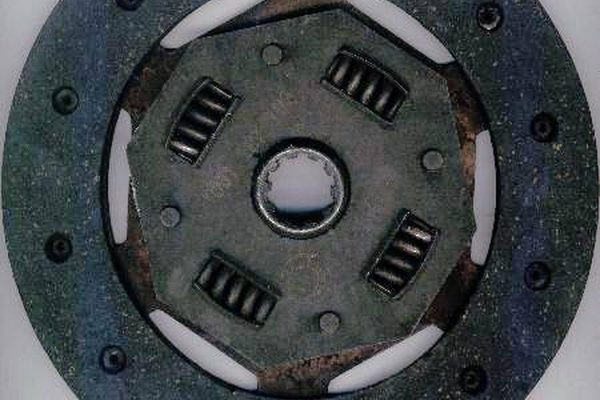
Clean the surface of the flywheel with a brake cleaner; then install the clutch disc and pressure plate assembly. The friction material of the clutch disc must face the pressure plate. Make sure the pressure plate pin holes line up with the flywheel pins. Install clutch bolts by hand.
Step 9
Insert the clutch plate alignment tool into the center hole of the clutch assembly to align the pressure plate and plate, then tighten the pressure plate bolts two turns at a time, working in a criss-cross pattern. Torque the bolts to 19 feet and remove the alignment tool.
Step 10
As you get the gearbox closer to the engine, align the gearbox input shaft with the splines on the clutch disc. Align the gearbox housing with the cylinder block and install it on the cylinder block.
Step 11
Install and tighten the gearbox with the engine mounting bolts.
Lower the vehicle and connect the black negative battery cable.
Tip
- If you need to find or identify parts for your specific vehicle, please refer to your vehicle's service manual. You can buy it at most auto parts stores or check it out for free at your local public library.
A warning
- When making clutch discs, many manufacturers add asbestos, which can cause lung cancer if inhaled. Never use compressed air to clean the clutch surface. Instead, use brake fluid and a clean rag to clean the parts and mounting surface before installing a new assembly.
Items you will need
- Jack and 2 Wreck Jack
- A set of keys
- Set of sockets and ratchets
- Zero strike
- Screwdriver