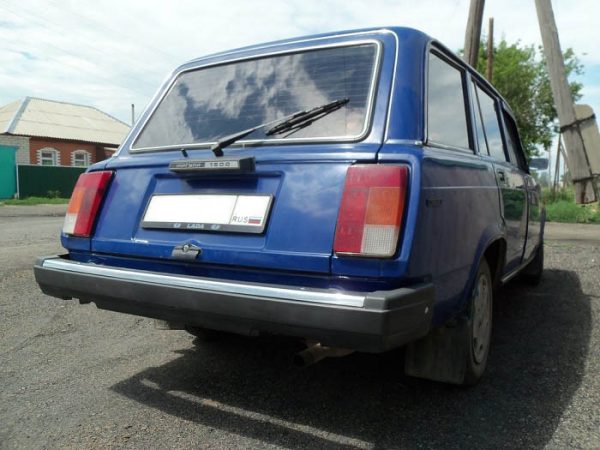
The exhaust system of a VAZ 2104 car - troubleshooting and do-it-yourself repair
Content
Regular elements of the exhaust system of a VAZ 2104 passenger car serve from 30 to 50 thousand kilometers. Then problems begin - due to wear, the tanks of the preliminary and main muffler burn out. Symptoms of a malfunction are noticeable without any diagnosis - a breakthrough of gases through the fistulas is accompanied by an unpleasant roaring sound. Replacing worn parts is not difficult for an experienced motorist; beginners are advised to first study the design of the Zhiguli exhaust tract.
Functions of the exhaust system VAZ 2104
To get the most power from the engine, you need to burn the fuel under optimal conditions. The required volume of air is added to gasoline, then the mixture is sent through the inlet manifold to the cylinders, where it is compressed by the pistons 8-9 times. The result - after the flash, the fuel burns out at a certain speed and pushes the pistons in the opposite direction, the motor performs mechanical work.
In addition to the energy that rotates the crankshaft of the engine, when the air-fuel mixture is burned, by-products are released:
- exhaust harmful gases - carbon dioxide CO2, nitric oxide NO, carbon monoxide CO and other chemical compounds in smaller volumes;
- a large amount of warmth;
- a loud roar-like sound generated by each flash of fuel in the cylinders of the power unit.
A significant proportion of the released thermal energy is dissipated into the environment due to the water cooling system. The rest of the heat is taken by the combustion products leaving through the exhaust manifold and exhaust pipe.
What tasks does the VAZ 2104 exhaust system solve:
- Removal of flue gases from the cylinders during the exhaust stroke - combustion products are pushed out of the chambers by pistons.
- Cooling gases by heat exchange with the surrounding air.
- Suppression of sound vibrations and reduction of noise level from engine operation.
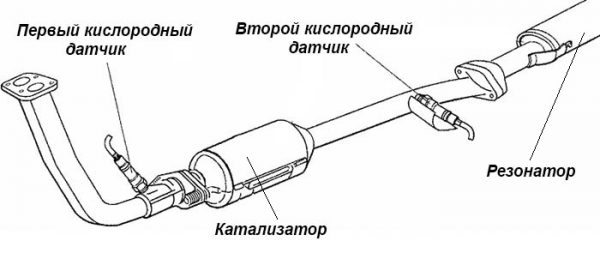
The latest modifications of the "fours" - VAZ 21041 and 21043 were equipped with an electronically controlled fuel supply system - an injector. Accordingly, the exhaust tract was supplemented with a catalytic converter section that neutralizes toxic gases by chemical reduction (afterburning).
Exhaust tract design
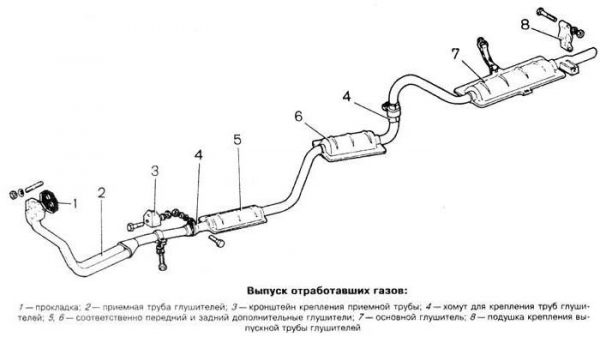
On all classic VAZ models, including the “four”, the exhaust is arranged in the same way and consists of three parts:
- a receiving section in the form of a double pipe is screwed to the flange of the exhaust manifold - the so-called pants;
- the middle part of the tract is a single pipe equipped with a resonator tank (on cars with 1,5 and 1,6 liter engines there are 2 such tanks);
- at the end of the path is the main silencer.
In the injector modifications of the "four", a neutralizer tank was added, installed between the "trousers" and the resonator section. The efficiency of the element is controlled by an oxygen sensor (otherwise - a lambda probe), which sends signals to the electronic control unit.
Each part of the system performs its function. The downpipe dampens primary noise, collects gases into a single channel and removes the lion's share of heat. The resonator and the main muffler absorb sound waves and finally cool the combustion products. The whole structure rests on 5 mounts:
- The downpipe is connected to the motor by means of a flange connection, the fasteners are 4 M8 threaded nuts made of heat-resistant bronze.
- The second end of the "pants" is screwed to the bracket located on the gearbox housing.
- The barrel of the main muffler is suspended from the bottom by 2 rubber extensions.
- The rear end of the exhaust pipe is attached to the body with a rubber cushion.
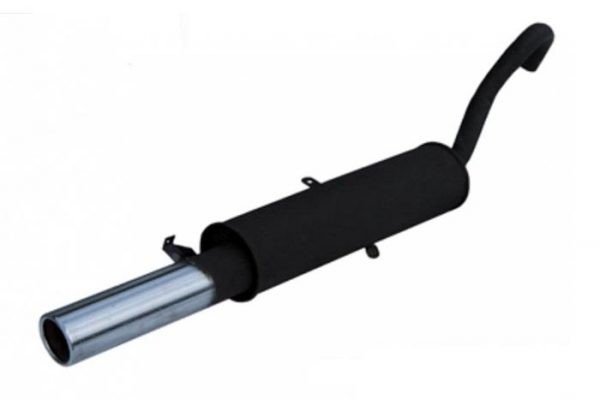
Main silencer - device and varieties
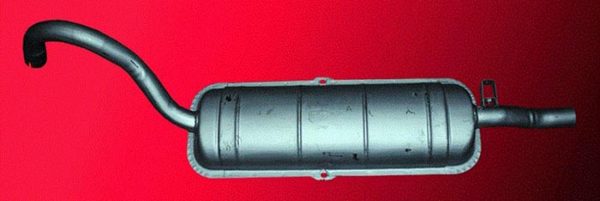
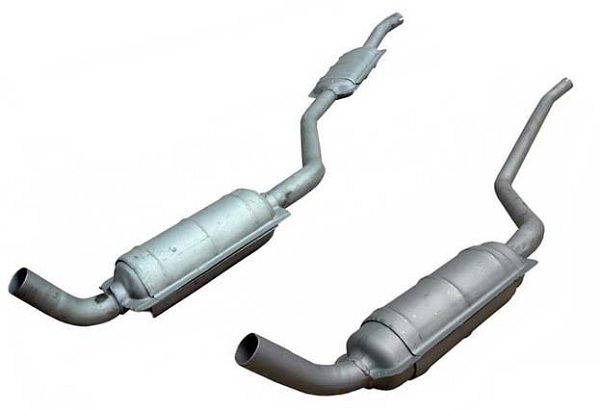
The prefabricated element is made of refractory "black" steel and covered with a layer of anti-corrosion paint. The item consists of 3 parts:
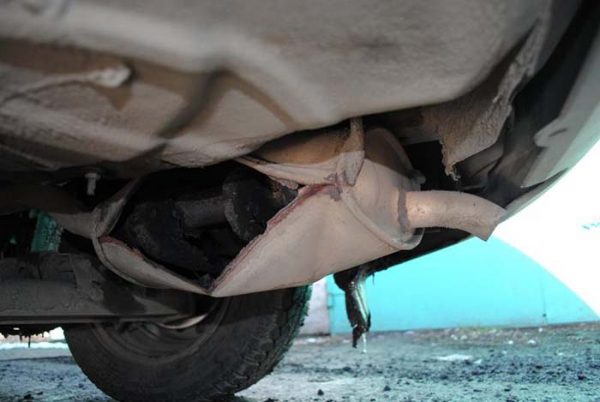
- front pipe, curved to bypass the rear axle;
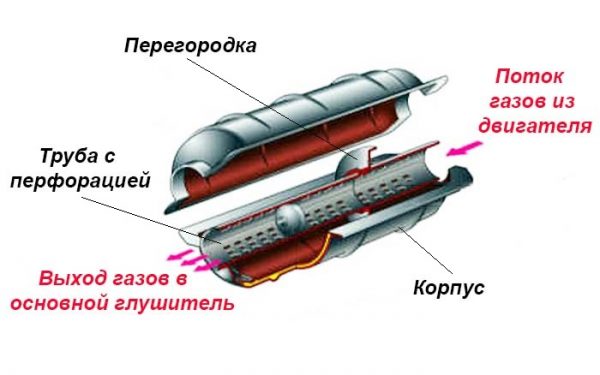
- three-chamber muffler tank with a system of partitions and tubes inside;
- outlet branch pipe with a bracket for attaching a rubber cushion.
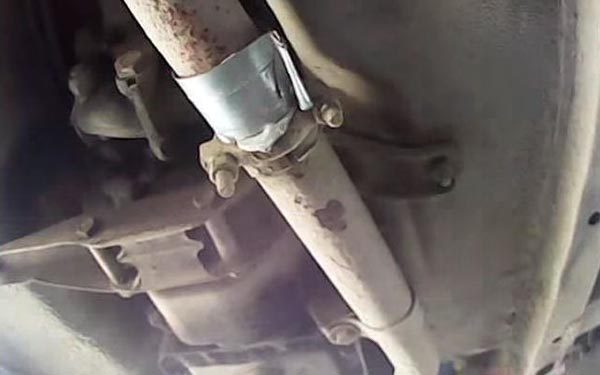
Slots are made at the end of the front pipe for docking with the resonator. The connection is fixed from the outside with a clamp, a tightening bolt and an M8 nut.
Silencers for the "classic" sold today are not reliable - spare parts are often made of second-rate metal and burn out after 15-25 thousand kilometers. It is quite difficult to identify a low-quality part when buying, the only way is to visually check the quality of the welds.
In addition to the factory version, other types of mufflers can be installed on the VAZ 2104:
- element entirely welded from stainless steel;
- sports (straight-through) option;
- homemade section with a round tank made of thin-walled iron pipe.
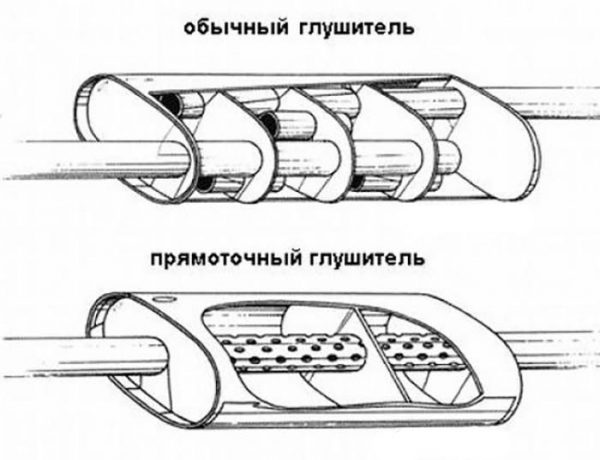
The straight-through version of the muffler differs from the standard part in the principle of operation. Gases pass through a perforated pipe and do not change direction, the section resistance is zero. Result: the engine is easier to "breathe", but the noise is suppressed worse - the operation of the motor is accompanied by a rumbling sound.
If you are "friends" with a welding machine, the factory version of the muffler can be modified or the element can be made from scratch. In home-made products, the principle of forward flow is implemented, since it is much more difficult to weld a flat tank with partitions - it is easier to buy a finished part. How to make the main muffler with your own hands:
- Select piping for the outer casing and straight-through duct. As a tank, you can use a round muffler from Tavria, take a curved front pipe from the old section from Zhiguli.
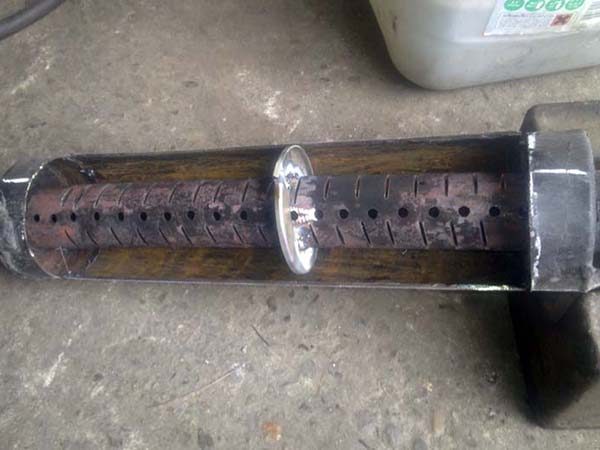
- Make an inner perforated pipe by drilling holes Ø5-6 mm and making through cuts in a thin circle through the metal.
 Perforation in the form of holes and slots is performed for the passage and further absorption of sound vibrations
 - Insert the pipe into the casing, weld the end caps and external connections.
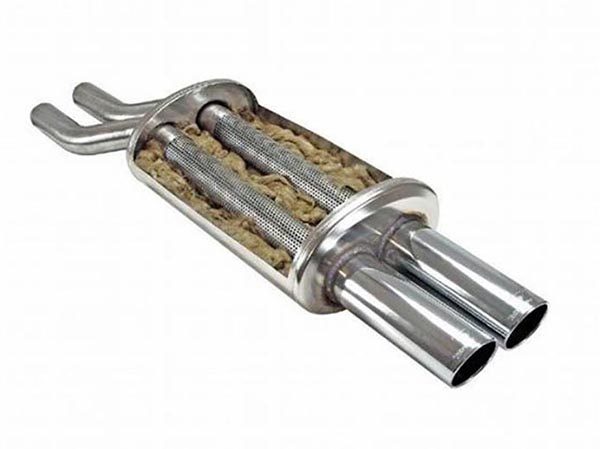
- Fill the cavity between the tank body and the direct-flow channel with non-combustible kaolin wool or basalt fiber.As a noise absorber, it is better to use non-combustible kaolin wool or basalt fiber.
- Weld hermetically seal the casing cover and install 3 lugs for rubber hangers.
The final stage of manufacturing is painting the part with a heat-resistant composition. After installing any muffler - factory or homemade - the protruding end of the pipe can be ennobled with a decorative nozzle, which is fixed on the outside with a locking screw.
Video: how to make a forward flow yourself

Fault Diagnosis
The first malfunctions of the gas exhaust system may begin after 20 thousand kilometers. How muffler malfunctions appear on the VAZ 2104 model:
- the main symptom is an increase in the noise level from the exhaust pipe due to gas breakthrough, the sound volume depends on the size of the defect;
- the fasteners of the sound-absorbing section wear out, the tank begins to stagger and hit the body elements, while driving from under the bottom a dull thud is heard;Rubber products stretch over time, the muffler body begins to dangle in a horizontal plane and touch the bottom of the car
- in rare cases, the pipe becomes clogged with soot, does not allow the flow of gases, the engine stalls and no longer starts;
- failure of lambda probes on cars with an injector leads to a re-enrichment of the fuel mixture, a sharp increase in gasoline consumption and malfunctions of the power unit in all modes.
Receiving signals from lambda probes, the electronic control unit regulates the supply of fuel to the cylinders. When the oxygen sensor does not show signs of "life", the controller goes into emergency mode and dispenses fuel "blindly", following the programmed program. Hence the excessive enrichment of the mixture, jerks during movement and other troubles.
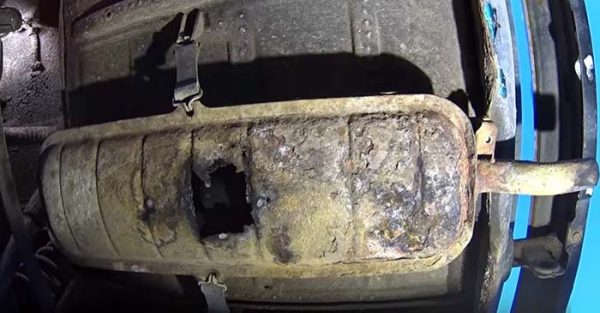
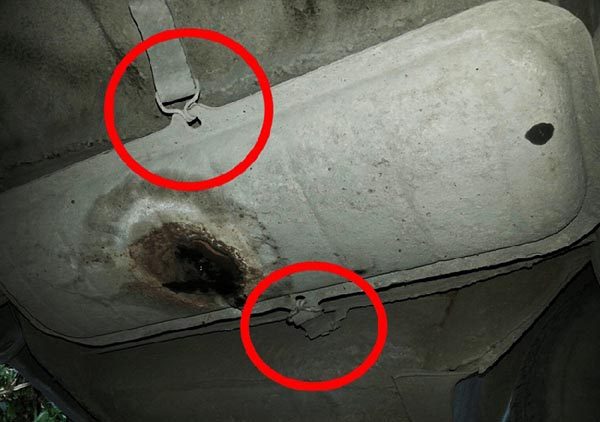
The most common muffler problem is the burnout of the tank or pipe connection, fixed with a clamp. Causes of malfunction:
- Aggressive condensate accumulates in the muffler bank, gradually corroding the metal. From the effects of chemical corrosion, many small holes form in the bottom wall of the tank, where smoke breaks through.
- Natural wear of the section. From constant contact with hot combustion products, the metal becomes thinner and breaks through at a weak point. Usually the defect appears near the welded joint of the pipe with the tank.
- Mechanical damage to the can from an external impact or as a result of burning out the fuel inside the exhaust manifold. In the latter case, a loud bang is heard from the pipe, sometimes the shock wave is able to tear the silencer body at the seams.
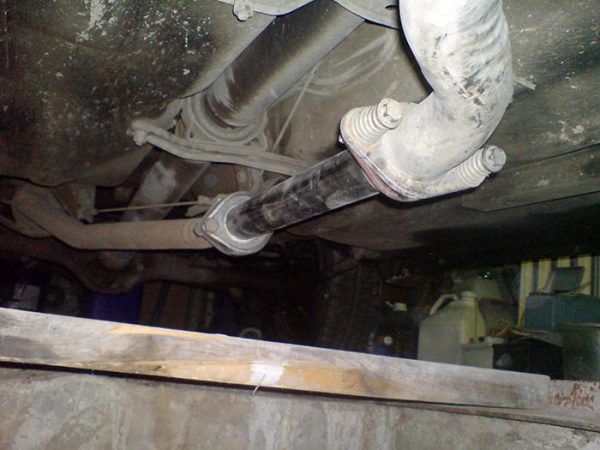
The most harmless malfunction is a gas breakthrough at the junction of the muffler and resonator pipes. Exhaust noise increases slightly, but if no action is taken, the volume gradually increases. The fastening of the joint weakens, the resonator section begins to sag and touch the ledges of the roadway.
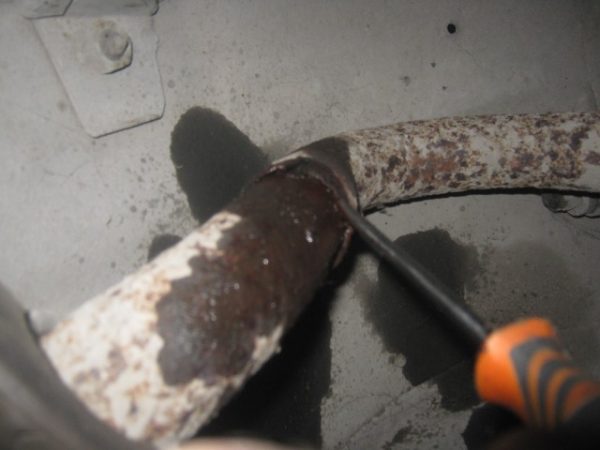
A clear sign of the release of gases at the junction of the exhaust pipes is the streaks of condensate that erupts along with smoke when the engine of the car did not have time to warm up to operating temperature.
Repair and replacement of the muffler section
If fistulas are found in the element body, experienced drivers prefer to contact a familiar welder. The master will check the thickness of the metal and immediately give an answer - whether it is possible to eliminate the defect or whether the entire part will have to be changed. Burnout of the bottom of the tank is brewed directly on the car, in other cases, the muffler must be dismantled.
Without welding equipment or sufficient qualifications, it will not work to brew a fistula on your own; you will have to buy and install a new spare part. If a lot of small holes eaten by corrosion are visible in the wall of the barrel, it is also pointless to contact a welder - the metal has probably rotted, there is nothing to grab the patch. It's easier to change the muffler on your own and not pay for a fairly simple operation.
What tool will you need
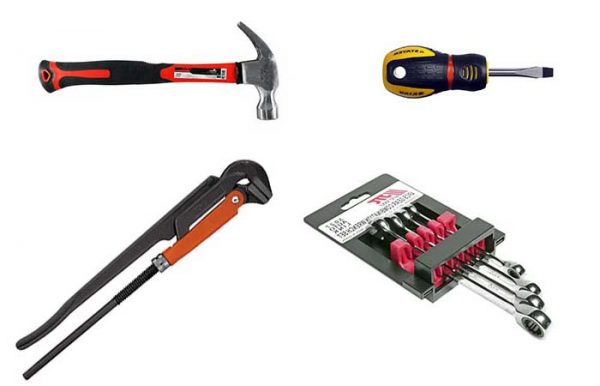
To disconnect the pipes and dismantle the muffler, prepare the following toolkit:
- 2 ring wrenches 13 mm in size;
- open end wrench 10 mm;
- pipe wrench No. 3, designed for reliable gripping of round parts with a size of 20 ... 63 mm;
- bench hammer;
- passages;
- slotted screwdriver with a wide tip;
- gloves are fabric.
Of the consumables, you will need a new set of rubber hangers (a pillow and 2 extensions with hooks) and aerosol lubricant WD-40, which greatly facilitates the unwinding of stuck threaded connections.
Work is recommended to be performed on a pit, overpass or car lift. Lying under the car, disconnecting the muffler from the resonator is very inconvenient - due to the lack of free space, you will have to act with your bare hands, swinging and hitting with a hammer is unrealistic.

Disassembly instructions
Before starting work, drive the "four" into the inspection ditch and let the car cool down for 15-30 minutes. Exhaust system parts are decently heated by exhaust gases and can burn your palms even through gloves.
When the muffler has cooled, apply WD-40 grease to the joint and bolt of the mounting clamp, then proceed with disassembly:
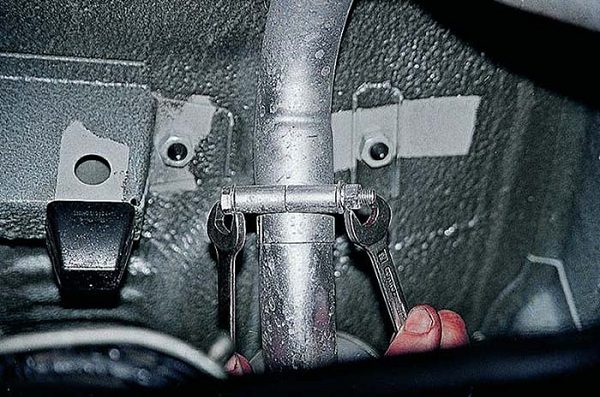
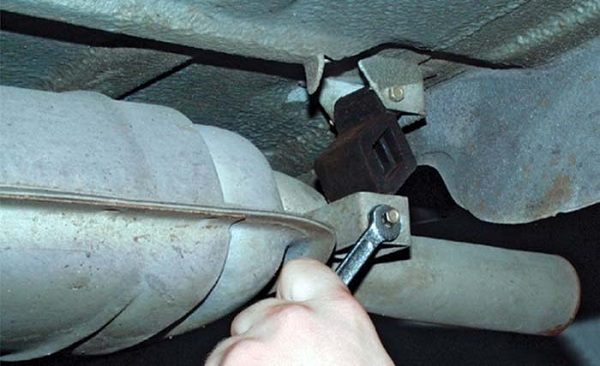
- Using two 13 mm wrenches, unscrew the nut and loosen the mounting clamp holding the resonator and muffler pipes together. Move the clamp to the side.When the clamp loosens, carefully knock it onto the resonator tube
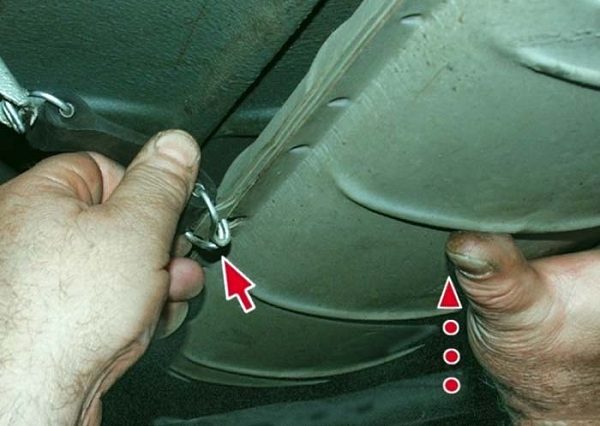
- Remove 2 hangers located on the sides of the case. Hooks are more convenient to remove with pliers.When disassembling, remember the correct position of the suspensions - hooks outward
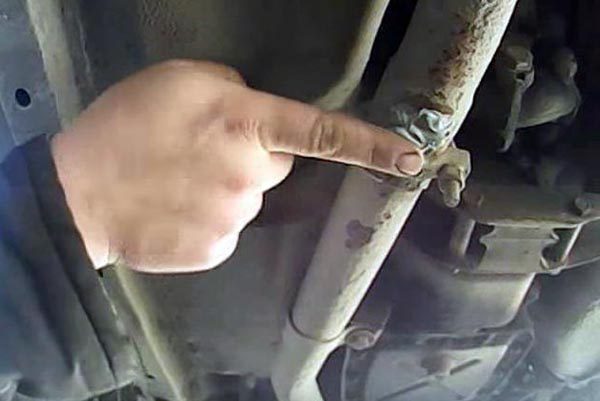
- Using a 10 mm wrench, remove the bolt connecting the rear cushion to the bracket on the muffler.The pillow mounting bolt often rusts and cannot be unscrewed, so motorists change it to a bent electrode or a nail
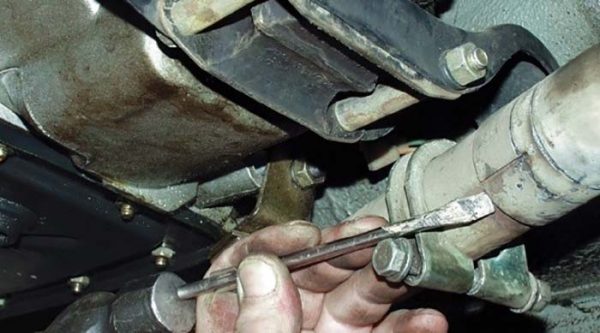
- Disconnect the released section from the resonator. Here you can use a pipe wrench, a hammer (hitting the tank through a wooden tip) or a flat screwdriver.
Using a wide screwdriver, you need to unbend the edges of the stuck pipe, and then loosen the connection with your hands, holding the resonator with a gas wrench. If the above methods do not help, simply cut the pipe with an angle grinder.
Installation of a new spare part is carried out in the reverse order. Here it is important to fit the muffler pipe all the way, otherwise the elements of the exhaust tract will start to hit the bottom or the resonator section will sag. Lubricate threaded connections with grease.
Video: how to replace the muffler yourself

Elimination of minor defects
In the absence of welding, a small hole in the muffler can be temporarily repaired with a high temperature ceramic sealant. A special composition for repairing exhaust pipes is sold at any automotive store. Additionally, you will need the following consumables:
- tin with a thickness of 0,2 ... 0,5 mm;
- degreaser - white spirit, gasoline "galosh";
- rags;
- a brush with a metal bristle, a large emery cloth, metal scissors.Ceramic sealant is often used by Zhiguli owners to eliminate exhaust pipe fistulas

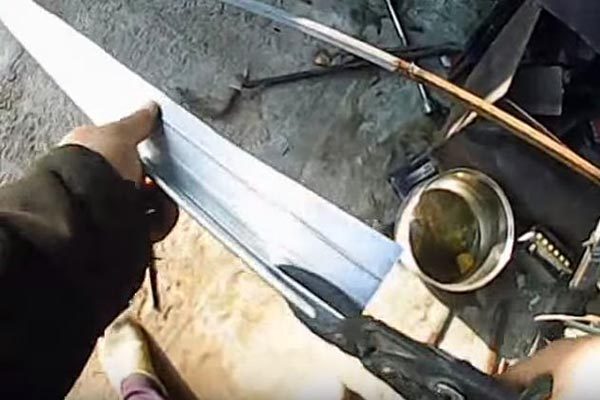
A piece of tin can be cut from a galvanized profile used for mounting drywall systems.
Before sealing the fistula, it is advisable to remove the muffler, otherwise you risk missing other defects. An exception is the sealing of holes in the bottom of the can, in this case it is not necessary to dismantle the section. How to properly close a fistula:
- Use a brush and sandpaper to clean the defect from dirt and rust. The operation allows you to level the surface and maximize the damage site.
- Prepare a tin clamp - cut a strip to the size of the defect.A thin-walled galvanized profile used in finishing works will be used to manufacture the clamp.
- Thoroughly degrease the surface and apply ceramic sealant to the damaged area. Make the layer thickness according to the instructions on the package.Before applying the ceramic composition, the pipeline section is thoroughly degreased.
- Perform a bandage - wrap the pipe with a cut-out strip of metal, bend its ends into a self-clamping double clamp.After a double bend of the strip, the ends of the bandage must be tapped with a hammer
When the sealant has hardened, start the engine and check that there are no escaping gases. Repair with a bandage is a temporary measure, the patch is enough for 1-3 thousand km, then the muffler still burns out.
Video: exhaust repair with sealant

Purpose and device of the resonator
In terms of structure, the resonator is similar to a straight-through muffler - a perforated pipe is laid inside the cylindrical body without any partitions. The difference lies in the jumper dividing the jar into 2 resonator chambers. The element performs 3 functions:
- perceives and pre-suppresses sound waves;
- dissipates part of the heat coming from the combustion products;
- prolongs the life of the main muffler.
During operation, a two-chamber tank uses the principle of resonance - sound vibrations are repeatedly reflected from the walls, collide with oncoming waves and cancel each other out. 2104 types of sections were installed on the VAZ 3:
- Cars with a carburetor power system were equipped with a long resonator for 2 tanks. An element with 2105 can was installed on a modification with a VAZ 1,3 engine with a volume of 1 liters.The number of cans in the resonator section depends on the engine displacement
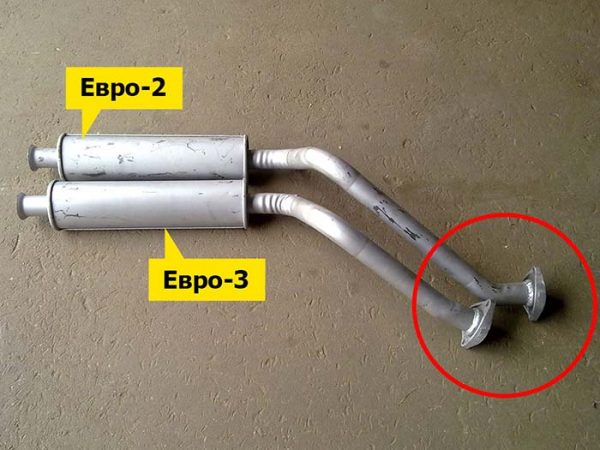
- Models with an injector, produced under environmental standards Euro 2, were completed with a shorter resonator with 1 tank. The inlet pipe began with a flange, which was fastened with two bolts to the counterpart of the neutralizer.
- On modifications of the VAZ 21043 and 21041, "sharpened" to the requirements of Euro 3, the shortest resonator was used, equipped with a mounting flange for 3 studs.Shorter Euro 2 and Euro 3 resonator sections are installed on the "four" with an injector
Damage and malfunctions of the resonator banks are similar to the main muffler section. During operation, the hulls and pipes burn through, rust or break from external influences. Repair methods are identical - welding, temporary bandage or complete replacement of the part.
Video: how to replace the resonator on classic VAZ models

Over the years, it becomes more difficult to find high-quality spare parts for domestic cars that have long been discontinued. Practice shows that it is better to repair the original factory muffler many times than to buy a part of unknown origin, which will literally crumble after 10 thousand km. The second reliable option is to incur financial costs, but put a durable stainless steel exhaust pipe.

