Ignition system VAZ 2101: what it consists of and how to adjust
Content
The VAZ 2101 ignition system is an integral part of the car, since it directly affects the engine start and its performance. Periodically, attention should be paid to checking and adjusting this system, which is due to the operation of its elements under constant mechanical, thermal and other influences.
Ignition system VAZ 2101
Classic Zhiguli models with carburetor engines are equipped with an ignition system that requires periodic adjustment. The efficiency and stable operation of the power unit depend on the correct setting of the ignition timing and the smooth operation of this system. Since ignition adjustment is one of the most important measures for setting up an engine, it is worth dwelling on this process, as well as on the constituent elements of the ignition system, in more detail.
What's this
The ignition system is a combination of several devices and devices that provide sparking and further ignition of the combustible mixture in the engine cylinders at the right time. This system has several functions:
- The formation of a spark at the moment of compression of the piston, according to the order of operation of the cylinders.
- Ensuring timely ignition timing according to the optimal advance angle.
- The creation of such a spark, which is necessary for the ignition of the fuel-air mixture.
- Continuous sparking.
The principle of spark formation
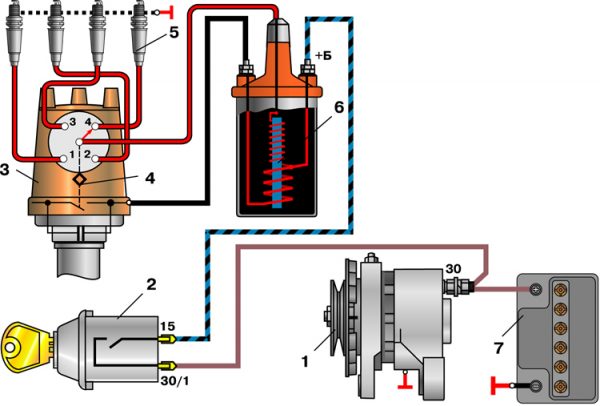
At the moment the ignition is turned on, current begins to flow to the contacts of the distributor breaker. During engine start, the ignition distributor shaft rotates simultaneously with the crankshaft, which closes and opens the low voltage circuit with its cam. Pulses are fed to the ignition coil, where the voltage is converted to high voltage, after which it is fed to the central contact of the distributor. Then the voltage is distributed by means of a slider over the contacts of the cover and is supplied to the candles through the BB wires. In this way, a spark is formed and distributed.
What is the adjustment
If the ignition is set incorrectly, many problems arise:
- power is lost;
- motor troit;
- fuel consumption increases;
- there are pops and shots in the silencer;
- unstable idling, etc.
To avoid all these difficulties, the ignition needs to be adjusted. Otherwise, normal operation of the vehicle will not be possible.
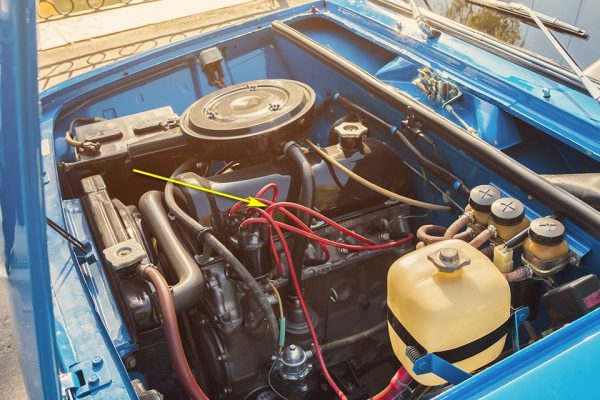
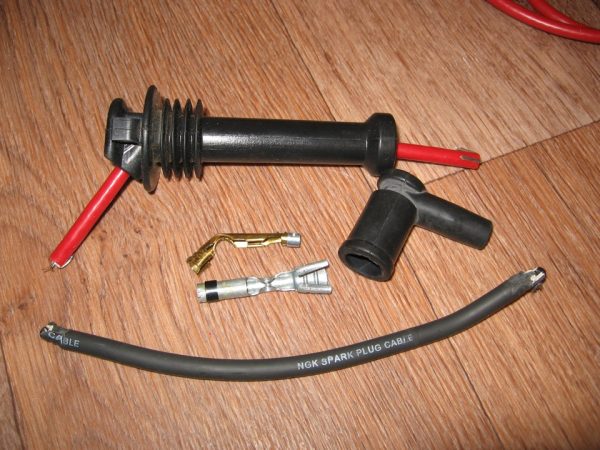
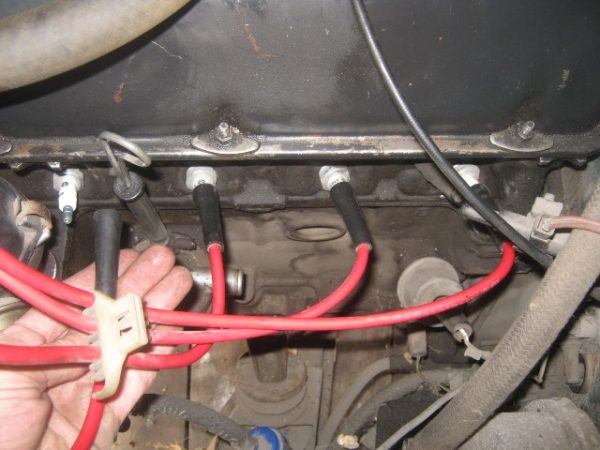
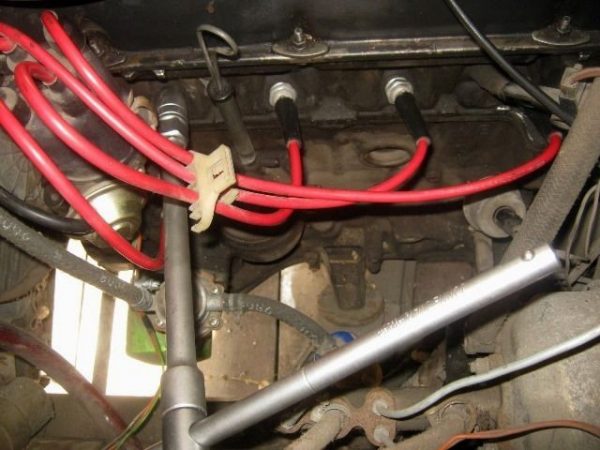
BB wires
High-voltage wires, or, as they are also called, candle wires, are different from all the others installed in the car. The purpose of these wires is to transmit and withstand the voltage passing through them to the spark plugs and to protect other elements of the vehicle from electric charge.
Malfunctions
The appearance of problems with explosive wires is accompanied by the following characteristic features:
- problem starting the engine due to insufficient voltage on the candles;
- shots at start-up and vibration during further operation of the motor;
- unstable idling;
- periodic tripping of the engine;
- the appearance of interference during the operation of the radio, which change when the engine speed changes;
- the smell of ozone in the engine compartment.
The main reasons that lead to problems with wires are wear and tear of the insulation. The location of the wires near the engine leads to temperature changes, especially in winter, as a result of which the insulation gradually cracks, moisture, oil, dust, etc. get inside. won't come. In addition, the wires often fail at the junction of the central conductor and the contact connectors on the candles or the ignition coil. To avoid mechanical damage, the wires must be properly laid and secured with special clamps.
How to check
First, you should visually inspect the cables for damage to the insulating layer (cracks, chips, melting). Attention should also be paid to contact elements: they should not have traces of oxidation or soot. Checking the central core of the BB wires can be done using a conventional digital multimeter. When diagnosing, a break in the conductor is detected and the resistance is measured. The procedure consists of the following steps:
- Remove spark plug wires.
 We pull rubber caps with wires from candles
 - We set the resistance measurement limit of 3-10 kOhm on the multimeter and call the wires in series. If the current-carrying wire breaks, there will be no resistance. A good cable should show about 5 kOhm.Good spark plug wires should have a resistance of about 5 kOhm
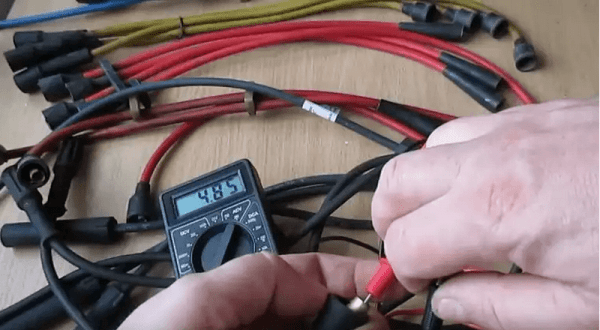
The resistance of the wires from the kit should not differ by more than 2-3 kOhm.
Video: checking BB wires

What to put
When choosing and buying high-voltage wires, you should pay attention to their marking. There are many manufacturers of the elements under consideration, but it is better to give preference to the following:
- I TAKE;
- NGK;
- PARTS-MALL;
- AMD;
- Bremen;
- Tesla Technics.
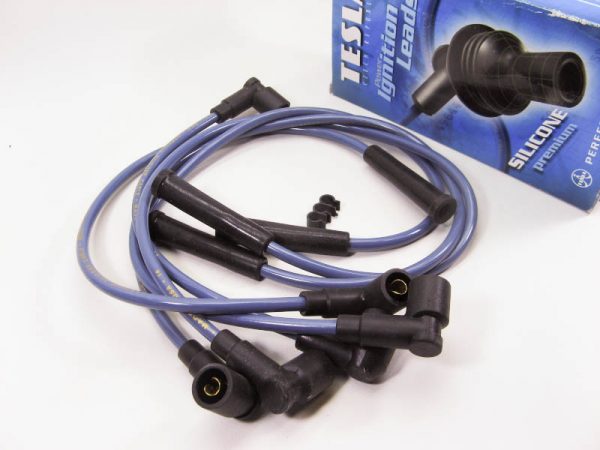
Recently, more and more car owners prefer to purchase silicone BB wires, which are distinguished by higher strength and protection of the inner layers from high temperatures, abrasion, and aggressive chemicals.
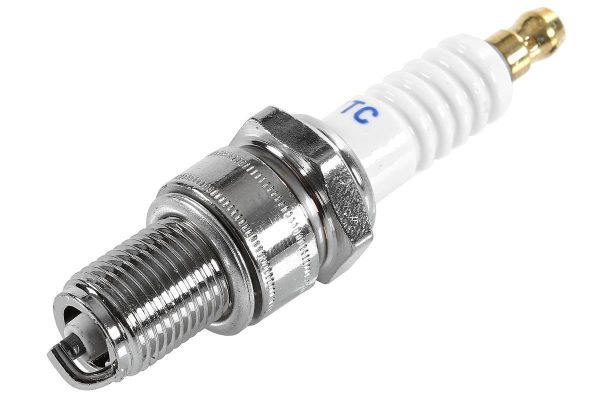
Candles
The main purpose of spark plugs in a gasoline engine is to ignite the working mixture in the combustion chamber. That part of the candle, which is inside the cylinder, is constantly exposed to high temperature, electrical, chemical and mechanical influences. Despite the fact that these elements are made of special materials, they still fail over time. Since both power, fuel consumption, and trouble-free starting of the engine depend on the performance and condition of the candles, attention should be paid periodically to checking their condition.
Ways to check
There are different methods for checking candles, but none guarantees their performance on the engine.
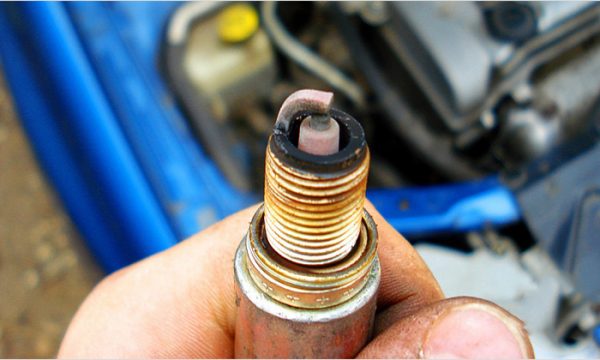
Visual inspection
During a routine inspection, for example, it can be determined that the engine has problems due to a wet spark plug, since the fuel in the combustion chamber does not ignite. In addition, inspection allows you to identify the condition of the electrode, the formation of soot and slag, the integrity of the ceramic body. By the color of the soot on the candle, you can determine the general condition of the engine and the correct operation of it:
- brown - normal working candle;
- in soot - indicates a too rich mixture or late ignition;
- in oil - a clear sign that oil enters the cylinder through the valve bushings or through the piston rings;
- melted contacts - this happens when the ignition is too early;
- ashes on a candle - the use of gasoline or oil with additives that enters the cylinders;
- cracked insulator - the use of low-quality gasoline and incorrect adjustment of the ignition system.
On a running motor
Diagnostics with the engine running is quite simple:
- They start the motor.
- BB wires are alternately removed from the candles.
- If, when one of the cables is disconnected, the operation of the power unit remains unchanged, then the candle or the wire itself, which is currently disconnected, is faulty.
Video: diagnosis of candles on a running engine

Spark test
You can determine the spark on a candle as follows:
- Disconnect one of the BB wires.
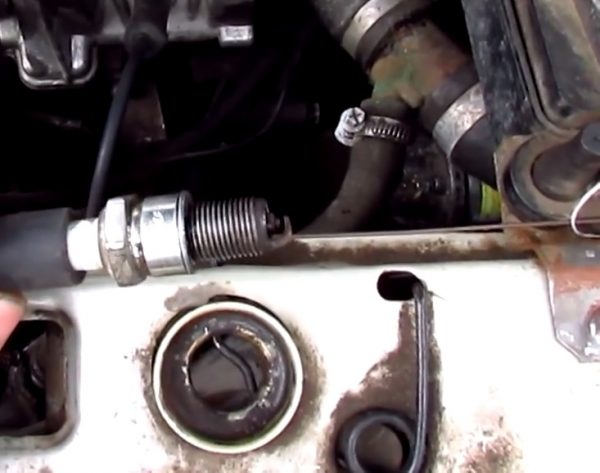
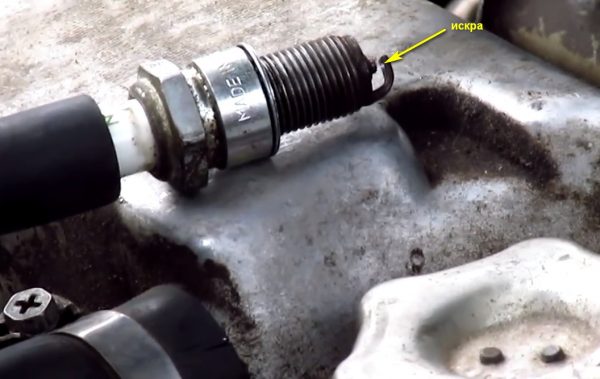
- We turn out the candle to be checked and put a cable on it.
- We lean the metal part of the candle element to the engine.We connect the threaded part of the candle to the engine or ground
- We turn on the ignition and make a few revolutions with the starter.
- A spark is formed on a working candle. Its absence will indicate the unsuitability of the part for operation.If you turn on the ignition and lean the unscrewed candle on the ground, a spark should jump on it when turning the starter
Video: checking a spark at a candle using an injection motor as an example

Before unscrewing the candle from the head of the block, it is necessary to clean the surface around so that dirt does not get inside the cylinder.
Multimeter
You need to understand that using a digital multimeter, the candle can only be checked for a short circuit, for which the resistance measurement mode is set on the device and the probes are applied to the central electrode and thread. If the resistance turned out to be less than 10-40 MΩ, there is a leak in the insulator, which indicates a malfunction of the candle.
How to choose candles
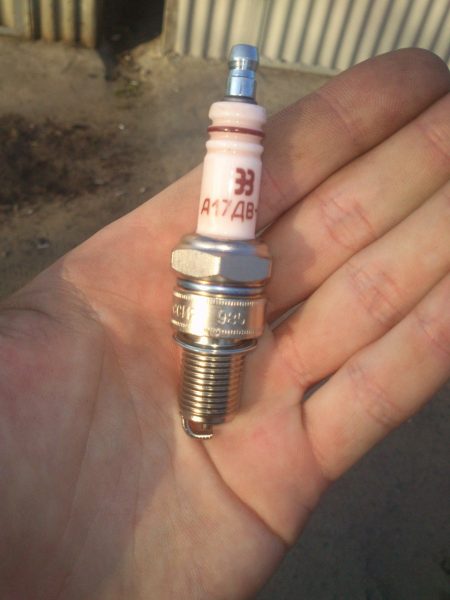
When choosing spark plugs for a “penny” or any other “classic”, you need to pay attention to the marking in the form of a numerical value, which indicates the glow number. This parameter indicates the ability of the candle to remove heat and self-clean from carbon deposits during operation. According to the Russian classification, the elements under consideration differ in their incandescent number and are divided into the following groups:
- from 11 to 16 - "hot" candles. They are used in engines with a low compression ratio and low power;
- from 17 to 19 - the most common candles, which are also used on the "classic";
- from 20 to 26 - "cold" candles used on powerful engines with a high compression ratio.
Installing "cold" or "hot" candle elements on the VAZ 2101 will lead to the fact that the power plant will not be able to function with high efficiency. Since the classification of Russian and foreign spark plugs is different and each company has its own, when selecting parts, you should adhere to the table values.
Table: spark plug manufacturers and their designation for different power and ignition systems
| Type of power supply and ignition system | According to Russian classification | NGK, Japan | Bosch, Germany | I take Germany | Brisk, Czech Republic |
| Carburetor, mechanical contacts | A17DV, A17DVM | BP6E | W7D | W7D | L15Y |
| Carburetor, electronic | A17DV-10, A17DVR | BP6E, BP6ES, BPR6E | W7D, WR7DC, WR7DP | 14–7D, 14–7DU, 14R-7DU | L15Y,L15YC, LR15Y |
| Injector, electronic | A17DVRM | BPRX NUMXES | WR7DC | 14R7DU | LR15Y |
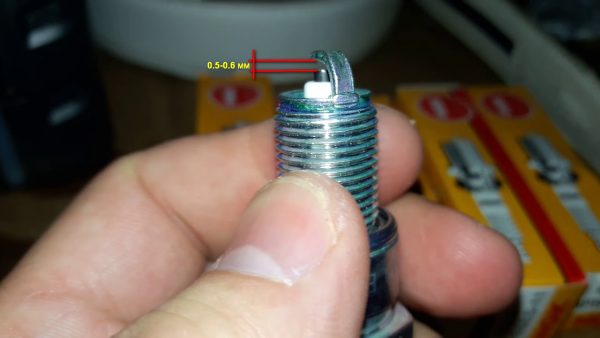
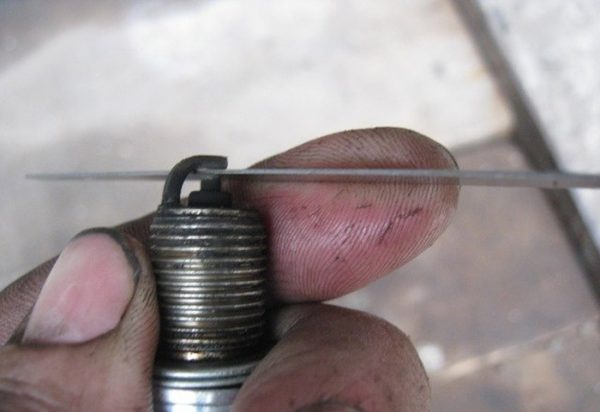
Gap of contacts of candles
The gap in the candles is an important parameter. If the distance between the side and center electrode is set incorrectly, this will lead to the following:
- problem starting the engine;
- decrease in dynamic performance due to improper ignition of the mixture;
- increase in fuel consumption.
Since the "Lada" of the first model is used with both contact and non-contact ignition systems, the gaps are set according to the system used:
- for a contact device, the gap must be maintained within 0,5–0,6 mm;
- for non-contact - 0,7–0,8 mm.
To adjust, you will need a candle wrench and a set of probes. The procedure consists of the following steps:
- We unscrew the candle.We remove the wire and unscrew the candle
- According to the system installed on the car, we select the probe of the required thickness and insert it into the gap between the central and side contacts. The tool should enter with little effort. If this is not the case, then we bend or, conversely, bend the central contact.We check the gap between the contacts of the candles with a feeler gauge
- We repeat the same procedure with the rest of the candles, after which we install them in their places.
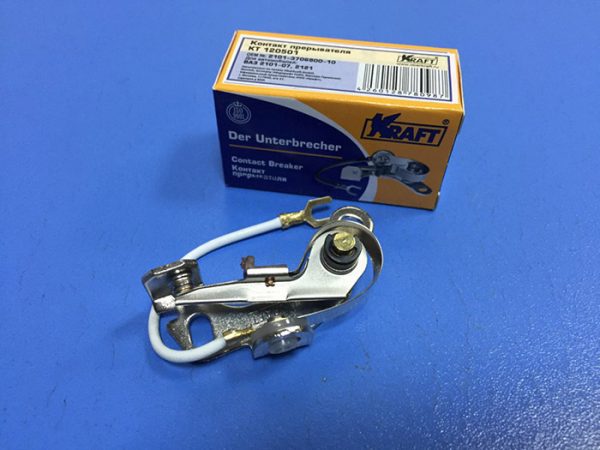
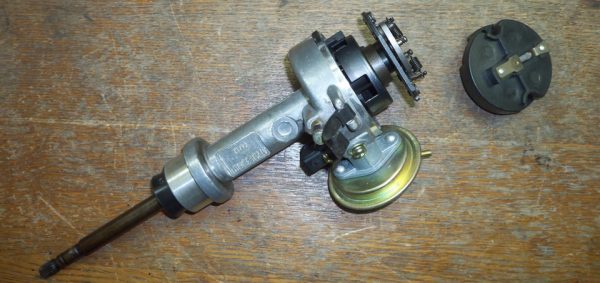
contact distributor
Stable operation of the engine is impossible without timely combustion of the working mixture. One of the main components in the ignition system is the distributor, or ignition distributor, which has the following functions:
- by disconnecting the contacts in the device, the start of sparking is set;
- the high voltage formed in the ignition coil is distributed to the desired spark plug;
- the beginning of the moment of spark formation changes;
- the accumulation and discharge of energy in the coil is ensured.
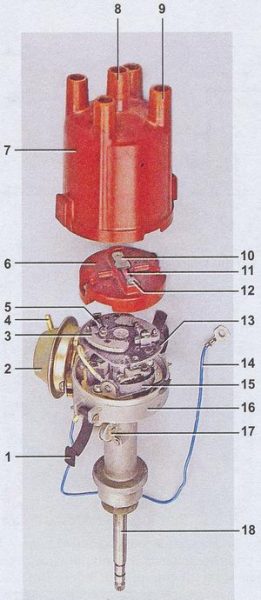
The distributor is called contact because in such a device the low voltage circuit that is supplied to the ignition coil is broken through the contact group. The distributor shaft is driven by the corresponding motor mechanisms, as a result of which a spark is applied to the desired candle at a certain point in time.
inspection
In order for the operation of the power plant to be stable, periodic checking of the distributor is a must. The main elements of the assembly that are subject to diagnostics are the cover, slider and contacts. The condition of these parts can be determined by visual inspection. There should be no signs of burning on the slider, and the resistor should have a resistance in the range of 4-6 kOhm, which can be determined with a multimeter.
The distributor cap should be cleaned and inspected for cracks. The burnt contacts of the cover are cleaned, and if cracks are found, the part is replaced with a whole one.
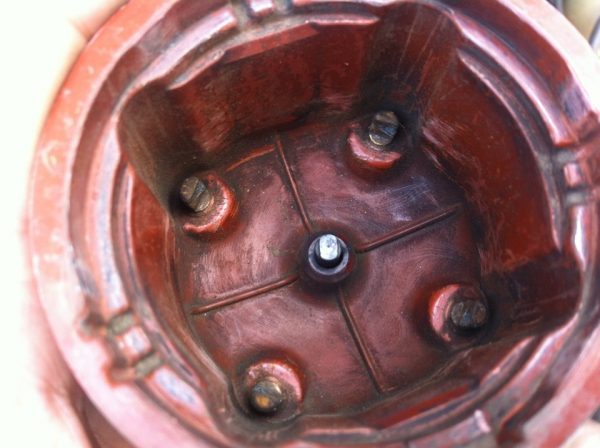
The contacts of the distributor are also inspected, they are cleaned with fine sandpaper from burning and the gap is adjusted. In case of severe wear, they are also replaced. Depending on the situation, more detailed diagnostics may be required, during which other problems may be identified.
Contact gap adjustment
The distance between the contacts on a standard VAZ 2101 distributor should be 0,35–0,45 mm. In case of deviations, the ignition system starts to fail, which is reflected in the incorrect operation of the motor:
- power does not develop;
- the car jerks;
- fuel consumption increases.
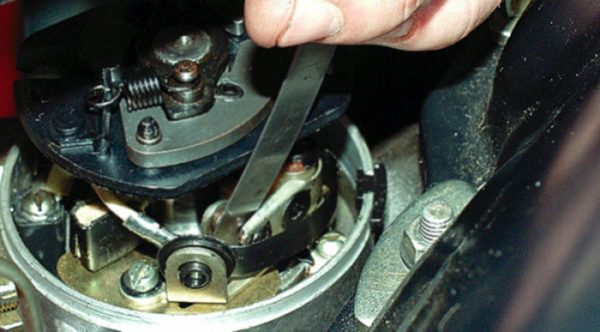
Breaker problems occur because the contacts are constantly working. Therefore, the adjustment has to be done quite often, about once a month. The procedure is carried out with a flat screwdriver and a 38 wrench in the following order:
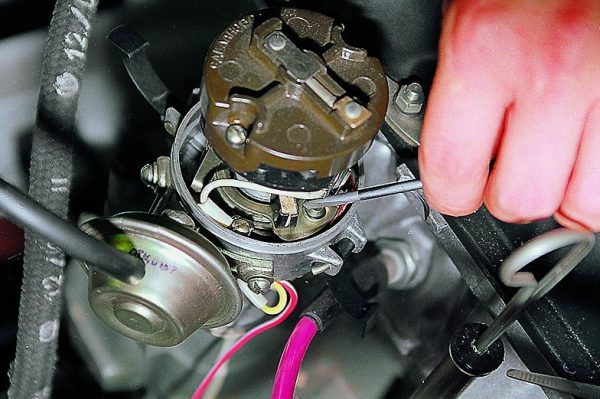
- With the engine off, remove the cover from the distributor.
- We rotate the crankshaft with a special key and set the breaker cam to a position in which the contacts will be as open as possible.
- We estimate the gap between the contacts with a probe. If it does not correspond to the required value, then loosen the corresponding fixing screws.We check the gap between the contacts with a probe
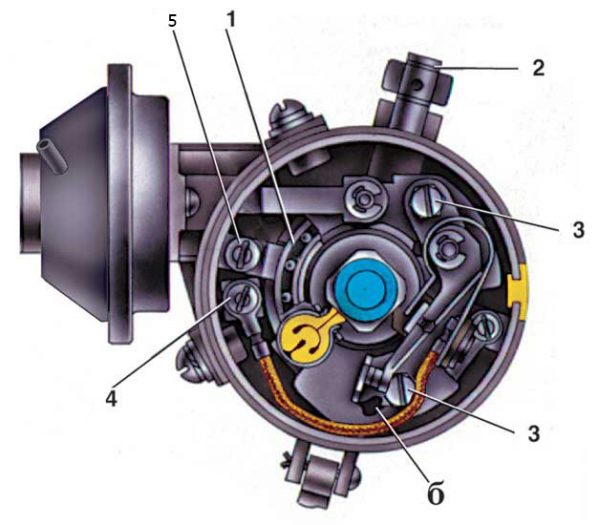
- We insert a flat screwdriver into the slot "b" and turn the breaker bar to the desired value.View of the distributor from above: 1 - bearing of the movable breaker plate; 2 - oiler housing; 3 - screws for fastening the rack with breaker contacts; 4 - terminal clamp screw; 5- bearing retainer plate; b - groove for moving the rack with contacts
- At the end of the adjustment, we wrap the fixing and adjusting screw.After adjusting and checking the gap, it is necessary to tighten the adjusting and fixing screws
Contactless distributor
The non-contact type VAZ 2101 ignition distributor is practically no different from the contact type, except that a Hall sensor is used instead of a mechanical interrupter. Such a mechanism is modern and more reliable, since there is no need to constantly adjust the distance between the contacts. Structurally, the sensor is located on the distributor shaft and is made in the form of a permanent magnet with a screen and slots in it. When the shaft rotates, the screen holes pass through the groove of the magnet, which leads to changes in its field. Through the sensor, the revolutions of the distributor shaft are read, after which the information is sent to the switch, which converts the signal into current.
Diagnostics
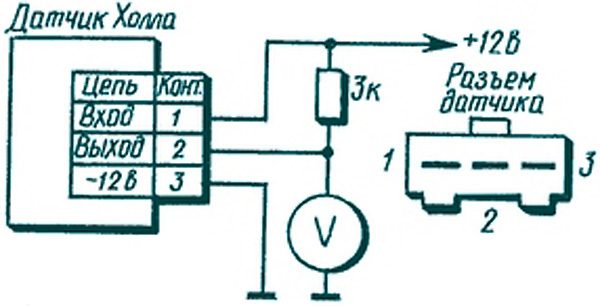
The non-contact ignition distributor is checked in the same way as the contact one, with the exception of the contacts themselves. Instead, attention is paid to the Hall sensor. If there are problems with it, the motor starts to work unstably, which manifests itself in the form of floating idle, problematic start, and twitching during acceleration. If the sensor fails completely, the engine will not start. At the same time, problems with this element occur infrequently. A clear sign of a broken Hall sensor is the absence of a spark at the center contact of the ignition coil, so not a single candle will work.
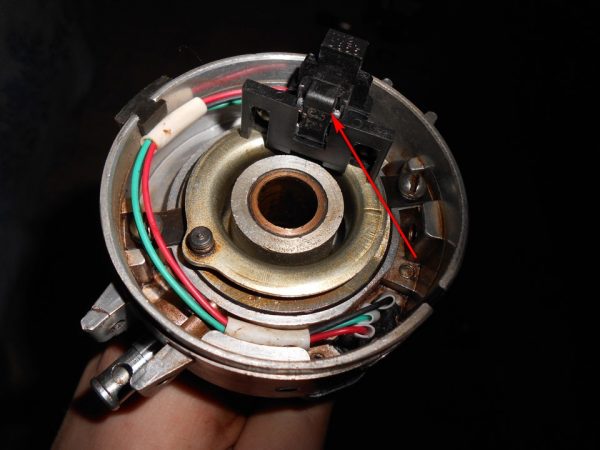
You can check the part by replacing it with a known good one or by connecting a voltmeter to the output of the element. If it turned out to be working, then the multimeter will show 0,4–11 V.
Setting the lead angle
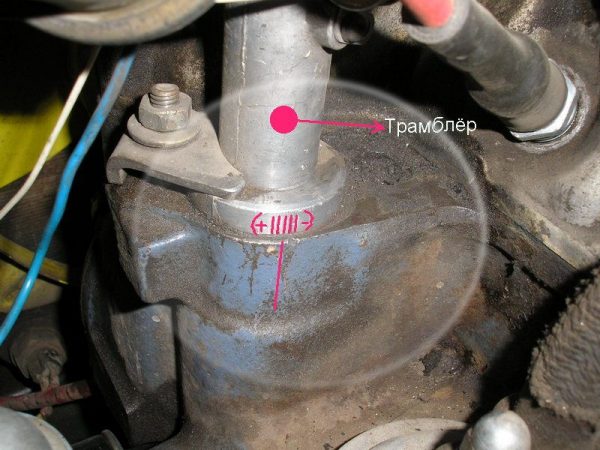
After carrying out repair work or replacing the ignition distributor on the "penny", it is necessary to set the correct ignition timing. Since this can be done in different ways, we will consider the most common of them, while it is important to know in what order the cylinders work: 1-3-4-2, starting from the crankshaft pulley.
By light bulb
This method is suitable if there are no special tools at hand. You only need a 12 V lamp, for example, from turn signals or dimensions with two wires soldered to it with stripped ends and a key for 38 and 13. The adjustment is as follows:
- We unscrew the candle element of the first cylinder.
- We turn the crankshaft with a 38 key until the compression stroke begins in the first cylinder. To determine this, the hole for the candle can be covered with a finger, and when a force occurs, compression will begin.
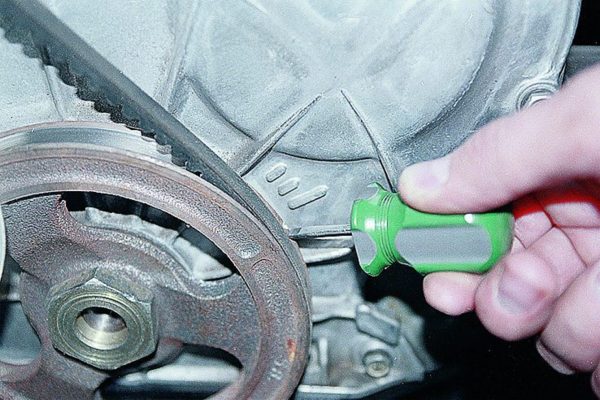
- We set the marks on the crankshaft pulley and the timing cover opposite each other. If the car is operated on 92nd gasoline, then you should choose the middle mark.Before adjusting the ignition, it is necessary to align the marks on the crankshaft pulley and the front cover of the engine
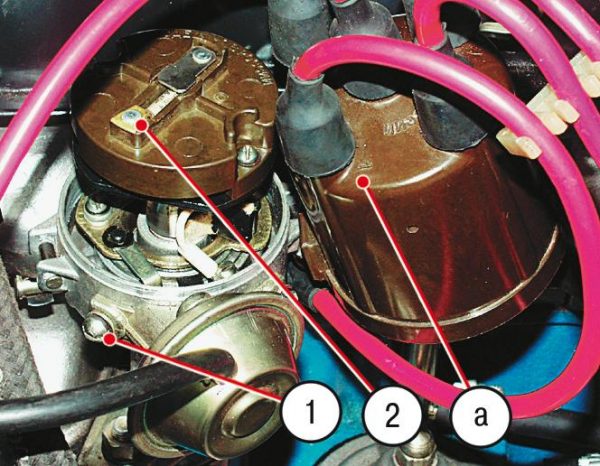
- Remove the distributor cap. The runner must look to the side the first cylinder on the cover.The position of the distributor slider: 1 - distributor screw; 2 - the position of the slider on the first cylinder; a - the location of the contact of the first cylinder in the cover
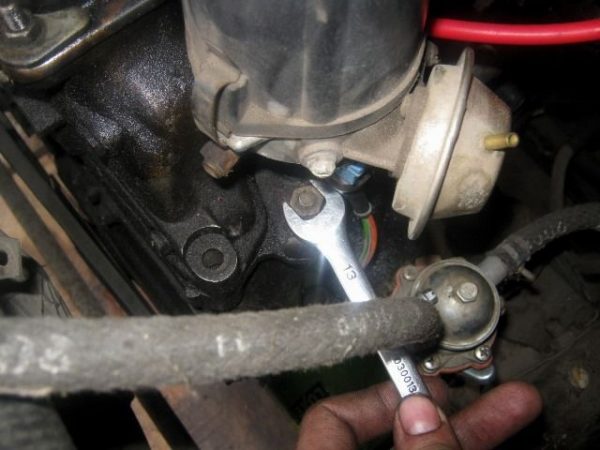
- We loosen the nut holding the mechanism.Before adjusting the ignition, it is necessary to loosen the distributor mounting nut
- We connect the wires from the light bulb to ground and the contact of the distributor.
- We turn on the ignition.
- We turn the distributor until the lamp lights up.
- We clamp the fastening of the distributor, put the cover and candle in place.
Video: setting the ignition on a VAZ by a light bulb

By stroboscope
With a stroboscope, the ignition can be set accurately, without the need to remove the cover on the distributor itself. If you have purchased or borrowed this instrument, the setup is performed in the following order:
- Loosen the distributor.
- We connect the minus of the stroboscope to ground, the positive wire to the low-voltage part of the ignition coil, and the clamp to the BB cable of the first cylinder.
- We start the engine and turn on the device, directing it to the crankshaft pulley, and a mark corresponding to the ignition moment will be displayed.
- We scroll the body of the adjustable device, achieving the coincidence of the marks on the crankshaft pulley and on the front cover of the motor.
- The engine speed should be around 800-900 rpm. If necessary, we adjust them with the corresponding screws on the carburetor, but since there is no tachometer on the VAZ 2101, we set the minimum stable speed.
- We clamp the distributor mount.
Video: strobe ignition setting

Aurally
If it became necessary to adjust the ignition, but there was no light bulb or special device at hand, the adjustment can be done by ear. Work is carried out on a warm engine in the following sequence:
- Slightly unscrew the distributor mount and slowly rotate it to the right or left.When adjusting, the distributor is rotated to the right or left
- At large angles, the motor will stall, at small angles, it will gain momentum.
- During rotation, we achieve stable revolutions within 800 rpm.
- We fix the distributor.
Video: adjusting the ignition on the "classic" by ear

Despite the apparent complexity of the ignition system, you can do it yourself to determine the problem, as well as adjust the formation and distribution of the spark at the right time. To do this, you must read the step-by-step instructions and follow them in the process of finding problems, fixing them, and also carrying out adjustment work.

