Glasses on the VAZ 2107: appointment and replacement
Content
Glass in the design of any car is an integral element and VAZ 2107 is no exception. Safe and comfortable driving would be impossible without this detail. Therefore, this body element must always be not only clean, but also free from defects. If such occur, then it is advisable to replace the damaged glass.
Glasses VAZ 2107 - the need for glasses in a car
Before starting a conversation about the glasses of the VAZ "seven", you need to consider the purpose of these elements. Automotive glass is a part of the body, which is assigned a protective function and provides protection for the driver and passengers from the effects of precipitation, dust, stones and dirt from the vehicle moving in front. The main requirements for auto glass are strength, reliability and safety. During the movement of the car, the main load falls on the windshield (windshield).
Windshield
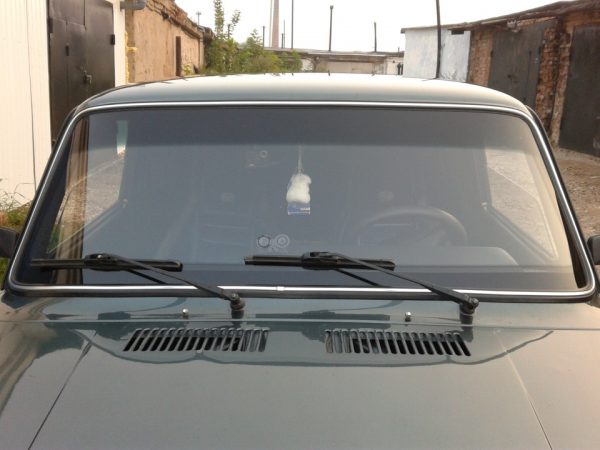
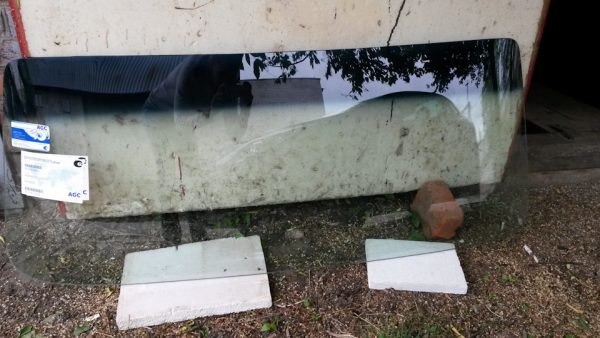
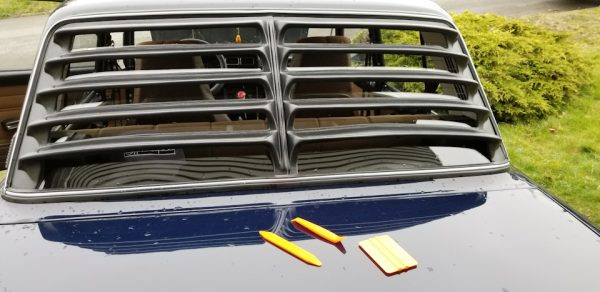
A windshield is a body element, which is a kind of shield mounted in front of the cab of a car in order to protect people inside it from damage, as well as to eliminate discomfort from oncoming air flow, dirt and other factors. In addition, the windshield is an element that directly affects the aerodynamics of the car. Since the element in question most often perceives a large amount of pollution and is often damaged by stones from oncoming or passing vehicles, which leads to its cracking, it is it that has to be changed more often than others. If there is a need to replace the windshield, it is important to know its parameters. The size of the windshield of the VAZ "seven" is 1440 * 536 mm.
How to remove glass
To dismantle the glass, you will need a minimum list of tools:
- flat and Phillips screwdriver;
- hook from a bent flat screwdriver.
We remove the glass as follows:
- Move the wipers away from the windshield.
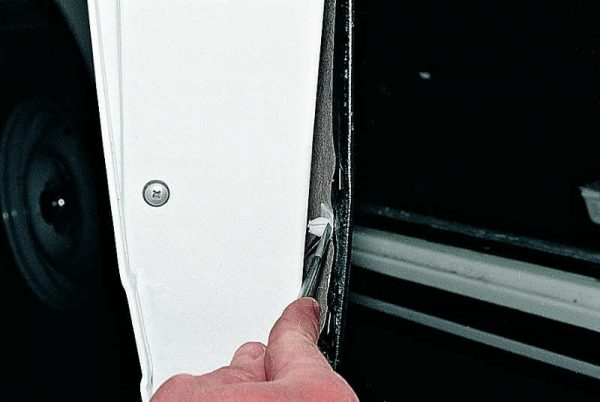
- Using a Phillips screwdriver, unscrew the 3 screws on the side trim of the front pillar.
 The side panel is held in place with three screws.
 - We dismantle the cover.Unscrew the fastener, remove the cover
- We perform similar actions on the other side.
- For convenience, we also remove the overlay on the ceiling.
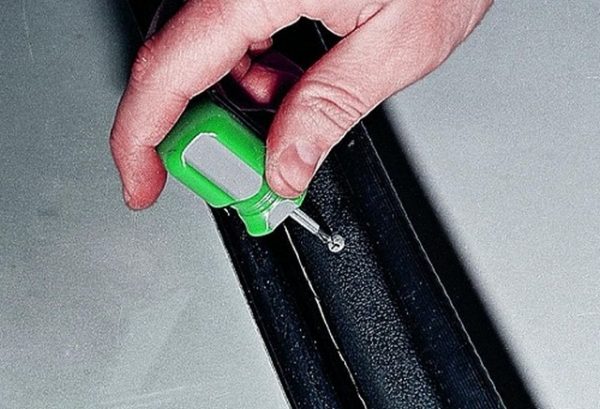
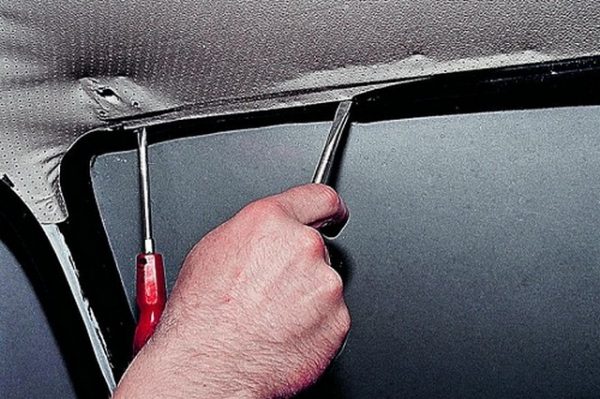
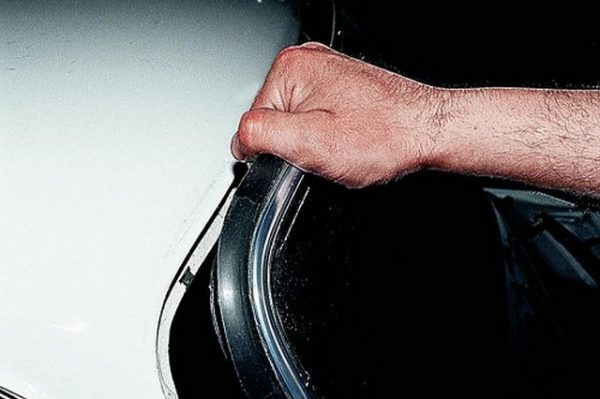
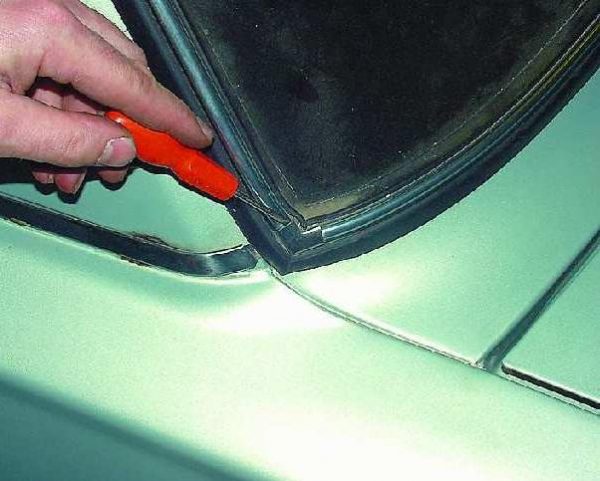
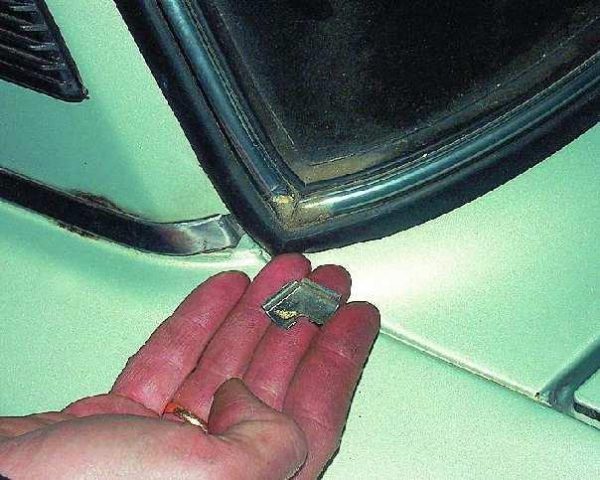
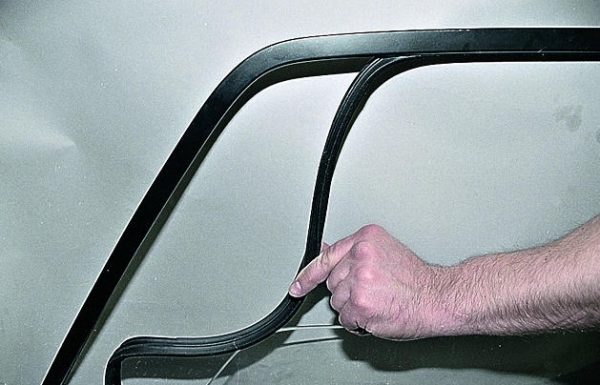
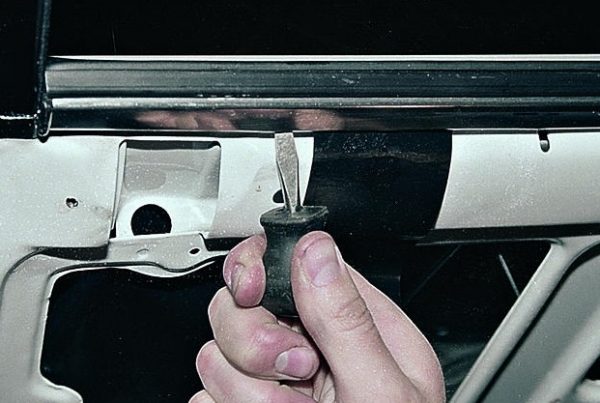
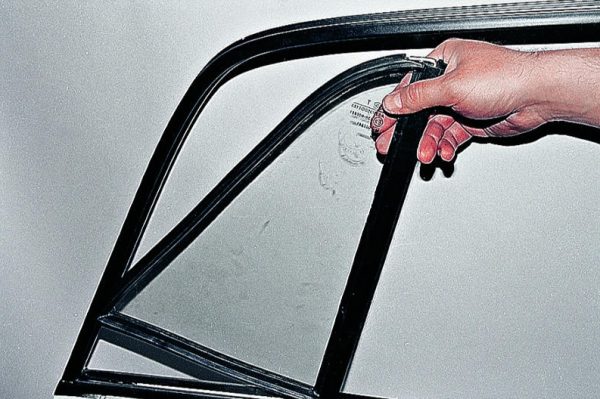
- With two flat screwdrivers or one screwdriver and a hook, we unscrew the edge of the seal by the flanging (windshield frame), gradually squeezing the glass out. For convenience, it is better to start from the top, moving to the sides.To dismantle the windshield, it is necessary to pry the seal with flat screwdrivers
- When the glass comes out from the top and sides, gently press it from the inside so that it comes out of the bottom of the opening, and then take it out along with the seal.When the glass comes out from above and on the sides, we press on it from the inside and take it out of the opening
How to install glass
Installation of new glass is carried out using the following list:
- means for degreasing and cleaning;
- clean cloth;
- cord with a cross section of 4–5 mm and a length of at least 5 m;
- molding.
It is more convenient to carry out work on installation of a windshield with the assistant.
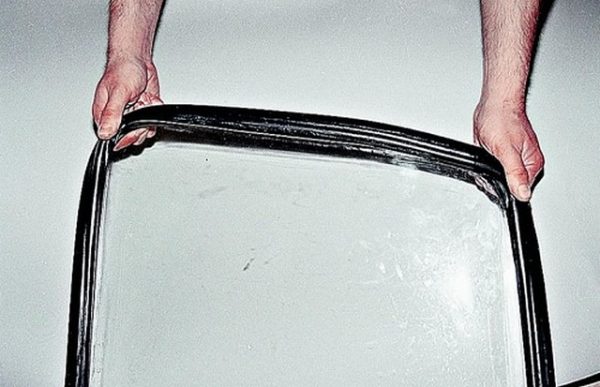
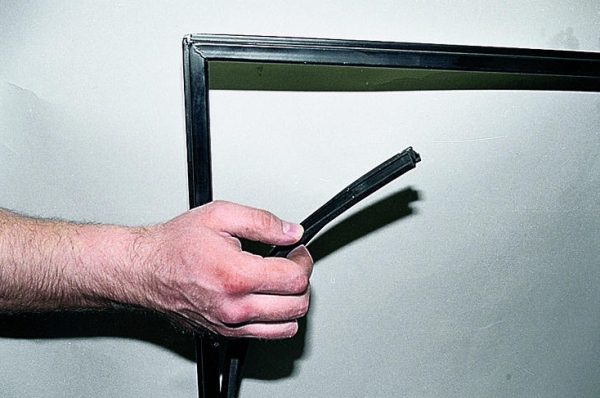
Before installing the glass, check the seal. If it does not have any damage, traces of rubber cracking, then the element can be reused. If defects are found, the sealing element should be replaced to avoid leakage. We mount the new glass in the following order:
- We remove the seal and edging from the old glass.
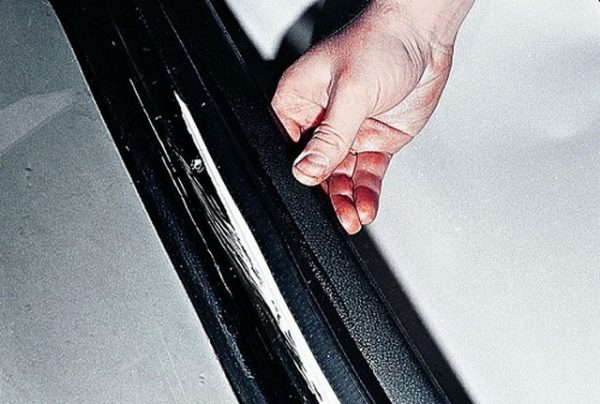
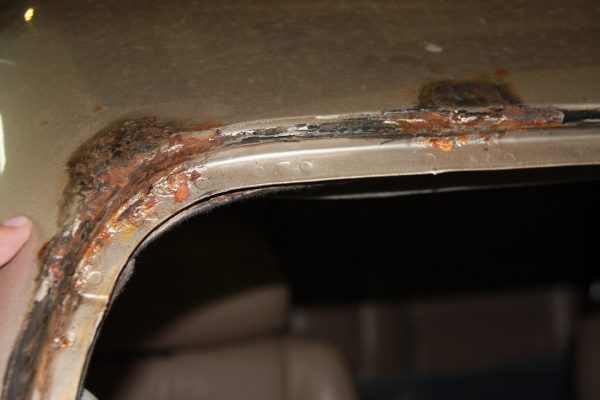
- Thoroughly clean the place where the seal fits to the body. If there are signs of corrosion on the frame, we clean them, treat them with a primer, paint and wait until all layers are dry. The old windshield seal is also well cleaned of dirt.If corrosion is detected at the sealing site, it is necessary to clean the rust, prime and paint over the damaged area
- We spread a piece of clean and soft cloth on the hood and put new glass on it.
- We put a sealant on the glass from the corners, spreading it well from all sides.The sealant on the glass should be put on from the corners, spreading it well from all sides
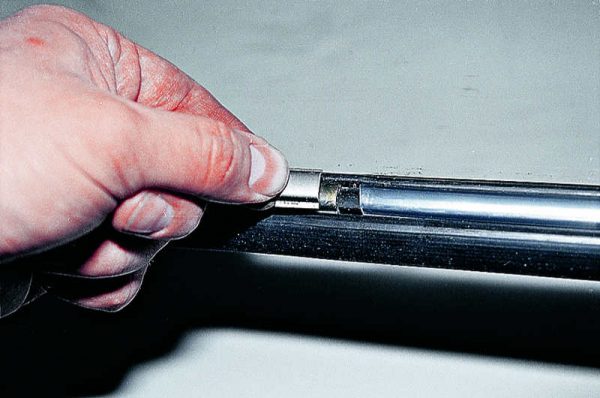
- We fill the edging into the sealant, after which we close the junction with a special lock.When the edging is tucked into the seal, insert the lock into the junction
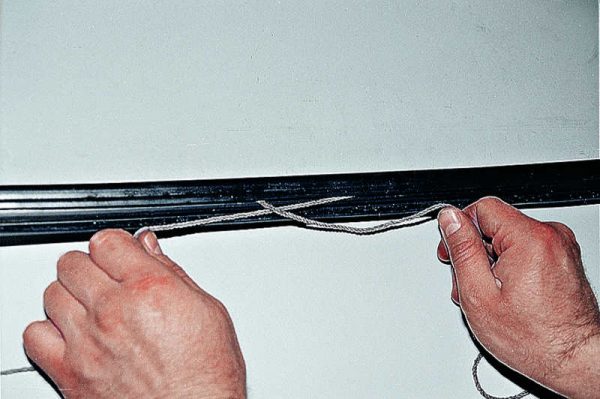
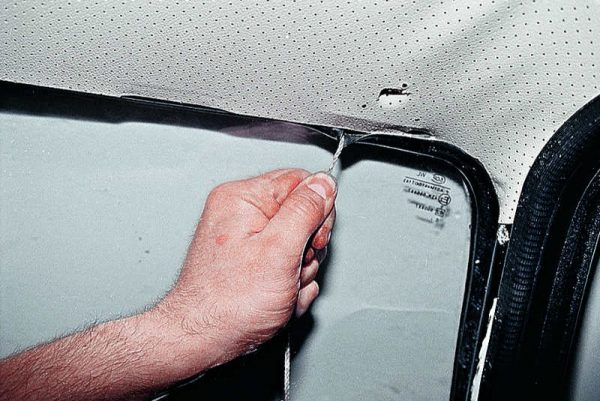
- We place the cord in the outer section of the seal so that the ends of the rope overlap in the lower part of the glass.We place the rope in a special cut in the seal, while the edges of the cord should overlap
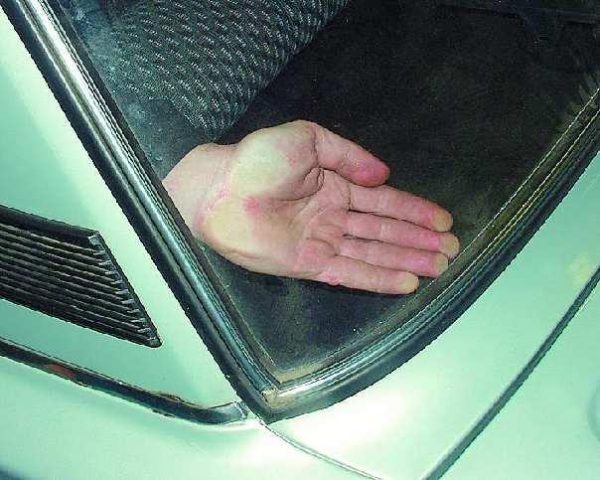
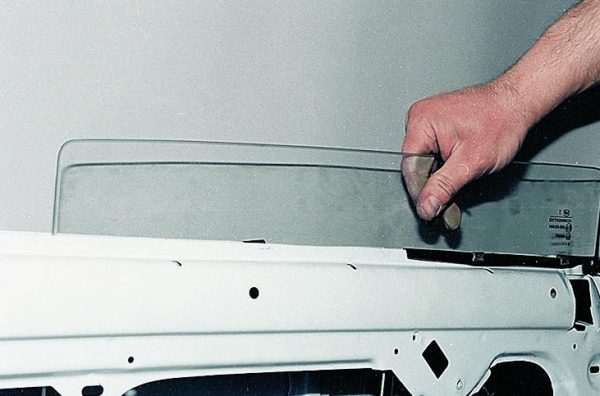
- We take the glass together with an assistant, apply it to the opening and align it.
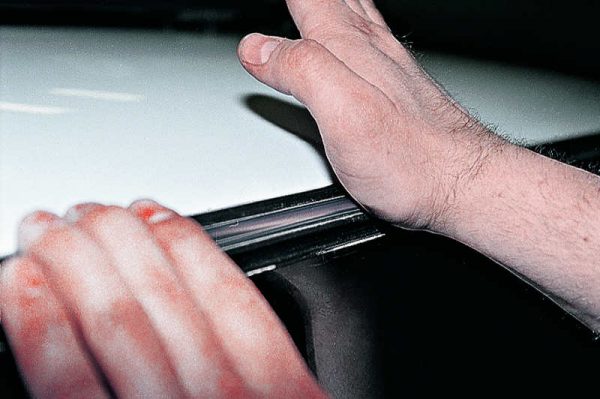
- The assistant sits in the car, and you press on the bottom of the glass. The partner begins to slowly remove the cord, and you help the sealer to take its position, seating the glass.Glass installation is best done with an assistant who is in the cabin
- We gradually move to the sides, and then up, achieving with a light tapping so that the glass, together with the sealant, sits in its place.
- In the upper part, we take out the cord from the sides to the center. In order for the sealant to sit as deep as possible on the flanging, it is necessary to simultaneously press on the glass itself.We pull the cord from the sides, gradually moving to the top of the glass
- At the end of the procedure, we install the ceiling and side linings in the cabin in place.
Video: replacing the windshield on the "classic"

Which manufacturer's glasses to install
Today, there is a huge choice of automotive glass manufacturers and the car owner, who does not often face the replacement of this body element, is not so easy to decide. Therefore, you should consider several of the most popular manufacturers whose products have proven themselves for their quality:
- BOR (Bor glass factory) is the leader of the glass industry in Russia. The plant is part of the Asahi Glass Company. Products are supplied to PAZ, UAZ, KAMAZ, GAZ, VAZ and Ford plants;
- KMK is one of the leaders in the production of auto glass in the secondary market;
- Benson (China) - the company has a special permit to sell its products in the Russian Federation. This suggests that during the purchase of such glass, the buyer can receive the necessary documents confirming the quality and safety of the product;
- Olimpia (Great Britain) - manufactures high quality glass not only for cars, but also for architecture and various industries. Glass production is carried out using high-quality equipment, which greatly reduces the influence of the human factor on the manufacturing process.
When choosing a windshield, attention should be paid not only to the price tag, but also to the attached documentation for this type of product. Manufacturers with obscure names and low prices are best avoided. With regard to the classic Zhiguli, it can be noted that the owners of these cars mainly purchase windshields from the Bor plant. The main thing is to check the documents when buying a product so as not to run into a fake.
Windshield tinting
Today, windshield tinting is quite popular among car owners. Some are of the opinion that window tinting is fashionable, while others are trying to hide objects in the cabin, while completely tinting the entire car. The best solution is to tint your windshield to protect your eyes from glare from oncoming traffic and bright sunlight, as well as to prevent damage to interior elements due to overheating. One of the most popular types of tinting is gluing a special film. It is important to understand that this process is not prohibited by anyone, but at the same time there are certain standards according to which the windshield must have a light transmission capacity of at least 70%. There are no restrictions for the rear and side windows. To tint the windshield of the "seven" you will need to prepare the following list:
- paper napkins;
- soft plastic spatula;
- rubber roller;
- building hair dryer;
- several sponges for washing dishes;
- sharp knife;
- spray gun;
- scraper.
The darkening process consists of the following steps:
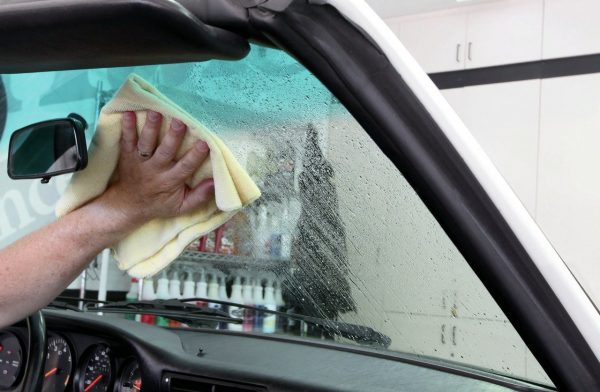
- We clean the surface of the glass from dirt by wiping it with soapy water.Before applying the film, the windshield must be cleaned of dirt.
- We prepare the pattern, for which we put the film on the glass and cut out a piece of the required shape with a margin of 3–5 cm.
- We apply a thin layer of soap solution from a spray bottle to the windshield.
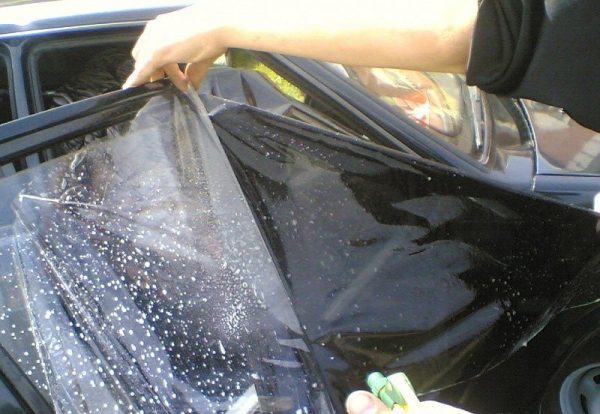
- Remove the protective layer from the prepared piece of film and spray a soapy solution onto the adhesive side.Remove the protective layer from the prepared piece of film
- We stick the film directly on the soap solution, straightening the material from the center to the edges of the glass.
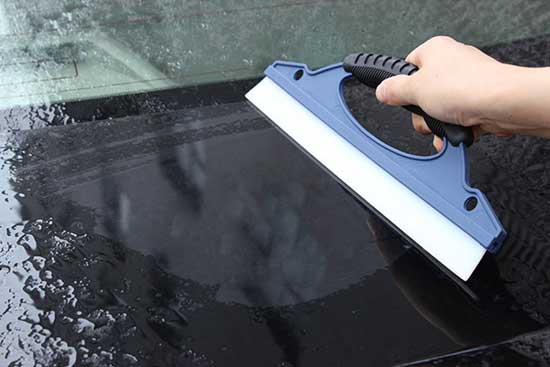
- We expel air bubbles and liquid with a special spatula. After smoothing, the film is dried with a building hair dryer.We smooth the film with a special spatula and dry it with a building hair dryer
- We cut off the stock of the film a few hours after its application.
Rear Glass
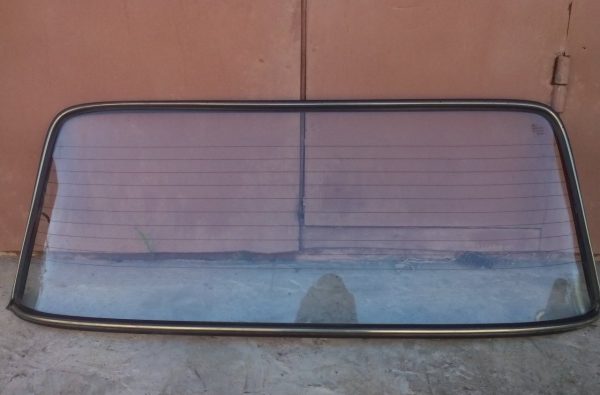
The rear window, by analogy with the windshield, is a shield mounted in the rear of the cab of the car and providing rear visibility. This element has to be removed, although infrequently, but sometimes it becomes necessary (replacement, installation of heated glass). The rear window of the VAZ 2107 has a size of 1360 * 512 mm.
How to replace
Removing the rear window is carried out in the same way as the front window, with the exception of some points. Consider them:
- Using a screwdriver, pry off the edging in the lower corner of the rear window.We pry the edging in the corners with a screwdriver
- We remove the corner element. Similarly, we dismantle the part on the other side.We dismantle the edging on both sides
- We take out the edging from the seal.
- We start dismantling the glass from the lower corners, moving up.We start removing the glass from the lower corners, gradually moving up
The rear window seal, by analogy with the windshield, is also checked for integrity and suitability for further operation.
Rear window tinting
The procedure for darkening the rear window exactly repeats the process of tinting the glass in front without any features. In places where it is not possible to smooth the film with a spatula, you can use a building hair dryer, but carefully so as not to overdo it and not overheat the material.
Video: rear window tinting on a Zhiguli

Rear window defogger
The VAZ "seven" from the factory was equipped with rear window heating. This function is quite convenient and indispensable in wet and frosty weather, when the glass fogs up or freezes.
Sometimes such a malfunction occurs when the heating does not work, while the glass fogs up. However, the problem is not always caused by a breakdown, but by high humidity, and nothing needs to be repaired.
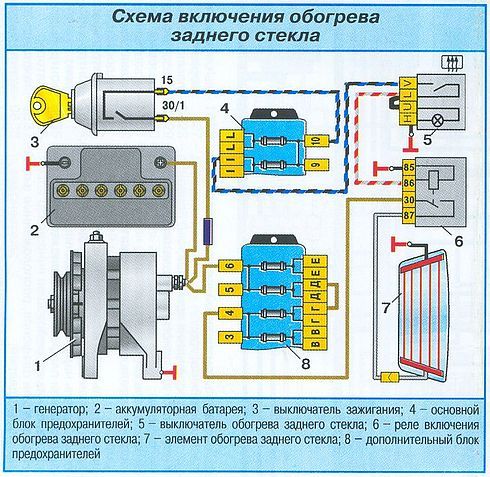
If the heating really does not work, for example, due to damage to the wiring, then in this case it is necessary to familiarize yourself with the connection diagram and perform the following troubleshooting sequence:
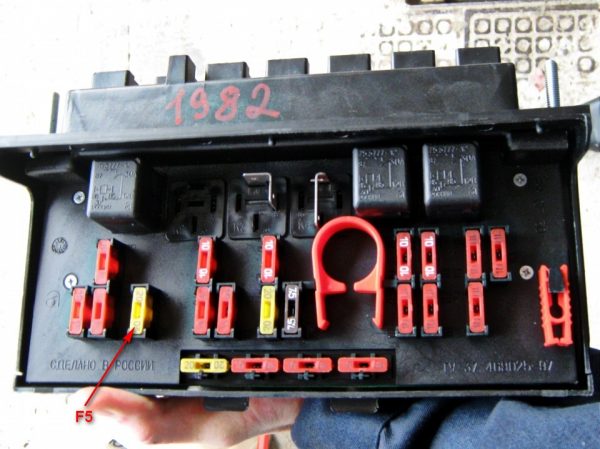
- We check the fuse, which is responsible for heating the tailgate. It is located in the mounting block and has the name F5.The fuse protecting the heated rear window circuit is installed in the fuse box
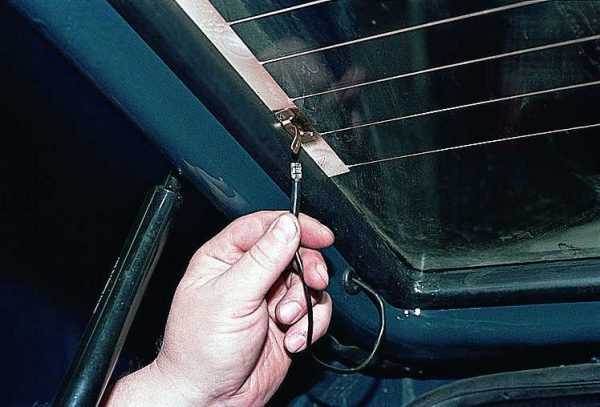
- We evaluate the condition of the heater terminals on the glass, as well as the ground on the body.When diagnosing the operation of the heater, it is necessary to check the contacts
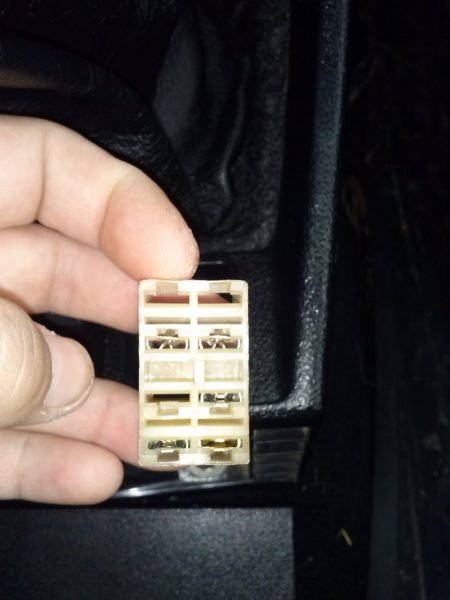
- We examine the connector that leads to the control unit (relay and button).The block through which the button is connected to the circuit also needs to be inspected.
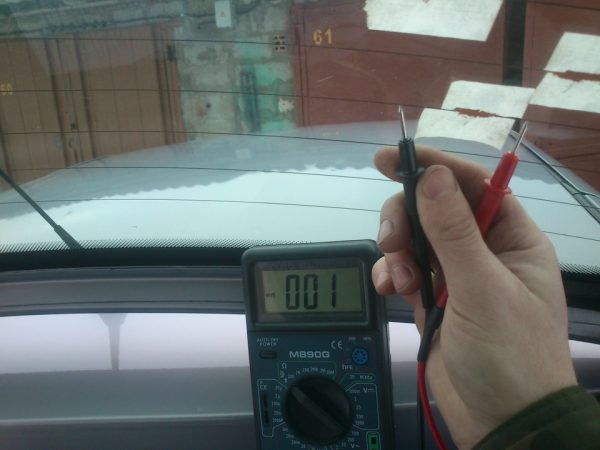
- Using a multimeter, check the heater. A good filament should have a resistance of about 1 ohm.Filaments are checked with a multimeter
If all of the above points did not give any result, there may be problems with the ignition switch or the board in the fuse box.
Video: rear window heating repair

Rear window grille
Some owners of classic Zhigulis install a grille on the rear window to give the car a certain sporty style. The grille is mounted with the glass removed under the seal, but to simplify the procedure, the glass can not be removed, although this will cause some inconvenience. To work, you will need a suitable tool, for example, a plastic spatula, a card or something similar, with which the seal is pry off and the grate is inserted.
The advantages of installing the product in question are reduced to the following points:
- in rainy weather, less water flies on the glass, which reduces the degree of its fogging;
- reduces the likelihood of glare from vehicles moving behind;
- in sunny weather, the interior heats up less and is translucent.
However, the installation of the grate was not without its drawbacks:
- when snow sticks in winter, it is rather problematic to clean it;
- over time, garbage is packed between the glass and the grate in the corners, which is not so easy to wash.
Side glass front door
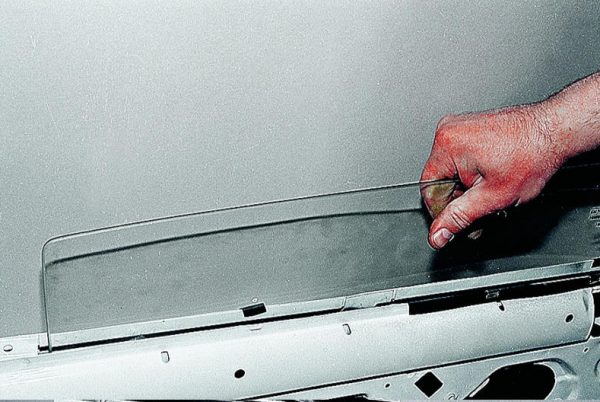
Dismantling the side glass of the front door on the VAZ 2107 may be required during repair work. The forward sliding glass has the sizes 729**421*5 mm.
How to remove glass
To dismantle the glass, you will need to prepare:
- flat and Phillips screwdriver;
- set of open-end wrenches.
Removal is carried out in the following order:
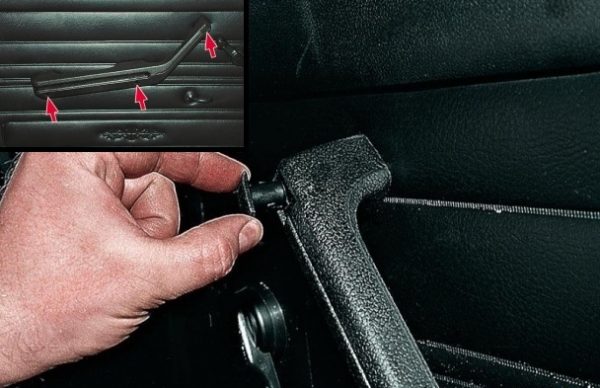
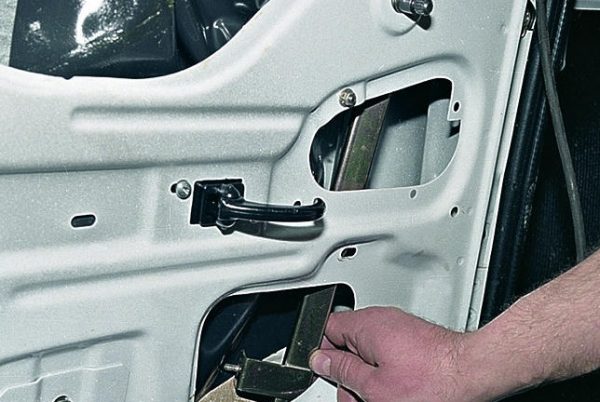
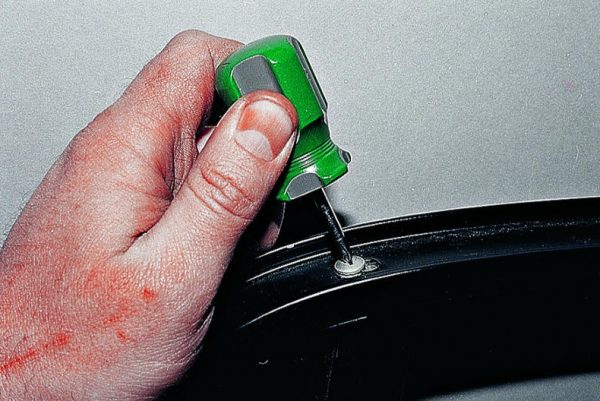
- We pry with a flat screwdriver and remove the plastic plugs from the armrest.We pry with a screwdriver and take out the armrest plugs
- We unscrew the fasteners and remove the armrest itself.Unscrew the armrest mount, remove it from the door
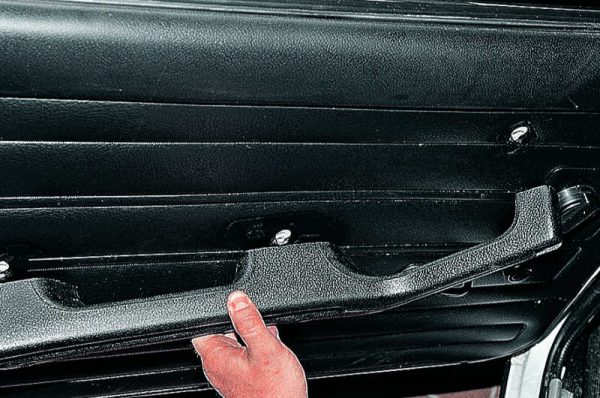
- We move the socket away from the lining, and then we shift the lining itself along the handle and remove the socket.We pry with a screwdriver and remove the lining of the window lifter handle
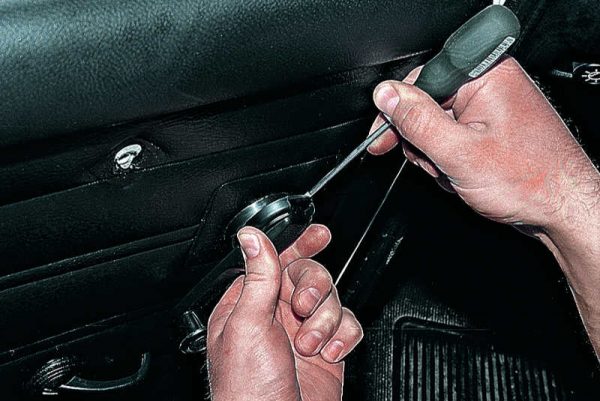
- Pry off the door handle trim with a flathead screwdriver and remove it.To remove the trim of the door handle, pry it with a flat screwdriver.
- We insert a screwdriver between the door trim and the door itself, snapping off the plastic clips.The door trim is held in place with clips that need to be pryed off with a screwdriver.
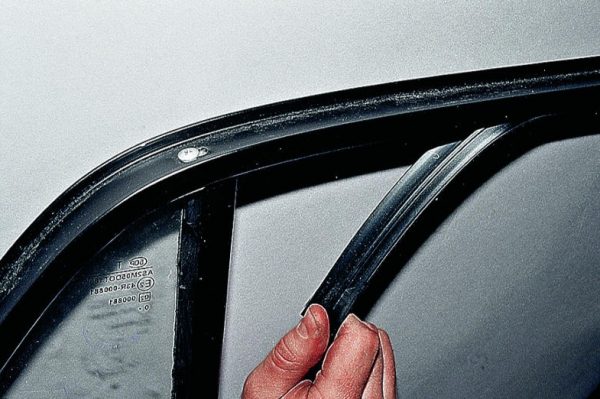
- Remove the sealing element from the front and top of the door frame.The seal is removed from the front and top of the door frame
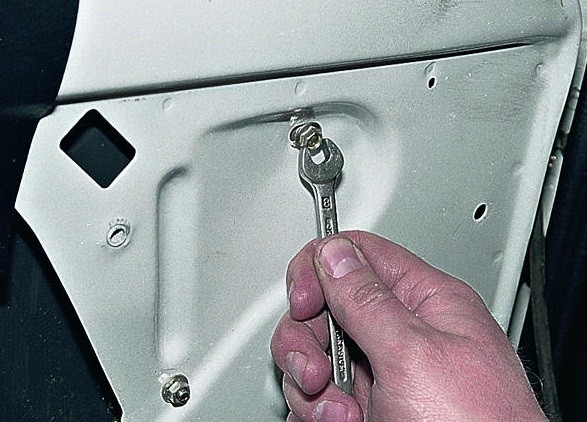
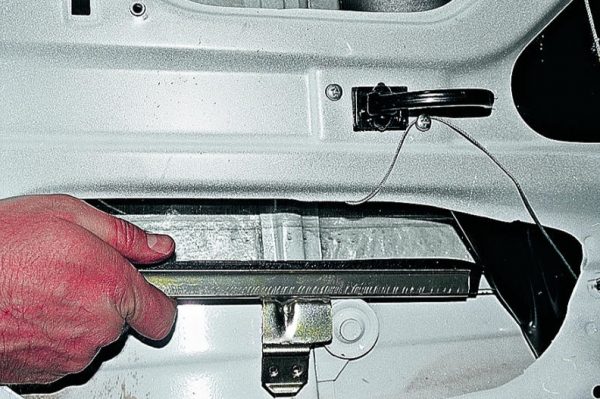
- Unscrew the fasteners of the front chute.The front chute is held by a nut by 8, unscrew it
- We take out the guide element from the door together with the seal.Unscrew the mount, remove the guide element
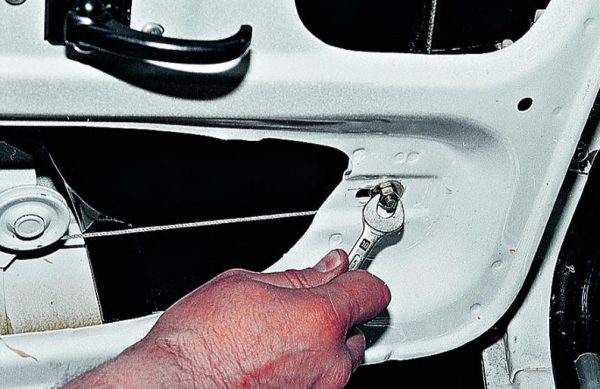
- We unscrew the fastening of the cable to the glass clip, lowering the glass itself down to the stop.
- We pry off with a screwdriver and remove the facing elements from the inside and outside.Pry off with a screwdriver and remove the chrome elements
- Remove the glass from the door.Removing the glass from the door
- If further disassembly of the door is required, remove the seal from the rear.Remove the seal from the back of the door.
- We unscrew the fastening of the rear guide element and take it out.We unscrew the fastening of the guide element and remove it from the door
- We assemble in the reverse order.


door glass seal
To prevent scratches on the sliding glass, the doors are equipped with a special element - velvet strips, which at the same time are a seal. Over time, the velvet layer is erased, the tightness is broken, as a result of which water gets inside the door, the glass dangles and scratches. In this case, the seal needs to be replaced.
To do this, it is enough to pry with a screwdriver and remove the worn-out elements, and install new ones in their place.
Side window rear door
The glazing of the rear door of the VAZ 2107 consists of two parts - a sliding glass and a fixed one. The first has dimensions 543*429 mm, the second - 372*258 mm. The removal of these door elements may also be required in order to repair the door.
How to remove glass
We dismantle the rear door glass in the following sequence:
- We raise the glass to the top position.
- Take off the door trim.
- Disconnect the lock drive rod from the guide element.
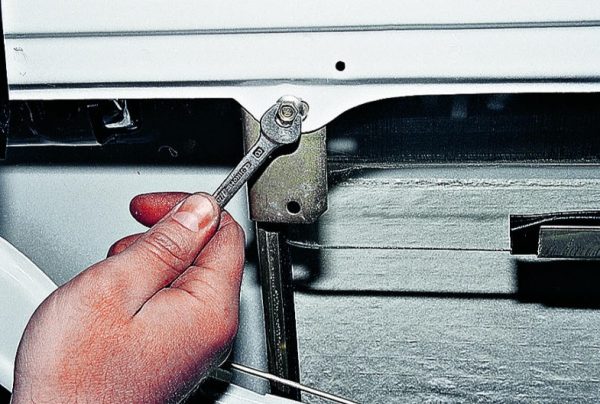
- Loosen the guide rail.We unscrew the fastening of the guide bar with a key of 8
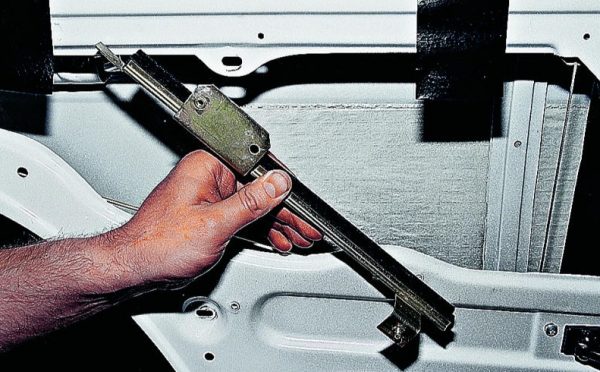
- We lower the element down and disengage from the rack.Unscrew the mount, remove the bar from the door
- Slightly move the glass down and unscrew the cable mount, then lower the glass until it rests on the lower roller.We unscrew the fastening of the cable and lower the glass all the way into the lower roller
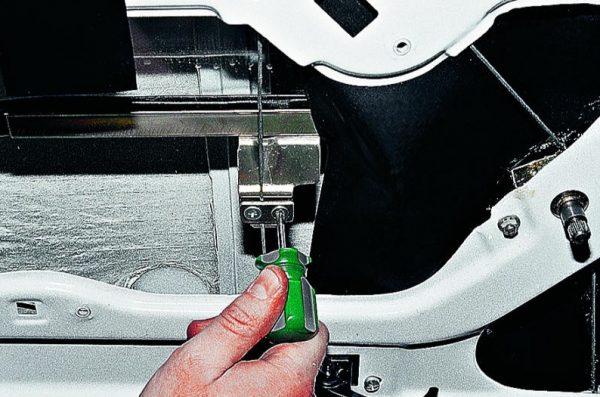
- Loosen the cable tension.The power window cable is tensioned with a roller, loosen it
- We remove the cable from the lower roller and fix it on the door in a taut state. We dismantle the glass from the roller and lower it all the way down.After dismantling the cable from the roller, lower the glass down to the stop
- Remove the top seal.Removing the top seal from the door
- Loosen the rack mount.The rack is fixed at the top of the door with a self-tapping screw, unscrew it
- We bring the rack forward together with the corner glass, pushing the seals of the chrome elements. We dismantle the chrome edging outside and inside.Removing the stand together with the corner glass
- Carefully remove the sliding window through the slot in the door.Removing the glass from the rear door
- We install both glasses in the reverse order.
Most often, glass in a car has to be removed, changed or removed during repair work. However, sometimes dismantling can be caused by the installation of tuning elements, the need for tinting, etc. Therefore, each Zhiguli owner should be able to remove and install the windshield, rear or door glass with their own hands. In addition, the procedure does not require special tools and skills.

