Tutorial: replacing oil seals on a motorcycle
Content
This is to be expected... After so many miles of good and loyal service, your bike's fork seals start crying thanks, as a result of fluid leaking through the tubes and the added effect of a bicycle pump. anxious. So it's time to change them. “Don't panic, it's not very difficult,” Moto-Station.com explains to you.
Replacing the oil seals on the motorcycle fork:
– Difficulty
– Duration 3 hours maximum
– Cost (fluid + seals) approx. 15 euro
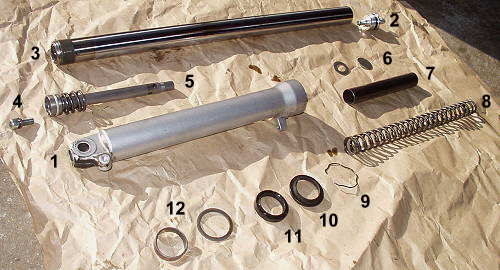
Motorcycle Fork Elements:
| 1 - scabbard 2 - plug 3 - tube 4 - BTR damper rod 5 - damper rod 6 - washers | 7 - spacer 8 – department 9 - locking clip 10 - dust cover seal 11 – sleep hinge 12 - pipe rings |
Like any “moving” component in your motorcycle, the fork is also subject to limitations that affect its performance. Over time, kilometers, dirt, mosquitoes and other "organic" or inorganic materials that can be applied to pipes, oil seals have great difficulty in sealing the bushings and therefore retaining the hydraulic fluid that brakes them. and departures. The first warning signs of deterioration are very obvious: traces of liquid on the tubes and bushings, increasing flexibility of the forks, deteriorating handling of the motorcycle or even harsh braking ...
From now on, you have several options for replacing fork oil seals. The easiest way is to take the bike to the dealership for fork repair, which will cost you 2-3 hours of labor + the cost of parts. More interestingly, an intermediate solution is to disassemble the fork tubes yourself and take them to your favorite mechanic, which will lead to significant labor savings (about 50%). Finally, the more daring and inquisitive will undoubtedly prefer to do everything themselves. From now on, they will unlock one of the "mysteries" of their motorcycle, enjoying the simple maintenance, with one exception.
Removing the motorcycle fork tubes may indeed require a special tool (an extension with a special end). If you are very, very good friends with your motorcycle dealer, you can always try to ask them to lend it to you (on bail if necessary). But if not, you may need a little ingenuity to achieve your goals, so the complexity of this operation is rated 5/10. To kick off this new DIY soap opera with Moto-Station.com, we believe you are big boys (or big boys), that you have oil seals, fork fluid and information. Useful methods, and what you already have yourself (!) Disassembled the fork of your motorcycle. Action!
Replacing the plug seals: follow the instructions
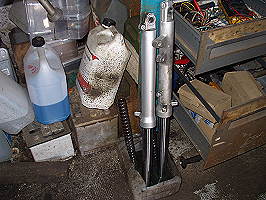
 | Therefore, to quickly move on to the most obvious operations, we assume that you have already removed the tubes from the tees, remembering to first loosen the caps at their top ... This allows you to complete unscrewing them without securing the tube. vice. Be careful, the spring is charged, so hold the cap tight ... Basically, you get the idea. |
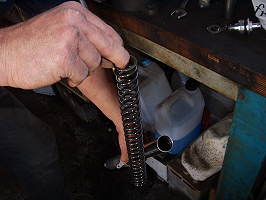 | Make sure that your motorcycle fork elements are on your workbench in the order in which you disassemble them: after the fork, washer, spacers ... and here is the spring. |
 | Now all that remains is to drain the oil contained in each fork bushing. To do this, we put them upside down in an old container, and good old Newton will do the rest. |
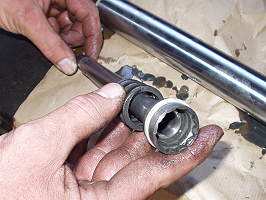
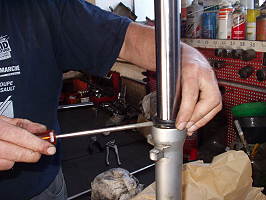 | Using a flat screwdriver, carefully loosen the gasket on the dust cover ... taking care not to scratch the tube. |
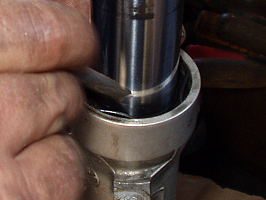 | Then, in turn, remove the clamp holding the spinnaker in place. Nothing too complicated yet. Are you all right? |
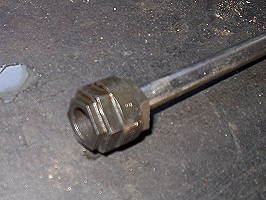
 | Here we get straight to the heart of the matter. You should be aware that the fork tube itself slides into another tube (or “damper rod”) at its thinner and more abutted lower end to prevent the main tube from separating from the hub (of course, in extreme cases ...). In short, we cannot remove the main tube without unscrewing this “damper rod”, which is usually held in place by a BTR screw at the bottom of the shell. You can guess here (apply force ...) the imprint of this shock absorber bar, which may have to be prevented from turning on by itself in order to unscrew the APC. |
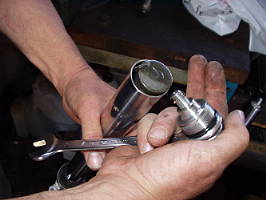
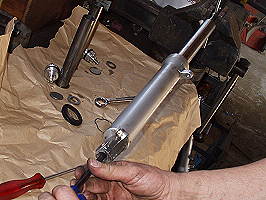
 | This is precisely the role of this tool, installed here at the end of the extension. If you can't borrow it from the dealership, you can do without it. Therefore, it is necessary to have a long thin hollow tube, the end of which you will flatten or deform, so that it can block the head of the shock absorber rod as much as possible. But we have seen how you can use, for example, a broom that has been resized accordingly. There are other tips to be aware of: see at the bottom of this page. |
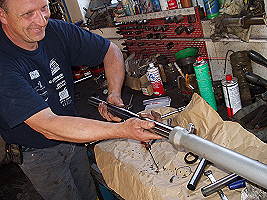
 | Here is the academic loosening of the famous armored personnel carrier with the appropriate tools. |
 | After everything is unscrewed, it remains to remove the tube and the oil seal. You kill two birds with one stone by pulling hard on the pipe, which will pull the spinnaker itself. Please note that we get a certain pleasure from this ... |
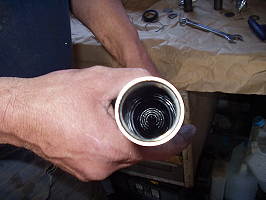
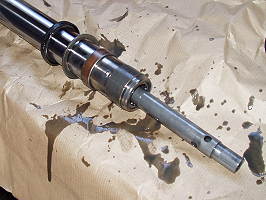 | This is what you should get when dismantling. We understand better how the fork works. In fact, the length of this famous shock rod screwed into the bottom of the hub determines the travel of the fork. |
 | And finally, here is his summit, the one that we blocked shortly before with the help of the appropriate tool. |
Some Motorcycle Fork Care Details
– You will find all the useful information in the well-known ETAI technical magazines and/or in the small manual sold with your motorcycle: fork oil viscosity (most often SAE 15 or 10), capacity of each tube (expressed in ml – about 300). up to 400 ml in total - or above the top of the tube), oil change intervals, fork details. If necessary, your motorcycle dealer will provide you with the missing information.
– Follow the manufacturer's recommendations exactly, especially regarding the viscosity and oil content of your motorcycle's forks. The viscosity of the oil is determined by the force of the spring and the use of the motorcycle. The recommended amount of oil also takes into account the amount of air required for the fork to function properly.
– As we have seen, the pressure of a single spring in the fork is usually enough to keep the shock rod from turning inside the bushing so that the BTR screw can be loosened. You can even push the tube deeper into its sheath to increase this pressure. Lack of success - BTR works in a vacuum - there are several solutions: the simplest is to take your fork arms to a mechanic equipped with impact screwdrivers / screwdrivers (otherwise called screwdrivers or impact drivers), pneumatic or electric, which are now most commonly used. unscrew the bolts on the wheels of the car. The union of rotation and impact is almost impossible to unscrew to unscrew anything and everything, and works great for motorcycle forks, for a small tip 😉 We recommend this solution from afar.
But if you are the resourceful, lonely and / or stubborn type, once you notice the shape of the notch in the bottom of the tube, all you have to do is make a tool to hold the head of the damper rod in it. passing directly into the tube by unscrewing the top cap. If desired, you can use a large hollow tube flattened at the end or a resized broom handle. But be careful, if you're really struggling, don't screw up your fork ... and carry it around until the faulty hardware is fixed by the pros. It will take 2 minutes and will cost so little that you can't do without it.
Good luck
Thanks to Henri-Jean Wilson of the 4WD / Motorcycle Garage in Beaumont du Gatin (XNUMX years old) for the warm welcome and help in creating this section.