Installation of parking sensors on 4 sensors
Content
Regular ultrasonic radars in cars warn the driver about detected obstacles when parking in a confined space. But this equipment is not installed by manufacturers on all models of machines. The owner can install the parking sensors with his own hands, for this he will need to carefully drill the bumper and pass the connecting wires through the car body.
Required Tools
To install the equipment in the car, you will need the following tools:
- special cutter for plastic (diameter must match the size of the sensor body);
- electric drill or cordless screwdriver;
- a set of keys;
- screwdrivers with flat and cross-shaped tips;
- a set of wrenches with Torx heads (required for cars of European production);
- test device;
- Scotch;
- roulette and level;
- pencil or marker.
How to install parking sensors
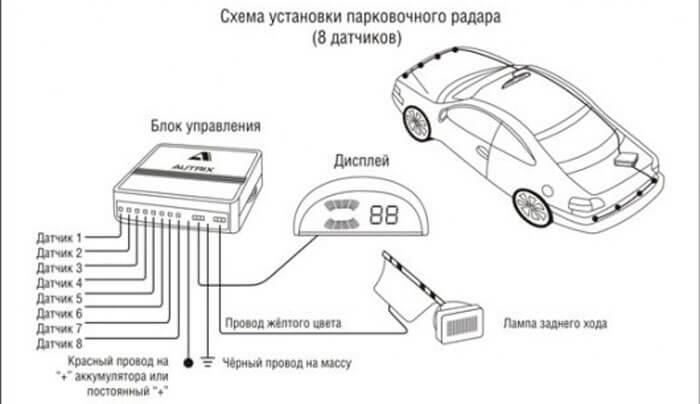
For self-installation of parking sensors, it is necessary to fix the sensors on the bumpers of the car and install the warning module on the car. The installation scheme includes a separate control unit, which is connected to the vehicle's on-board network. The parts are interconnected with cables included in the kit.
Before starting installation work, it is recommended to check the functionality of the components of the parking assistance system. The parts are connected according to the factory wiring diagram, then they turn on a 12 V DC source, rated for current up to 1 A. To check the sensors, a sheet of cardboard is used, on which holes are drilled to install the product. Then an obstacle is installed in front of each of the sensitive elements, the accuracy is checked with a tape measure distance measurements.
When installing sensors, it is necessary to take into account the orientation of parts in space.
There is an inscription UP on the back, which is complemented by an arrow pointer. During installation, the device is placed with the arrow pointing up, but the sensor can be rotated 180 ° if the bumper is at a height of more than 600 mm or if the bumper surface is tilted upwards, which degrades the sensitivity of the ultrasonic device sensor.
scheme
The installation scheme provides for the placement of ultrasonic sensors on the front and rear bumpers. Sensors are located in the end plane, as well as in the corners of the bumper, providing an extension of the controlled area. The parking assistant can work in conjunction with a rear-view camera that displays an image on the radio screen or on a separate screen. The control unit is mounted under the upholstery of the trunk or in the passenger compartment (in a place protected from moisture). An information board with a buzzer is placed on the instrument panel or built into the mirror.
Installing the rear parking sensors
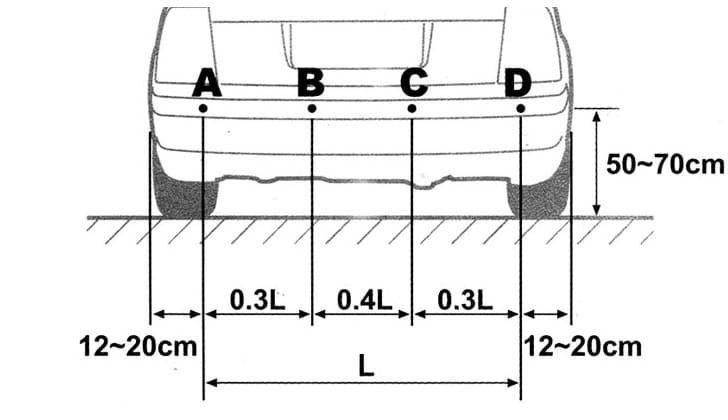
Installation of the rear parking sensors begins with marking the surface of the bumper. The accuracy of the assistant’s work depends on the quality of the markup, so it is necessary to study the manufacturer’s recommendations in advance. If installed incorrectly, “dead” zones are formed in which an obstacle may appear.

How to install the rear ultrasonic sensors:
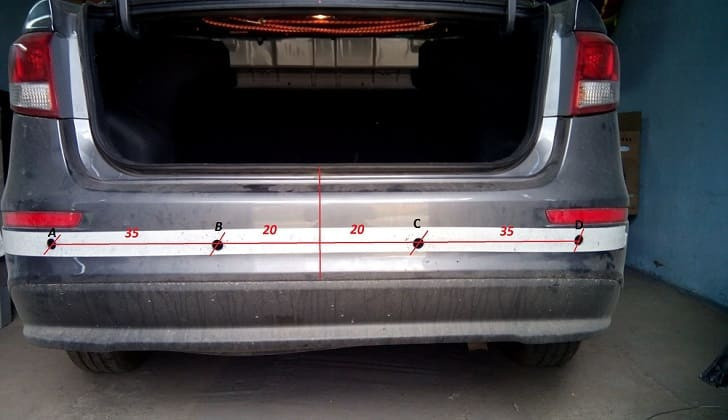
- Mark the plastic bumper cover and apply pieces of masking tape to the sensor locations. The equipment kit may include a pattern that allows the owner to mark the surface of the bumper and independently install the sensitive elements. Equipment manufacturers recommend installing detection elements at a height of 550-600 mm from the ground.
- Determine the location of the centers of the holes using a tape measure and a hydraulic or laser level. Ultrasonic sensors should be placed symmetrically at the same height.
- Mark the centers of the channels with a thin center punch so that the cutter does not slip. For drilling, use the tool supplied by the park assist manufacturer. The diameter of the hole must match the size of the sensor body so that the elements do not fall out during operation.
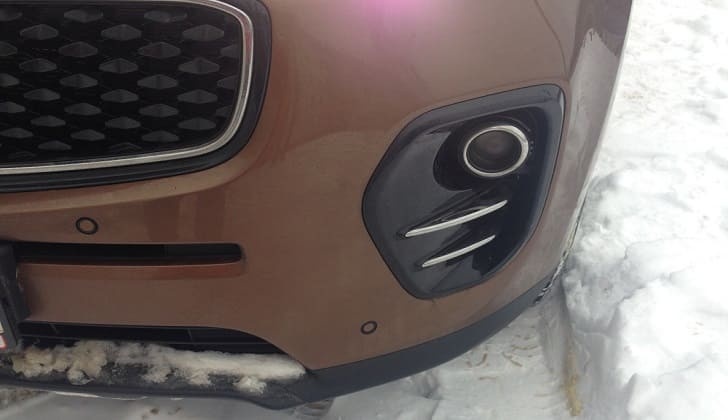
- Attach the cutter to the power tool chuck and start drilling. The cutting tool must be perpendicular to the surface being machined, while controlling the horizontal position of the cutter. Please note that there is a metal stud under the plastic case that can break the tool.
- Install the sensor housings with connecting cables into the holes provided. If a foam damper is installed in the design of the machine, then it is necessary to carefully pierce the part, the resulting channel is used to output the connecting wires. If work is carried out on a removed plastic sleeve, the wires are laid along the inner surface to the point of entry into the housing.
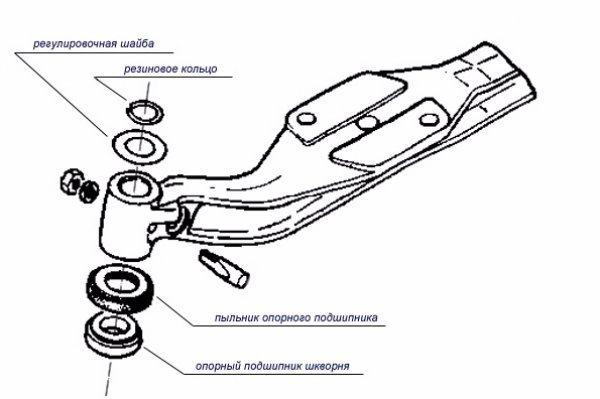
- Attach the sensors using the mounting rings provided; letters are applied to the body of the parts, which determine the purpose of the sensitive element. Rearrangement of objects in places is prohibited, as the accuracy of the device is violated. On the back of the housing there are explanatory markings (eg arrows) indicating the correct position on the bumper.
- Route the sensor wires through the stock rubber o-ring or plastic plug in the trunk. If the entrance was made through a plug, then the entry point is sealed with a layer of sealant. Cables are stretched with a piece of elastic rope or wire.
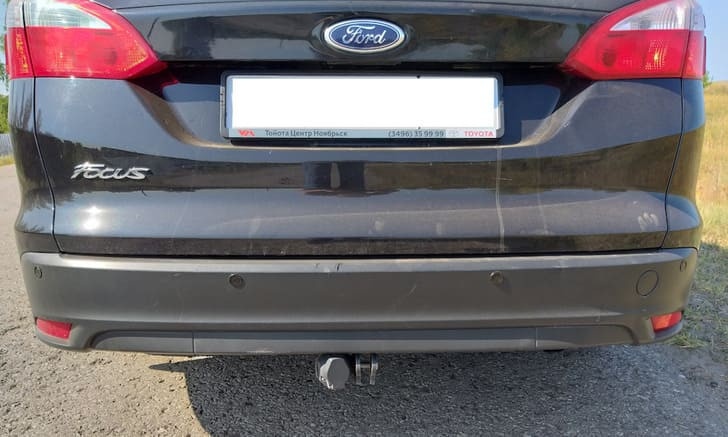
The owner can install rear parking sensors on any car equipped with a plastic bumper. It is allowed to color the plastic housings of the sensors in the color of the housing, this does not affect the performance of the products. If you plan to use a parking aid with a towbar, the sensor elements are placed on the sides of the towbar. The length of the device does not exceed 150 mm, so the towbar does not cause false alarms of the sensors.
Installing the front parking sensors
If you plan to install parking sensors for 8 sensors, then you will need to drill holes in the front bumper and install sensors in them. When drilling channels, it should be borne in mind that the regular electrical wiring of the car is laid inside the plastic casing, therefore it is recommended to work on a disassembled bumper. After marking the centers of the holes, drilling is performed. When installing sensors, do not press on the central part of the body.
Connecting cables are routed through the engine compartment from the cooling system radiator and exhaust manifold. Wires are recommended to be placed in a separate protective sleeve, which is put on a regular wiring harness. The entrance to the cabin is carried out through the existing technological holes in the engine shield.
Ways to activate the front assistant:
- Reversing lights signal. When you start moving backwards, the ultrasonic sensors in front and behind the car are activated. The disadvantages of this method include the impossibility of turning on the front sensors when parking the car with the front part close to the wall.
- With the help of a separate button, the owner turns on the equipment only in case of maneuvers in cramped conditions. The key is mounted on the instrument panel or center console, the switch design has an LED to determine the operating mode.
After installing the sensors, it is necessary to check the correct installation and laying of the connecting cables.
The control unit supports automatic diagnostics; After power is applied, the sensors are interrogated.
When a bad element is detected, an audible alarm will sound and segments will flash on the information module display to indicate the failed element. The owner of the machine must ensure that the cable and insulation are intact, and that the wiring to the controller is properly connected.
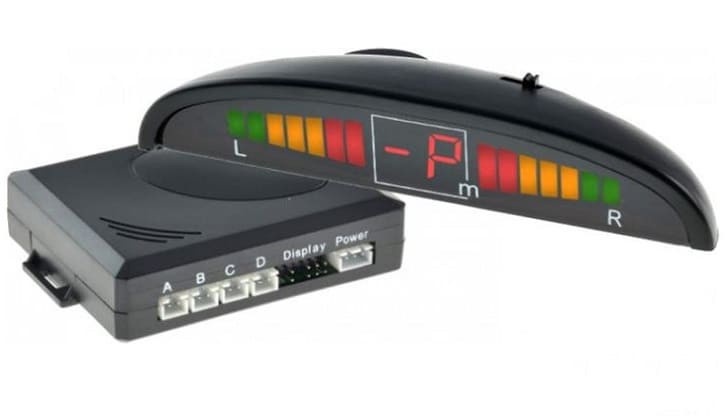
Information display
After installing the sensors, the owner proceeds to place an information board in the cabin, which is a small-sized liquid crystal display or a block with control light indicators. There are assistant modifications with an information panel made in the form of a rear-view mirror. When installing the screen on the windshield, the cables pass through the trunk under the headlining and the plastic trim on the roof pillars.

To install the information block yourself, you must:
- Find a free space on the instrument panel, the equipment should not block the view from the driver's seat. Figure out how to lay the connecting cable to the controller, the cable runs inside the panel and then goes to the luggage compartment parallel to the standard wiring harnesses.
- Clean the plastic surface of dust and degrease with a composition that does not destroy the base.
- Remove the protective film from the double-sided tape attached to the base of the device. The information module does not have its own power supply, power is supplied from the parking assistance system controller.
- Install the module in the dashboard and connect the hose. If the equipment supports the scanning of "dead" zones on the signal of the steering column switch, then LEDs are installed on the A-pillars of the roof. The instruments are connected to the control box, the cables are routed along with the main wiring of the display.
How to connect a device
To connect the parking sensors to 4 sensors, you need to run wires from the ultrasonic elements to the control controller, and then connect the information display. The control unit only needs power when reverse gear is engaged. Installing the kit for 8 sensors differs by laying an additional wiring cable from the sensors located in the front bumper. The controller is attached to the trunk wall using screws or plastic clips; it is allowed to install the device under decorative moldings.
For example, the circuit diagram for connecting the SPARK-4F assistant controller provides for a wired input from the sensors, a positive power signal is supplied from the reversing lamp. This technique ensures the operation of the equipment only in reverse gear of the car. The negative wire is attached to special bolts welded to the body. The control unit has a block for turning on direction indicators, the signals are used to enter the programming mode and switch menu sections.
The parking sensors scheme involves the activation of a silent mode, which allows you to determine the distance to cars behind or in front. The controller is additionally connected to a limit switch located on the brake pedal. It is allowed to be powered by brake lights located in the rear lights. When you press the pedal and the neutral position of the gear selector, the display shows the distance to obstacles. The screen layout has a button to force the screen to turn off.
Some assistants support the function of warning the driver about cars in the "dead" zones. The sensors are triggered when a warning signal is given by the direction indicator, when a car or motorcycle is detected, the warning LED on the rack trim lights up, the signal is duplicated on the screen. Permanent or temporary deactivation of the function is allowed by applying a signal to a separate contact (performed by a toggle switch or by pressing the brake pedal).
How to setup
The installed parking sensors and control controller require programming. To enter the setup mode, you need to turn on the ignition, and then turn on the reverse, which supplies power to the control unit. An additional algorithm depends on the parking sensors model. For example, to enter the programming mode of the SPARK-4F product, you will need to press the turn signal lever 6 times. The control box display will show PI, allowing you to start the adjustment.
Before starting programming, the gear lever is placed in neutral position, the brake pedal is held down. The transition between menu sections is carried out with one click on the direction indicator lever (forward and backward). Entering and exiting the settings section is done by turning the reverse gear on and off.
To adjust the sensitivity of the rear sensors of the car, you need to put the car on a flat area, there should be no obstacles behind it. Ultrasonic sensors scan the area behind the machine for 6-8 seconds, then an audible signal is heard, accompanied by an indication on the control device. Some assistants are equipped with a screen that can be installed in different positions. Screen orientation is selected in the corresponding section of the menu.
You can select the duration of the beeps that will be emitted when an obstacle is detected. Some of the devices take into account the towing hook or spare wheel that is located at the rear of the machine. The controller remembers the offset of these elements and takes it into account when the sensors are working. Some products have a sensor signal amplification mode. The owner empirically selects the desired value, and then re-adjusts the sensitivity of the elements.