
Replacing the sensors of the BMW X5 E53 engine management system

Upon completion of the replacement of the engine parameter sensors, it is necessary to read the information about the malfunction from the ECU‑KSUD memory of the “DME” system memory. Troubleshoot and clear the memory of information about the malfunction of the memory.
The BMW X5 E53 crankshaft speed sensor is installed under the starter and must be replaced in the following order. Switch off the ignition and remove the booster plate. Unblock the cable and disconnect it from the engine crankshaft speed sensor (23, see Fig. 3.3). Loosen screw (24) and remove sensor.
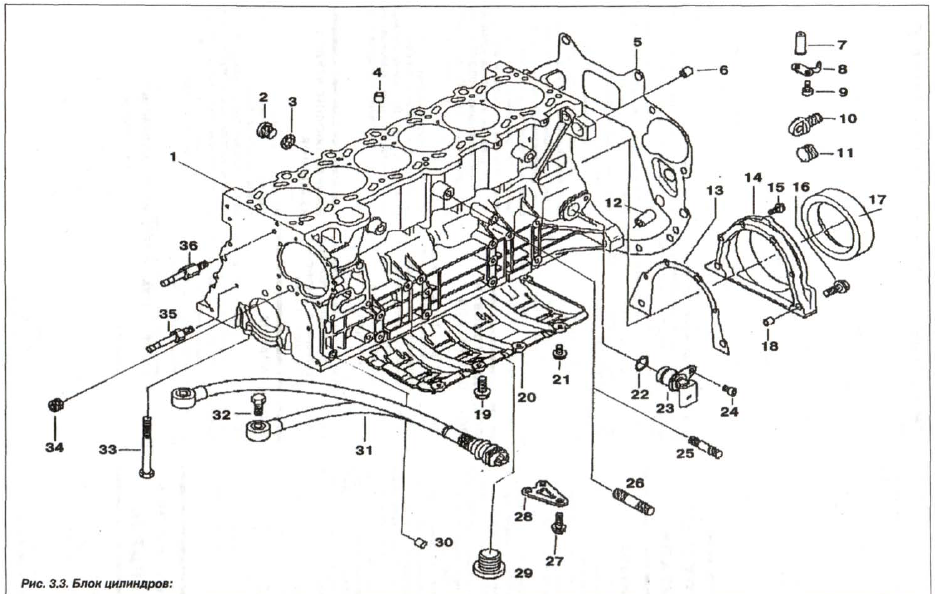
1 - cylinder block; 2—threaded plug (M14x1,5); 3— sealing ring; 4 - centering sleeve (13,5); S - shield; 6, 30 - centering sleeve (10,5); 7, 8 - nozzle; 9 - bolt (M6x16); 10 - socket; 11 - cover; 12 - centering sleeve (14,5); 13 - seal: 14 - stuffing box cover; 15,16 — bolt (M8×32); 17—omentum; 18 - centering sleeve (10,5); 19—bolt (M8×22); 20 - oil level sensor; 21 - bolt (M6x12); 22—sealing ring (17×3); 23 - crankshaft sensor; 24 — bolt (M6×16); 25—fork (M8×35); 26 - fork (M10 × 40); 27—bolt (M8×22); 28—intermediate insert; 29—threaded plug (M24×1,5); 30—centering sleeve (13,5); 31—knock sensor; 32 —bolt (M8×30); 33 —bolt (M10×92); 34 - screw cap (M14×1,5); 35, 36 - cover pin
The intake camshaft position sensor (35, see Fig. 3.63) is located in the cylinder head, it must be replaced in the following order.

1, 19 - socket; 2—nut; 3—protective cover; 4 - overlap; 5, 28, 31, 33, 39 - sealing ring; 6, 23 - locating pin; 7—rubber-metal hinge; 8, 9 - blind nut; 10 - sealing washer; 11—seal; 12, 13, 14 - profile joint; 15, 37—sealing ring (17×3); 16, 35—camshaft sensor; 17, 34 - bolt (M6x16); 18 - precision bolt; 20 - plug with a sealing ring; 21 - hook flange; 22—slide; 24 - nut M6; 25— jumper "dough"; 26 - bolt (M6x10); 27—nut M8; 29, 32—hollow bolt; 30—oil line; 36-EMK; 37—ring (17×3); 38 - piston; 39—spring; 40 - cylinder head; 41 - metal seal; 42—executive block; 43—oil filler cap; 44 - headdress
Switch off the ignition and remove the air filter housing. Remove the solenoid valve (36) from the D-VANOS control unit on the intake camshaft. Disconnect the loop on the cable box.
Connect a piece of auxiliary cable about 50 - 60 cm long to the sensor loop, which will make it even easier to install a new sensor. Loosen screw (34) securing sensor (35). Remove the sensor from the cylinder head. Pull out the end of the sensor cable until the auxiliary cable snaps into place in the cable box. Remove the sensor along with the cable connecting it to the system. Disconnect the auxiliary cable from the failed sensor. Attach the auxiliary cable AL of the new sensor. Insert the cable from the new sensor into the cable box using the auxiliary cable.
Check O-ring (33) for possible damage, replace if necessary. Replace the O-ring (37) of the D-VANOS solenoid valve (36) and tighten the valve to 30 Nm (3,0 kgfm).
The exhaust camshaft position sensor of the BMW X5 E53 is located in front of the cylinder head on the exhaust side and must be replaced in the following order. Switch off the ignition and disconnect the sensor cable.
Remove the screw (17) that secures the sensor to the cylinder head. Remove the encoder (16) from the cylinder head. Check sealing ring (15) for possible damage, replace if necessary.
Switch off the ignition and remove the intake manifold. Loosen the bracket tab on the cable box and remove it. Loosen screws (32) and remove knock sensors from cylinder bank 1-3 and cylinder bank 4-6.
When installing, clean the contact surfaces of the knock sensors and their attachment points on the cylinder block. Install the knock sensors and tighten the mounting bolts (32) to 20 Nm (2,0 kgfm).
Lubrication system sensors (3 pcs.) are installed in two places. Two oil sensors are installed in the oil filter housing: temperature (10, see Fig. 3.16) and pressure (11), located diagonally.
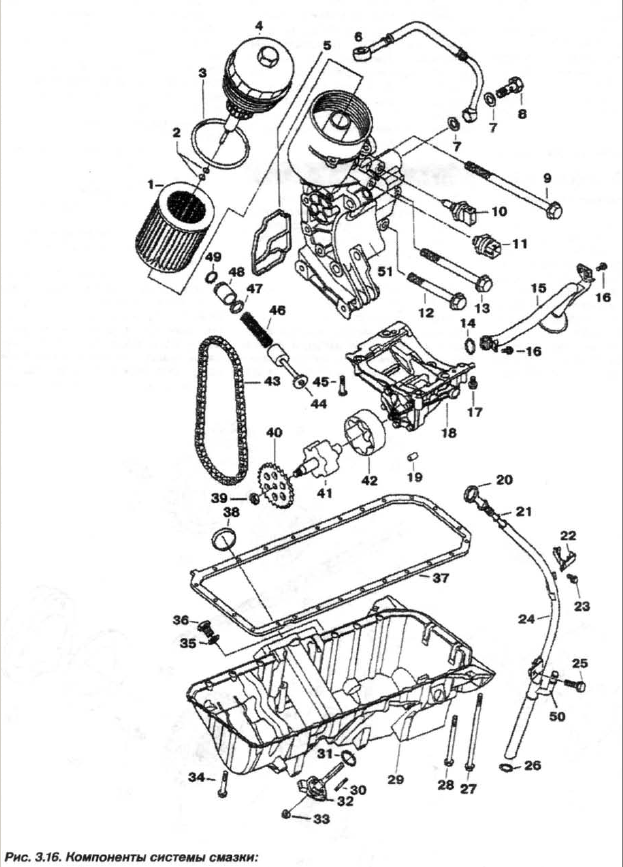
1 - replaceable element; 2 — ring (7,0×2,5); 3 — ring (91×4); 4 - filter cover; 5 - sealing gasket; 6—oil line; 7—sealing ring (A14x20); 8 - hollow bolt; 9 — bolt (M8×100); 10 - oil temperature sensor; 11—oil pressure sensor; 12—bolt (M8x55); 13 — bolt (148×70); 14 — ring (20×3); 15 - suction pipe; 16 — bolt (M6×16); 17,45—bolt (M8×55); 18—oil pump; 19 - sleeve; 20 - probe; 21 - ring (9x2,2); 22 - support; 23, 25, 27, 28, 34—screw; 24—guide; 26 — ring (19,5×3); 29 - oil pan; 30 - pin (M6×30); 31, 35 - sealing ring; 32-oil level sensor; 33—nut (M6); 36 - cork (M12 × 1,5); 37—sealed gasket; 38 - mounting ring; 39— nut (M10×1); 40—asterisk; 41 - inner rotor; 42—outer rotor; 43 - chain; 44—distributor; 46 - spring; 47—ring (17×1,8); 48—spacer sleeve; 49 - retaining ring (2x1); 50 - bypass pipe of the oil separator hose; 51 - oil filter housing
The temperature sensor is mounted slightly higher.
The oil temperature sensor must be replaced in the following order. Switch off the ignition. Unscrew the cover (4) of the oil filter so that the oil flows into the oil pan. Remove the air filter housing. Disconnect the oil temperature sensor circuit and unscrew the oil temperature gauge sensor.
When installing, tighten the oil temperature sensor to 27 Nm (2,7 kgf m). Check the oil level and top up if necessary.
The replacement of the BMW X5 E53 oil pressure sensor (11) must be carried out in the following order. Switch off the ignition. Unscrew the cover (4) of the oil filter so that the oil flows into the oil pan. Remove the air filter housing and disconnect the oil pressure sensor circuit. Unscrew the oil pressure sensor.
When installing, tighten the oil pressure switch to 27 Nm (2,7 kgfm). Check the oil level and top up if necessary.
Switch off the ignition. Unscrew the oil filter cap to allow oil to drain into the engine oil pan. Remove the gusset, remove the plug (36) and drain the engine oil. Dispose of the drained oil for recycling. Disconnect the loop from the oil level sensor.
Loosen nuts (33) and remove oil level sensor (32). Clean the sealing surface on the oil pan. Replace the o-ring (31) on the oil level sensor and the o-ring (3) on the oil filter cap (4). Pay attention to the locking pin (30).
Install and tighten the oil filter cap to 33 Nm (3,3 kgf m). Install reinforcement plate and tighten to 56 Nm + 90°. Fill the engine with oil and check its level.
The replacement of the BMW X5 E53 temperature sensor (19, see Fig. 3.18) of the incoming air must be carried out in the following order.

1 - rubber bushing; 2 - air intake; 3—shell; 4 - shock absorber; 5 - ring (91×6); 6 - bracket (34mm); 7—snob (42mm); 8—muffler/housing; 9—spacer sleeve; 10 - support; 11 - bolt (M6x12); 12—bell; 13 - hinge; 14 - valve xx; 15 - valve holder; 16 - replaceable filter element; 17 - T-bolt (M6x18); 16—executive block; 19—temperature sensor; 20 — ring (8×3); 21 - nut (MV); 22 - sleeve; 23—intake manifold; 24 - nut (M7); 25—hinges; 26—ring (7x3); 27— screw; 28 - adapter
Switch off the ignition and remove the nozzle cover. Disconnect the intake air temperature sensor circuit. Press the latch and remove the intake manifold temperature sensor.
When installing the sensor, check the o-ring (20) for damage and replace the o-ring if damaged.
The accelerator pedal (gas) position sensor is located in the passenger compartment and is connected directly to the pedal, it must be replaced in the following order. Switch off the ignition. Gently press the locking tab down and remove the accelerator pedal module (2) from the side.
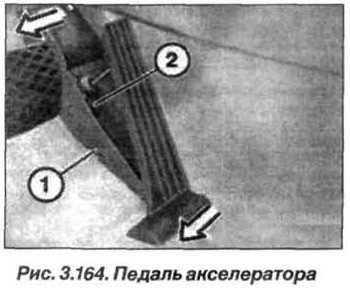
Disconnect the AL from the accelerator pedal module and remove the accelerator pedal position sensor.
Install the accelerator pedal position sensor in reverse order.
The coolant temperature sensor is located under the exhaust manifold in the cylinder head, next to the 6th cylinder and must be replaced in the following order. Switch off the ignition and remove the intake manifold. Disconnect the circuit and remove the coolant temperature sensor.
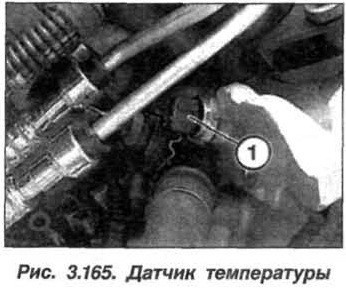
The temperature sensor must be installed in the reverse order, while it is necessary to install the temperature sensor in place and tighten it with a torque of 13 N m (1,3 kgf m). Reassemble the engine, check the coolant level and top up if necessary.
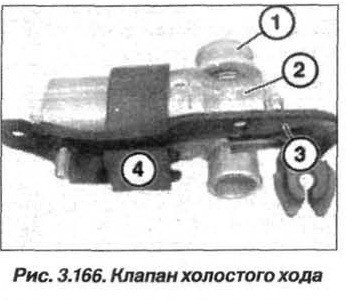
Replacing the idle valve BMW X5 E53. The idle air valve is located below the intake manifold, directly above the throttle body.
Replacement of the valve of regulation of idling it is necessary to carry out in a following order. Switch off the ignition and disconnect the "-" terminal of the battery. Remove the suction hose between the air filter housing and the throttle body. Disconnect the AL from the resonant valve (18) and the idle control valve (14).
- Loosen the cable box fixing screw and the idle air valve support screws (13). Remove the idle air valve from the intake manifold with bracket.
- Remove the idle air valve from the rubber support (4).

The gasket (1) between the idle air valve (2) and the intake manifold must always be replaced. When replacing the gasket, first install it on the intake manifold. - To facilitate installation of the idle valve, coat the inside of the seal with grease to make it slide easier.
Replacing the fuel pump relay should be done in the following order. Read the ECU-ECU error memory information from the DME system, turn off the ignition. Open the glove box and remove it.
- Loosen the screws and pull the fuse box down (without disconnecting the cable).
- Remove the relay from the fuel pump.
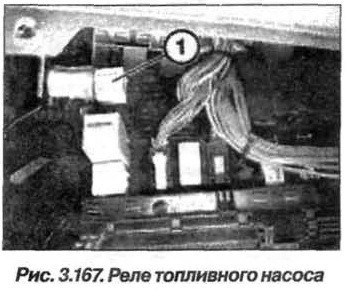
Attention!
After removing the fuel pump relay, when the ignition key is turned to the start position, the fuel pump does not turn on and the engine does not start.
The installation of the fuel pump relay must be done in reverse order, while reading the ECM fault memory information from the DME system. Check the logged error messages. Troubleshooting and deleting information from the fault memory.