Replacing pads Nissan Almera

Replacing the Nissan Almera pads is required when the pads are very worn. Similarly, the pads must be changed if the front ventilated brake discs or the rear drum brakes of the Nissan Almera are replaced. Installing old pads is not allowed. It is worth remembering that the pads need to be changed as a set, i.e. 4 pieces each. More detailed instructions on how to replace the front and rear Almera pads.
Measuring the front pads Nissan Almera
For work, you will need a jack, a reliable support and a set of standard tools. We remove the front wheel of your Nissan Almera and securely install the car on the factory mount. To freely remove the old pads, you need to slightly tighten the pads of the brake disc. To do this, inserting a wide-blade screwdriver through the caliper hole between the brake disc and caliper and leaning on the disc, move the caliper, sinking the piston into the cylinder.

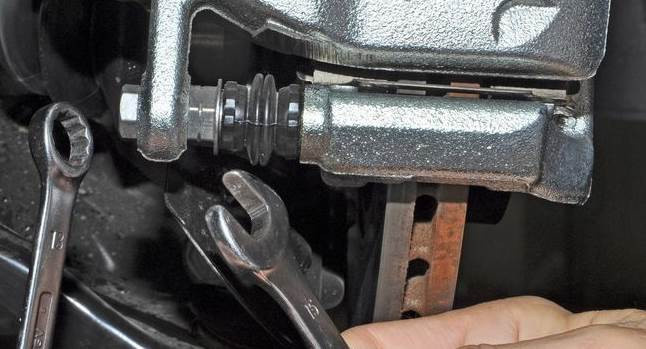
Next, using the “13” spanner wrench, unscrew the bolt securing the bracket to the lower guide pin, holding the finger with the “15” open-end wrench.
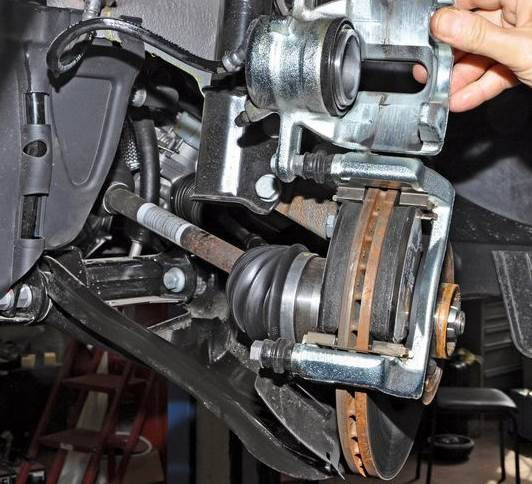
Rotate the brake caliper (without disconnecting the brake hose) on the top guide pin.
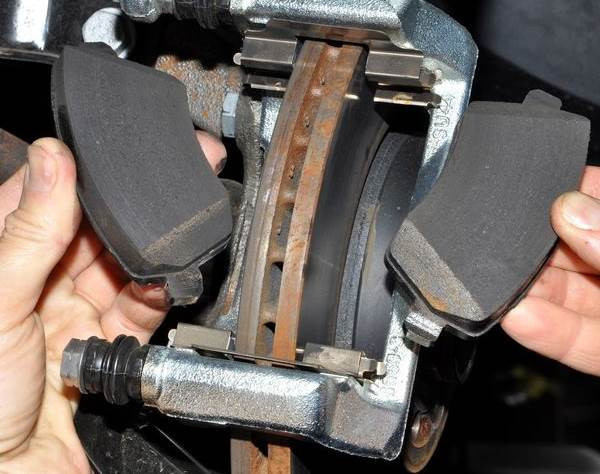
Remove the brake pads from their guide. Remove the two spring clips from the pads.
With a metal brush, we clean the spring retainers and the seats of the pads in their guide from dirt and corrosion. Before installing new pads, check the condition of the guide pin guards. We will replace a broken or loose lid.
To do this, remove the guide pin from the hole in the guide block and replace the cover.

To replace the top cover of the guide pin, it is necessary to unscrew the bolt securing the bracket to the pin and completely remove the guide pad bracket. The main thing is that the caliper does not hang on the brake hose, it is better to tie it with wire and hook it on the zipper, for example.
Before installing the pin, apply some grease to the hole in the guide shoe. We also apply a thin layer of lubricant to the surface of the finger.
We install new brake pads in the guide pads and lower (screw) the bracket.
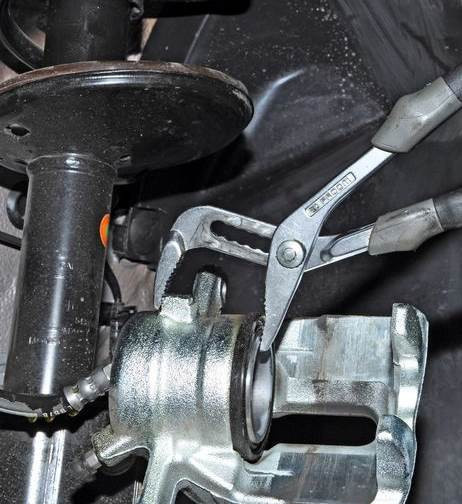
If the part of the piston protruding from the wheel cylinder interferes with the installation of the caliper on the brake pads, then with sliding pliers we sink the piston into the cylinder.
They also replaced the pads on the other side of the Nissan Almera. After replacing the pads, press the brake pedal several times to adjust the gaps between the pads and the ventilated discs. We check the fluid level in the tank and, if necessary, bring it to normal.
During operation, the surface of the brake disc becomes uneven, as a result of which the contact area of new, not yet run-in pads with the disc decreases. Therefore, during the first two hundred kilometers after replacing the Nissan Almera pads, be careful, because the braking distance of the car may increase and the braking efficiency will decrease.
Measuring the rear pads Nissan Almera
We removed the rear wheel and securely attached our Nissan Almera to the factory mount. Now you need to remove the drum. But for this, the rear pads must be reduced. If this is not done, it is almost impossible to remove the drum, due to wear on the inside of the drum that occurs during operation.
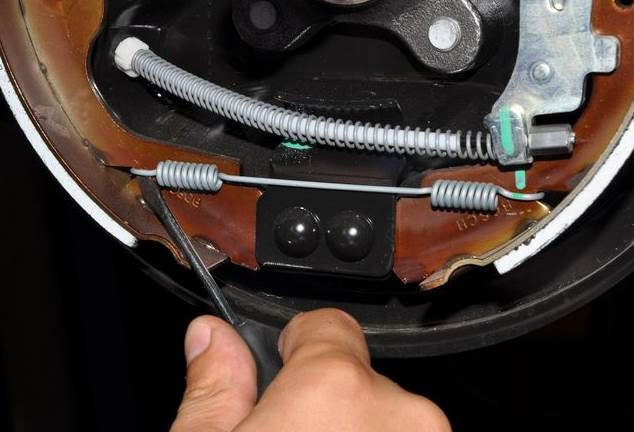
To do this, use a flathead screwdriver to turn the ratchet nut on the mechanism for automatically adjusting the gap between the shoes and the drum through the threaded hole in the brake drum, thereby reducing the length of the spacer bar. This moves the pads together.
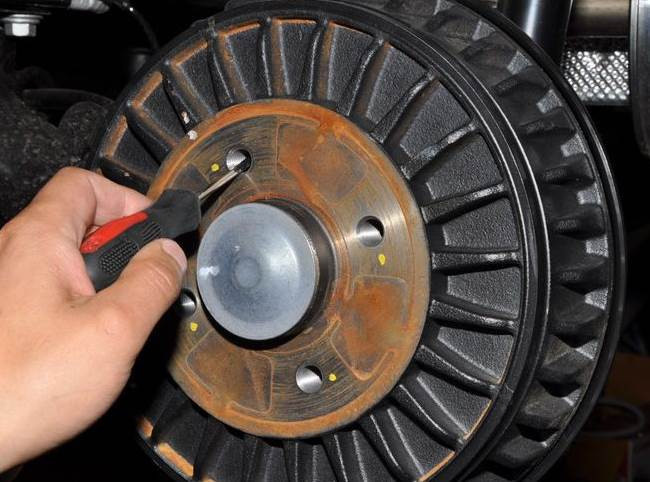
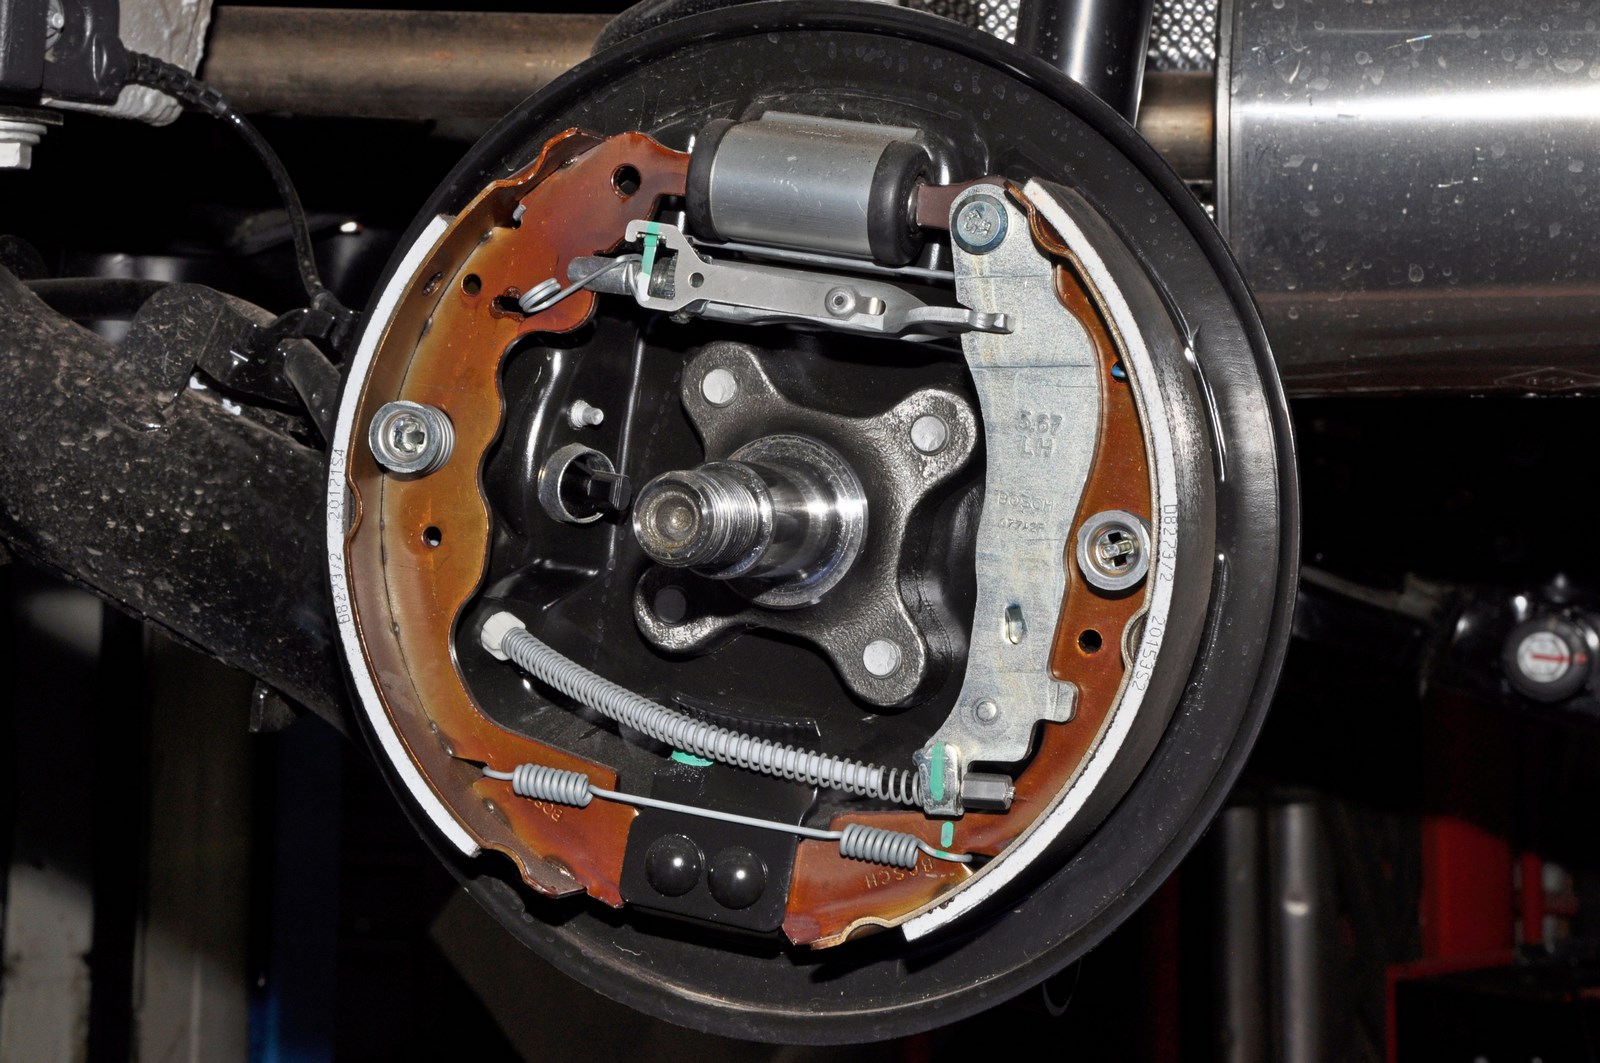
For clarity, the work is shown with the drum removed. We turn the ratchet nut on the left and right wheels by the teeth from top to bottom.
Next, using a hammer and chisel, the protective cap of the hub bearing was knocked out. We remove the cover.

Using the “36” head, unscrew the Nissan Almera wheel bearing nut. Remove the brake drum assembly with bearing.

See the diagram of the entire Nissan Almera brake mechanism in the following image below.

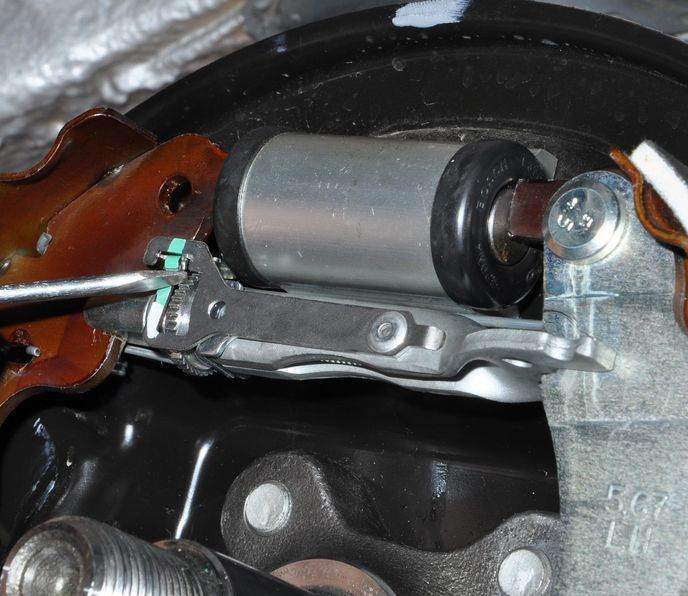
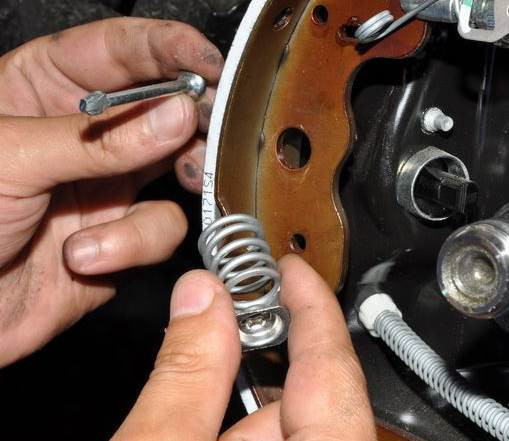
Having removed the drum, we proceed to disassemble the mechanism. While holding the front shoe support post, use pliers to rotate the post spring cup until the notch in the cup lines up with the post stem.
We remove the cup with the spring and take out the support column from the hole in the brake shield. Remove the rear strut in the same way.
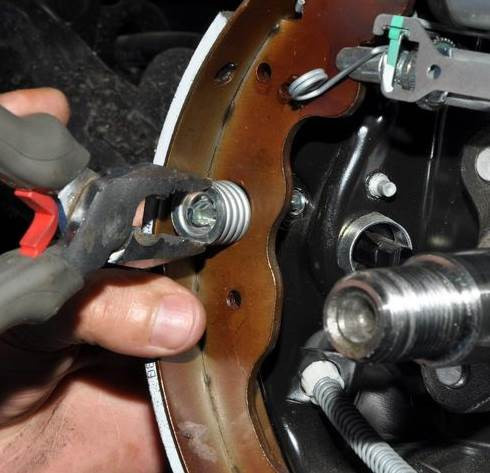
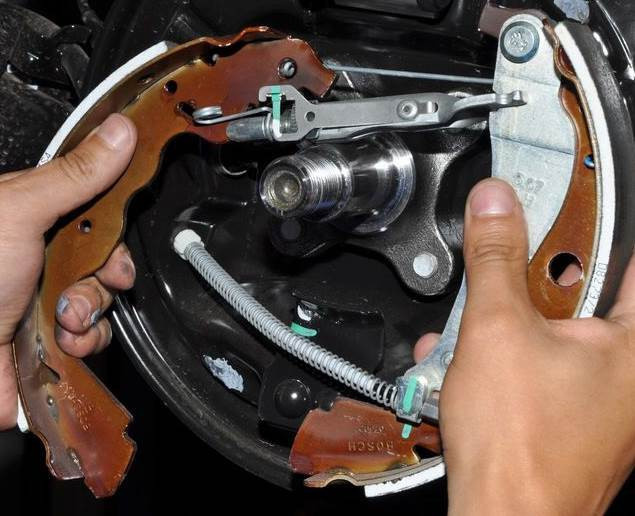
Resting with a screwdriver, unhook the lower hook of the clutch spring from the block and remove it. Carefully, so as not to damage the anthers of the brake cylinder, remove the rear shoe assembly from the brake shield.
Disconnect the parking brake cable from the rear shoe lever. Remove the front and rear pads along with space.
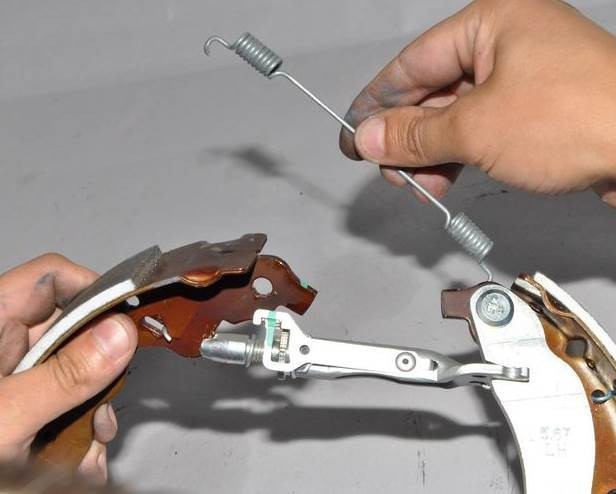
We unhooked the top link spring hook and the lash adjuster spring from the front shoe.
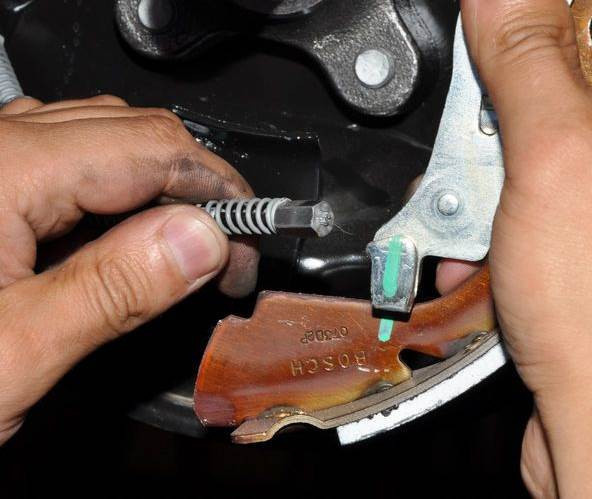
Disconnect the spacer and the rear brake shoe, remove the return spring from the spacer. We check the technical condition of the parts and clean them.
The mechanism for automatic adjustment of the gap between the shoes and the drum consists of a composite gasket for the shoes, an adjusting lever and its spring. It starts to work when the gap between the brake pads and the brake drum increases.
When you press the brake pedal under the action of the pistons of the wheel cylinder, the pads begin to diverge and press against the drum, while the protrusion of the regulator lever moves along the cavity between the teeth of the ratchet nut. With a certain amount of wear on the pads and the brake pedal depressed, the adjusting lever has enough travel to turn the ratchet nut one tooth, thereby increasing the length of the spacer bar, as well as reducing the clearance between the pads and the drum. Thus, the gradual elongation of the gasket automatically maintains the clearance between the brake drum and the shoes.
Before installing new pads, clean the spacer tip and ratchet nut threads and apply a light film of lubricant to the threads.
We set the automatic gap adjustment mechanism to its original state by screwing the tip of the spacer into the hole in the bar with your hands (the thread remains on the tip of the spacer and the ratchet nut).
Install new rear brake pads in reverse order.
Before installing the brake drum, we clean its working surface with a metal brush from dirt and wear products of the pads. Similarly, the brake pads on the right wheel were replaced (the thread on the tip of the spacer and the ratchet nut is correct).
To adjust the position of the brake shoes (the operation must be carried out after final assembly, when the drum is installed), press the brake pedal several times. We hold it in the pressed position, and then repeatedly raise and lower the parking brake (when moving the lever, you must hold the parking brake off button on the lever all the time so that the ratchet mechanism does not work). At the same time, clicks will be heard in the brake mechanisms of the rear wheels due to the operation of the mechanism for automatically adjusting the gaps between the brake pads and brake drums. Raise and lower the parking brake lever until the brakes stop clicking.
We check the level of brake fluid in the reservoir of the hydraulic drive of the system and, if necessary, bring it to normal. After installing the brake drum, tighten the hub bearing nut to the specified torque of 175 Nm. Don't forget you need to use a new Nissan Almera hub nut.