Replacement lamp Nissan Qashqai
Content
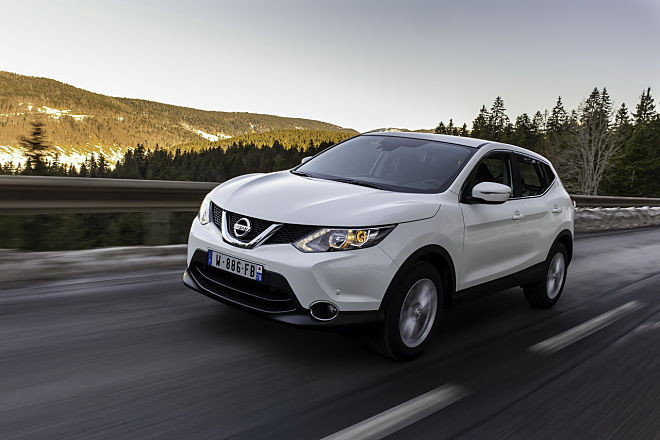
Nissan Qashqai is a world-famous crossover produced from 2006 to the present. Produced by the Japanese company Nissan, one of the largest in the world. Cars of this brand are distinguished by high reliability, unpretentiousness in maintenance. As well as an affordable price combined with a stylish appearance. The car is also popular in our country. In addition, since 2015, one of the St. Petersburg plants has been assembling its second generation for the Russian market.
Brief information about the car Nissan Qashqai:
It was first demonstrated as a novelty in 2006, at the same time mass production of the car began.
In 2007, the first Qashqai went on sale. By the end of the same year, more than 100 thousand cars of this brand had already been successfully sold in Europe.
In 2008, the production of Nissan Qashqai + 2 began, this is a seven-door version of the model. The version lasted until 2014, it was replaced by the Nissan X-Trail 3.
In 2010, production of the restyled Nissan Qashqai J10 II model began. The main changes affected the suspension and the appearance of the car. Even the optics have also changed.
In 2011, 2012, the model became one of the best-selling in Europe.
In 2013, the concept of the second generation of the J11 car was introduced. The following year, the new version began to circulate.
In 2017, the second generation was restyled.
In Russia, the production of an updated second-generation car began only in 2019.
Thus, there are two generations of Qashqai, each of which, in turn, has undergone restyling. Total: four versions (five, considering seven doors).
Despite the fact that significant changes have affected the appearance of the car, including its external optics, there are no fundamental internal differences. All models use the same types of lamps. The principle of replacing optics remains the same.
List of all lamps
The following types of lamps are involved in the Nissan Qashqai:
| Goal | Lamp type, base | Power, W) |
|---|---|---|
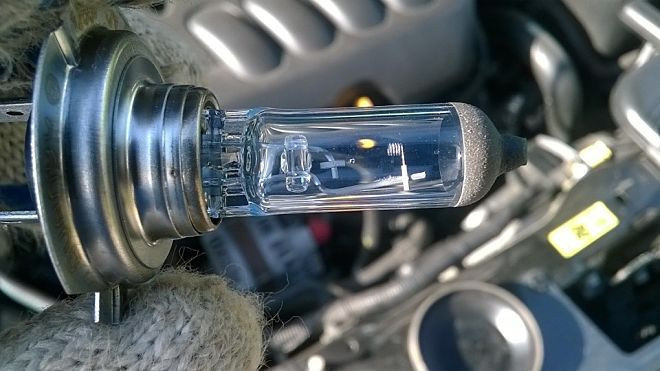
| Low beam lamp | Halogen H7, cylindrical, with two contacts | 55 |
| High beam lamp | Halogen H7, cylindrical, with two contacts | 55 |
| Fog | Halogen H8 or H11, L-shaped, two-pin with plastic base | 55 |
| Front turn signal lamp | PY21W yellow single contact bulb | 21 |
| Turn signal lamp, reverse, rear fog | Orange single-pin lamp P21W | 21 |
| Lamp for lighting rooms, trunk and interior | W5W small single contact | 5 |
| Brake signal and dimensions | Two-pin incandescent lamp P21/5W with metal base | 21/5 |
| Repeater turn | Single contact without base W5W yellow | 5 |
| Upper brake light | LEDs | — |
To replace the lamps yourself, you will need a simple repair kit: a small flat screwdriver and a medium-length Phillips screwdriver, a ten socket wrench and, in fact, spare lamps. It is better to work with cloth gloves (dry and clean) so as not to leave marks on the glass surface of the lamps.
If there are no gloves, then after installation, degrease the surface of the bulbs with an alcohol solution and let it dry. Do not wave your hand at this time. This is really very important. Why?
If you work with bare hands, prints will definitely remain on the glass. Although they are not visible to the naked eye, they are fatty deposits, on which dust and other small particles will subsequently adhere. The light bulb will shine dimmer than it could.
And more importantly, the dirty area will get hotter, eventually causing the bulb to burn out quickly.
Important! Disconnect the negative battery terminal before starting work.
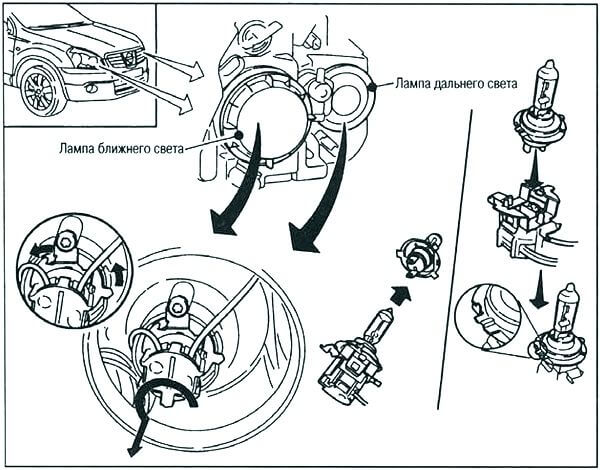
Front optics
Front optics include high and low beam, dimensions, turn signals, PTF.
dipped headlights
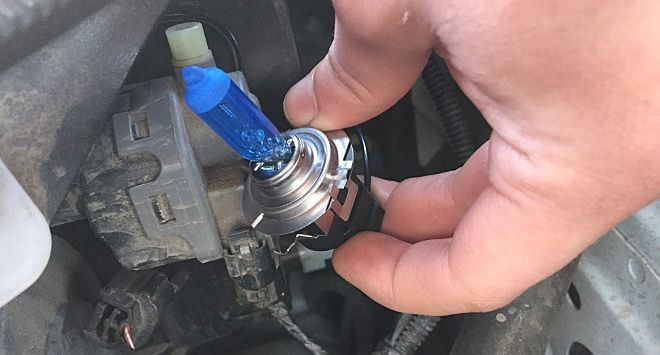
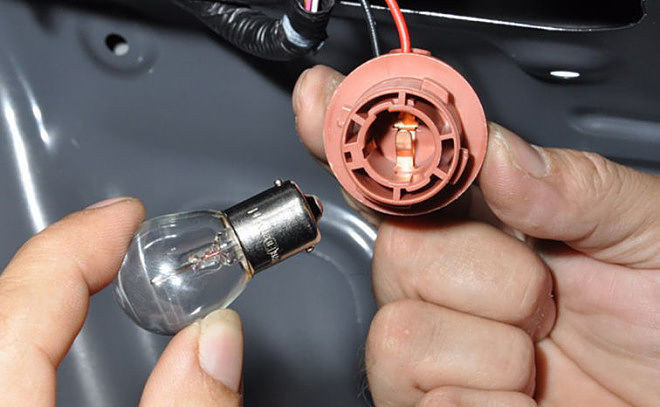
Before starting work, remove the protective rubber casing from the headlight. Then turn the cartridge counterclockwise and remove it. Remove the burnt out light bulb, put a new one in its place and install in the reverse order.
Important! Standard halogen lamps can be converted to similar xenon lamps. Its durability, as well as the brightness and quality of light, are much higher. In the future, these bulbs will need to be changed less frequently than incandescent bulbs. The price is, of course, somewhat higher. But the replacement is paid only in full.
High beam headlights
You can change your high beam just like you change your low beam. First, remove the rubber housing, then unscrew the bulb counterclockwise and replace it with a new one.
parking lights
To replace the front indicator signal, the cartridge rotates clockwise (unlike most others, where rotation is counterclockwise). Then the lamp is removed (here it is without a base) and replaced with a new one. Installation is in the reverse order.
Turn signals
After removing the air duct, unscrew the cartridge counterclockwise, unscrew the light bulb in the same way. Replace with a new one and install in reverse order.
Installing the side turn signal is carried out in the following sequence:
- gently press the turn signal towards the headlights;
- remove the turn signal from the seat (in this case, its body will simply hang on the cartridge with wiring);
- turn the chuck to disengage the indicator cover fastening;
- gently pull out the bulb.
Perform installation in reverse order.
Important! When removing the turn signals, dipped and main beam from the left Nissan Qashqai headlight, you must first remove the air duct. How to do this can be read below.
- A flat screwdriver will help to unhook the two hooked clips that secure the air duct.
- Disconnect the air intake tube from the plastic housing where the air filter is located.
- The air collector can now be easily removed.
After performing the necessary manipulations with the lamps, it is important not to forget to put them back, strictly following the sequence. To carry out maintenance of the right headlight, no additional manipulations are required; nothing prevents access to it.
PTF
The front fender makes it difficult to remove the front fog lights. It is attached with four clips that are easy to remove with a flathead screwdriver. So what you need to do is:
- release the power terminal of the fog lights by pressing the special plastic retainer;
- turn the cartridge counterclockwise by about 45 degrees, pull it out;
- after that, remove the light bulb and insert a new serviceable lighting element.
Carry out the installation of the side light in reverse order, remembering to install the fender liner.
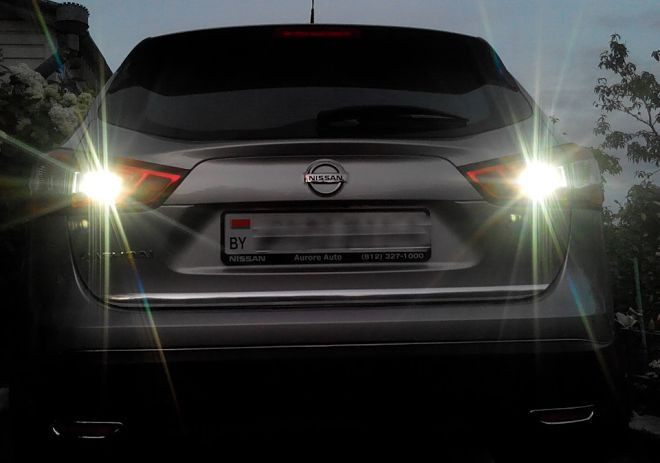
Rear optics
Rear optics include parking lights, brake lights, reverse signal, turn signals, rear PTF, license plate lights.
Rear dimensions
Replacing the rear marker lights is done in the same way as replacing the front ones. The cartridge must be turned clockwise and the bulb removed, replaced with a new one. The lamp is used without a base, its disassembly is simple.
Stop signals
To get to the brake light, you must first remove the headlight. The sequence of actions for replacing light elements is as follows:
- remove a pair of fixing bolts using a 10 socket wrench;
- carefully pull the headlight out of the socket on the car body, while the latches will resist;
- turn the headlight with its back towards you to gain access to the disassembled elements;
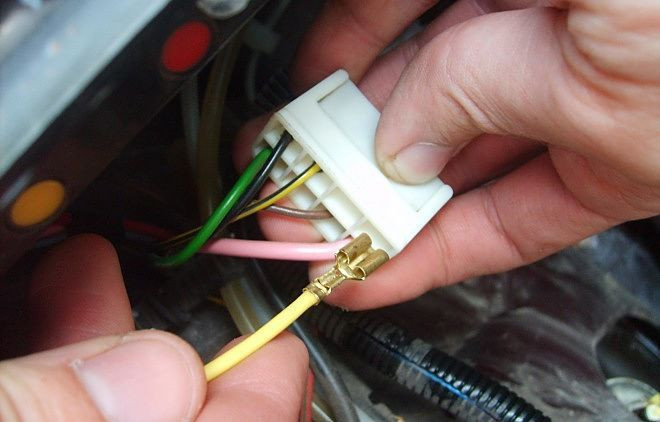
- we release the terminal with the wiring with a screwdriver, remove it and remove the rear optics;
- press the brake light bracket retainer and remove it;
- lightly press the bulb into the socket, turn it counterclockwise, remove it.
Install a new signal light and install all components in reverse order.
Reverse
This is where things get a little more problematic. In particular, to change the taillights, you will first need to remove the plastic lining from the tailgate. It is not as difficult as it seems - it is attached with ordinary plastic clips. So what you need to do is:
- unscrew the cartridge to the left;
- firmly press the base to the contacts of the cartridge, unscrew it counterclockwise and pull it out;
- insert a new signal light and install in reverse order.
When replacing reversing lights, the sealing rubber ring must also be checked. If it is in a dilapidated state, it is worth replacing it.
Turn signals
Rear direction indicators are replaced in the same way as brake lights. Also remove the headlight assembly. But there are some differences. Sequencing:
- unscrew the two fixing screws using a handle and socket size 10;
- carefully remove the lamp from the seat in the machine body; in this case, it is necessary to overcome the resistance of the latches;
- turn the back of the headlight towards you;
- release the clamp of the power terminal with a screwdriver, pull it out and remove the rear optics;
- press the lock of the direction indicator bracket and pull it out;
- turn the base counterclockwise, remove it.
Install all components in reverse order.
Rear foglights
The rear fog lights must be changed as follows:
- remove the plastic housing of the lamp by prying it with a flat screwdriver;
- press the latch to release the block with power cables from the flashlight;
- turn the cartridge counterclockwise by about 45 degrees;
- remove the cartridge and replace the bulb.
Perform installation in reverse order.
License plate light
To replace the light bulb that illuminates the car's license plate, you must first remove the roof. It is fixed with a latch on the spring, which must be pry with a flat screwdriver to disengage.
Then you need to separate the cartridge from the ceiling by turning it counterclockwise. The light bulb here does not have a base. To change it, you just need to remove it from the cartridge. And then install the new one in the same way.
In addition, LED brake lights are also located there. You can change them only together with the rest of the device.

Salon
This is with regard to the external lighting of the car. Also in the car there are optics. Includes lamps directly for interior lighting, as well as for the glove compartment and trunk.
Interior lamps
The headlight of the Nissan Qashqai has three bulbs covered with a plastic cover. To access them, you need to remove the cover. It glides easily with fingers. Then change the bulbs. They are mounted on spring contacts, so they can be easily removed. The taillight in the cabin is similarly arranged.
Glove compartment lighting
The glove box lamp, as the least used, lasts a long time. However, it needs to be replaced from time to time. You can do this through the side of the glove compartment. To do this, you need to remove the plastic side panel by gently prying it from the bottom with your fingers and pulling it towards you, and then down.
Insert your hand into the empty hole, find the socket with the light bulb and pull it out. Then replace the bulb and install all components in reverse order.
Important! If you have replaced factory incandescent bulbs with similar LED bulbs, the polarity must be observed when replacing. If the lamp does not light up after reinstallation, you need to turn it over.
Luggage compartment lighting
To remove the trunk light cover, pry it off with a flathead screwdriver. Then carefully unplug the power cord. And also remove the diverging lens, fixed with plastic fasteners. The light bulb here, as in the cabin, is fixed with springs, so it can be easily pulled out. After replacing it with a new one, you should not forget to put everything else in its place.
In general terms, the replacement of optics, both external and internal, is one of the simplest stages of self-maintenance of a car. Even a beginner can cope with such manipulations. And the simple schemes proposed in this article will help you figure it out.
If any difficulties still arise, YouTube will come to the rescue, where there is a huge variety of videos on this topic. And also be sure to watch the video below on this topic. Good luck with your lens replacement!