Oil change: how to check the oil in a car
Content
Oil change is the most routine maintenance procedure for any car. (important). An oil change is necessary to keep the moving parts of the engine lubricated. Without new, fresh oil, dirt and deposits in the engine, which will ultimately affect the performance of your car. While this is far from the only way to properly maintain a car, an oil change is essential.
You need to change your oil about every 3,000 miles or every six months, which is usually easy to keep track of. But sometimes you need to check your engine oil level yourself to determine when an oil change is needed and whether your engine is running properly. In this article, we will give you a step-by-step guide to checking your car's engine oil.
What do you need to check the oil in a car?
When inspecting the oil, you will need a few items:
- Lint-free rag. Old washcloths or T-shirts usually work well. Paper towels, depending on their softness and type, sometimes contain too much lint.
- your car's dipstick. The dipstick is part of the engine and is needed to check the oil level in the engine. Make sure you see this when you start. The dipsticks usually have a highly visible orange or yellow knob on the left side of the engine.
- flashlight. Depending on the time and place of the oil check, you may need a flashlight. You usually never want to use your phone's flashlight when you're working under the hood.
- Instructions for use. If you have any problems or questions, it's always best to consult the user manual first. Keep this close when you do an oil check.
Checking the oil in a car: a step by step guide
- Park the vehicle on a level surface with the engine off and open the hood. The hood release lever is usually located on the left side of the dashboard on the driver's side. You will also need to unlock the latch under the front edge of the hood to fully raise the hood.
- Let the car sit for a few minutes to let the engine cool down. Every time you check or work under the hood, you need to make sure it's cool and safe.
- After you have run the engine and found the dipstick, pull the dipstick completely out of the tube it is in.
- Wipe the oil off the end of the dipstick with a lint-free rag, then insert the dipstick back into the tube until it stops at the engine.
- Pull the dipstick completely out again and check the oil level indicator on the dipstick. It depends on the make and model of the car. Some dipsticks have two lines: the bottom one indicates the oil level is one quart, and the top one indicates the car's oil tank is full. But other probes are marked with min and max lines. As long as the oil is between these two indicator lines, the oil level is fine..
- Finally, insert the dipstick back into the engine and close the hood.
Inspection of the oil itself, if necessary
If the oil level is OK but something is still wrong with your vehicle, such as poor performance, check engine light is on, or increased engine noise, you can check your vehicle's oil level to see if you need it. replace. change the oil. When your dipstick is removed after step 5 in the previous section, take a close look at the oil itself. If it is dark, cloudy, or has a burnt smell, it is best to change that oil.
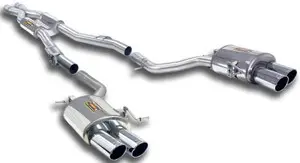
- An effective muffler can help you with your car
Performance Muffler has a team of automotive experts who can help with exhaust repairs and replacements, catalytic converter services, closed loop exhaust systems and more. We've been customizing cars in Phoenix since 2007.
Contact us for a free quote to service or improve your vehicle, and browse our blog for more automotive tips and tricks such as jumpstarting your car, winterizing your car and more.

