Do-it-yourself replacement of valve stem seals, guide bushings and valves on the VAZ 2106
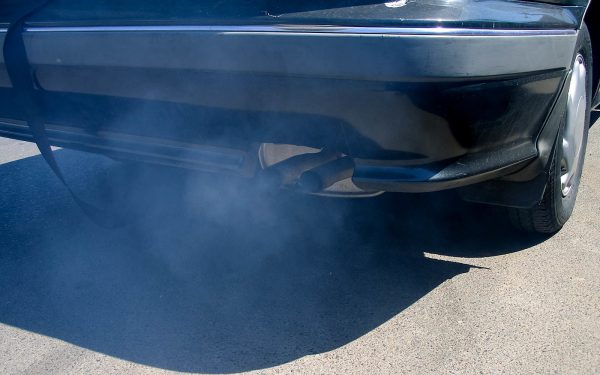
VAZ 2106, like any other car, needs periodic maintenance and repair during operation. If blue smoke was noticed from the exhaust pipe and at the same time the consumption of engine oil increased, then it is likely that the time has come to replace the valve stem seals. The repair procedure is simple and, with a minimum set of tools, even a motorist with little experience can do it.
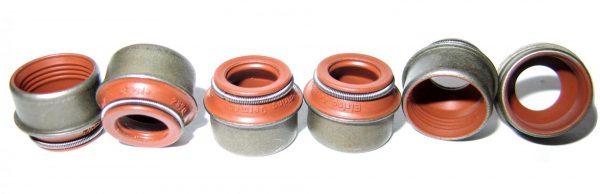
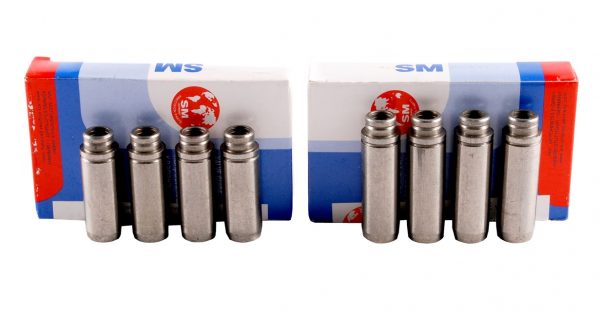
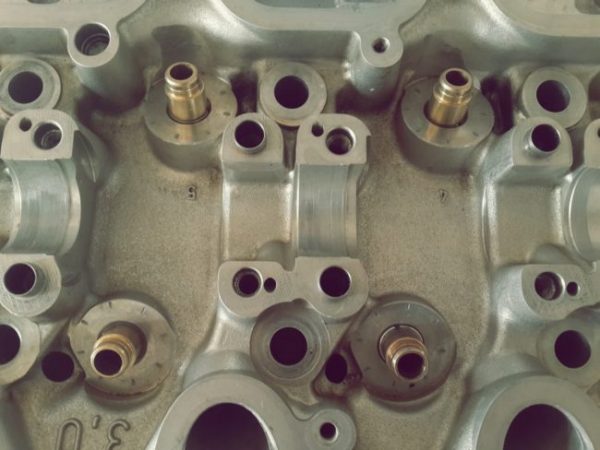
Oil scraper caps of the VAZ 2106 engine
Valve stem seals or valve seals primarily prevent excess oil from entering the engine. The part is made of a specially formulated rubber that wears out over time, leading to lubricant leakage. As a result, oil consumption increases. Therefore, it is worthwhile to understand in more detail what this part is, how and when to replace it with a VAZ 2106.
What are we for
The design of the power unit has inlet and outlet valves. The valve stem is in constant contact with the camshaft, resulting in an oily mist. The reverse part of the intake valve is located in the area of constant presence of small drops of fuel or in the area of hot exhaust gases, which is typical for the exhaust valve. Proper operation of the camshaft is impossible without lubrication, but getting it inside the cylinders is an undesirable process. During the reciprocating movement of the valve, oil is removed from its stem by the stuffing box skirt.
Learn more about VAZ 2106 engine malfunctions: https://bumper.guru/klassicheskie-modeli-vaz/poleznoe/ne-zavoditsya-vaz-2106.html
Signs of wear
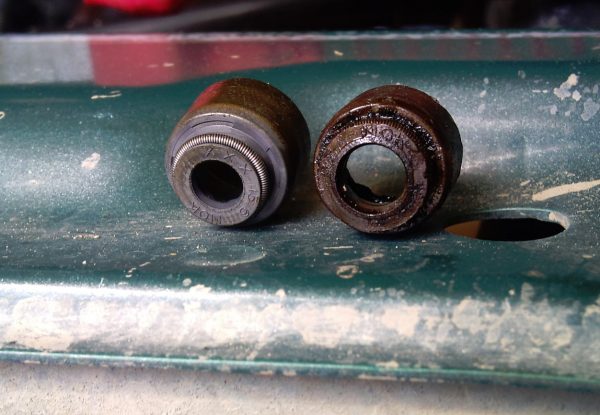
During engine operation, the valves are subjected to constant friction, as well as the aggressive effects of lubricants and exhaust gases. This leads to the fact that the rubber from which the rubbing part of the stuffing box is made hardens, the working edges of the cap wear out. Despite the high quality of the material, the part has to be changed over time. In order to extend the life of the caps, it is necessary to use high-quality engine oil.
The average service life of valve seals is about 100 thousand km.
The fact that the seals have become unusable and it is time to change them is evidenced by characteristic signs:
- bluish smoke comes out of the muffler;
- engine oil consumption increases;
- spark plugs are covered with soot.
Video: a sign of wear on valve stem seals

When to change and for what
When the valve stem seals do not cope with the function assigned to them, oil begins to seep into the cylinder. However, according to the indicated signs, one cannot be completely sure of the wear of the part in question, since lubricant can also enter the combustion chamber when the piston rings are damaged or worn. To determine what exactly needs to be replaced - rings or seals, you need to observe the exhaust while the car is moving. If, when braking the engine, you sharply press the gas pedal and characteristic bluish smoke appears from the exhaust system, this will indicate wear on the valve stem seals. The same situation will be observed after a long parking of the car.
The appearance of smoke during the described actions can be explained as follows: when the tightness between the valve stem and the guide sleeve is broken, oil enters the cylinders from the block head. If the piston rings are worn or their occurrence, the motor will behave somewhat differently.
Ring Seating - Rings are not able to come out of the piston grooves as a result of carbon deposits.
If there is a problem with the piston rings in the power unit, then smoke from the muffler will appear when working under load, i.e. when driving a car with a load, dynamic driving. Ring wear can be indirectly determined by a decrease in power, an increase in fuel consumption and the appearance of problems when starting the engine.
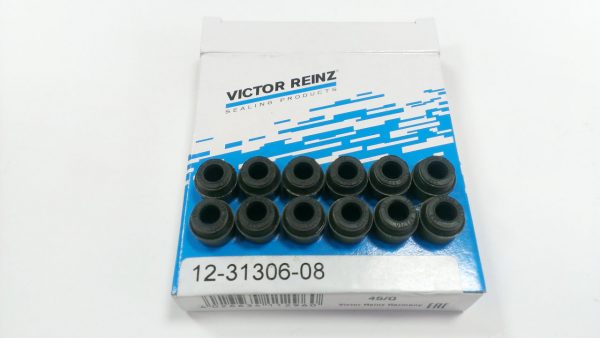
Having figured out how to identify the wear of the valve stem seals, it remains to find out which components to put on the VAZ 2106. Today, parts from different manufacturers are offered on the shelves of car dealerships. Therefore, vehicle owners have a completely logical question, which one to give preference to? The fact is that among quality products, there are many fakes. For the "six" we can recommend the installation of valve stem seals from Elring, Victor Reinz, Corteco and SM.
Replacing the valve stem seals
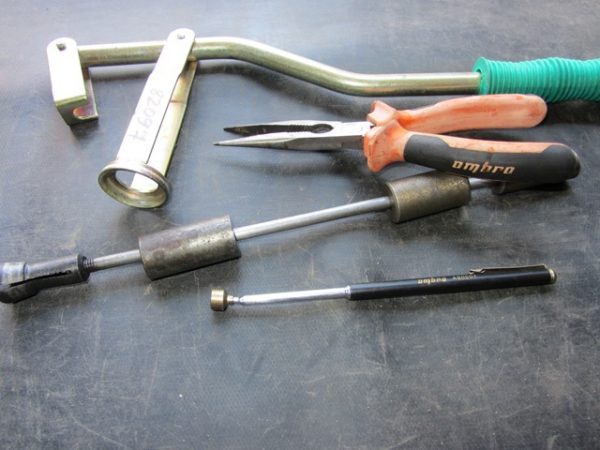
Before proceeding with the replacement of valve seals, it is necessary to prepare a tool:
- desiccant;
- tweezers;
- a set of keys;
- a rod of tin solder with a diameter of 8 mm;
- a hammer;
- long nose pliers or magnetic handle.
Then you can proceed with the repair procedure in the following sequence:
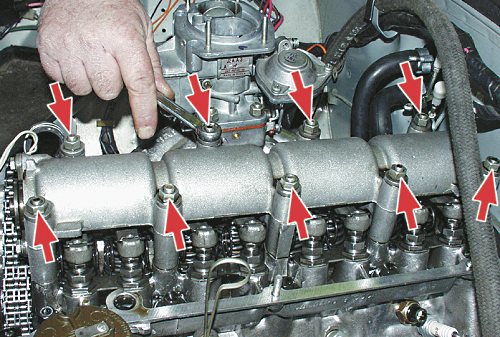
- Remove the negative terminal from the battery, air filter and valve cover.
 To remove the valve cover, you will need to remove the air filter and housing.
 - We turn the crankshaft so that the mark on the camshaft gear coincides with the protrusion on the bearing housing, which will correspond to the TDC of 1 and 4 cylinders.The timing mechanism must be set to TDC 1 and 4 cylinders
- We unbend the lock washer and loosen the gear mounting bolt.
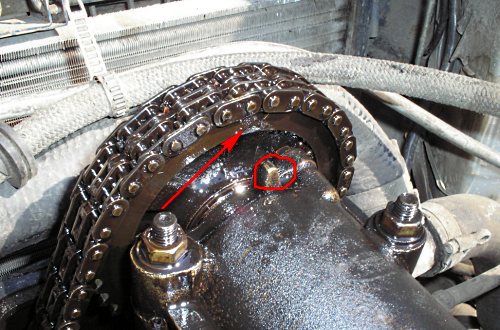
- We loosen the cap nut of the chain tensioner and, having squeezed out the tensioner shoe with a screwdriver, tighten the nut.To loosen the chain tension, you will need to slightly unscrew the cap nut
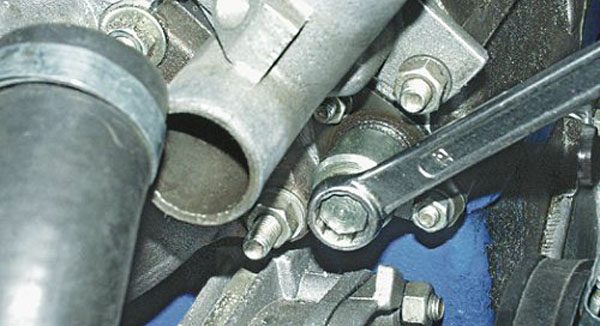
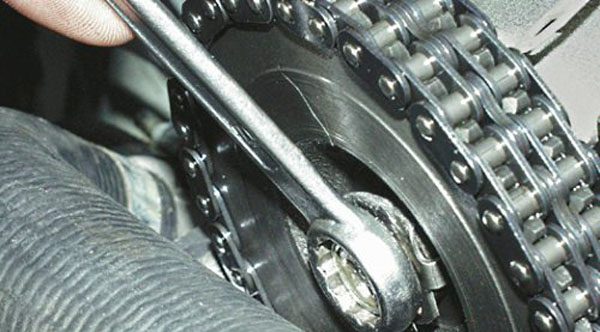
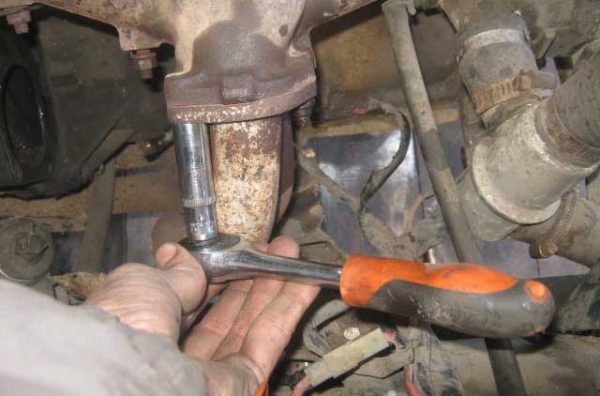
- Loosen the camshaft gear fastener.Using a 17 key, unscrew the bolt securing the camshaft sprocket
- To prevent the asterisk from falling and disconnecting from the chain, we connect them with a wire.
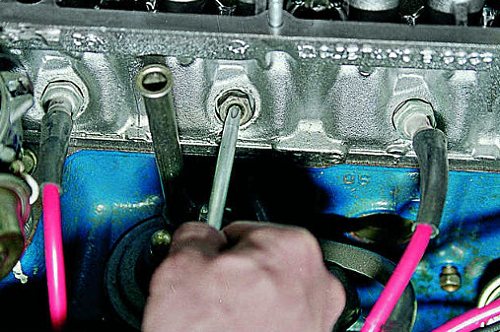
- We unscrew the fastening of the camshaft bearing housing and dismantle the mechanism, as well as rockers with springs.The fastening nuts are unscrewed and the bearing housing is dismantled, as well as rockers with springs
- We remove the high-voltage wires from the spark plugs, turn the candles themselves out and place a tin rod in the hole so that its end is located between the piston and the valve.To prevent the valve from falling into the cylinder, a soft metal bar is inserted into the candle hole.
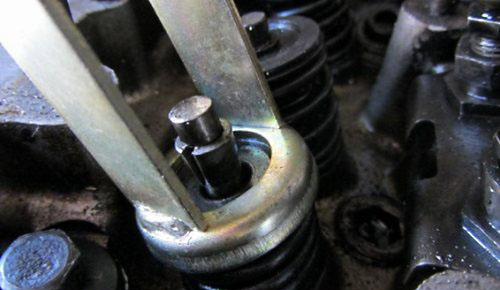
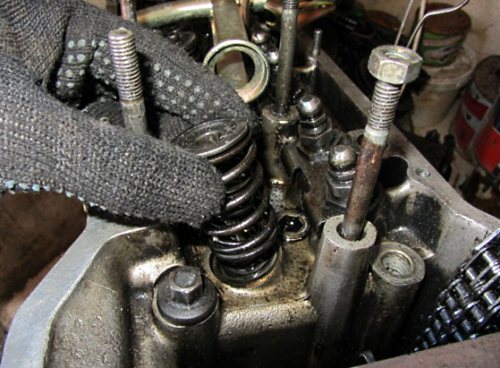
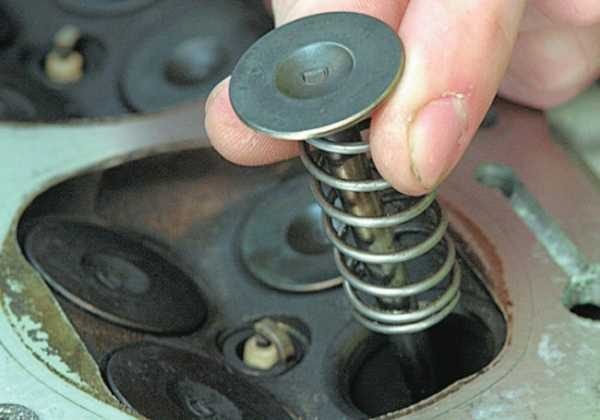
- With a cracker, we compress the springs of the first valve and, using long-nose pliers or a magnetic handle, remove the crackers.The cracker is fixed on a pin opposite the valve from which it is planned to remove the crackers. The spring is compressed until the crackers are released
- Dismantle the valve disc and springs.We dismantle the plate and springs from the valve
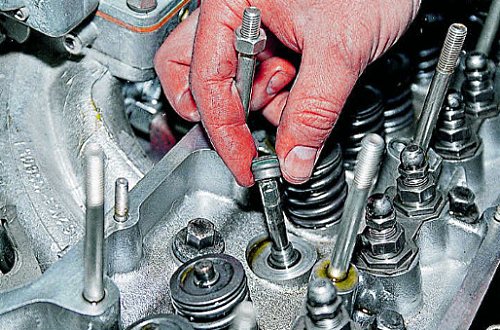
- We put a puller on the stuffing box and dismantle the part from the valve.The oil scraper cap is removed from the valve stem using a screwdriver or puller
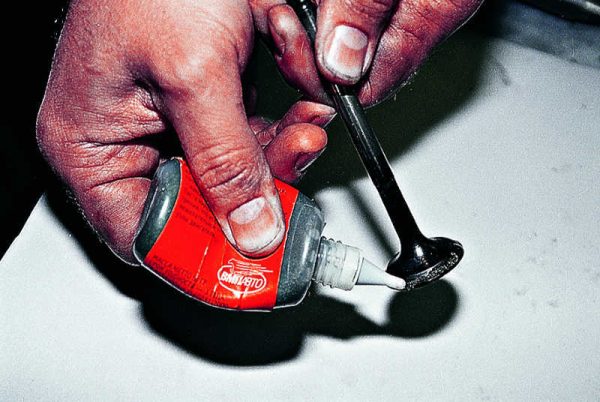
- We moisten the new cap with engine oil and press it with the same puller, only with the reverse side.Before installing a new cap, its working edge and stem are lubricated with engine oil.
- We carry out a similar procedure with 4 valves.
- We turn the crankshaft half a turn and replace the oil seals on 2 and 3 valves. Rotating the crankshaft and setting the piston to TDC, we replace all other oil seals.
- After replacing the parts, we set the crankshaft to its original position and assemble all the elements in the reverse order.
Video: replacing valve seals on a VAZ "classic"

During assembly, adjust the valve clearances and tension the chain.
Replacing engine valves VAZ 2106
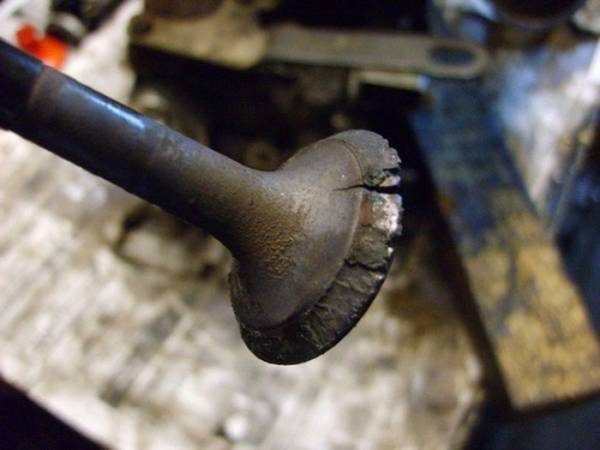
Quite rarely, but such a problem happens when a valve or several valves need to be replaced. If this part is damaged, compression in the cylinder will drop and power will decrease. Therefore, repair is a necessary procedure to restore the performance of the power unit.
Can valves be repaired?
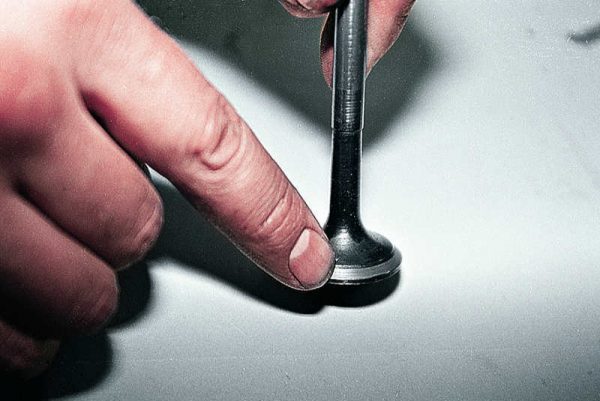
The most common reasons for replacing valves are when a part burns out or the stem bends for one reason or another, for example, with a weak tension or a broken timing drive. The easiest and most affordable way to repair is to replace the damaged element. The cost of valves for the VAZ 2106 is not so high as to try to restore this part, especially since this is not always possible.
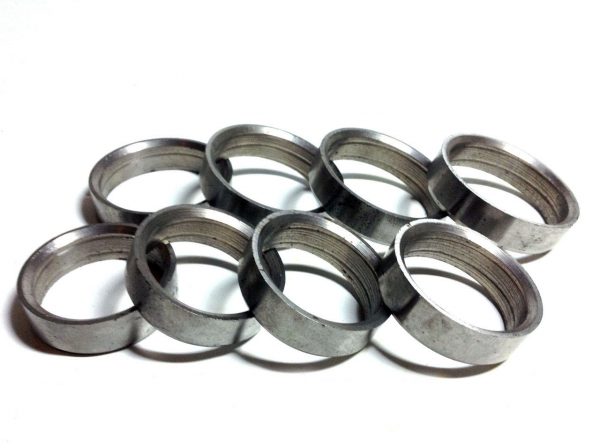
Replacing the guides
The valve guides in the cylinder head perform several functions:
- heat removal;
- setting the valve over the hole;
- ensuring minimum oil consumption.
The part is made of metal and is installed in the block head by pressing. Over time, the bushings wear out and need to be replaced, which is carried out in the following cases:
- oil consumption increases, and blue smoke comes out of the exhaust pipe;
- when the engine is running, a characteristic sound appears from the cylinder head;
- block head overhaul.
More about the cylinder head device: https://bumper.guru/klassicheskie-modeli-vaz/grm/poryadok-zatyazhki-golovki-bloka-cilindrov-vaz-2106.html
To carry out the work, you need to prepare such a tool:
- a set of open-end and spanner wrenches;
- set of heads;
- crank;
- torque wrench;
- screwdriver;
- pliers;
- mount;
- key to rotate the crankshaft;
- puller to unlock the valves;
- a hammer;
- mandrel for knocking out and pressing bushings;
- 8.025 mm reamer.
Then you can start the repair procedure:
- We dismantle the air filter housing and the filter itself.
- Drain the coolant from the cooling system.To drain the antifreeze, a plug is unscrewed on the cylinder block, and a faucet on the radiator
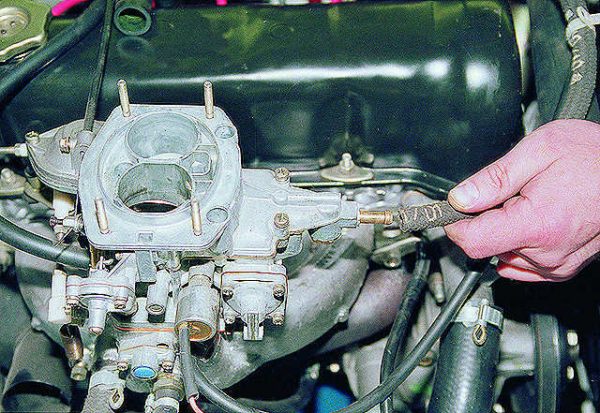
- Unscrew the carburetor hose clamps, and then remove the hoses themselves.We unscrew all the clamps securing the carburetor hoses and tighten them
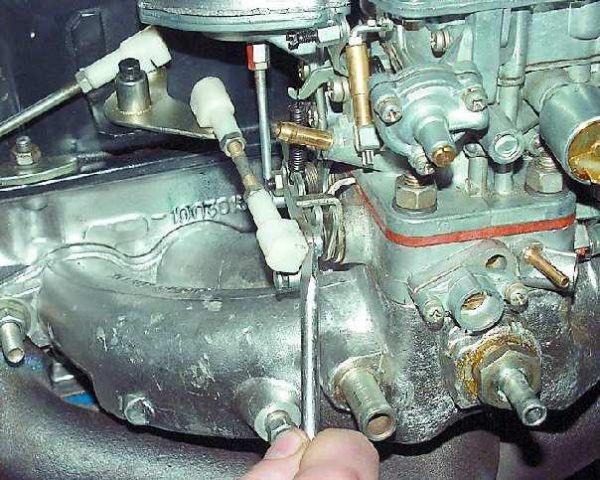
- We disconnect the thrust of the accelerator pedal and release the suction cable.
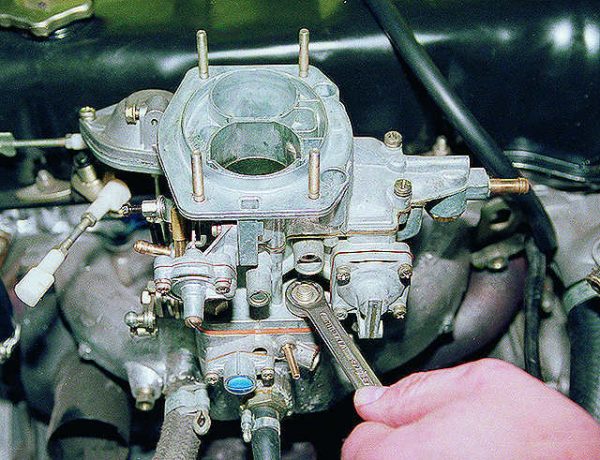
- We unscrew the fasteners of the carburetor and remove the assembly from the car.To dismantle the carburetor from the engine, unscrew 4 nuts with a 13 wrench
- We unscrew the fastening of the intake pipe to the exhaust manifold.We disconnect the exhaust pipe from the exhaust manifold by unscrewing the fasteners from four nuts
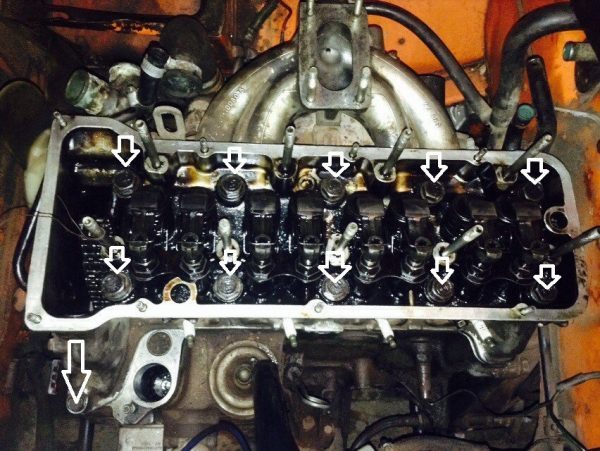
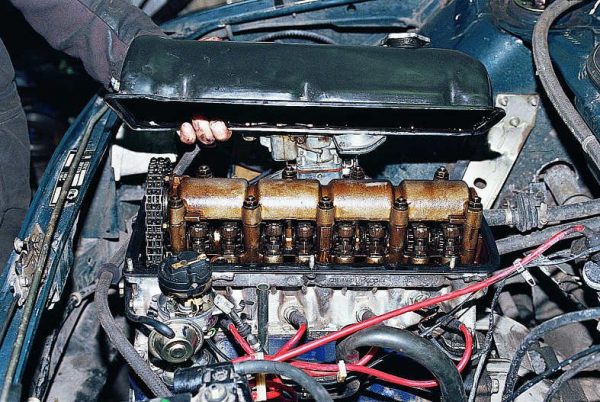
- With a 10 head or socket wrench, unscrew the nuts securing the valve cover, and then remove it from the motor.
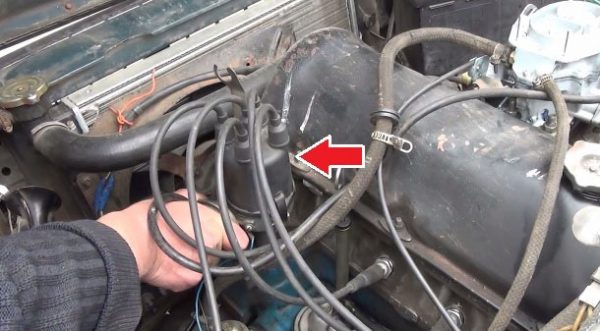
- We unscrew the fasteners of the distributor and remove it together with high-voltage wires.We dismantle the ignition distributor along with wires
- We unscrew the camshaft sprocket bolt, remove the gear and fix it together with the chain with a wire.
- We unscrew the fastening of the bearing housing and dismantle the assembly from the head of the block.
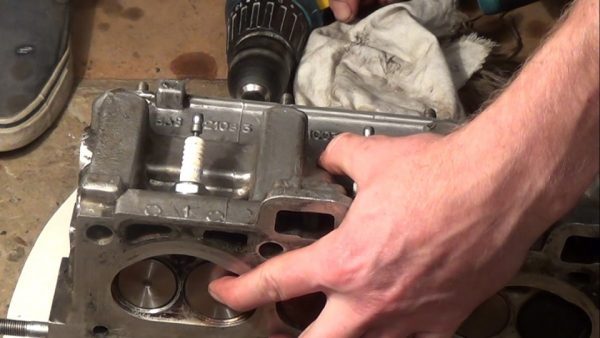
- We dismantle the cylinder head from the engine by unscrewing the corresponding fasteners.To remove the cylinder head from the engine, unscrew 10 bolts
- We use a puller to loosen the valves.
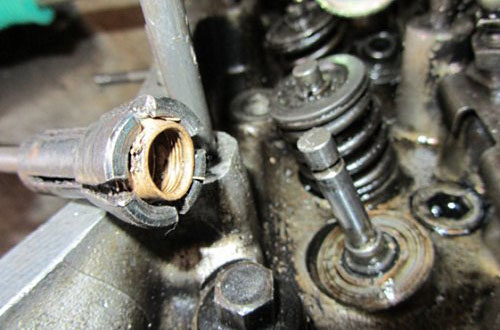
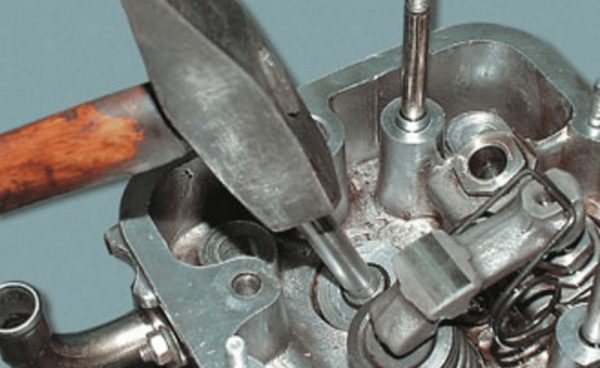
- We press out the guide bushing using a mandrel, on which we strike with a hammer.Old bushings are pressed out with a mandrel and a hammer
- To install a new part, we put on the retaining ring and, hitting the mandrel with a hammer, press the sleeve all the way into the plane. We first place the guides in the refrigerator for a day, and heat the cylinder head for five minutes in hot water at about 60 C.The new bushing is inserted into the seat and pressed in with a hammer and mandrel.
- Using a reamer, we adjust the hole to the desired diameter.Having installed the guide bushings in the head, it is necessary to fit them using a reamer
- Assemble in the reverse order.

The guide bushings for the intake valves are slightly shorter than those for the exhaust valves.
Video: replacing valve guides

Seat replacement
Valve seats, like the valves themselves, constantly operate at high temperatures. Over time, various types of damage may appear on the elements: burns, cracks, shells. If the head of the block has been subjected to overheating, then misalignment of the seat and valve is possible, which leads to loss of tightness between these elements. It should also be taken into account that the seat along the axis of the cam wears out faster than in other places.
To replace the seat, it must be removed from the seat. This can be done with different tools and devices:
- machine;
- electric drill;
- a hammer with a metal tip;
- old valve.
The saddle with the cylinder head can be dismantled in several ways:
- On the machine. The saddle is subjected to boring, the metal becomes thinner, the strength decreases. After processing, the rest of the part is turned and removed with pliers.
- Electric drill. An abrasive-type circle of a suitable diameter is clamped into the drill chuck and the metal of the seat is processed. In the process of grinding, the tension is loosened, which will allow you to remove the part from the seat.
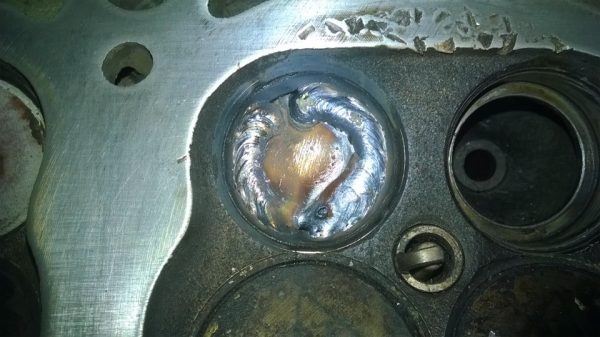
- Welding. An old valve is welded to the seat, after which both parts are knocked out with a hammer.
The new seat is installed as follows:
- To ensure the necessary tightness, the head of the block is heated on a stove to 100 ° C, and the saddles are placed in a freezer for 48 hours.
- Using a tool, a new part is pressed into the cylinder head.
- When the head has cooled, the saddles are countersinked.
The best option for chamfering, both in terms of speed and quality, is a machine. On special equipment, the part can be rigidly fixed, and the cutter can be clearly centered, which ensures high work accuracy. Since not every car owner has the opportunity to use a special machine, you can resort to an electric drill and cutters.
With this tool, you will need to cut three edges on the saddle:
- external (60˚);
- internal (30˚);
- central (45˚).
The central edge is the working surface with which the valve comes into contact.
Video: how to replace a valve seat

At the end of the procedure, the valves are ground and the cylinder head is assembled.
Lapping and installation of valves
Valves are ground in order to ensure maximum tightness of the combustion chamber. If air and fuel enter it, the stable operation of the engine will be disrupted. Lapping is necessary not only in the case of a major overhaul of the cylinder head, i.e. when replacing valves and seats, but also with minor defects in the contact plane.
The procedure can be performed in several ways:
- on special equipment;
- manual cutter;
- with their own hands.
In most cases, owners of cars of the VAZ family perform such work manually. In this case, you will need the following tools and materials:
- manual or electric drill with the ability to adjust the speed;
- abrasive paste;
- spring;
- kerosene.
The spring should be of such rigidity that it can be squeezed by hand without much difficulty.
After preparing the tools, you can get to work:
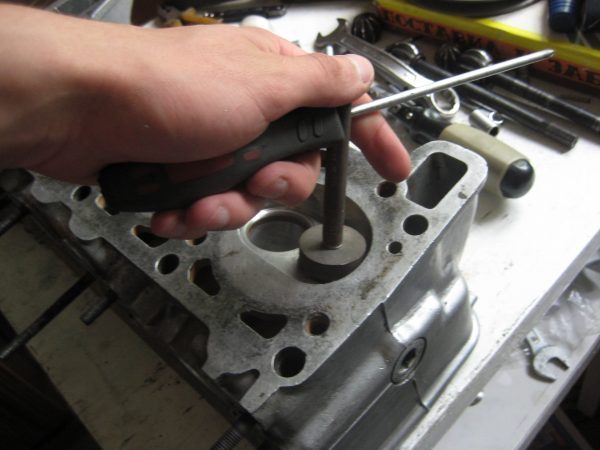
- We put a spring on the valve stem and install it in place in the cylinder head.To grind the valves on the stem put on a spring
- We insert the valve stem into the drill and clamp it.
- Apply abrasive paste to the lapping surface.Abrasive paste is applied to the lapping surface
- We rotate the valve manually or with an electric drill at low speed (500 rpm) in both directions.The valve with the stem clamped into the drill chuck is lapped at low speed
- We grind the planes until they become dull.After lapping, the working surface of the valve and seat should become matte
- After completing the procedure with all the valves, we wipe them with kerosene, and then clean them with a clean rag.
The valves are installed in the reverse order of disassembly.
Valve lid
КThe valve cover protects the timing mechanism from external influences, as well as from leakage of lubricant to the outside. However, over time, oil smudges can be observed on the engine, which are the result of gasket damage. In this case, the seal needs to be replaced.
About the chain drive device: https://bumper.guru/klassicheskie-modeli-vaz/grm/kak-vystavit-metki-grm-na-vaz-2106.html
Replacing the gasket
To replace the gasket, you will need to remove the cover. In this case, you will need the following tools:
- heads for 8 and 10;
- extension;
- ratchet or crank;
- pliers.
Next, we proceed with the dismantling procedure:
- We unscrew the nuts securing the air filter cover, remove it and the filter itself.
- We unscrew the nuts securing the housing and remove it, after pulling off the crankcase exhaust hose.
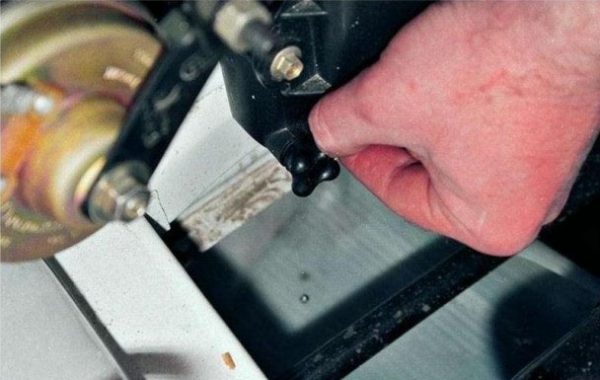
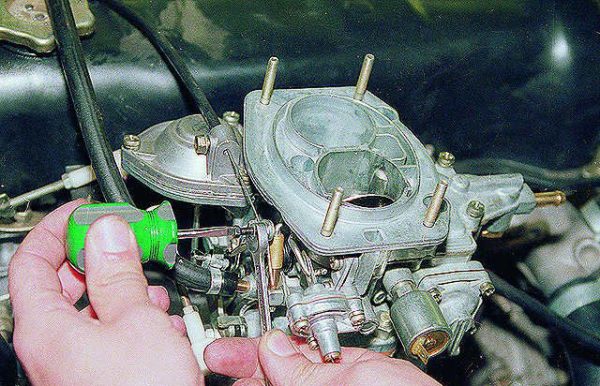
- Disconnect the carburetor throttle drive linkage.Disconnect the throttle link from the carburetor
- We remove the air damper control cable, for which we loosen the nut by 8 and the screw for a flat screwdriver.To disconnect the suction cable from the carburetor, loosen the nut and screw
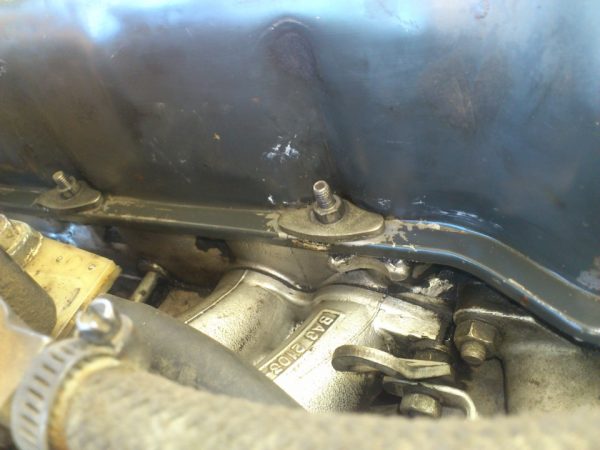
- We unscrew the fastening of the valve cover with a socket wrench or a 10 head.We unscrew the fasteners of the valve cover with a head or socket wrench by 10
- Let's dismantle the cover.After unscrewing the fasteners, dismantle the cover
- We remove the old gasket and clean the surface of the cover and cylinder head in the place where the seal fits.We remove the old gasket and clean the surface of the cover and cylinder head in the place where the seal fits
- We put on a new gasket and assemble in the reverse order.

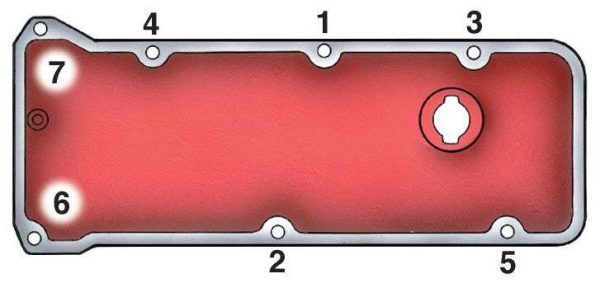
In order for the cover to be installed properly, the nuts are tightened in a certain order.
If it becomes necessary to replace the valve seals or the valves themselves with elements that ensure their normal operation, it is not necessary to seek help from a service station. Following step-by-step instructions, repair work can be done by hand.

