Replacing the heater radiator vaz 2115
Content
I believe that many car owners do not have a garage and, accordingly, the ability to completely disassemble one or another unit for replacement or repair. For this reason, it is necessary to invent non-standard ways to repair or replace parts without completely disassembling.
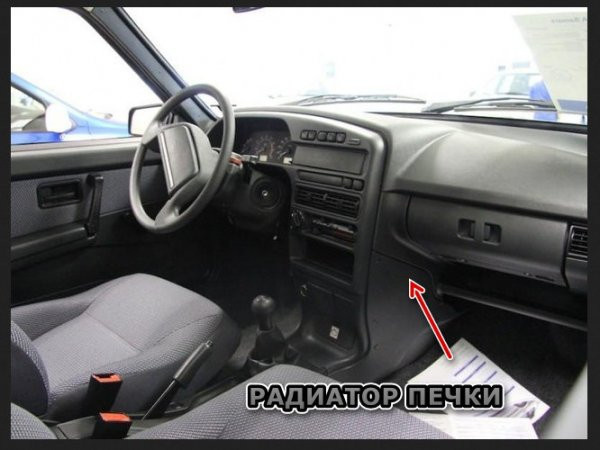
Recently, I had a heater (stove) radiator leak, and in order to get to it, I have to completely unscrew the dashboard. But if you don't have a garage, you don't want to do this. After studying a huge amount of information on the Internet, I found an excellent, and most importantly, an easy way to change the radiator on the stove.
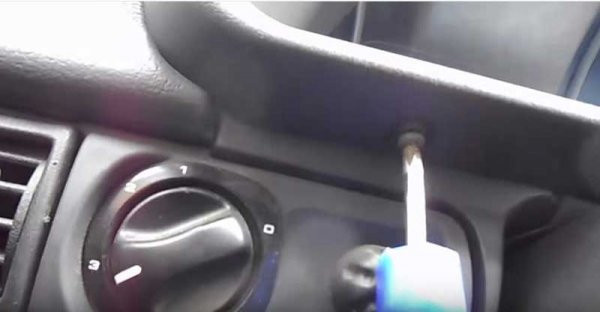
Loosen a few screws
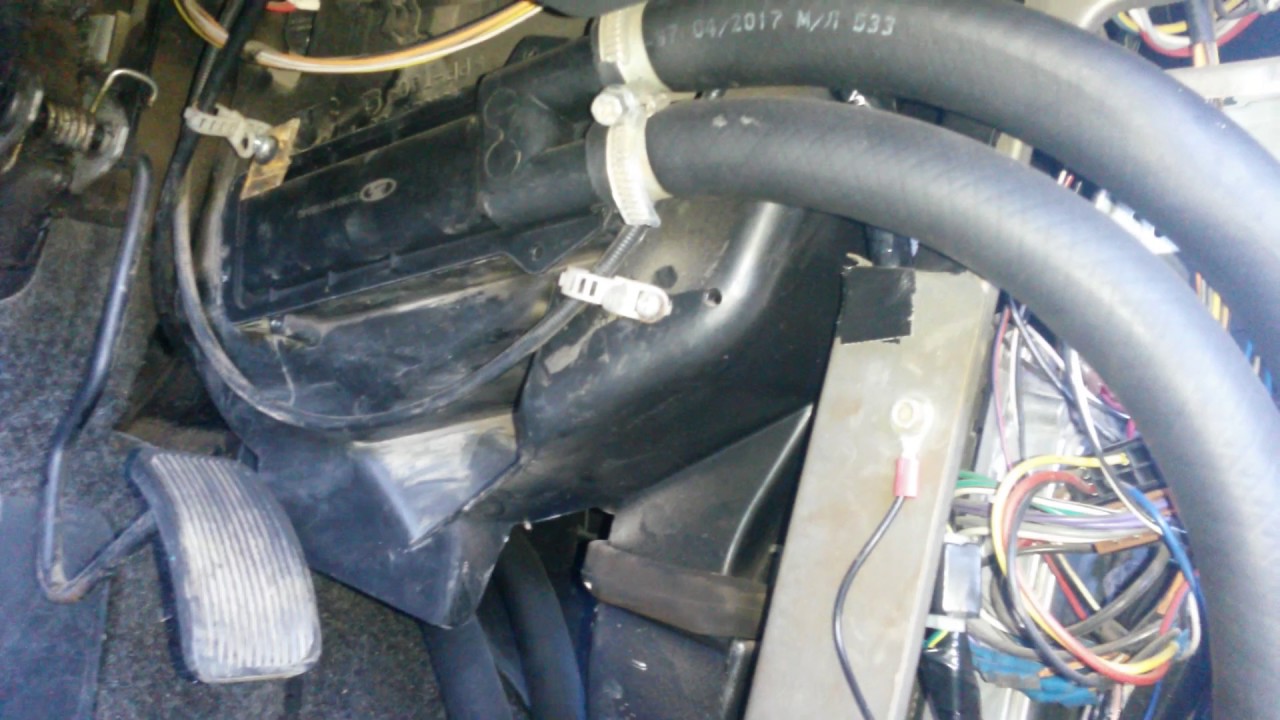
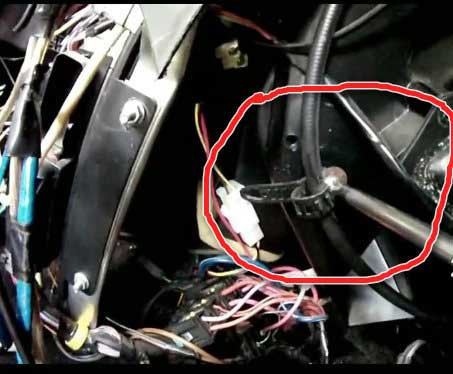
We unscrew the screws on the passenger side, the first two screws must be unscrewed with a screwdriver (they directly hold the ordered one), and the third screw with an 8 key or a cap (it will be much more convenient. And the fourth one is located on the driver’s side in the same place as the 3rd bolt. Hold the BRAIN, so to speak))).
After unscrewing the bolts, the board will have free play, which will allow you to move the torpedo and get to the radiator.
Drain ANTIFREEZE / TOSOL
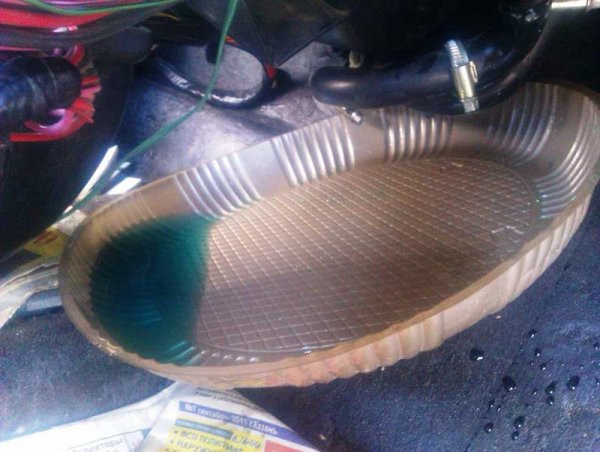
We unscrew the bolt, but before that we do not forget to put a container under the bottom into which the liquid will drain. It is worth unscrewing a little, gradually draining the liquid, and when most of it is drained, you can unscrew the plug of the expansion tank. But you should not do this right away, since the pressure will be strong and the liquid will pour out with a probability of 99.
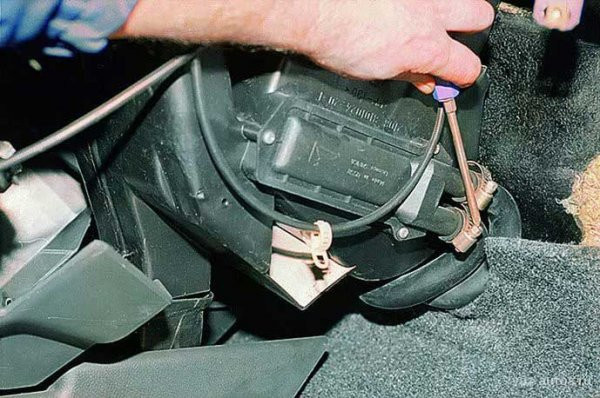
We unscrew the pipes
After the liquid has been drained from the system, it is necessary to unscrew the pipes suitable for the radiator. Be careful, liquid may remain in the radiator.
Then we unscrew the three screws that hold the radiator itself and take it out.
Be sure to clean the inside of the oven of leaves and other debris. Then we install a new radiator and assemble in the reverse order.
This method saved me a lot of time and did not require a complete disassembly of the dashboard, which is good news.
Inconvenient design solutions
Cars VAZ-2114 and 2115 are quite modern and quite popular cars of the economy segment.
But on these machines, as on most new models, there is one not very pleasant feature.
Increasing the comfort of the cabin and the design of the front panel, the designers significantly complicate the maintenance of the heating system.
The stove radiator in these cars is hidden under the panel and it is not so easy to get to it.
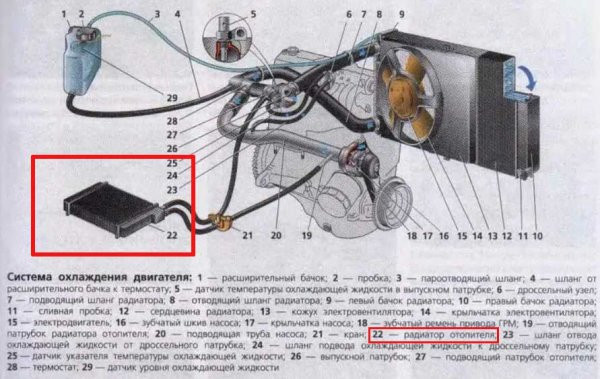
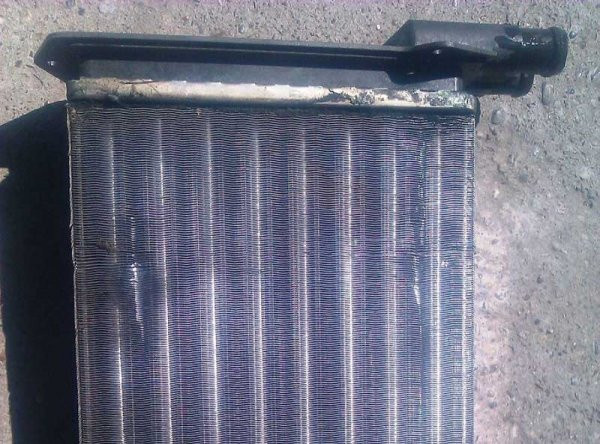
But the heating radiator is a rather vulnerable element of the cooling system. And if the interior heating has deteriorated, then in more than half of the cases the problems are associated with the heat exchanger.
And all this despite the fact that the element itself is practically not repaired, and often simply replaced.
The main reasons for replacement
There are not so many reasons why it may be necessary to replace the radiator of the internal heating system. One of them is the aspect of loss.
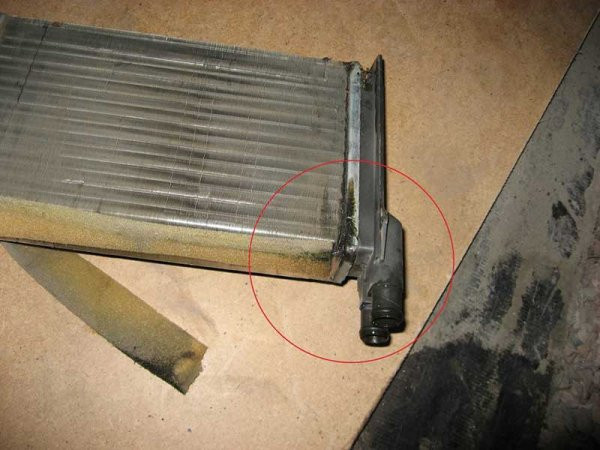
Heat exchangers are made of non-ferrous metals - copper or aluminum.
Gradually, these metals are oxidized under the action of the liquid, which leads to the appearance of cracks through which the coolant exits.

The second reason for replacing the stove radiator is clogging of pipes with dirt. The coolant circulating through the cooling system removes corrosion products, small particles, etc.
Also, the liquid cannot contain them by itself, and these contaminants settle on surfaces, including the stove radiator.
As a result, at first the heating system loses efficiency, and then (with severe pollution) it simply stops working.
In some cases, radiator blocks can be removed by washing them with chemicals.
But if the blockage of the pipes is severe, mud plugs can only be removed mechanically. And this can only be done with the radiator removed.
Before proceeding with disassembly, you must first make sure that there are problems with the radiator.
Therefore, the loss of this element is manifested by the appearance of traces of antifreeze on the floor of the cabin.
But damage to the radiator pipes or loss of tightness at the junction with the heat exchanger can lead to the same result.

A drop in heating efficiency can occur not only due to clogging of the radiator pipes, but also due to severe clogging of its cells.
Dust, fluff, foliage, insect remains get stuck between the cooling fins, making it difficult to transfer heat to the air.
But in this case, identifying the problem is very simple: turn on the stove fan at maximum power and check the air flow from the deflectors.
If it is not durable, the radiator needs to be cleaned, which is also impossible to do effectively without removing the element.
Also, the stove may stop heating due to the ventilation of the radiator, which often happens when replacing the coolant. Often the cause is also a malfunction of the elements of the cooling system, especially the thermostat.
In general, before removing the radiator from the stove, you should make sure that the cause of poor interior heating is hidden. And for this you will have to almost completely revise the cooling system.
Radiator replacement methods
There are two ways to remove the stove radiator on the VAZ-2113, 2114, 2115. The first involves the complete removal of the front panel, which is necessary to access the heat exchanger.
Please note that complete disassembly is a relative concept, since the panel itself is not removed from the car, but only separated from the body, which allows it to be brought closer to the radiator.
You will also need to move the torpedo itself.
The second way is without removing the panel. But it is not suitable for everyone, since in order to provide access it is necessary to make incisions in some places so that the lower part of the panel in the area of \uXNUMXb\uXNUMXbthe heat exchanger can be bent.
The disadvantage of the first method is the laboriousness of the work, since you will have to unscrew a lot of fasteners and disconnect the wiring, which is quite suitable for the panel.
As for the second method, the panel itself, in fact, will be damaged, although it is cut in places hidden from view.
Also, after the replacement is complete, you will need to think about how to reattach and secure the cut pieces.
But since the stove radiator can leak at any time, accessibility is very important, so the second method is preferable.
We select a replacement radiator
But before proceeding with the removal and replacement operation, you must first select a new heat exchanger.
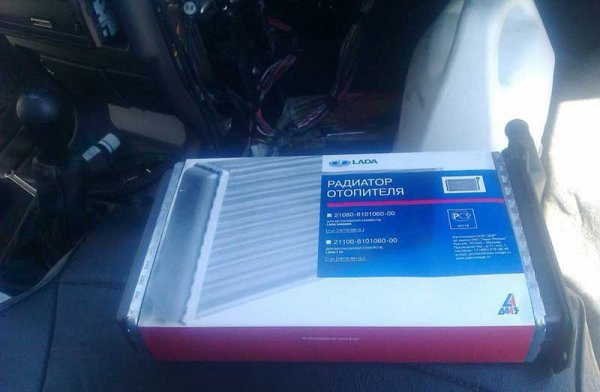
you can buy a stove radiator from the factory, catalog number 2108-8101060. But similar products DAAZ, Luzar, Fenox, Weber, Thermal are quite suitable.
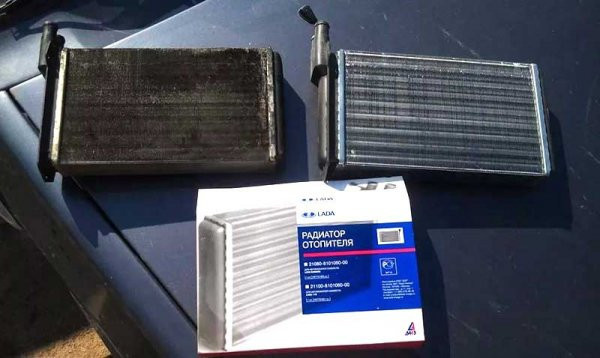
As for the material, it is recommended to use copper heat exchangers, but they are much more expensive than aluminum ones. Although not for everyone, many use aluminum products and are quite satisfied.
In general, the main thing is that the radiator is designed specifically for these cars.
On the VAZ-2113, 2114 and 2115 models, the designers used the same front panel layout, so the procedure for replacing them is the same.
Next, we will look at how to remove the radiator from the internal heating system using the VAZ-2114 as an example, and how this is done in different ways.
Change without removing the panel
But whichever method is used, the coolant must first be drained from the system. Therefore, you will need to stock up on antifreeze in the right amount in advance.
To begin with, consider the replacement method without removing the panel. As already mentioned, for this you have to make cuts somewhere.
To get the job done you will need:
- A set of screwdrivers of different lengths;
- Rags.
- Canvas for metal;
- A flat container for draining the remaining coolant from the radiator;
Having prepared everything and drained the coolant from the cooling system, you can get to work:
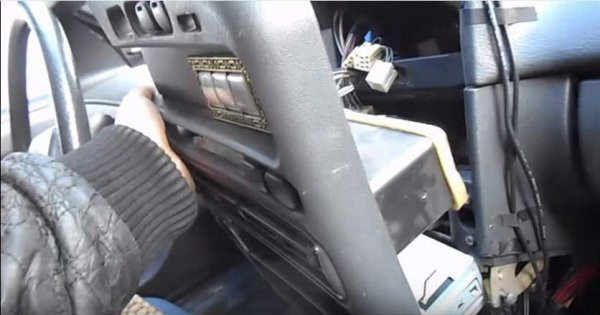
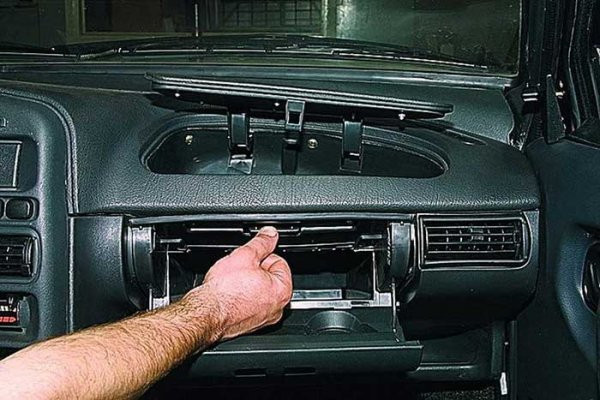
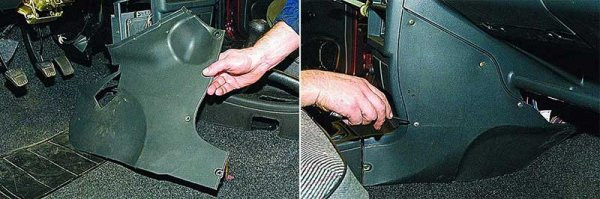
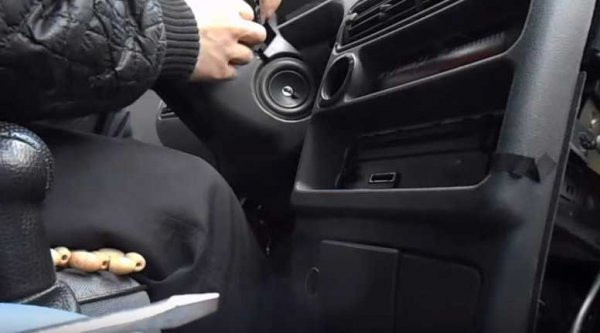
- We remove the glove box (glove box) from the panel, for which it is necessary to unscrew the 6 screws that hold it;

- Remove the side trims of the center console;
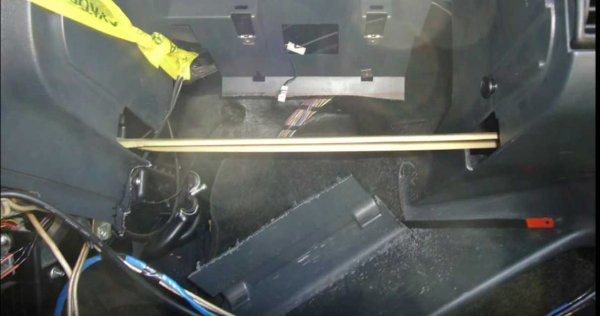
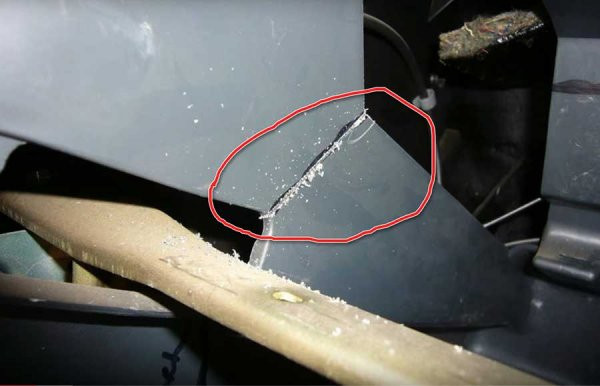
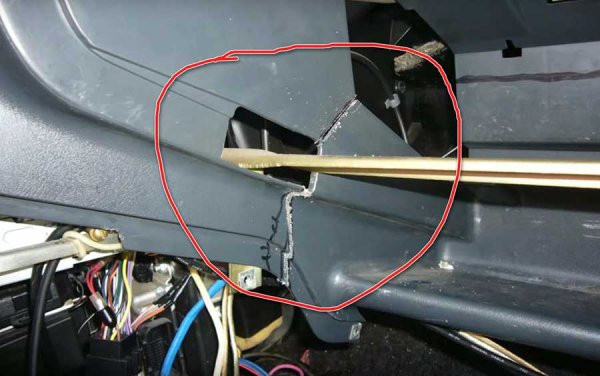
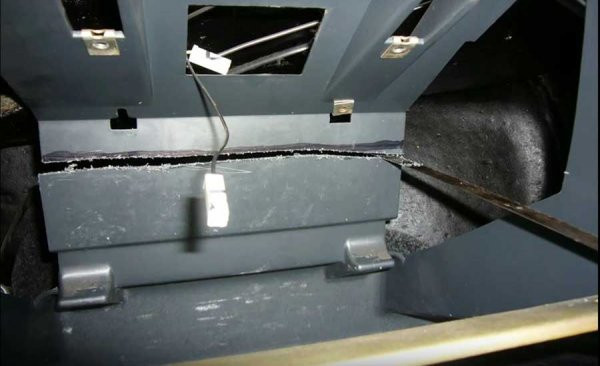
- We make the necessary cuts with metal fabric: the first cut is vertical, we make it on the inner wall of the panel near the center console (behind the metal bar of the glove box). And here you need to make two cuts.
The second cut is horizontal, runs along the upper part of the rear wall of the opening under the glove box.
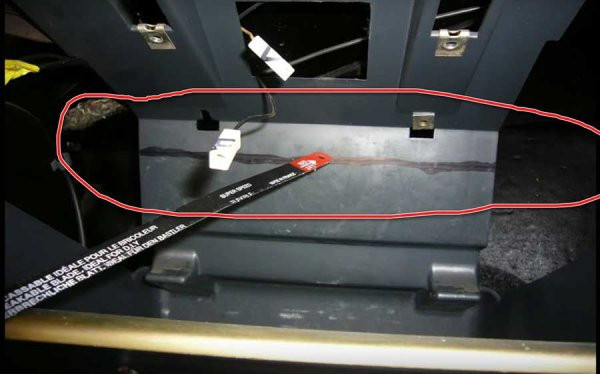
The third is also vertical, but not across. Placed directly on the back wall of the bottom panel shelf;
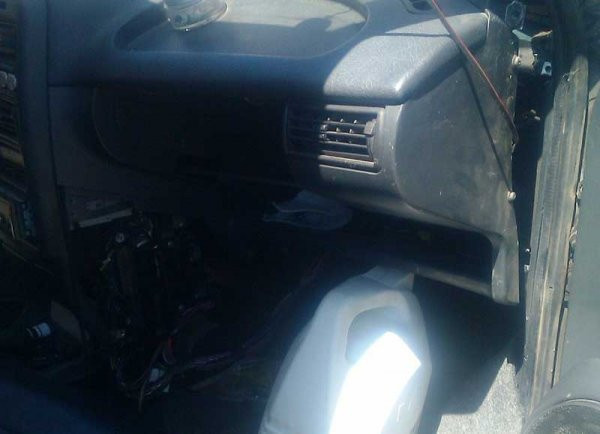
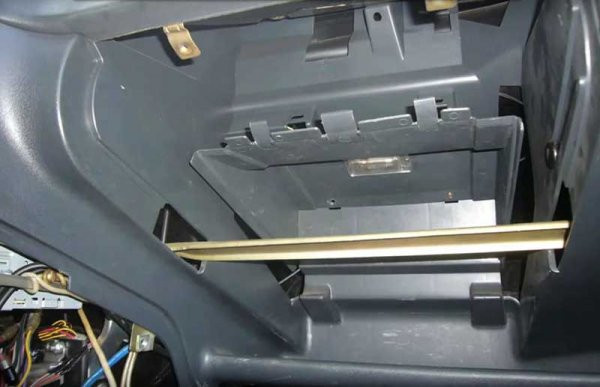
- After all the cuts, part of the panel along with the wall can be bent to gain access to the radiator. We bend this part and fix it;
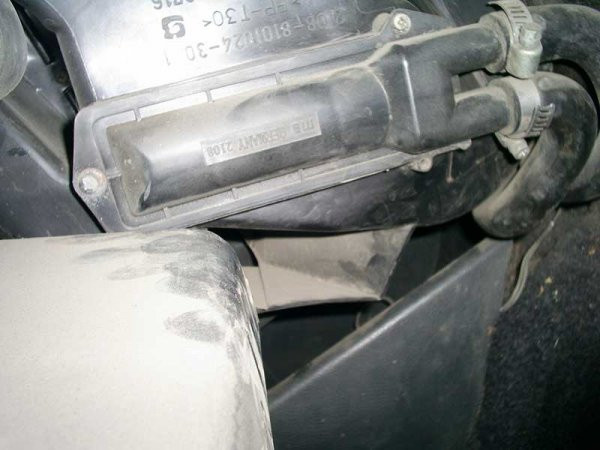
- We unscrew the nearest bracket for fastening the cable for controlling the hatch of the heating system and bring the cable to the side;
- We loosen the clamps of the pipes for supplying coolant to the radiator. In this case, it is necessary to replace the prepared container for the connection points, as the liquid flows out of the heat exchanger. We remove pipes;
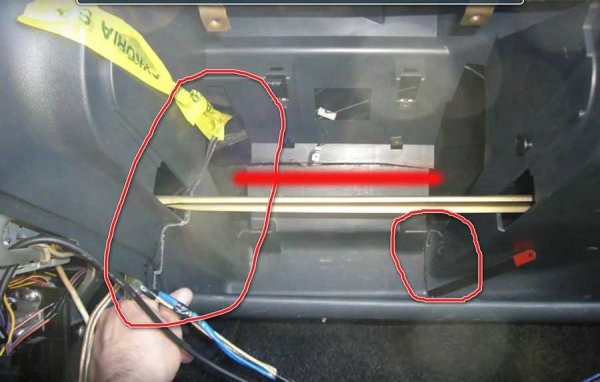
- We unscrew the three screws that hold the radiator, remove it and immediately inspect it.


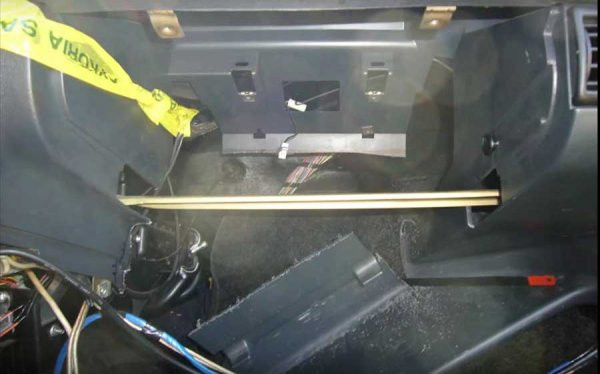
Then we install the heat exchanger, fix it on the plinth, connect the pipes and fix it with clamps. Lubricate the tubes with soap to facilitate insertion.
At this stage of operation, the cooling system must be filled with liquid and bled to remove air pockets.
After that, it remains to make sure that the joints of the pipes with the radiator do not leak, and the regulator and the faucet are connected without errors.
After that, it remains to return the cut out part of the panel to its place and fix it. To do this, you can use screws and plates.
The main thing is to fix it in several places so that in the future the cut part does not move when moving. Use sealant or silicone.

This method is convenient because when you replace the radiator again (which is quite possible), it will be very easy to do all the work - just remove the storage box and unscrew a few screws.
In addition, all cutouts are made in such places that after assembling the panel and installing the glove compartment, they will not be noticeable.
Change with panel removal
For those who do not want to damage the panel, a method that involves removing it is suitable.
In this case, you will need the same tool as mentioned above, with the exception of a hacksaw blade.
The main thing here is to have on hand as many Phillips screwdrivers of different lengths as possible.
And then we do everything like this:
- Remove the side panels of the center console (see above);
- Dismantle the storage box;
- Remove facing of the central console. To do this, you need to remove the tips of the sliders to control the heating system and “turn” to turn on the stove fan. We take out the tape recorder. We unscrew the fixing screws of the case: at the top of the center console (hidden by a plug), above the instrument panel (2 pcs.) And at the bottom (on both sides of the steering column);
- Remove the upper part of the casing from the steering column;
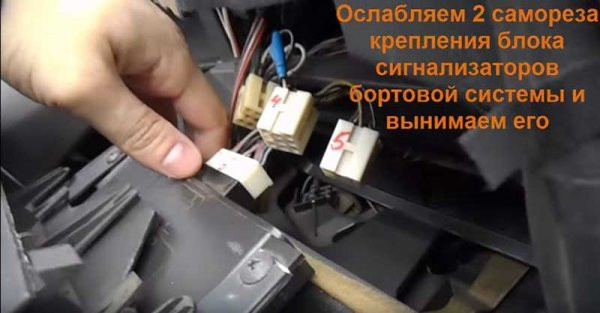
- Remove the console cover. We disconnect from it all the pads with wiring, having previously marked with a marker the place where it was (a photo can be taken). Then remove the cover completely;
- We unscrew the screws that secure the panel to the body (two screws on each side near the doors);
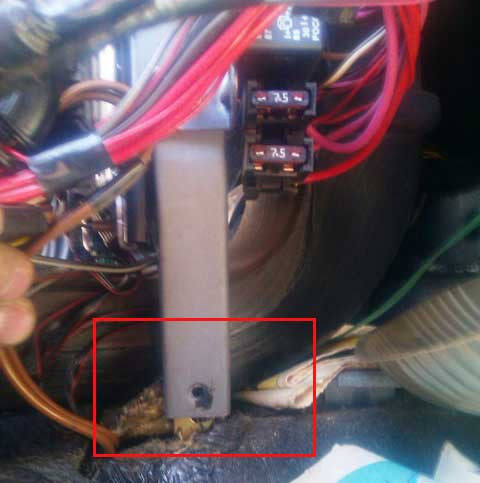
- We unscrew the screws that hold the metal frame for mounting the computer (at the top under the panel and at the bottom near the floor);
- We unscrew the screws located above the steering column;
- After that, the panel rises and goes towards itself;
- We bring the panel to ourselves, then ask an assistant or raise it with a jack to provide access to the radiator. You can temporarily make a small accent;
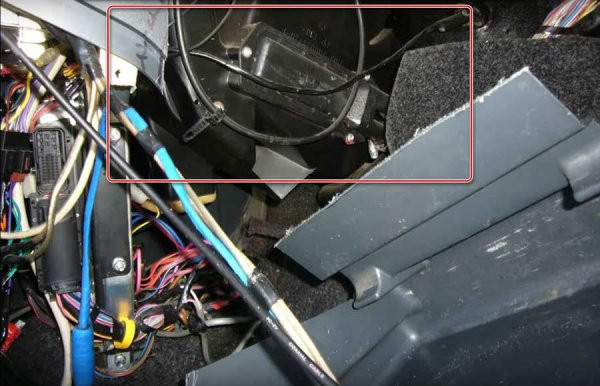
- Disconnect the radiator hoses (do not forget to replace the container to collect the remaining coolant);
- We unscrew the three fixing screws and remove the heat exchanger.


After that, it remains only to put a new item and get everything back.
But here you need to take into account some nuances:
- To securely fix the joints of the pipes with the radiator, the clamps must be replaced with new ones;
- After installing a new heat exchanger and connecting a bypass pipe to it, it is necessary to immediately check the tightness of the connection by filling the cooling system with antifreeze. And only after making sure that there are no leaks, you can put the panel in place.
- It will not be superfluous to coat the joints with a heat-resistant sealant;
As you can see, the second method is more laborious, but the panel itself remains intact.
Also, with this method, at the assembly stage, all joints of the panel with the body can be smeared with sealant to eliminate squeaks.
In general, both methods are good, but each has its own advantages and disadvantages. So which one to use is up to the car owner to decide.